Edit Portraits in Lightroom: A Comprehensive Guide
Edit Portraits in Lightroom: A Comprehensive Guide
Introduction to Edit Portraits in Lightroom
Edit portraits in Lightroom is a fundamental skill for photographers looking to enhance their portrait photography. This process to edit portraits in Lightroom involves a series of modifications and enhancements that bring out the good in your subject, ensuring their features are highlighted and any imperfections are minimized.
When it comes to modifying portraits, Lightroom offers a comprehensive set of tools designed to refine every aspect of your images. From adjusting exposure and colour stability to retouching skin and enhancing details, each step is crucial for creating professional-quality portraits. This approach is especially beneficial for those dedicated to portrait photography, and this is what I will be teaching you from the scratch.
Table of Contents
Basic Tools to Edit Portraits in Lightroom
Editing portraits in Lightroom involves using a variety of gadgets to enhance and perfect your images. These help you make precise modifications to bring out the good in your portraits, whether you’re working on professional shots or engaging in self-portrait photography.
Crop and Spot Removal Tool
The Crop tool allows you to frame your portrait perfectly. You can fine-tune the aspect ratio, straighten the horizon, and eliminate distracting elements from the edges of your image. This is essential for creating a clean and focused composition in photography.
The Spot Removal is perfect for retouching skin and removing blemishes. You can click and drag over imperfections, and Lightroom will blend the surrounding area to create a smooth appearance. This is especially useful for achieving a polished look in self-portrait photography.
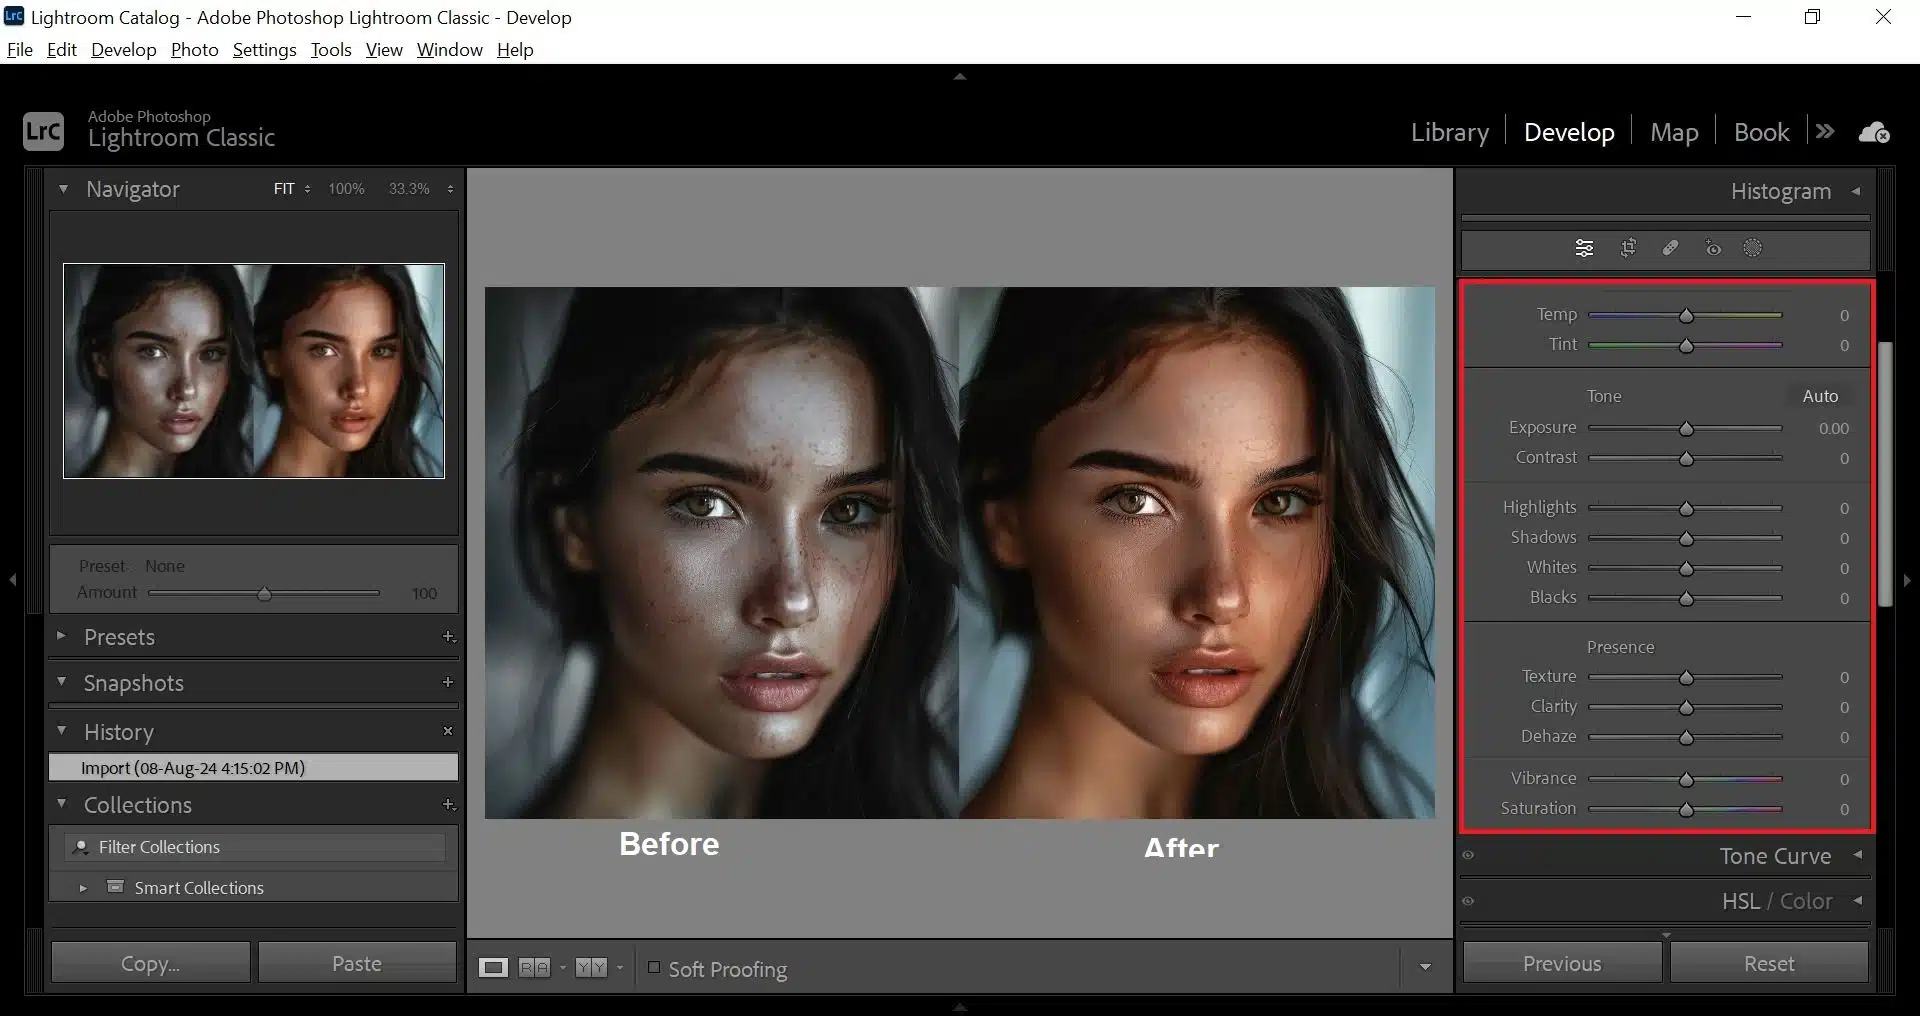
Exposure & White Balance to Edit Portraits in Lightroom
This helps you fine-tune the overall brightness of your image. Increasing exposure can brighten a dark picture while decreasing it can tone down an overly bright image. This is crucial for stabilizing the light in your portrait.
White Balance adjustments ensure that the colours in your picture look innate. You can use the Temperature and Tint sliders to correct any colour casts, making sure the outer tones appear realistic and pleasing.
Shadows and Highlights
These sliders allow you to recover details in both the darkest and brightest parts of your image. Adjusting the Shadows slider can reveal hidden details in dark places, while the Highlights slider can bring back details in the lightest places.
Clarity and Texture
The Clarity and Texture pointers enhance the mid-tone variances and details in your image. Adding lucidity can make your portrait pop by emphasizing the details, while the Texture pointer helps to bring out fine details and other elements without making the image look overly sharp.
Lightroom offers several options specifically designed for portrait editing, enabling photographers to enhance their pictures effectively. These can help in fine-tuning details, improving overall image quality, and achieving professional results.
Clone and Heal and Adjustment Brush
Clone and Heal: These are two modes in the Spot Removal. Clone stamp tool directly copies the source area, while Heal blends it with the surrounding colours and textures. Using the Heal mode often provides a more innate look, making it ideal for portrait retouching. This ensures that the retouched area matches the rest of the area seamlessly.
Adjustment Brush: It allows you to make localized modifications to specific places of your portrait. You can use this to brighten eyes, whiten teeth, and smooth areas, enhancing the overall appearance of your subject. It is versatile and can target precise areas without affecting the entire image.
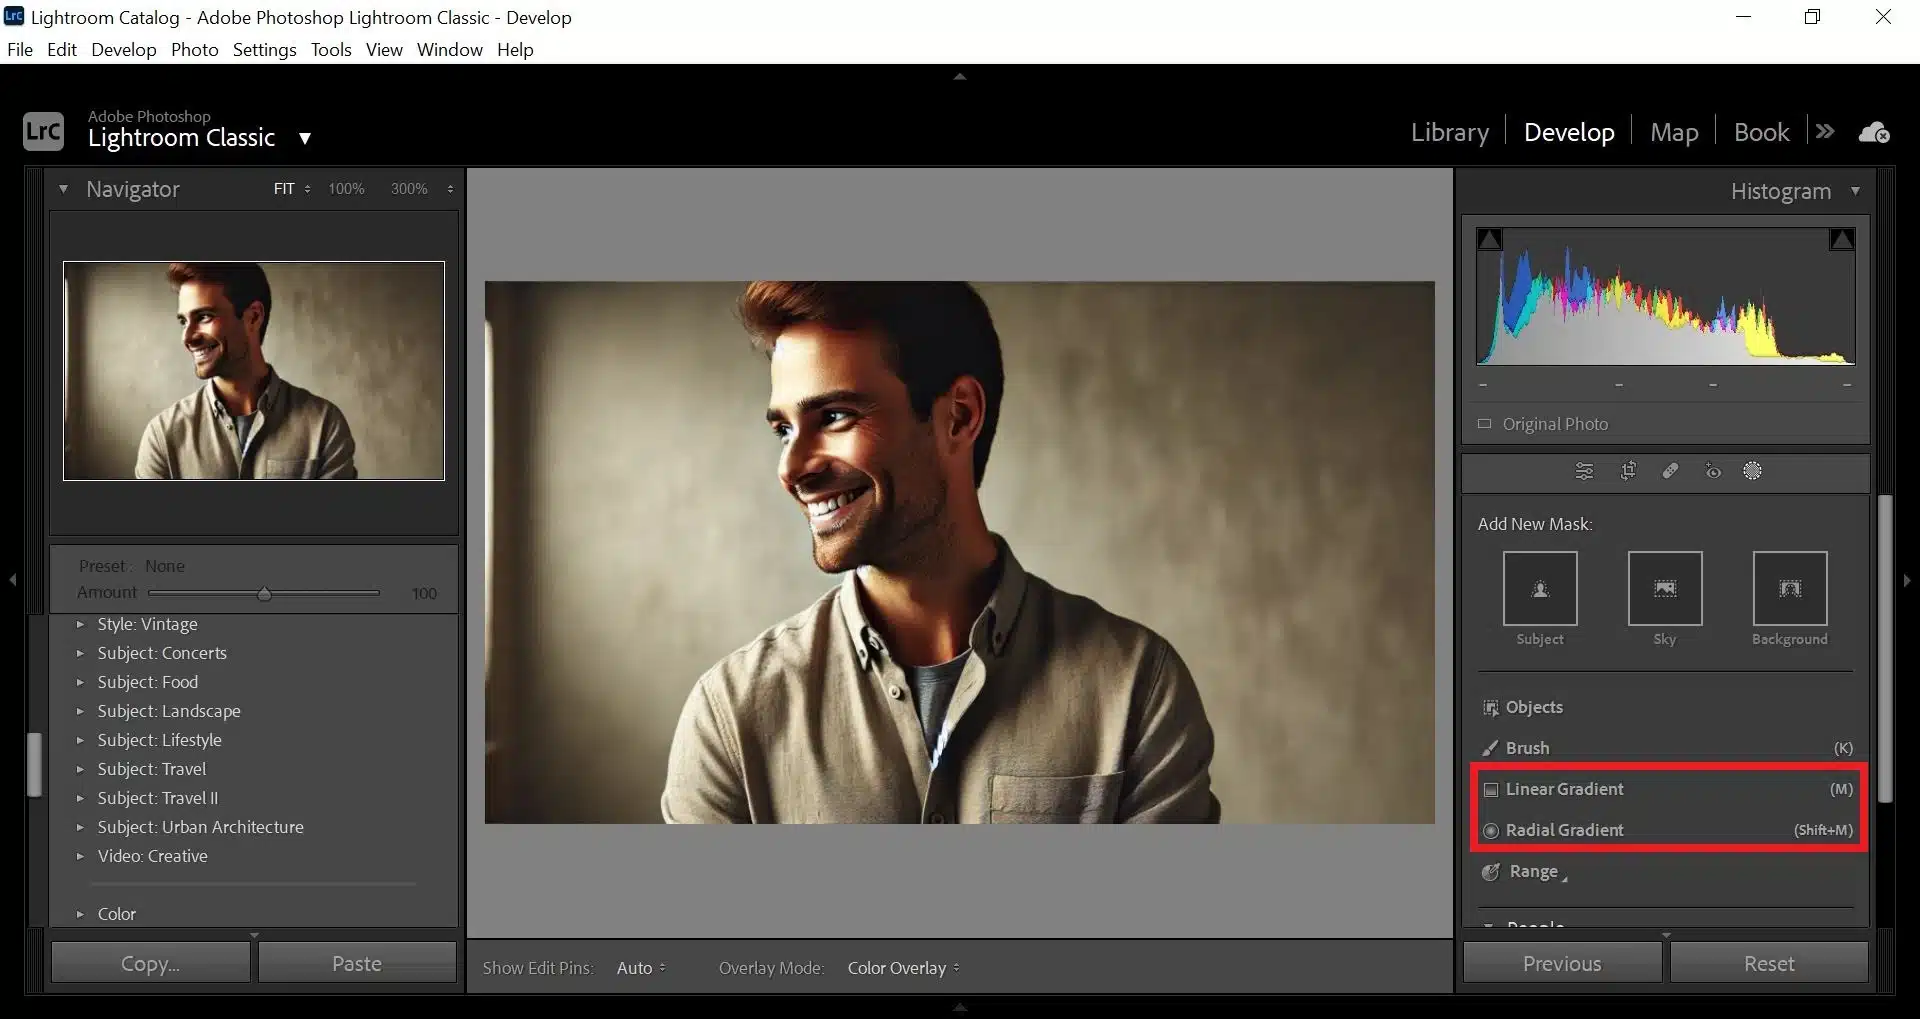
Radial Filter and Graduated Filter
Radial filter: Besides vignetting, the Radial Filter can also be used to apply other modifications like sharpness or blur background to specific places. By selectively enhancing or diminishing details, you can create a more dynamic and engaging portrait, making certain features stand out.
Graduated filter: This is also effective for batch editing, allowing you to apply the same gradient modification to multiple pictures simultaneously. This can save time and ensure consistency across a series of portraits, particularly useful in professional photography where uniformity is key.
Using Presets and Masking Tools
Preset:Lightroom preset can streamline your modifying workflow by applying a set of predefined modifications with a single click. These can be tailored for specific portrait styles, enhancing skin tones, variance, and lucidity quickly and efficiently. They are a great starting point for beginners and a time-saver for professionals.
Masking tools: It enables you in Lightroom to make precise modifications to specific places of your portrait. By creating masks, you can isolate facial features, hair, or clothing, and apply targeted edits without affecting other parts of the image. This ensures detailed control over the modifying process.
Here are some additional options that can help you modify your portrait in Adobe Lightroom:
To edit portraits in Lightroom, there is a a systematic approach to enhance and refine facial features. This process utilizes several advanced techniques to achieve professional results.
1. Using the Dehaze Tool to Edit Portraits in Lightroom
This is excellent for adding depth and contrast to the face. By carefully increasing the dehaze pointer, you can make the facial features stand out more prominently without making the image look unnatural. This is particularly useful for portraits taken in foggy or hazy conditions, helping to clear up the face and make it more vibrant.
2. Utilizing the Calibration Panel
The Calibration section at the bottom of Lightroom’s Develop module can be crucial for fine-tuning the colours of your portrait. By fine-tuning the red, green, and blue primary pointers, you can significantly improve area tones. It allows for a more refined and subtle colour correction, ensuring that the area looks innate and healthy.
3. Applying Lens Corrections to Edit Portraits in Lightroom
Lens Corrections help in rectifying any distortions or vignetting caused by the lens. Enabling profile corrections automatically fine-tunes these distortions, ensuring that the face maintains its innate proportions. This step is essential for achieving a realistic and undistorted portrayal of the subject.
4. Using the Detail Panel
It is essential for enhancing the sharpness and reducing noise in your portrait. By fine-tuning the sharpening pointers, you can bring out the details in the eyes, lips, and hair, making the portrait look crisp. Additionally, the noise reduction pointers help in smoothing the area without losing essential details, especially in portraits taken at high ISO settings.
5. Working with Split Toning
Split Toning allows you to put on different colours to the highlights and trails of your portrait. This can be particularly effective for creating a specific mood or artistic effect. For instance, adding a warm tone to the highlights and a cool tone to the shadows can give the portrait a dynamic look, enhancing the overall appeal of the face.
6. Using External Plugins
For more advanced modifications, consider using external plugins. These plugins can provide specialized features and additional functions that extend Lightroom’s capabilities. Plugins designed for portrait retouching can offer advanced area smoothing, eye enhancement, and other options that streamline the modifying process and ensure professional-quality results.
Softening Skin Portraits in Lightroom
It involves a meticulous process that ensures smooth skin and is natural without losing important details. This process leverages several advanced techniques to refine skin textures and achieve a professional finish.
Using the Texture Pointer
The Texture pointer is a powerful software for skin softening. By reducing the texture, you can smooth out minor imperfections and fine lines without overly blurring the area. It helps maintain the innate look of the area while providing a subtle softening effect.
1. Select the Adjustment Brush from the Develop module.
2. Fine-tune the Texture pointer to a negative value.
3. Brush over the areas of the skin that need softening, avoiding eyes and lips.
Fine-Tuning with the Luminance Slider
The Luminance pointer in the Noise Reduction section helps in smoothing area tones by reducing noise. It is particularly useful for portraits taken at high ISO settings where noise is more pronounced.
1. Navigate to the Detail section.
2. Increase the Luminance pointer under Noise Reduction.
3. Fine-tune the Luminance Detail and Luminance Contrast pointers to maintain area texture.
Using the Calibration Panel
It allows you to fine-tune the overall colour profile of your portrait. Fine-tuning the red, green, and blue primary pointers can help in achieving a stabilized and innate area tone.
1. Scroll down to the Calibration section.
2. Fine-tune the Red, Green, and Blue Primary sliders.
3. Monitor the changes to ensure the skin tones are innate and stabilized.
Utilizing the Clarity Slider to Edit portraits in Lightroom
This can be used inversely to soften the area. Reducing the lucidity decreases mid-tone contrast, which helps in smoothing out rough textures and creating a more polished look.
1. Select the Adjustment tool.
2. Set the Clarity slider to a negative value.
3. Apply the brush to the areas of the skin that need softening, avoiding the eyes and mouth for an innate look.
How to edit portraits in Lightroom often involves these nuanced modifications to achieve a flawless look.
Applying Color Grading
It is extremely useful for enhancing area tones. By fine-tuning the colours in the trails, mid-tones, and highlight, you can create a more cohesive and appealing skin tone.
1. Go to the Color Grading section.
2. Fine-tune the colours for trails and mid-tones.
3. Blend the colours to achieve an innate and pleasing area tone.
Enhancing Facial Features and Edit Portraits in Lightroom
How to edit portraits in Lightroom involves utilizing various advanced techniques to enhance facial features, making them appear more attractive and polished. Below, we delve into detailed processes for each specific enhancement using essential tools in Lightroom.
1. Making Hair Look Heavy and Better
To make hair appear fuller and more vibrant, the Adjustment filter and Radial Filter are particularly useful. Begin by selecting the Adjustment Brush and increasing the Clarity and Contrast settings. Carefully brush over the hair, emphasizing the strands to add depth and texture. This technique brings out the natural shine and volume of the hair, making it look more lively and healthy.
Increase the Exposureand Shadow settings and place the filter over sections of the hair to create an innate volumizing effect. This method enhances the overall look of the hair, making it appear heavier and better defined.
2. Making Eyes Big and Attractive
Enhancing the eyes can dramatically improve the overall portrait. Start with the Adjustment Brush tool, increasing the Clarity and Sharpness settings. Carefully run it over the iris to make them appear more detailed and vibrant. This technique ensures that they become the focal point of the portrait.
To make them appear larger, use the Transform tool. Select the area around the eyes and slightly enlarge them. This should be done with subtlety to maintain a natural look. Enhancing in this way ensures they stand out and capture attention.
3. Changing Eyeball Colour
Changing the colour can put on a unique touch to portraits. Fine-tune the Tint and Color Temperature sliders to change the eye colour to the desired hue. This method allows for precise control over colour transformation.
Additionally, the HSL/Color Panel can be used to fine-tune the new colour. Fine-tune the Hue, Saturation, and Luminance of the selected colour to ensure it looks natural and complements the rest of the portrait. This technique allows for creative flexibility while maintaining realism.
4. Changing Nose Shape
To subtly alter the shape of the nose, start with the Radial Filter. Apply localized modifications by decreasing the Exposure and variance around the sides of the nose, creating a slimming effect. This technique refines the nose’s appearance without drastic changes. This creates a climax that can alter the perceived shape, making the nose appear more refined and proportional. This method ensures subtle yet effective modifications.
Tips for Modifying Additional Features to Edit Portraits in Lightroom
Portrait Retouching in Lightroom involves mastering these techniques to achieve a refined and professional look.
Making Lips More Attractive
Enhancing lips involves adding color and definition. Select the area to increase the Saturation and Clarity settings. Brush over the lips to enhance their innate color and make them stand out. This technique ensures the lips look vibrant and appealing.
For additional enhancement, apply the Radial Filter to the lips and increase the Sharpness and Clarity settings. This makes the lips pop, adding a polished look to the portrait.
Reducing Fine Lines to Edit Portraits in Lightroom
Reducing fine lines is crucial for a smooth and youthful appearance. Utilize the Detail section to adjust the Noise Reduction slider. This helps in smoothing out the area and reducing the visibility of fine lines. Focus on maintaining outer texture while minimizing imperfections. Decrease the Texture settings and apply the brush over places with fine lines. This technique smooths the area, ensuring an innate look while reducing signs of aging.
Changing Eyebrow Structure
Altering the structure of brows can significantly change the expression of the portrait. Use the Adjustment Brush to darken or lighten specific places of the brows, reshaping them as desired. This method allows for precise modifications to the eyebrow’s appearance. For more detailed reshaping, use the Clone/Heal to remove stray hairs and refine the brow shape. This technique ensures clean and well-defined brows, enhancing the overall facial structure.
Use Vignette Tool
It enhances facial features by subtly darkening the edges of the picture, drawing attention to the center. Apply a light vignette effect to focus attention on the face, enhancing its prominence in the portrait. This technique is particularly effective for emphasizing facial features and creating a pleasing visual stability.
Optimizing Camera Settings to Edit Portraits in Lightroom
Creating stunning portrait pictures requires careful optimization of your camera settings. Whether you’re using a DSLR, mirrorless camera, or even a mobile device, adjusting the settings correctly can make a significant difference in the quality of your portraits. Here are some key settings to consider.
1. Aperture Settings
Using a wide aperture (low f-number) is essential for achieving a beautiful background blur, also known as bokeh. This technique helps to isolate the main focus from the background, making the main focus stand out. A setting like f/2.8 or lower is ideal for portraits. It will give your pictures a professional look by creating a shallow depth of field.
2. ISO Settings
Selecting the right ISO setting is crucial for maintaining quality. For well-lit environments, keep the ISO as low as possible (e.g., ISO 100 or 200) to reduce noise. In low-light conditions, you might need to increase the ISO but try not to go too high to avoid grainy pictures. Experimenting with ISO settings will help you find the right stability for clear and crisp pictures.
3. Shutter Speed
Choosing the appropriate shutter speed ensures your main focus is sharp and in focus. For handheld shots, a shutter speed of at least 1/125th of a second is recommended. If you’re capturing a moving subject, you might need a faster shutter speed. Proper shutter speed settings will prevent motion blur and help capture detailed portraits.
4. White Balance
Adjusting this is important to get accurate colors in your portraits. Most cameras have functions like daylight, cloudy, tungsten, and fluorescent. Choose the one that matches your shooting environment, or use the auto white balance setting for convenience. Correcting these settings will ensure that skin tones look pleasing and realistic.
Here are the great cameras to shoot great portraits:
Additional Settings to Edit Portraits in Lightroom
Focusing Mode
Using the right focusing mode can significantly improve your portrait shots. For still portraits, single-point autofocus is recommended. It allows you to place the focus precisely where you want it. For portraits involving movement, continuous autofocus mode can be beneficial. This setting will keep your main focus in focus as they move.
Picture Style
Many cameras offer different picture styles or profiles that can enhance your photos. Styles like portrait mode often put on warmth and soften the photo to make the face look better. Explore the picture style settings in your camera and choose one that enhances the subject’s features and fits your desired outcome.
Lighting Considerations
Lighting plays a crucial role in portrait photography. Using natural light can give your portraits a soft and flattering look. Position your main focus near a window or shoot during the golden hour (shortly after sunrise or before sunset) to take advantage of the best lighting conditions. Proper lighting will bring out the best in your main focus and add depth to the photos.
Mobile Photography Tips
For those using a mobile phone for portraits, many of the same principles apply. Utilize portrait mode if your phone has it, as it automatically adjusts settings to blur the background and focus on the main focus. Ensure good lighting and keep the camera steady for sharp photos. Mobile photography apps can also offer additional controls for fine-tuning your shots.
Sharpening Portraits in Lightroom
Enhancing sharpness in Lightroom can significantly improve the detail and definition in your portraits. Here’s a step-by-step guide to help you achieve this effectively.
Using the Sharpening Pointer
Begin with the Sharpening pointer, which controls the overall sharpness. Move the pointer to the right to increase the sharpness. This works by enhancing the difference between pixels, making the details more pronounced. Be cautious not to overdo it, as this can introduce noise and artifacts into your picture.
Adjusting the Radius Pointer
It controls how far from the edge the sharpening effect extends. A smaller radius is ideal for fine details, while a larger radius is better for broader features. Typically, a smaller radius (around 1.0) is recommended for portraits to maintain a refined look.
Enhancing the Detail Pointer
The Detail pointer focuses on the finer elements. Increasing this pointer will enhance smaller details within your photo, adding texture. Be careful, as too much detail can make the portrait appear overly sharp and unnatural. A stabilized setting is crucial for maintaining a professional look.
Using the Masking Pointer
It allows you to control where the sharpening effect is applied. By moving this pointer to the right, you can limit the sharpening to the more defined edges, leaving smoother places untouched. This helps in maintaining a clean look while emphasizing important features.
Final Touches with Output Sharpening
When exporting your portrait, use the Output Sharpening option in the Export window. If exporting at a smaller size for web use, set this to ‘Sharpen for Screen’ with a standard amount. This step ensures that your portrait retains its sharpness even after resizing.
Choosing the Best Medium for Portraits
Selecting the ideal medium for creating portraits can significantly influence the final outcome. Different mediums offer unique qualities and effects, and choosing the right one depends on your artistic vision and preferences. Here are some popular mediums and their characteristics to help you make an informed choice.
Oil Paint
Oil paint is renowned for its rich, vibrant colors and smooth blending capabilities. This medium allows for intricate detail and subtle transitions between tones, making it perfect for creating lifelike portraits. However, oil paint has a long drying time, which can be both a benefit and a drawback. The extended drying period allows for extensive manipulation and layering, but it also means that completed works take longer to finish. Oil paintings typically require several months to fully dry and be ready for varnishing.
Acrylic Paint
Acrylic paint is highly versatile and dries much faster than oil paint, allowing artists to build up layers quickly. This medium is suitable for both detailed work and bold, expressive strokes. Acrylics can mimic the effects of both watercolors and oils, depending on how they are used. They are also more resistant to cracking and fading over period, making them a durable choice for portraits. Additionally, acrylic paint is water-soluble when wet, simplifying the cleanup process.
Watercolor
Watercolor is known for its transparency and fluidity, producing soft and luminous effects that are ideal for delicate and light-filled portraits. This medium can be challenging to control, as watercolors often bleed and blend unpredictably. However, the results can be stunningly beautiful, with a unique freshness and spontaneity. Watercolor paintings are typically done on paper, and the medium’s quick drying period allows for swift execution and adjustments.
Charcoal
Charcoal is excellent for creating bold, dramatic portraits with strong variances and rich textures. It is particularly effective for capturing expressive lines and deep shadows. Charcoal can be used for quick sketches or detailed, finished works. One of the advantages of charcoal is its ease of blending and erasing, which allows for flexibility and correction. However, charcoal drawings can smudge easily and often require fixative spray to preserve the artwork.
Digital Art
Digital art offers unparalleled flexibility and convenience, allowing artists to experiment with different styles and effects without the constraints of physical materials. It can be created using various software programs, and artists can work with layers to make non-destructive modifications. This medium is perfect for those who want to integrate modern techniques or who appreciate the ease of digital manipulation. Digital art can be easily printed on various surfaces, providing versatility in presentation.
FAQs to Edit Portraits in Lightroom
How to edit a portrait picture in Lightroom?
Modifying a photo portrait in Lightroom involves several key steps. First, import your photo and start with cropping to improve composition. Next, enhance the lighting by adjusting the exposure and fine-tuning the trails. Finally, use the HSL panel to refine the colors, ensuring a stabilized and vibrant look. These steps will help you create a polished and professional portrait.
How to Edit Portraits Like a Pro?
To modify portraits like a pro in Lightroom, begin by defining your goals for the final look. Use the dodge and burn technique to add depth and dimension. Refine your settings by applying masks for precise control over specific parts of the photo. Pro-level modifying involves subtle changes that enhance without overdoing any single aspect, resulting in a stabilized and refined portrait.
Does Lightroom Have Portrait Mode?
Lightroom does not have a specific “Portrait Mode” like some cameras, but it offers various options and presets tailored for portrait editing. These include adaptive presets for quick enhancements and detailed masks for fine-tuning individual features. These features collectively provide powerful capabilities for portrait editing, ensuring professional-quality results.
How do I edit perfectly in Lightroom?
You can perfectly edit in lightroom by applying adaptive functions and masks. Start by selecting a preset designed for portraits to make initial enhancements. Then, use AI-powered masks to isolate and refine specific features like hair and lips. This approach allows for detailed adjustments while maintaining overall harmony in the picture.
Conclusion
Mastering how to edit portraits in Lightroom can truly transform your photography, making your portraits look polished and professional. From enhancing facial features to optimizing camera settings, each step in the editing process plays a crucial role in achieving stunning results. Personally, I’ve found that taking the schedule to perfect settings like aperture and ISO has made a significant difference in my portrait pictures. One memorable experience was during a family photoshoot where refining the white balance and using the vignette effect added a warm, professional touch to the images, making the memories even more special.
For those looking to dive deeper into the world of portrait retouching and editing, I highly recommend exploring our comprehensive courses. Our Photoshop course and Lightroom course offer detailed, step-by-step instructions to help you become proficient in these powerful editing platforms.
If this article has helped you, then Like and Share it with your friends
Facebook
Twitter
LinkedIn
Pinterest
Have a nice photoshoot!
Learn more about Photo Editing with Lightroom and Photoshop:
Discover the secrets of photography with our printable guide! Master essential techniques like aperture, shutter speed, and ISO to create stunning images. Get your free printable PDF now and start turning your snapshots into masterpieces!