Photoshop Skin Retouching: Transform Your Portraits
Photoshop Skin Retouching: Transform Your Portraits
Introduction to Photoshop Skin Retouching
Unlock the secret to Photoshop Skin Retouching Tutorial, a game-changer for anyone aiming to turn their photos into breathtaking masterpieces.
Photoshop’s new features have many Photo skin smoothing tools for editing purposes. It helps make pictures look perfect by fixing the skin color. This makes the photos look nicer and makes sure everyone looks great. With Photoshop skin retouching tutorial, anyone can fix up photos really well, just like a pro
Let’s try some Photoshop skin retouching actions and find out how to make photos amazing! It doesn’t matter if it’s a quick pic or a fancy photo; learning how to fix up skin makes any photo better. This Photoshop retouching tutorial is easy to follow and will teach you how to make everyone look their best. Get ready to make all your photos look awesome!
Table of Contents
Understanding the Basics of Skin Retouching
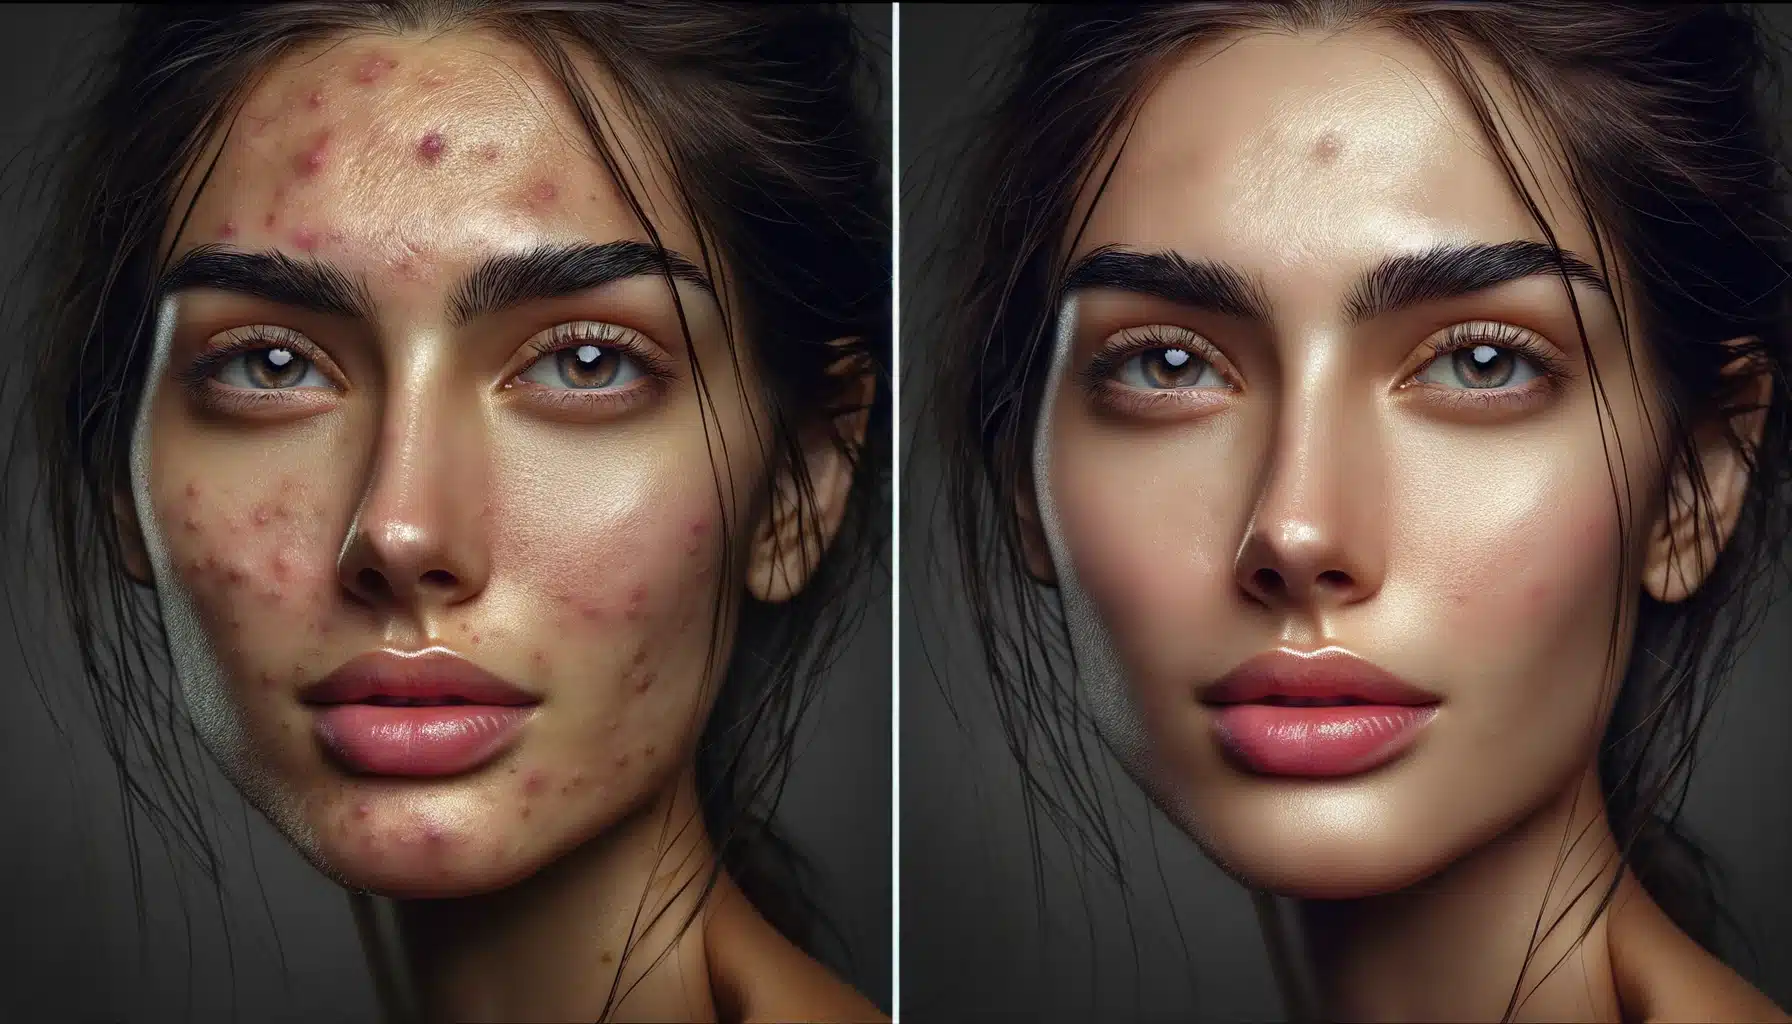
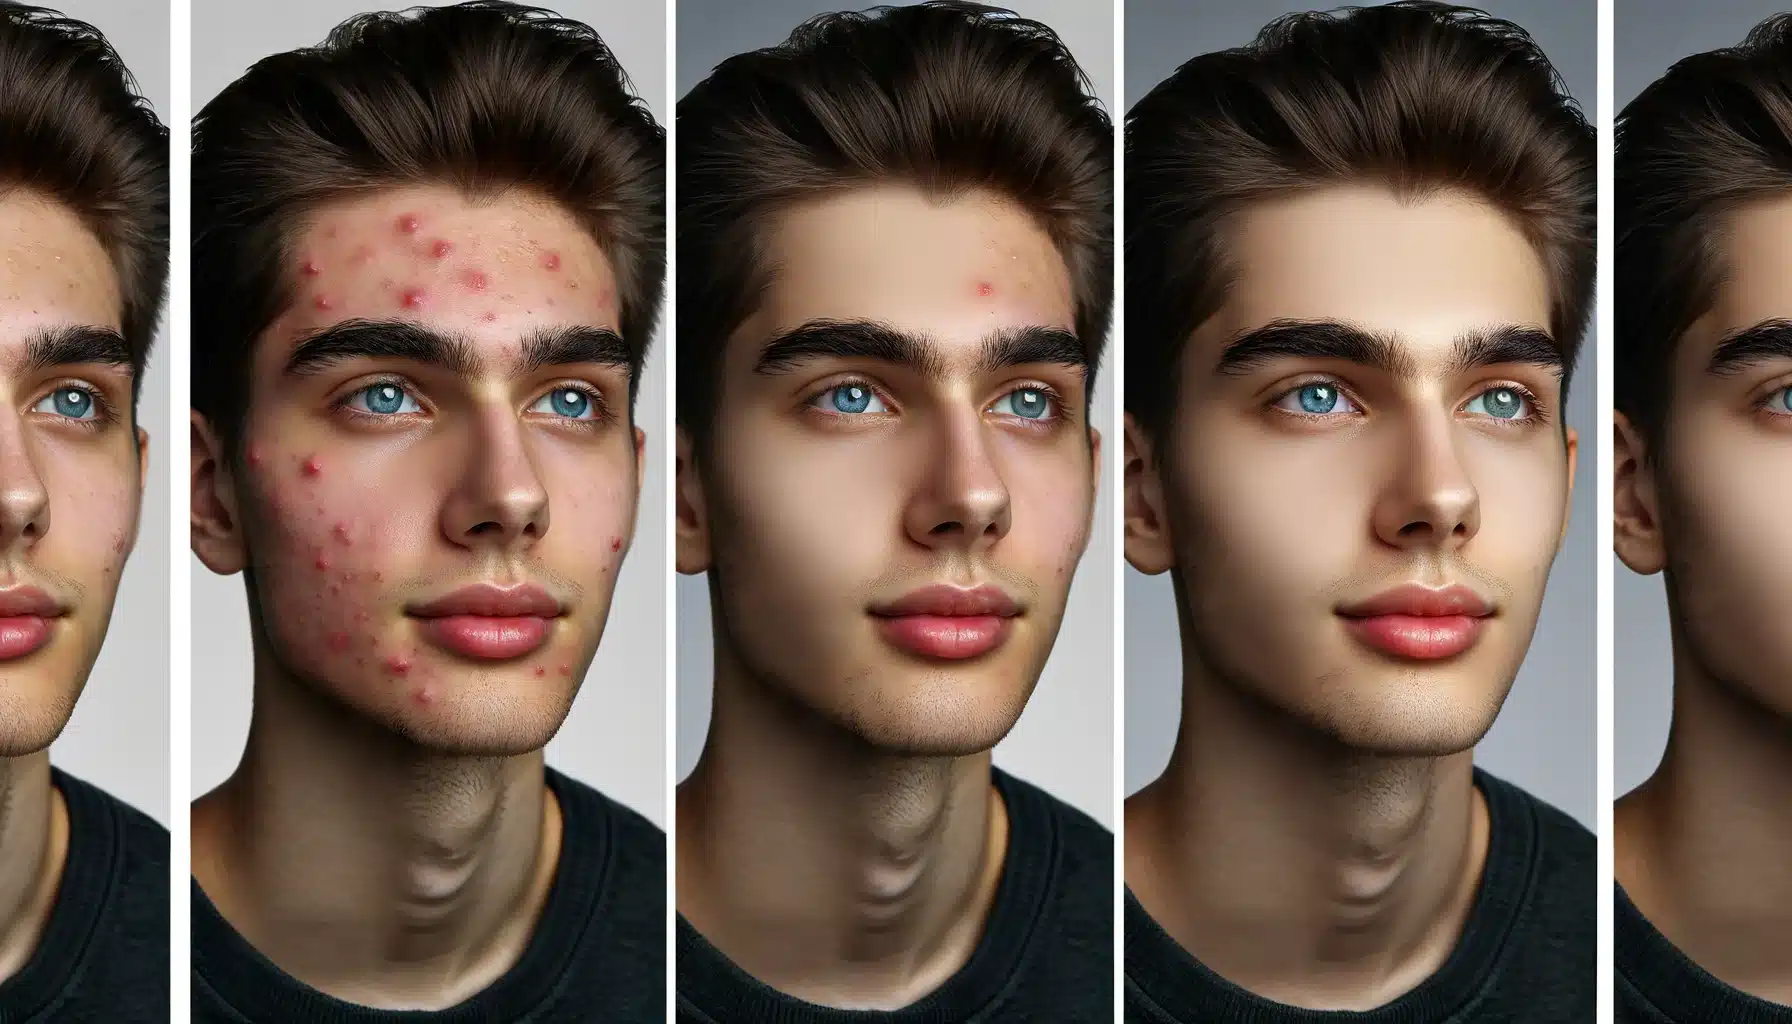
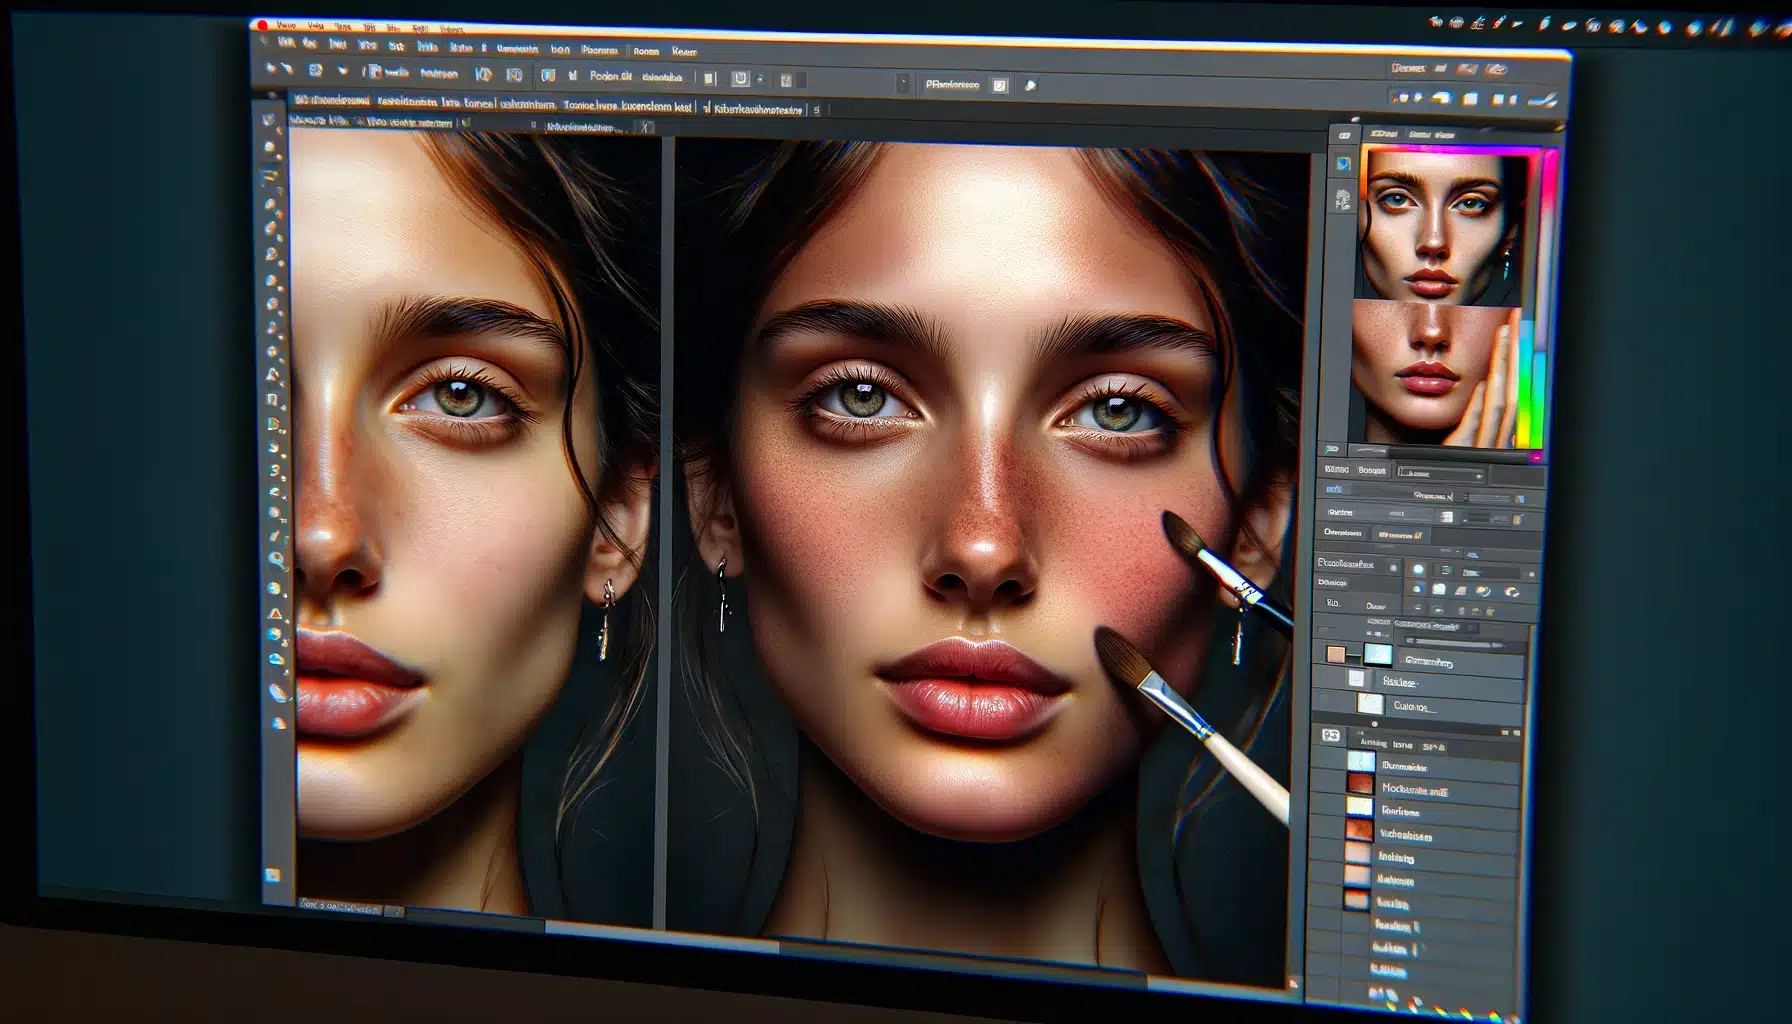
Skin retouching makes skin look better with snapshot touch-up techniques in the software like Adobe Photoshop and Lightroom. It fixes blemishes, scars, and uneven tones that make us feel conscious. Think of it like erasing pencil marks. Now with a few clicks in Photoshop, you can make the spots you don’t like disappear from your favorite portraits.
Photoshop has some cool tools that are like tiny erasers and brushes that help clean up the skin in images. These digital skin-enhancing tools play a crucial role in Photoshop retouching. Here’s how you can use them to master Photoshop and Lightroom portraits editing:
Healing Brush: This is a magic marker that can copy one part of the picture and use it to cover up something else. If there’s a spot or blemish on the skin, you can use the healing brush cover it up with clear skin from another part of the photo. It blends the spot in so well that you won’t even remember it was there!
Spot Healing Brush: This tool is even more magical because you don’t have to tell it where to get the clean skin from. You just click on the blemish, and spot healing brush will make it disappear! It’s perfect for quick fixes.
Patch Tool: Imagine you are using a sticker to cover a hole in your paper. You can select the area that’s not perfect and then choose a good skin area to replace it with. Photoshop blends it all together nicely.
Other Useful Techniques
Frequency Separation: This might sound complicated, but think of it like separating the colors in a coloring book from the lines. This way, you can color without going outside the lines. In Photoshop, it means you can work on making the skin tone even without messing up the skin's natural textures and lines. It’s great for more detailed work where you need to be really precise.
Selective Color Adjustment: This methods helps you choose only the colors you want to change, like turning down reds or turning up yellows. It’s like coloring with super-precise crayons that only color where you want them to.
Adjustment Layers: These layers are like stickers you can put on and take off without harming the picture underneath. You can use tools called Curves, Levels, and Hue/Saturation. They help make the skin tone look just right.
By using these photo touch-up techniques, you can make anyone in your photos look as good as possible! And the best part? It looks so natural that no one will ever know that you have used Photoshop skin retouching.
Comprehensive Guide to Facial Retouching in Photoshop
Skin tone adjustment in Photoshop provides essential help regarding portrait skin smoothing. However, it’s not about creating perfection or altering appearances drastically. Instead, the goal is to make good features even better. And this Photoshop retouching tutorial will help you do just that.
Step-by-Step Guide to Digital Skin Enhancing Features
Step
Tool Used
Description
Brighten the Eyes
Dodge Tool
Apply on the whites and irises of the eyes to enhance their sparkle while keeping the natural eye color.
Enhance the Lips
Sponge Tool
Increase saturation slightly and add a subtle gloss effect to make the lips stand out.
Define the Eyebrows
Burn Tool
Deepen the eyebrow color to frame the face effectively, similar to how a frame enhances a picture.
How to Balance Feature Retouching
Keep Proportions in Check: When adjusting facial features, ensure you maintain the person's unique facial proportions. Changes should feel authentic, not artificial.
Match the Mood: The level of retouching should suit the photo's context. Keep things simple for everyday photos but add more drama for special shots.
Preserve Personality: Every face tells a story. Aim to enhance, not erase, the features that give character.
Easy Steps to Smoother Skin
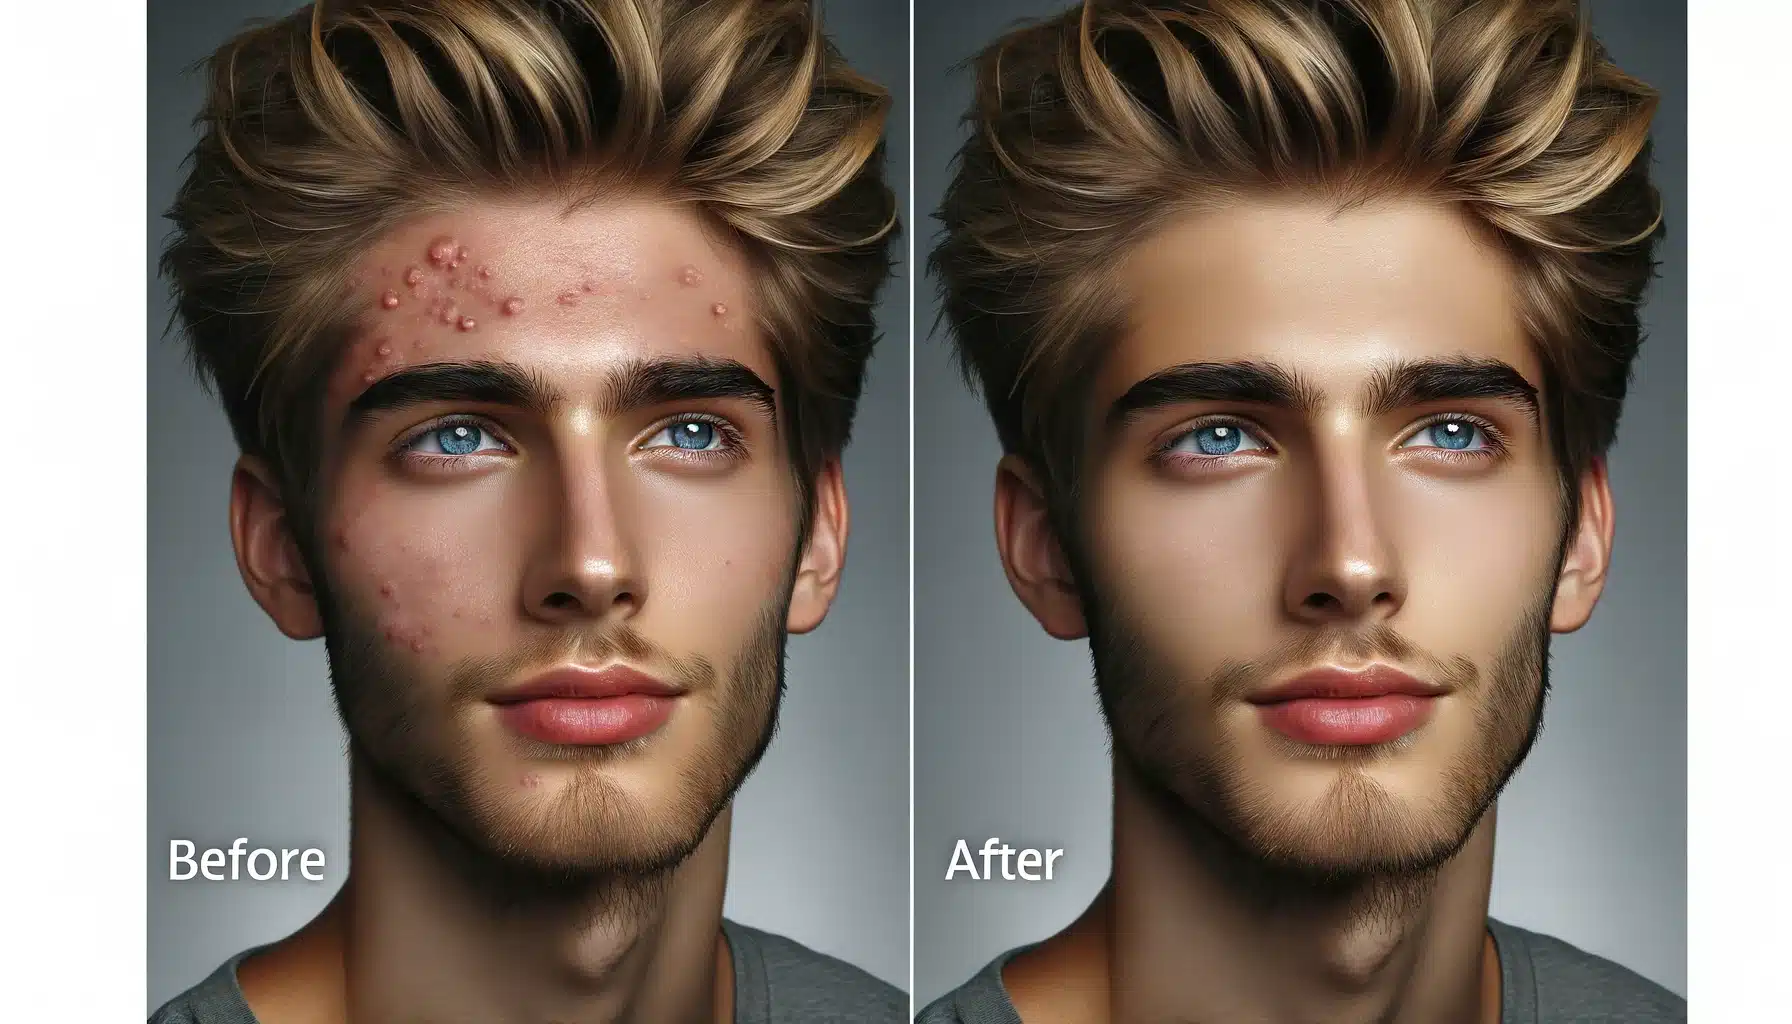
Choose the Right Tool: Start with the Spot Healing Brush for tiny spots. It's like a magic wand for small flaws. It erases spots without making everything look fake.
Soften the Skin: The Blur Tool helps smooth rough spots. For example, if a photo shows someone with a small scratch, you wouldn't cover their whole face with makeup. Instead, you'd use a bit of concealer. That's how the Blur Tool should be used, lightly, like a dab, not a thick layer.
Keep It Real: Let some natural lines show. Remember, people's faces aren't all smooth. They have lines, freckles, and textures. Skin should look soft, not plastic.
You can also join Lightroom Training to learn the best retouching techniques.
Utilize the High Pass Filter for Subtle Smoothness
Step 1: Select the High Pass Filter: Find this under Filter > Other > High Pass. This filter sharpens the edges in your image, which can help define features while smoothing the skin.
Step 2: Adjust the Radius: Start with a low radius to avoid over-sharpening. A value between 2 and 4 pixels usually works well for a subtle effect.
Step 3: Blend for Best Results: Set the layer blending mode to Overlay or Soft Light for a natural look. This enhances the skin's texture without making it look artificial.
Master the Gaussian Blur for Even Skin Tones
Using Layers: Duplicate your image layer, then apply Filter > Blur > Gaussian Blur to the top layer. A radius of 3-5 pixels smoothens the skin without losing essential details.
Layer Masks for Precision: Add a layer mask to the blurred layer. Paint with a soft, black brush over areas you want to keep sharp (like the eyes and mouth), allowing the clear skin beneath to show through.
Opacity Adjustments: Reduce the opacity of the blurred layer to blend it naturally with the original. This step is crucial to maintain the photo’s authenticity while enhancing the skin’s appearance.
We have gathered a professional tutorial of the Landscape Photos. Don’t forget to check it out.
Photoshop Skin Retouching: Answering Top Questions
In this section, we’ll tackle the most common queries users have about Photoshop skin retouching, providing clear advice to help you enhance your portrait editing skills.
Which steps can be accomplished for retouching the skin tone in Photoshop?
Step 1: Open the image in Photoshop.
Step 2: Analyze and Plan: Begin by evaluating the skin tones in the image. Identify areas that need correction or enhancement.
Step 3: Use Layers: Go to Layer > New Adjustment Layer > Curves. Gently adjust the curves to lighten or darken the skin tone as needed without losing the natural look.
Step 4: Color Balance for Harmony: Navigate to Layer > New Adjustment Layer > Color Balance. Tweak the color sliders to achieve a natural and even skin tone. Focus on reducing redness or sallowness by subtly adjusting colors.
How do I make my skin look better in Photoshop?
Step 1: Gaussian Blur for smoothness: Duplicate your image layer, apply Gaussian Blur, and use a Layer Mask to selectively blur the skin, maintaining clarity in features like eyes and lips. Adjust the opacity to ensure a natural blend.
Step 2: Remove Blemishes: Utilize the Spot Healing Brush for small blemishes and the Healing Brush for larger ones. Work on a new layer to ensure non-destructive editing.
Step 3: Enhance Features: Brighten eyes and teeth slightly with the Dodge Tool, but use a soft touch to maintain realism.
How do I filter skin in Photoshop?
Skin Tone Correction: Use the Camera Raw Filter for an advanced yet intuitive approach to adjusting skin tones. Access this via Filter > Camera Raw Filter, and experiment with the Temperature and Tint sliders for skin tone adjustments.
Utilize Portrait Filters: For a quicker fix, explore the Portrait category in the Neural Filters gallery. These AI-driven filters can smooth skin, enhance lighting, and even change facial expressions with a few clicks.
What is the technique used in skin retouching?
Frequency Separation Technique: This involves creating two layers, one for texture and one for color. Edit the texture layer to fix imperfections without altering color, and adjust the color layer to smooth out color variations, achieving a balanced and natural look.
What are some time-saving tips for skin retouching in Photoshop?
Use Actions: Record actions for routine steps like Photoshop skin retouching actions or adjusting brightness. Once recorded, these actions can be applied to any photo with just one click.
Batch Processing: If you have a series of photos from the same shoot, use the Batch Process feature to apply the same retouching effects to all of them at once.
Keyboard Shortcuts: Learn Photoshop’s keyboard shortcuts for the tools. Also, set up your own shortcuts for less common tasks.
How can I retouch a model's skin for free in Photoshop?
Use Built-in Tools: Leverage Photoshop facial editing tools like the Healing Brush and Clone Stamp for effective retouching.
Self-Educate: Invest time in exploring Photoshop Retouching Tutorial to enhance your editing skills.
Consistent Practice: Practice regularly to get faster and better at retouching skin effectively without needing paid plugins or tools.
Concluding our journey through the art of Photoshop skin retouching tutorial, I’m reminded of the countless hours I’ve spent perfecting images, transforming them from simple snapshots into pieces of art. One personal project that stands out is when I decided to try Photoshop retouching an old family photo. The original image had uneven skin tones and various blemishes that detracted from the loving expressions captured. Using the techniques discussed, such as the Frequency Separation Technique and Skin Tone Adjustment in Photoshop, I was able to breathe new life into this lovely memory.
This experience showed me how awesome Photoshop is. So, if you want to get really good at Photoshop or Lightroom, you should check out our comprehensive courses. Whether you’re interested in diving deeper into Photoshop or exploring the vast capabilities of Lightroom, these courses equip you with the knowledge and skills to bring your creative visions to life.
If this article has helped you, then Like and Share it with your friends
$2,061.00Original price was: $2,061.00.$1,061.00Current price is: $1,061.00. 27638
Download Your Free Guide Now!
Discover the secrets of photography with our printable guide! Master essential techniques like aperture, shutter speed, and ISO to create stunning images. Get your free printable PDF now and start turning your snapshots into masterpieces!