Lens correction in Lightroom is a game-changer for photographers looking to elevate their images.
Have you ever noticed those pesky distortions or unwanted vignettes in your photos? It’s frustrating, right?
I understand the struggle, so I’m here to guide you through the magic of lens correction. Imagine transforming your images with just a few clicks, making them appear as stunning as the scene you captured.
In this article, I’ll explain how to use lens correction in Lightroom and reveal how it can enhance your photos’ quality and authenticity. Whether you’re a seasoned photographer or just starting, this feature is a must-know tool in your editing arsenal.
So, let’s dive in, and I’ll show you how to make those subtle adjustments that result in extraordinary images.
Table of Contents
What is Lens Correction Lightroom?
Lens correction in Lightroom addresses distortions caused by lenses in your photos, making images appear closer to what you see with your eyes.
These corrections tackle issues like warped lines, mismatched colors, and other optical problems commonly encountered in photography.
Why Use Lens Correction in Lightroom?
Lens correction enhances photo quality by resolving issues with the camera’s lens that might cause subjects to look stretched or compressed.
Lightroom’s lens corrections make photos appear more natural. Features include enabling profile corrections to adjust automatically for these distortions and streamlining the editing process.
Common Issues Addressed by Lens Correction
When editing photos, you may encounter specific issues that can detract from the overall quality.
Lens correction in Lightroom effectively addresses these problems, helping you achieve clearer and more accurate images. Below are common issues that lens correction can help you resolve:
- Distortion: Significant for removing unwanted bending of lines, especially with wide-angle cameras.
- Chromatic Aberration: Occurs when different colors don’t focus at the same point, creating a fringe around objects. Users can remove chromatic aberration to enhance image clarity.
The lens corrections tab in Lightroom is a central hub for adjustments, focusing on correcting common lens aberrations.
Distortion is a frequent issue with wide-angle cameras and must be addressed to ensure image accuracy.
Users can also use the option to manually adjust under the manual tab for issues not corrected automatically.
Lightroom’s lens corrections are not limited to a single lens type; they support numerous lens profiles with unique optical characteristics ready to improve overall image quality.
In the lens corrections tab, users can easily access the profiles provided by Adobe. These profiles support professional DSLRs and simple point-and-shoot models and showcase the wide range of available camera settings.
Lightroom Classic makes these enhancements even more seamless, a significant update for those familiar with Adobe Camera Raw. Users working with raw files will also notice improved handling of common lens deviations.
Pro Tip: Always start with the automatic lens correction profile and then tweak manually only if necessary.
To enhance your editing process, consider using the color profile in Photoshop for more precise adjustments.
Additionally, explore the color range command to refine your selections and remove blemishes in Photoshop for a polished final image. This saves time and ensures high-quality results.
Exploring the Lens Corrections Panel
The lens corrections panel in Lightroom is a pivotal section for adjusting optical characteristics. It helps correct common lens aberrations, such as distortion.
Users find various options to make subtle or significant changes.
Navigating the Lens Corrections Panel
Navigating this panel is user-friendly.
You first need to locate the lens corrections tab. Once there, you find different sections such as:
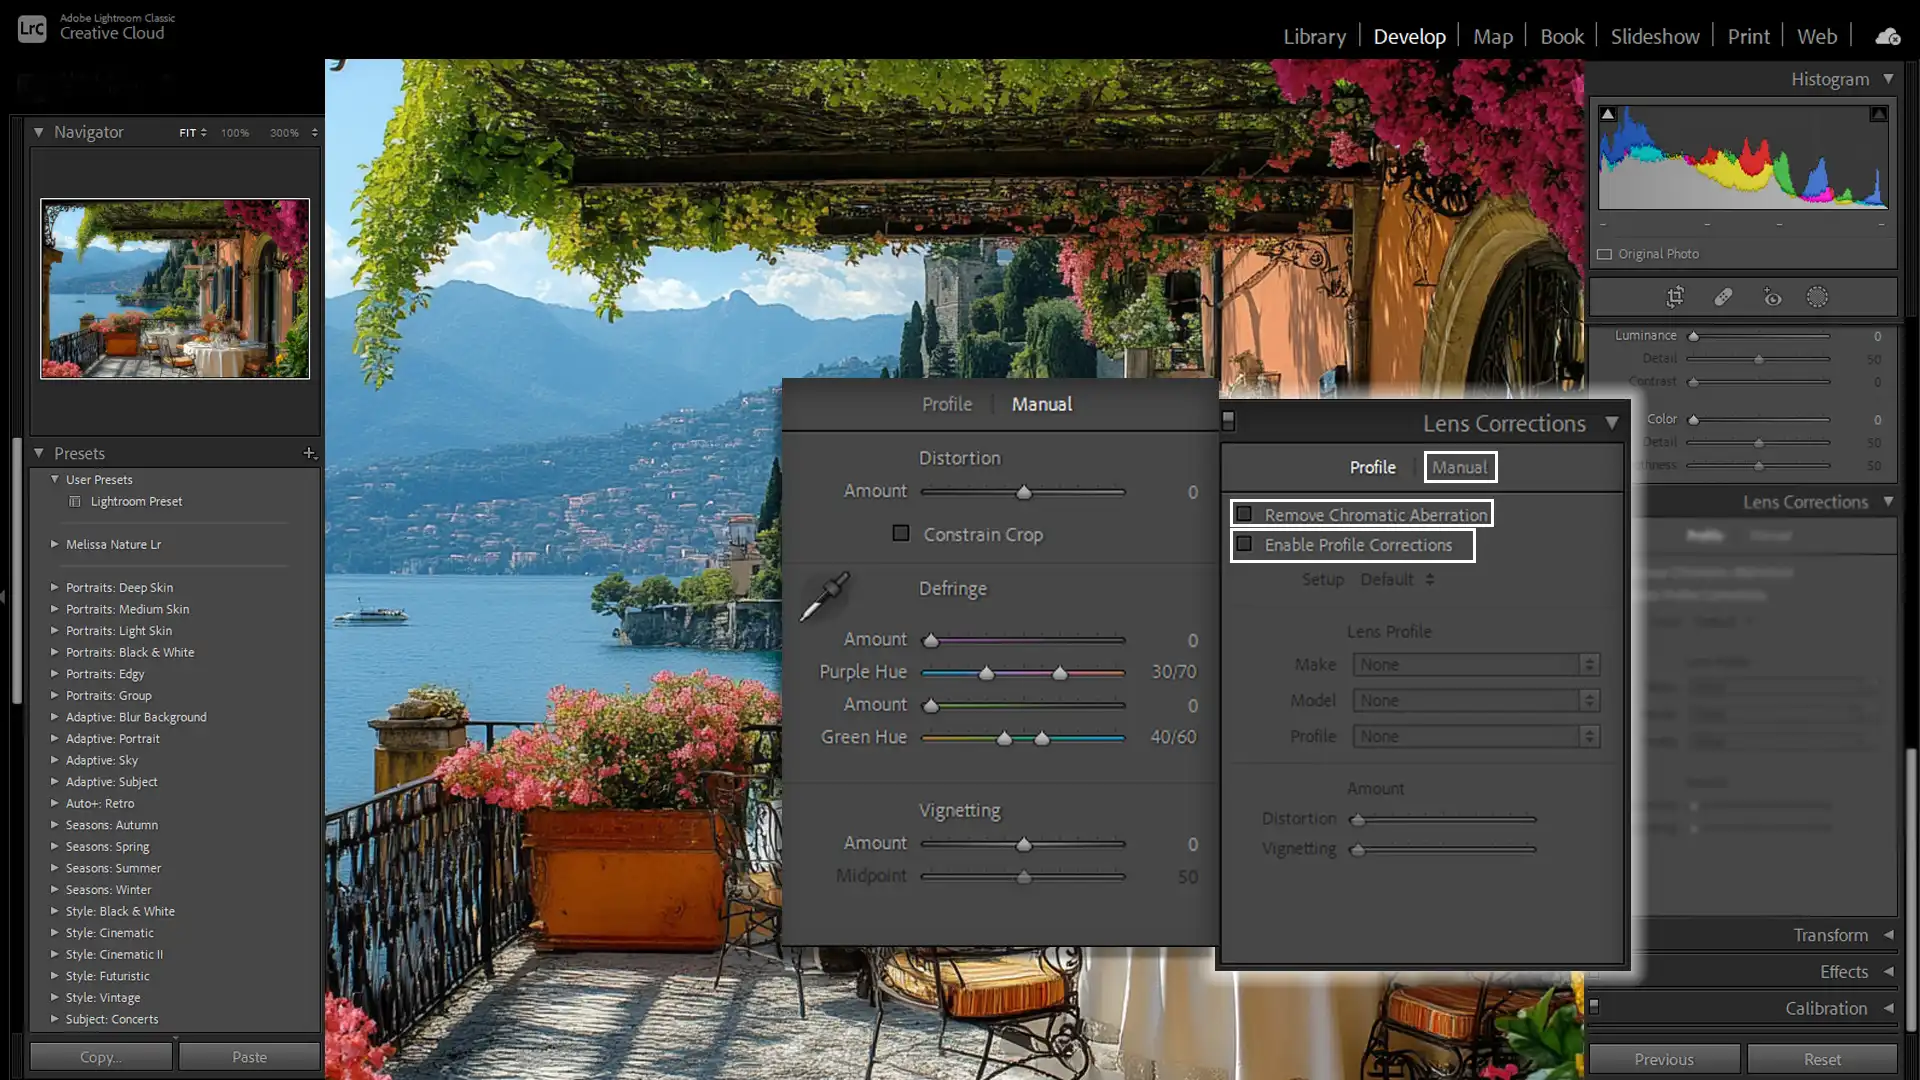
- Enable profile corrections
- Remove chromatic aberration
These lens correction tools ensure that your photos look their best.
Within the panel, you can select from numerous inbuilt lens profiles. The profiles are suitable for DSLRs and point-and-shoot cameras.
Here, you apply the corrections based on your selected lens type. When using specific lens profiles, the software will adjust distortions automatically.
Automatic vs Manual Lens Corrections
There’s a choice between automatic and manual options:
- Automatic lens corrections use defaults that suit most scenarios. Just a few clicks and your photo aligns perfectly.
- The manual tab gives more control over adjustments. This is useful when working with wide-angle cameras to ensure precision. Begin with auto, then fine-tune manually if needed.
Each lens has a distinct lens correction profile. With automatic settings, Lightroom utilizes these profiles to apply changes.
On the other hand, manual methods require more familiarity with sliders.
Profile Corrections and Their Importance
Profile corrections are fundamental for correcting chromatic aberration. These adjustments ensure tones appear uniform across your images.
A Lightroom lens corrections feature helps view real-time improvements in clarity. It recognizes and adjusts based on different cameras and lens brands.
Separate lens profiles for different digital cameras ensure every picture meets your standard.
Correcting visuals is important, especially for camera raw enthusiasts. Seamless adjustments preserve image integrity.
The integrated profiles cover numerous makes and models, including each lens setup.
Pro Tip: For beginners, always start with automatic settings. Ensure ‘enable profile corrections‘ is checked, and let Lightroom do the initial work.
Later, explore the manual section to understand better how minute tweaks impact your images.
Adjusting the sliders sharpens your skills and enhances confidence in your distortion correction work.
Step-by-Step Guide to Lens Correction in Lightroom
Before diving into the lens correction process, the first step is to import your photos into Lightroom. This sets the stage for making necessary adjustments to enhance your images effectively. Let’s explore how to get your photos ready for editing
Importing Your Photos
Let’s get started on how to use Lightroom:
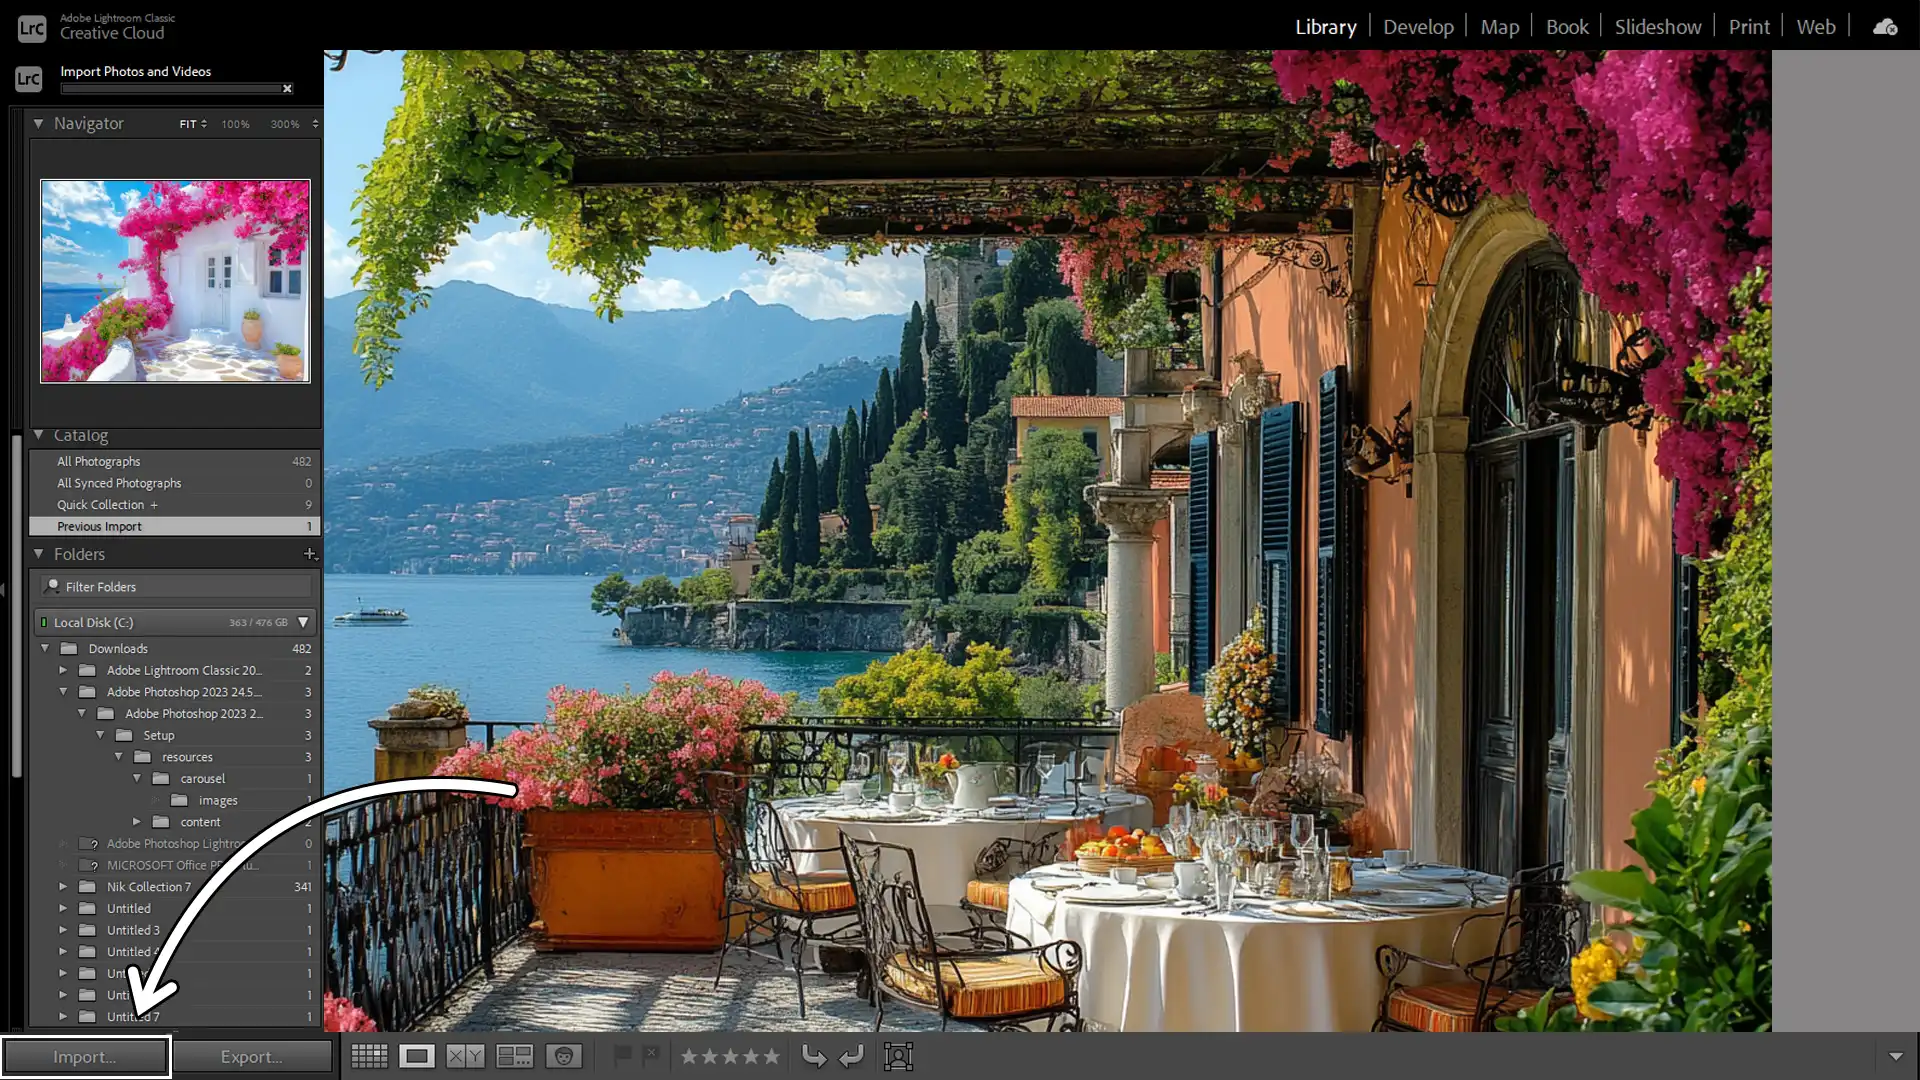
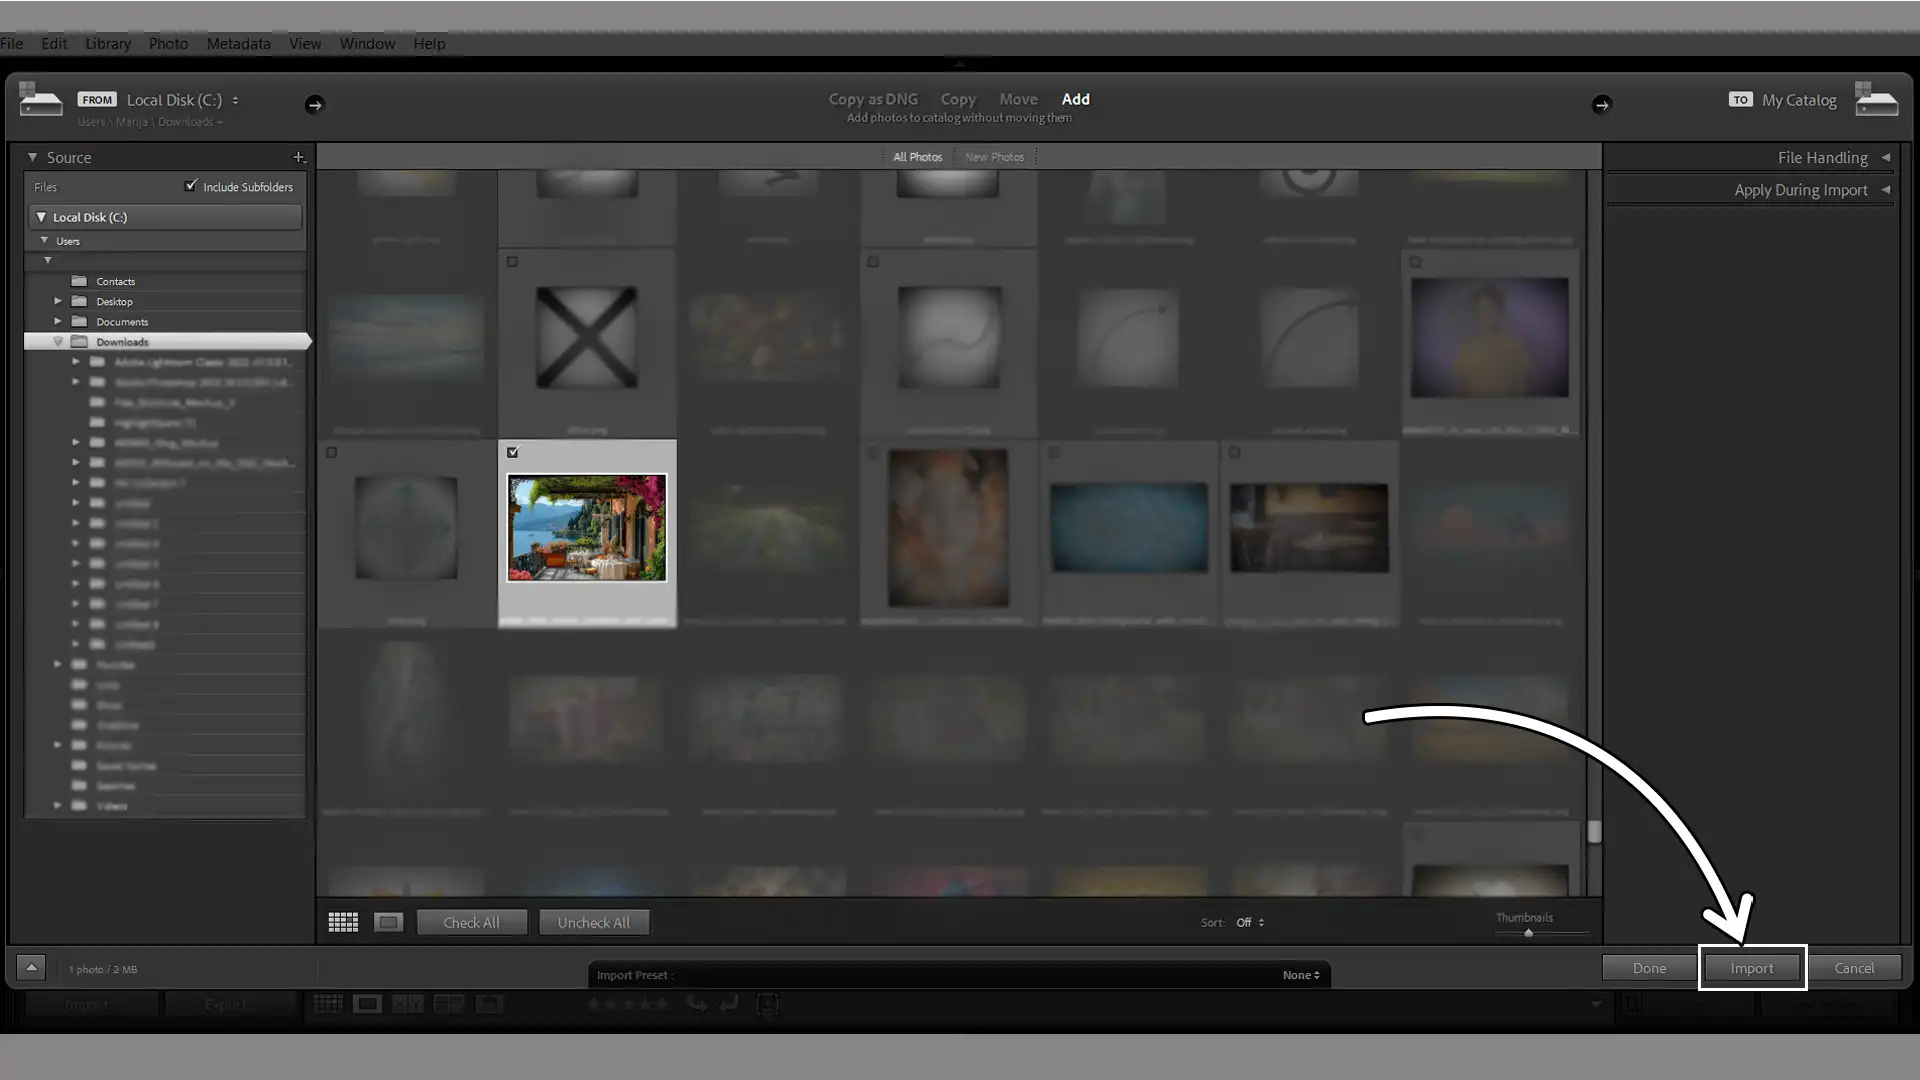
- First, import your photos into Lightroom Classic. It can't be simpler.
- Click on the "Import" button.
- Navigate to your image folder.
- Hit "Import" again.
Choosing between RAW or JPEG format is important here. RAW files are your best friend because they store all image data, providing maximum flexibility for editing.
Applying Lens Corrections Automatically
Once your photos are ready, head over to the lens corrections tab and turn on “Enable Profile Corrections.”
Automatically, Lightroom lens corrections will work their magic.
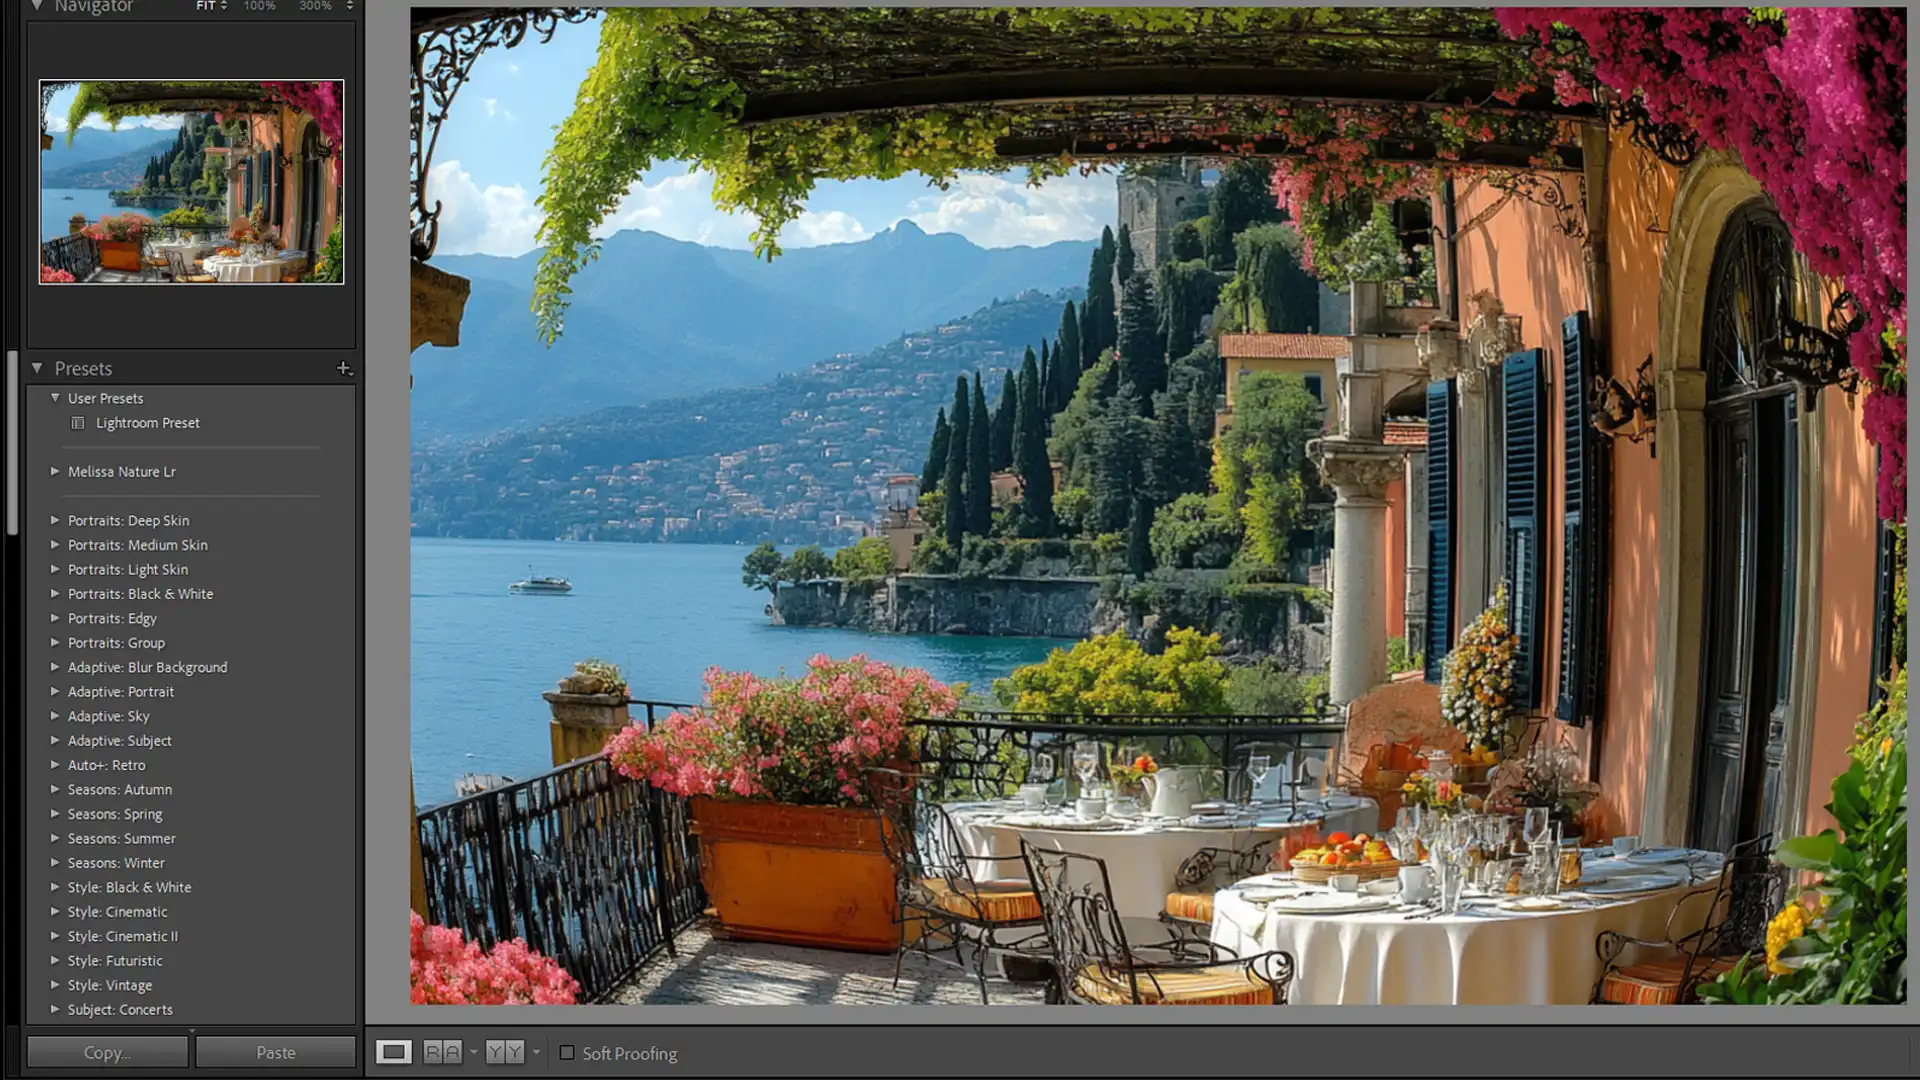
- It uses specific lens profiles.
- From wide-angle cameras to point-and-shoot models, it covers them all.
- It corrects common lens anomalies like distortion and chromatic aberration. Fine-tuning with Manual Adjustments.
If you’re up for it, try making adjustments manually. The lens corrections tab lets you tweak manually:
- Fix lens deviations by adjusting sliders.
- Deal with focal length issues.
Lightroom Classic is excellent for further refining these changes.
When dealing with separate lens profiles, you might need tweaks.
Using Lightroom lens corrections can significantly enhance image quality. Applying the correct lens profile matters. Explore Camera Raw settings if needed.
Start with automatic and progress into expert manual edits.
Pro tip: Never forget to save your settings! Save your go-to adjustments as a preset. This way, future edits become quicker and more efficient.
Advanced Techniques for Lens Corrections
We dive deeper into Lightroom Classic, exploring advanced methods for refining your photos through lens corrections.
This isn’t just an application of presets. Let’s dig into how we can improve the quality of our images by customizing adjustments for your specific lenses.
The table below summarizes basic elements of lens correction techniques, including how to customize lens profiles, utilize external plugins, and troubleshoot common issues.
| Aspect | Overview |
|---|---|
| Understanding Lens Correction | Explore how lens correction improves photo quality by addressing distortions and aberrations. |
| Customizing Lens Profiles | Learn to adjust lens profiles specifically for wide-angle lenses to enhance your images. |
| Using External Plugins | Discover how external plugins can complement Lightroom’s built-in features for more precise corrections. |
| Troubleshooting Lens Correction Issues | Identify common problems and learn effective solutions to ensure successful lens corrections. |
Customizing Lens Profiles When Using Wide Angle Lenses
I know what you’re thinking – all these lens profiles should do the job, right?
Lightroom Classic offers many options, but sometimes, you want to tailor these settings to get the best results. Navigate the lens corrections tab to fix unique issues with your wide-angle cameras.
Altering distortion and tweaking the vignette amount become simple tasks, trusting in the profiles present but allowing yourself room to explore adjustment beyond defaults.
Pro Tip: Learn how correct the perspective in Lightroom for an even easier workflow!
Utilizing External Plugins
Sometimes, the built-in options aren’t enough to apply lens corrections perfectly. I admit that on lazy days, the best plugins seem like magic.
They offer specialized tools to enhance camera raw files with detailed precision. They seamlessly integrate into your workflow and provide even more control over repairs for intense chromatic aberrations or tough distortions that Lightroom Classic alone can’t handle.
Trust me, try different plugins – you’ll be amazed by the extra finesse they offer!
Troubleshooting Common Issues
Sometimes, point-and-shoot models have a lens profile that doesn’t quite cover everything.
Troubleshooting common issues involves patience and experimentation. When the lens corrections tab doesn’t address certain problems, it’s worthwhile revisiting your raw files with fresh eyes.
This approach can help you better understand image distortion and how to fix it.
In closing, using the lens profile capabilities within Lightroom Classic not only resolves distortions but also helps to correct common lens aberrations, effectively elevating your photographic work.
Pro Tip: Always work with raw files for more profound color accuracy and when making corrections to details. These files give you more data to manipulate and adjust.
As you explore the Lightroom photo editor, you’ll find that working with raw files significantly enhances your editing experience.
For those looking to enhance their editing skills further, exploring Lightroom shortcuts can significantly speed up your workflow.
Frequently Asked Questions

What does lens correction do in Lightroom?
- Lens correction in Lightroom helps fix common lens flaws, such as distortion, chromatic aberration, and vignetting (dark corners).
Should I turn on lens correction?
- Turning on lens correction: Yes, it's generally a good idea to improve the quality of your photos by making them look more natural and aligned with how you saw the scene when taking the picture.
What is a lens correction?
- Lens correction refers to the adjustments made to a photo to compensate for the imperfections inherent in photographic lenses. These adjustments help align the image closer to what the human eye sees.
How do I fix lens distortion in Lightroom Classic?
- Fixing distortion in Lightroom Classic: Use the Lens Correction tab. Enable the 'Profile Corrections' option to adjust distortion automatically based on the lens used. If you need to make adjustments manually, use the sliders in the 'Manual' tab under the same panel.
Conclusion
Lens correction in Lightroom has truly transformed my photo editing experience. Before discovering this tool, I often struggled with distorted images caused by lens imperfections.
With the help of “lens correction Lightroom,” I can easily fix these issues and make my photos look more like what I envisioned when I took them. This feature is simple to use, yet it significantly enhances the quality of my final images.
If you’re eager to master these techniques and elevate your editing skills, I highly recommend checking out my Photoshop Course and Lightroom course.
These resources have played an important role in my journey, providing valuable insights and practical steps to make the most of Lightroom’s capabilities.
Also, you can explore more about the tools by visiting Adobe Photoshop and Adobe Lightroom.
Whether you’re just starting or looking to refine your skills, these courses can guide you in harnessing the power of lens correction in your photography.
Read more about Photoshop:


