How to Adjust White Balance: Techniques for Perfect Photo Colors
How to Adjust White Balance: Techniques for Perfect Photo Colors
Introduction
Do you know what is white balance and how to adjust white balance. To understand this, let’s take an example first. Imagine capturing a breathtaking sunset on your camera, expecting to see a canvas of vibrant oranges and deep purples, but instead, your photo displays a dull, washed-out scene. This common frustration can stem from an overlooked aspect of photography ie., white balance. White balance adjustment is like tuning an instrument before a concert; it ensures the colors in your photograph strike the perfect chord, reflecting what your eyes truly see.
White balance is an essential camera configuration that adjusts tints in an image to make it appear as natural as possible, reflecting how it would look under neutral light. This control is crucial because different light sources emit light with varying color temperatures, which can significantly affect the appearance of your photos.
Table of Contents
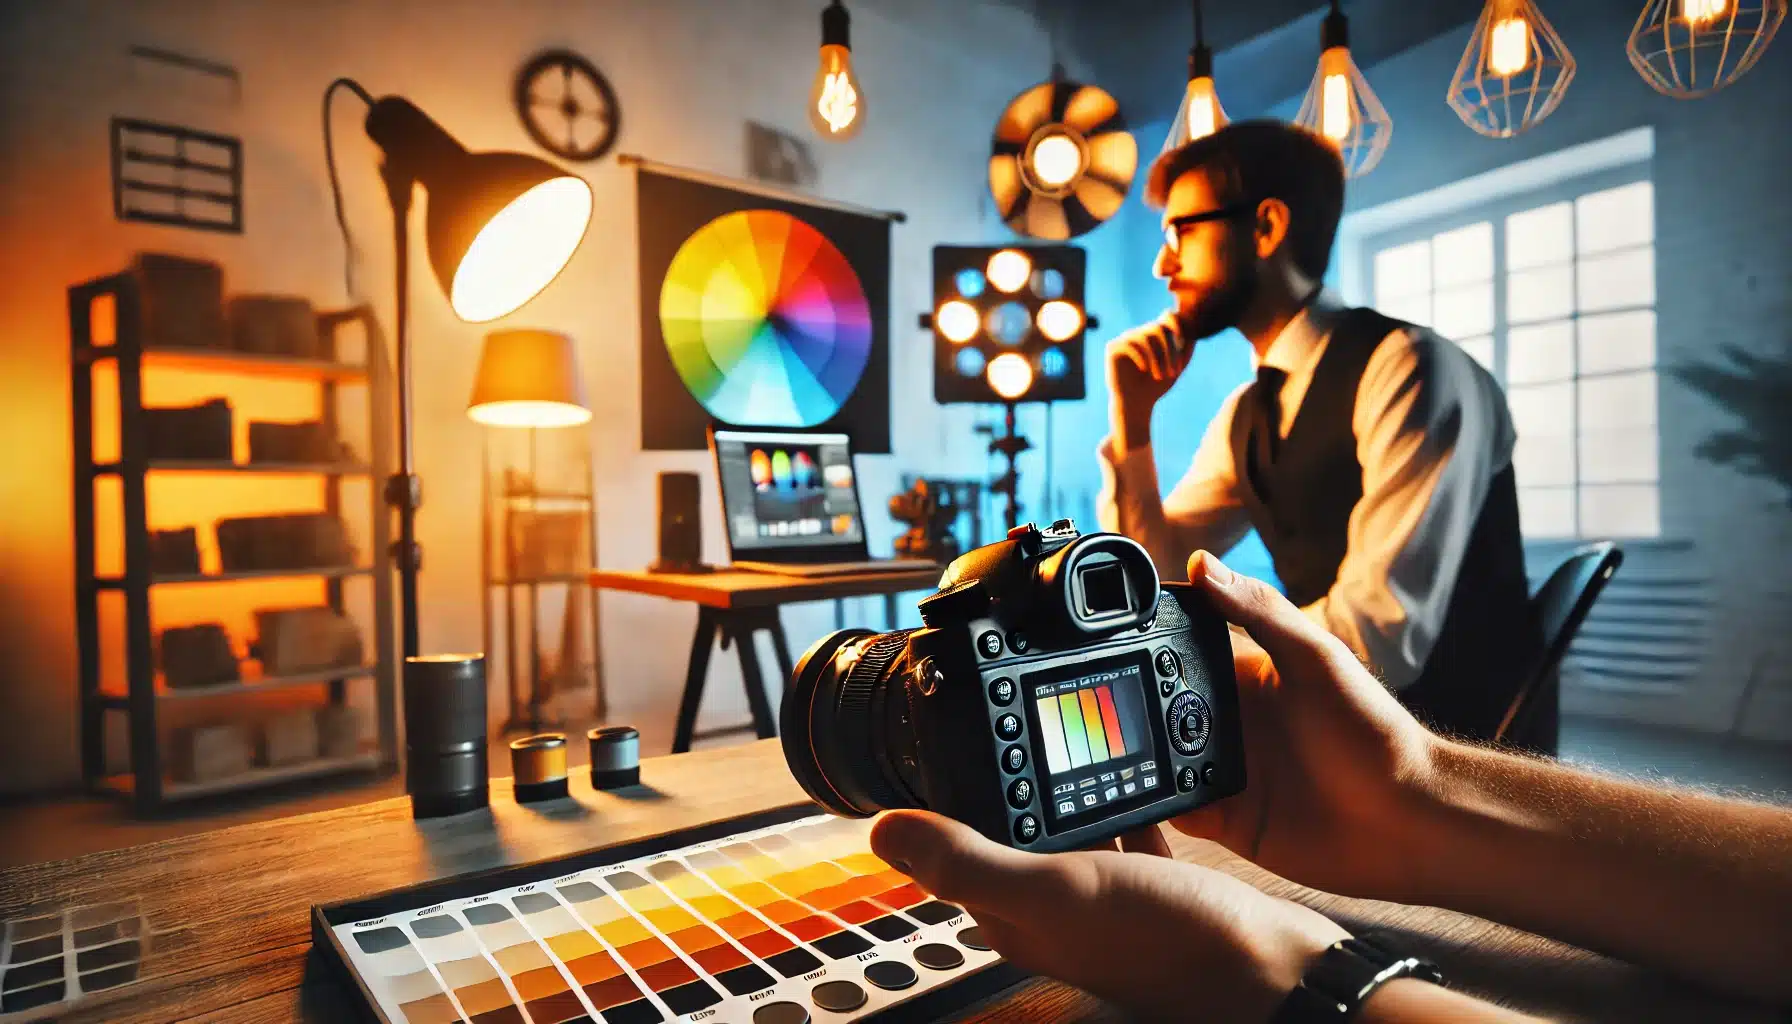
Understanding Color Temperature and White Balance
Color temperature and white balance are foundational concepts in photography that influence how tints are captured and displayed in your images. Hue temperature is measured in Kelvin (K) and describes the hue of various light sources; lower Kelvin numbers produce warmer, yellowish tint, typical of candlelight or sunset scenes, while higher Kelvin values result in cooler, bluish tones, like those on a cloudy day or in areas shaded from direct sunlight.
Most cameras offer a range of preset white balance configurations tailored to common lighting situations such as daylight, shade, tungsten, and fluorescent as well as an auto white balance (AWB) option. While AWB works well for general shooting, it can occasionally misinterpret mixed lighting conditions, leading to less than ideal tone representation. For the utmost control, photographers can set the white balance manually using a gray card. This method involves taking a photograph of the gray card under the same lighting conditions as the shoot, then adjusting the camera’s white balance to treat the tone of the gray card as neutral. This ensures all other colors are balanced including black and white accurately around it.
Understanding Your Camera's White Balance Settings
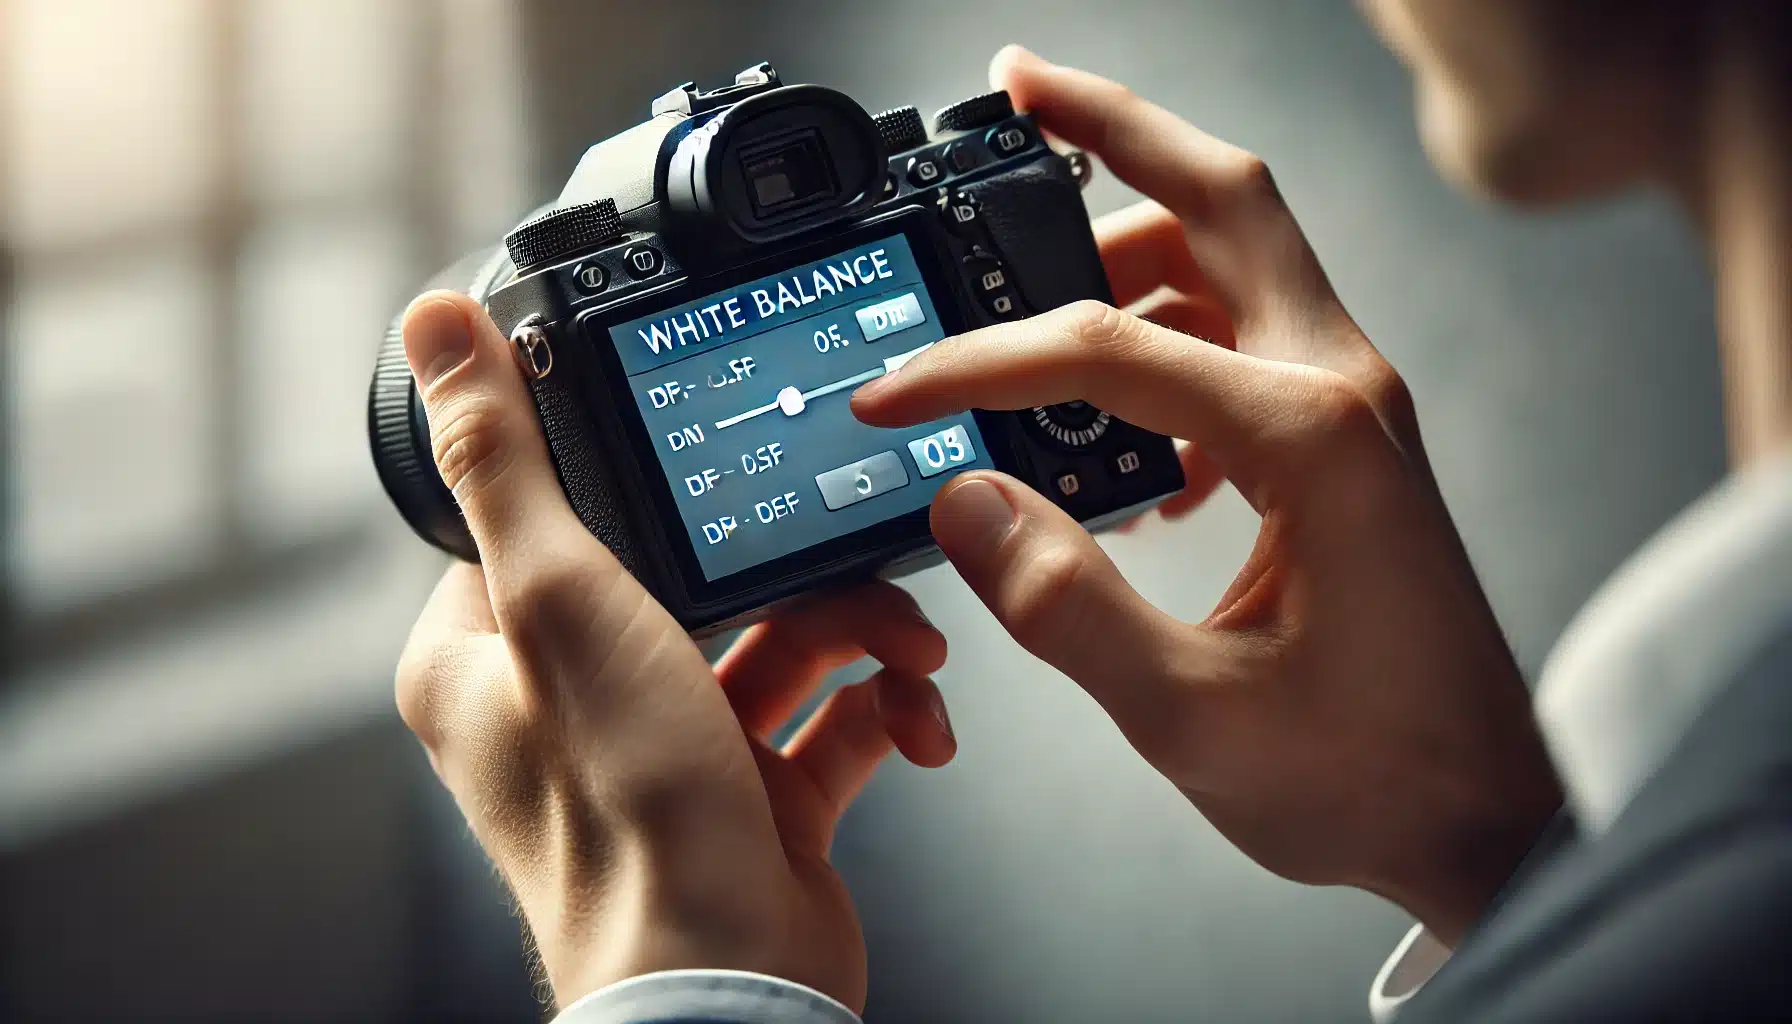
To adjust white balance directly in your camera, you need to familiarize yourself with the white balance configurations available in your camera’s menu. Before starting your photo session, adjust white balance control to reflect the mood you’re aiming to achieve. Here’s how you can navigate these configurations:
Locate the White Balance Menu: Typically, you can access the white balance control by pressing the menu button on your camera. Navigate through the menu until you find the ‘White Balance’ option. This step is crucial as it's the gateway to all other white balance adjustments.
Select the Desired Configuration: Use the directional keys to move through the different white balance options such as Daylight, Cloudy, Tungsten, Fluorescent, and more. Each control compensates for the color temperature of different light sources. Make sure to experiment with these control to understand how each affects your photos.
Confirm Your Selection: Once you’ve highlighted the desired white balance setting, press ‘OK’ or ‘Select’ to apply that modification. This adjusts the camera’s shade interpretation to match the selected lighting condition. It's a simple click that can significantly improve the tone accuracy in your images.
Setting Custom White Balance
For more accurate tone rendering, setting a custom white balance is recommended. This process involves a few more steps but allows for precision:
Prepare a Gray or White Object: Place a neutral gray card or a white object within the scene you are shooting. A proper white balance adjustment is crucial for photographing snowy landscapes to avoid blue-tinted snow. This should be in the same lighting conditions as your subject. Ensure the object is well-lit and represents the type of light under which you are shooting.
Set Custom White Balance: Return to the white balance menu and select the ‘Custom’ or ‘Manual’ white balance setting. Follow the prompts to select the photo you just took as the reference. This tells the camera to use the tints in that photo as the baseline for neutral, adjusting all other tints based on this reference. By doing so, you ensure that the camera's interpretation of color temperature is tailored to the specific environment.
Adjusting White Balance for Specific Scenes
Sometimes, the standard presets do not perfectly match the illumination conditions, or you might want to creatively alter the white balance for artistic effects:
Experiment with Presets: Don’t hesitate to try different white balance presets in the same scene to see which gives the best results. What looks best might surprise you! This method allows you to visually gauge which preset optimally enhances the natural standards of the scene.
Adjust Kelvin Values Manually: If your camera allows, manually adjusting the Kelvin value can give you complete control over the color temperature. This is useful in mixed light conditions or when aiming for a specific mood. Manipulating the Kelvin scale can drastically alter the mood and feel of your photographs, making it a powerful tool in your creative arsenal.
Use White Balance Bracketing: Some cameras offer white balance bracketing features, where the camera takes several shots in quick succession, each with a slightly different white balance setting. This can be helpful to quickly find the best setting without manually changing the white balance for each shot. It's an excellent way to ensure you capture the perfect balance, especially in rapidly changing or unpredictable luminesce conditions.
For those looking to adjust white balance after the shot has been taken, programs likeLightroom provide robust tools tailored for this purpose. When you adjust white balance correctly, the whites in your photo will appear crisp and true to shade. Both applications allow photographers to correct and enhance the white balance in images, particularly when shooting in RAW mode. RAW files retain extensive data from the camera sensor, giving you a broader range of control over white balance adjustments compared to JPEGs. The white balance adjustment feature in these given software’s can rescue images taken in poor luminesce conditions. Continuous learning about white balance adjustment techniques is essential for professional photographers who shoot in varied glow scenarios.
Using Lightroom for Basic Adjustments: Lightroom's white balance selector tool is a quick way to correct white balance. Simply select the tool, then click on a point in the image that should be neutral (white or gray). This adjusts the entire image to neutralize shade casts at that point. For more detailed alterations, you can manually tweakthe temperature and tint sliders, shifting the shades towards blue or yellow, and green or magenta, respectively.
Photoshop for Advanced Control: In Adobe, the 'Curves' adjustment layer is particularly powerful for white balance correction. You can fine-tune the red, green, and blue channels individually to achieve a balanced result. This method is ideal for correcting specific areas of an image that may have different brightness levels due to uneven illumination.
Step-by-Step Guide to White Balance Adjustment in Post-Processing
Adjusting white balance in post-processing can be a meticulous but rewarding task. Here’s how to approach it effectively:
Set the Correct White Balance in RAW Editor: If you are working with a RAW file, use your software’s white balance tools to select the correct preset that matches the original illumination conditions, or adjust the temperature and tint manually until the colors look natural.
Use Color Balance Tools for Fine-Tuning: In Adobe, navigate to Color Balance under the Image modifications menu. Here, you can subtly shift shadows, midtones, and highlights toward the desired hue, which is helpful for images shot under mixed brightness conditions or where specific color casts prevail.
Using Advanced Techniques for Precise Modifications
For photographers looking to achieve the highest level of accuracy, or when dealing with complex brightness scenarios, advanced techniques can be invaluable:
Working with Layers in Photoshop: Create adjustment layers specifically for white balance corrections. This non-destructive mode allows you to revert changes without affecting the original image. Layer masks can be used to apply corrections only to specific areas of the image that require tunings.
Using the Curves Tool: The Curves tool in Adobe allows for nuanced control over color and luminance. By adjusting individual color channels, you can remove unwanted color casts and enhance the overall brightness and contrast, making the image appear more balanced and visually pleasing.
Frequently Asked Questions on White Balance
How should you adjust white balance?
For beginners, understanding white balance adjustment is key to improving photo quality. To adjust white balance effectively, select a camera preset that matches your lighting conditions, such as Daylight or Tungsten, or use a gray card for manual setting when shooting in RAW for optimal accuracy. This ensures your camera adapts to the specific colour temperature of different light sources.
What is the best configuration for white balance?
The optimal setting often depends on the luminescence; Auto White Balance (AWB) is suitable for varied conditions, while specific presets like Daylight or Cloudy can offer more accuracy. For precise control, manually control the white balance using a gray card provides the most accurate colour rendition.
What happens when the white balance is off?
An incorrect white balance can cause unnatural color tints in your photos, making them look overly blue, yellow, or pink. This can distort true colours, especially noticeable in skin tones or when capturing vibrant landscapes, requiring tunings to restore natural hues.
How to get a perfect white balance in Photoshop?
In Adobe Photoshop, perfect white balance can be achieved by using the Eyedropper Tool to click on a neutral area, which adjusts colors based on that point. For detailed alterations, the Curves or Color Balance tools allow for tweaking specific color channels and correcting any color casts for a balanced result.
Conclusion
In my own experience as a photographer, mastering the art of adjusting white balance has been transformative. I recall a specific instance during a wedding shoot under mixed lighting—without adjusting the white balance, the romantic, soft hues that were so evident to the eye would have been lost to harsh, unflattering tones. By manually adjusting the white balance with a gray card, I captured the warmth and ambiance that the couple was hoping for, ensuring the photos perfectly reflected the beauty of their day.
Understanding and controlling white balance is crucial, not just for professional photographers but for anyone keen to enhance their photographic skills. If you’re looking to deepen your understanding of essential photography techniques, like white balance adjustments and others consider exploring our comprehensive courses on Photoshop and Lightroom. These courses are designed to equip you with the skills necessary to bring your creative vision to life, ensuring every shot you take is as vibrant and true to life as possible.
$2,061.00Original price was: $2,061.00.$1,061.00Current price is: $1,061.00. 27638
Download Your Free Guide Now!
Discover the secrets of photography with our printable guide! Master essential techniques like aperture, shutter speed, and ISO to create stunning images. Get your free printable PDF now and start turning your snapshots into masterpieces!