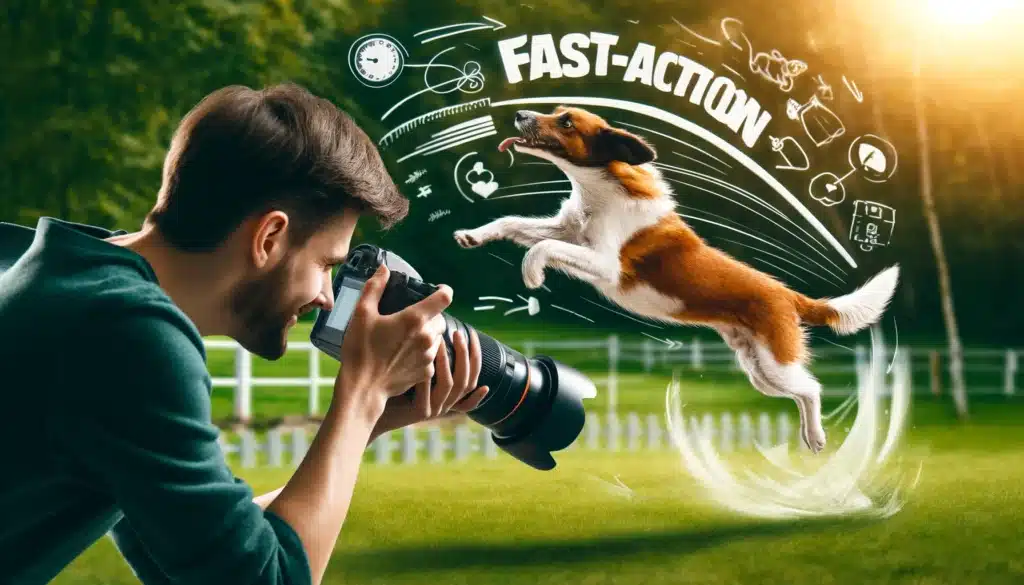
How to Do Pet Photography: Tips for Capturing Perfect Pet Portraits.

How to Do Pet Photography: An Introduction

Welcome to our Guide to pet photography tips and techniques to learn how to do pet photography like a pro! Capturing the unique charm and personality of our beloved animal companions offers a delightful challenge. Whether you’re an established photographer, aiming to enhance your portfolio, or a devoted dog owner eager to preserve precious memories, mastering the art of pet photography is essential.

Pet photography tips involve much more than simply pointing a camera at your furry friend. It demands a blend of patience, creativity, and technical skill to capture those perfect moments that truly reflect your pet’s spirit. This guide will walk you through the basics of editing pet photos in Photoshop, ensuring every snapshot resonates with life and character.

Table of Contents

Capturing Don's Adventures: An Animal photography Journey

Wildlife photographer Don capturing a pride of lions at sunrise on the African savannah

In the realm of wildlife photography, Don’s story stands out as a testament to passion, dedication, and a deep connection with the natural world. Don, a seasoned wildlife photographer, embarks on thrilling adventures to capture the untamed beauty of nature’s inhabitants. From the majestic roar of lions on the African savannah to the graceful flight of eagles in the remote wilderness, Don’s lens tells the tale of awe-inspiring encounters with wildlife.

The Call of the Wild

Don’s journey begins with a sunrise safari, where he patiently waits for the perfect moment to capture the pride of lions basking in the golden bright. With a keen understanding of animal behavior and a respectful approach, he immortalizes the raw power and regal presence of these magnificent creatures. Each click of his snapper captures not just an image but a glimpse into the untamed spirit of the wild.

Beyond the Lens

Beyond the thrill of capturing iconic wildlife scenes, Don’s work extends to conservation efforts, using his photographs to raise awareness and inspire action for endangered species. Through exhibitions, workshops, and collaborations with conservation organizations, he amplifies the voice of nature, advocating for its protection and preservation for future generations.

Exploring Camera Types for Optimal Pet Photo Shoots

Photographer using a DSLR to capture a playful dog in a park

When planning to photograph pets, the choice of snapper can significantly impact the quality and style of the visual captures you produce. Make time to scout out the perfect location for your pet photograph shoot. Here are some specific snapper types and their advantages for pet photography:

How to Do Pet Photography with DSLR Cameras

DSLRs are a favorite among professional photographers due to their high resolution and superior photograph quality. They offer extensive customization through a wide range of camera lenses and manual configuration, which is crucial for adjusting to the fast-paced environment of pet photography.

Mirrorless Cameras

These snappers provide similar functionality to DSLRs but in a more compact and lighter form factor. Mirrorless snappers offer faster picture-taking speeds and a quieter operation, which is great for capturing frames, of easily startled pets like cats and birds without disturbing them.

Point-and-Shoot Cameras

For those who prefer simplicity, point-and-shoot snappers are user-friendly and portable, making them ideal for quick and casual picture-taking sessions. While they don’t offer the same level of control or photograph quality as DSLRs or mirrorless cameras, many new models have impressive automated features suitable for pet photography.

Essential Camera Gear for Animal Portraiture

Professional photographer setting up camera gear for a pet photo shoot

To ensure a successful photograph session with your pets, having the right snapper gear is as important as choosing the right camera. Don’t rush, take your time to capture the perfect shot of your pet. Here are some key pieces of equipment to consider:

Telephoto Lens

Ideal for outdoor shoots where you might need to maintain a distance, a telephoto lens allows you to zoom in on your pet without intrusion, capturing natural and spontaneous shots. Additionally, the compression effect of telephoto lenses can flatteringly blur the background, focusing attention solely on your pet, thus enhancing the subject isolation and aesthetic appeal of your snaps.

Wide-Angle Lens

This lens type is perfect for capturing the entirety of a scene, useful for including a backdrop that tells a story about your pet’s environment, or for clicks where multiple pets are involved. A wide-angle lens also adds a sense of scale and depth, making it great for dynamic, impactful images that convey the energy and environment surrounding your pet.

Prime Lens

Known for their sharpness and ability to perform well in low brightness, prime lenses are worthy for capturing detailed clicks of your pet. They typically offer a wider aperture, which helps in focusing on your pet and blurring the scene. Prime lenses are excellent for studio portraits of cats and dogs, providing a beautiful depth of field that makes your pet stand out.

Flash and Diffuser

Although natural shine is preferred, a flash can be useful in low-light conditions. Using a diffuser with a flash softens the brightness, preventing harsh shadows and bright spots that could make pets uncomfortable or alter the natural look of their fur. This makes it easier to achieve a balanced exposure and a more flattering photograph, especially in indoors.

Tripod

A tripod is essential for keeping the snapper steady, especially in low light conditions or when using slow shutter speeds. This can be particularly useful for taking group pictures or pet portraits where you want to ensure sharpness. Tripods are invaluable when attempting long exposure shots that can creatively snug the movement of faster animals like dogs.

Camera Strap

A sturdy camera strap is crucial for pet photography as it provides security and quick access to your snapper. Invest in an ideal lens and buy a camera bag to protect your gear. This setup is especially important when taking snaps dynamic environments where you need to move as freely as possible, allowing for quick adjustments and safe handling.

Reflectors

These are used to bounce natural glow onto your subject, brightening up shadows and highlighting details. Reflectors can be particularly useful in outdoor settings to enhance natural shine without the use of artificial illumination. They are especially handy for outdoor dog photography sessions where sunlit may need to be manipulated to suit the conditions.

Basic Camera Configurations for Companion Animal Photography

Photographer adjusting camera settings for pet photography in a park

When taking snaps, especially of subjects like dogs, understanding some basic configuration of your snapper is crucial to getting the best frames. With time, you’ll learn how to anticipate and record your pet’s adorable moments. Here’s a simple explanation of these configurations:

Shutter Speed

This is how fast your snapper captures the photograph. According to pet photography tips, use a fast shutter speed to freeze your pet’s movements. If the shutter speed is too slow, your subject might look blurry from moving.

Aperture (f-stop)

Aperture setting determines how much of your photograph is pinpointed. A lower f-stop means more of your subject will stand out against a softly blurred environment. This is perfect for aiming on a dog while making the scene less distracting. Pet photography tips advise using a wide aperture for a beautiful bokeh effect.

ISO

This adjusts how sensitive your snapper is to brightness. A higher ISO can assist in darker conditions, but it can make your picture look grainy. Lower ISO acts best when there’s plenty of sunlit, resulting in sharper and clearer images.

Focus Mode

Focus mode helps you control where your snapper sharpens the image. For moving subjects, like dogs during a playtime shoot, a continuous focus mode is best as it adjusts the aim automatically as your subject moves.

White Balance

This setting affects the colors in your shots. It adjusts how warm or cool the colors appear based on the brightness. Proper white balance ensures the colors look natural, whether you’re shooting under direct sunlight or in the shade.

SettingTypical ValuesWhen to UseRecommendation
Shutter Speed1/250s to 1/1000s or fasterFast motion shots to freeze movementIncrease shutter speed for playful or fast-moving pets
Aperture (f-stop)f/2.8 to f/5.6To blur the background and center sharply on the petUse a wider aperture for portraits, and narrower for group shots
ISO100 to 1600 depending on the illuminationLower in bright conditions, higher in low brightnessKeep it as low as possible to reduce noise
Focus ModeContinuous AF (AF-C)Keeping the target on moving petsUse single-point AF to target precisely on the pet’s eyes
White BalanceAuto or specific to the light sourceTo ensure the pet’s coat color is accurately representedAdjust manually in mixed lighting for best results

How to Do Pet Photography with Mobile Phones

Using an iPhone 15 Pro Max to capture a playful cat indoors

Secrets to Choosing the Ideal Smartphone

When selecting the best smartphone for animal photography, the attention should be on camera quality and the ability to handle fast movements effortlessly. Smartphones photography using advanced sensors and high-resolution cameras offer the clearest snapshots of your pets. Look for features like multiple lenses and enhanced autofocus that help refine the details and textures of your pet’s fur in every snapshot. Improve your skills with these essential pet photography tips and tricks

Top Smartphones for Capturing Your Pet's Moments

iPhone 15 Pro Max

Known for its advanced triple-camera system, this model provides a versatile range of  options. Its main camera excels in clarity and color accuracy, making it perfect for taking vibrant snapshots of pets. Additionally, the iPhone 15 Pro Max features enhanced low-light performance, ensuring high-quality images even in dimmer settings.

Samsung Galaxy S21 Ultra

This device stands out with its 108MP sensor that brings incredible sharpness to your snapshots. Its Dual Pixel autofocus technology of Samsung S21 Ultra ensures that you never miss a moment, even with the quickest of pets. The snapper also features a 100x Space Zoom, allowing for detailed close-ups from far distances, perfect for capturing the finer details of your pet’s features.

Google Pixel 6 Pro

The Pixel 6 Pro shines with its computational photography capabilities. It automatically adjusts settings to best suit the scene, ensuring that your pet’s portraiture looks stunning with minimal effort on your part. Additionally, its Real Tone technology accurately shoot and reflects the true colors and nuances of various fur types, enhancing the natural beauty of your photograph. 

Pet photography Tips and Advanced Techniques

Pet photographer using composition techniques outdoors

Elevating your furry friend photography involves refining your technique and creatively using composition and illumination to offer you snug the perfect animal portraiture, and to enhance the visual impact of your perfect pictures. Below are pet photography tips that will help you improve your pet photo shoot skills.

Enhancing Composition in Pet Portrayals

Rule of Thirds

Using the rule of thirds in pet photography can transform simple pictures into captivating stories. Position your furry friend so that its eyes align with one of the intersection points on the grid, typically used by photographers to produce interest and balance in their pictures. This strategic placement guides the viewer’s eye naturally across the photograph. It assists you in creating a focal point that feels natural, enhancing the overall appeal of the visual capture. Remember, the eyes are often the most expressive part of the animal, making this technique particularly powerful in pet photography.

Leading Lines

Incorporating leading lines into your photograph can significantly enhance the composition by guiding the viewer’s eye directly to the main subject; the pet. Utilize elements such as pathways, fences, or even shadows and beams of radiance that create lines leading towards your pet. This method not only draws attention to your furry model but also adds a dynamic quality to the pictures

As a photographer, exploring your environment to find these natural guides can assist in creating more purposeful and striking photographs. Leading lines also serve to give your shot depth, making your pet stand out even more effectively.

Frame within a Frame

Creating a frame within a frame is a classic photography technique that can add depth and context to your images, making them more intriguing and layered. Look for natural frames like doorways, windows, or overhanging branches to encase your pet portraiture. This approach not only emphasizes the viewer’s attention on the pet but also enhances the storytelling aspect of the shot. As a photographer, using such frames aids in isolating the subject effectively, which can be particularly useful in busy or distracting environments. This technique also instills a sense of place and can evoke emotions, adding to the photograph’s impact.

Elevating Composition in Portrayals

Frame with Intention

Think about the elements surrounding your pet. A clean, uncluttered environment ensures your subject stands out, making your pet portrayals more visually striking. Be intentional about what is visible in the backdrop; a chaotic setting can distract from the main subject. Position your pet so that the backdrop complements its form and color, enhancing the overall visual presentation. This thoughtful arrangement can turn a simple snapshot into a compelling portrait, highlighting your pet’s best features against a harmonious backdrop.

Play with Perspective

Varying your perspective can add an exciting dimension to your portrayals. Getting down low can offer a glimpse of the world from your pet’s viewpoint, adding a heartfelt and immersive quality to your task. Alternatively, taking pictures from above as your pet looks up injects a quirky, playful element into your setup. Each shift in angle invites viewers to see your pet in a new glare, adding layers to your visual narrative. Such changes in perspective can dramatically alter the storytelling of your photo, bringing freshness and creativity to each shot.

Use Natural Frames

Incorporate natural frames like doorways, windows, and branches to direct attention on your pet. These frames draw the viewer’s eye directly to your subject, simplifying the composition while adding depth. This technique not only highlights your pet but also integrates the environment into your visual story, creating a cohesive scene. By framing your pet with elements in their surroundings, you produce a ‘picture within a picture,’ which can intrigue and engage your audience even more.

Accessories and Props

Introduce colorful and fun props such as hats and scarves to infuse personality into your shots. Consider buying a pet photography studio kit for a professional setup, ensuring your setup looks polished and planned. Keep a sturdy camera bag to protect and transport your equipment easily, allowing you to work efficiently and target on creating memorable shots. To get the best angles, buy props like a ramp or stairs. Props not only add interest and color but can also reflect the personality of your pet, making each photograph unique and personal.

Mastering Illumination Techniques

Utilizing Natural Glow

Harness the gentle luminosity of early morning or late afternoon light for the most flattering results. This natural glow softens features and enriches the visual mood of your portrayals. Position your pet to make the most of this luminosity, using the golden hours to catch warmth and depth in your setups. The right illumination conditions can transform an ordinary photograph into a masterpiece, enhancing the natural beauty and features of your pet portraiture.

Reflectors for Brightening

Employ reflectors to enhance natural glare and illuminate your subject. Reflectors are especially useful in shaded outdoor settings, where they can brighten shadows and accentuate details in your pet’s fur. This simple tool can transform the quality of your lighting, ensuring your pet looks vibrant and lively. Proper use of reflectors can also assist balance the illumination in your scene, preventing overexposed skies or underexposed subjects.

Diffused Light for Indoor Shoots

When working indoors, use diffused light sources to eliminate harsh shadows and develop a flattering ambiance. Softboxes or sheer curtains are excellent for achieving this soft, gentle glare, perfect for indoor sessions. This setup ensures your pet is showcased under the most complimentary conditions. Diffused illumination mimics the natural light quality of overcast days, ideal for highlighting subtle textures and colors without the harshness of direct light.

Post-Processing Techniques for Pet Snaps

Digital artist using Adobe Photoshop for pet photo enhancement

Post-processing techniques for editing pet portraitures in Photoshop after having outdoor pet photo shoots can elevate your tame pictures from good to excellent, adding polish and enhancing the visual appeal. Whether you’re a pro or a beginner, spend time editing your pet snaps to make them truly special. these pet photography tips will assist you improve. Explore various methods to edit and enhance your pet shots for stunning results. If you’re new to pet photography, buy an online course to learn the basics.

Editing Pet Photos in Photoshop

Advanced Editing Techniques

For advanced editing, consider using Adobe Photoshop for precise adjustments and creative effects. Utilize layers, masks, and filters to fine-tune your tame snaps and achieve professional-level results. Experiment with different techniques to find the best workflow for your editing process. Incorporating a layering technique in your session can provide more control over each element, allowing for refined adjustments without altering the original data.

Enhancing Colors and Contrast

One of the key post-processing techniques for pet portraitures is adjusting colors and contrast. Use tools like levels, curves, and saturation adjustments to bring out vibrant colors and improve contrast. This step can make your pet’s fur and features pop in the final portrayal. Adjusting these elements can also help maintain a excellent color balance, ensuring that the portrayal appears natural and appealing.

Removing Unwanted Elements

During the pet photo editing in Photoshop, remove any distracting elements or imperfections from the background or the pet itself. Use the clone stamp tool or content-aware fill in Photoshop to seamlessly erase unwanted objects and develop a clean, professional-looking pictorial depiction. This cleanup is crucial for maintaining the focus on the pet and enhancing the overall visual impact of the portrait.

Final Touches and Sharpening

Before finalizing your edit, apply final touches such as vignetting, sharpening, and noise reduction. Vignette can draw attention to your pet by darkening the edges of the frame while sharpening and noise reduction ensure crisp details and a clean final result. Ensure you keep these adjustments subtle to avoid over-processing, which can detract from the natural look of the portrait. Additionally, consider applying selective sharpening to key areas like the eyes and fur, which can enhance the perceived sharpness and focus of the portrait without affecting the overall softness of the background.

Useful Apps and Tools for Animal Portraiture

Person using mobile apps for pet photography outdoors

In the world of furry friend pictorial representation, having the right apps and tools can significantly enhance both the filming and editing process. Want to seize your pet’s personality? Try these pet photography tips. These digital aids can assist you seize perfect pet shots.

Top Apps for Capturing Pet Images

Lightroom Mobile

Adobe’s Lightroom Mobile is perfect for photographers who want detailed editing control. Lightroom offers features like selective adjustments and preset filters, which can be particularly supportive for balancing colors and enhancing the textural details of your furry friend’s fur. Moreover, this app also provides advanced tools for batch editing, allowing users to apply changes to multiple photos at once, and greatly speeding up the workflow for professionals.

Snapseed

This versatile editing app offers a range of tools and filters that can enhance your snapshots instantly. Its user-friendly interface makes it suitable for both beginners and professionals looking to refine their pictures on the go. Additionally, Snapseed includes advanced features such as selective adjustments and a healing tool, which are great for making precise edits and removing blemishes from your photos.

Lenses

Specifically designed for iPhone users, Camera offers advanced camera modes not typically available on standard snapper apps. It includes features like manual focus, exposure control, and detailed editing options, making it ideal for capturing high-quality pictures of your furry friends.

Photographer capturing a playful dog during a pet photoshoot in a park

FAQs on How to Do Pet Photography

How to Do a Pet Photoshoot?

To capture great portraitures of your pet, keep a few pet photography tips in mind. First, use a worthy snapper with a fast-action capability so you can freeze all those cute moments, even when your pet is on the move. Get close to your pet for intimate and playful shots, and play around with the aperture to blur out distracting backgrounds. Always ensure you have fun during the session, as pets pick up on your mood and react accordingly.

Is pet photography profitable?

Yes, pet photography can be quite profitable. Many pet owners cherish high-quality portrayals of their furry friends and are willing to pay well for professional portraits. To succeed, emphasize on building a portfolio that highlights your ability to capture the unique personalities of pets in exploit. Networking with pet stores and vet clinics can also help you find clients.

What settings should you use when photographing pets?

When photographing pets, start by using a fast shutter speed, such as 1/250 or higher, to freeze any quick movements. Set your camera to continuous shooting mode to capture multiple frames and increase the chances of getting the perfect shot. Use a wide aperture, around f/2.8 to f/5.6, to achieve a shallow depth of field and make your pet stand out against a blurred background. Adjust your ISO setting to ensure proper exposure, keeping it as low as possible to minimize noise while maintaining a well-lit photograph.

What is a good camera for pet photography?

A decent camera for pet photography should be fast enough to capture quick movements and have a flexible aperture for managing different depths of the field. Look for cameras that offer quick autofocus and the ability to shoot high-quality pictorial depictions in various light conditions. DSLRs and mirrorless cameras are often preferred for their reliability and high-quality outputs that ensure you never miss an exciting moment or a tender photography session.

Conclusion

As someone deeply passionate about pet photography, I’ve found that continuously honing my skills has been key to capturing those fleeting moments that pet owners cherish. Just last week, I managed to take a stunning snapshot of a playful kitten mid-pounce using some of the advanced techniques discussed earlier. The perfect illumination caught the gleam in its eyes, making the pictorial depiction not just a photo, but a captured memory that speaks volumes.

If you’re as eager as I am to transform your pet portraiture art from ordinary to extraordinary, enhancing your skills through structured learning is a great step forward. I highly recommend checking out the comprehensive Photoshop Course and Lightroom Course. These courses are tailored to equip you with the tools and pet photography tips to elevate your skills and they will help you capture the perfect pictures of your furry friends. Where professional photographers share their top pet photography tips to help you improve your skills and take amazing pictures of your pets. By following pet photography tips, you can create beautiful and cherished memories with your pet.

If this article has helped you, then Like and Share it with your friends!
Facebook
Twitter
LinkedIn
Pinterest

Have a nice photoshoot! 

Learn more about

Download Your Free Guide Now!

Discover the secrets of photography with our printable guide! Master essential techniques like aperture, shutter speed, and ISO to create stunning images. Get your free printable PDF now and start turning your snapshots into masterpieces!