| Aspect |
Description |
Example |
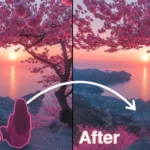
| Bokeh Effect |
Aesthetic enhancement of out-of-focus areas. |
Magical atmosphere through focused blurring. |
| Focused Blurring Technique
|
Adjusts the selected areas. |
Transforms images into stunning bokeh compositions. |
| Creating Magical Compositions |
Draws attention to the subject against visually appealing backgrounds. |
Emphasizing the main subject’s importance. |
| Enhancing Creativity |
Transforming ordinary scenes into extraordinary visual experiences. |
Boosts creativity and enhances storytelling capabilities, creating memorable and visually captivating photographs. |