Introduction to How to Avoid Rolling Shutter Effect
Do your photos and videos sometimes look weird or distorted across the pixels? Are you seeing moving objects appear wobbly or bent? If so, you might be dealing with the rolling shutter effect. This issue can seriously affect your photography, making your shots look strange and unprofessional. Learning how to avoid rolling shutter effect is key to capturing clear, beautiful images.
In this article, we will dive into what causes the rolling shutter effect and how you can fix it. So read ahead to explore the best tips, camera settings, and tools to reduce or eliminate this problem. Plus, you’ll learn practical techniques for shooting and photo editing to ensure your photos and videos come out perfectly.
Table of Contents
What is the Rolling Shutter Effect?
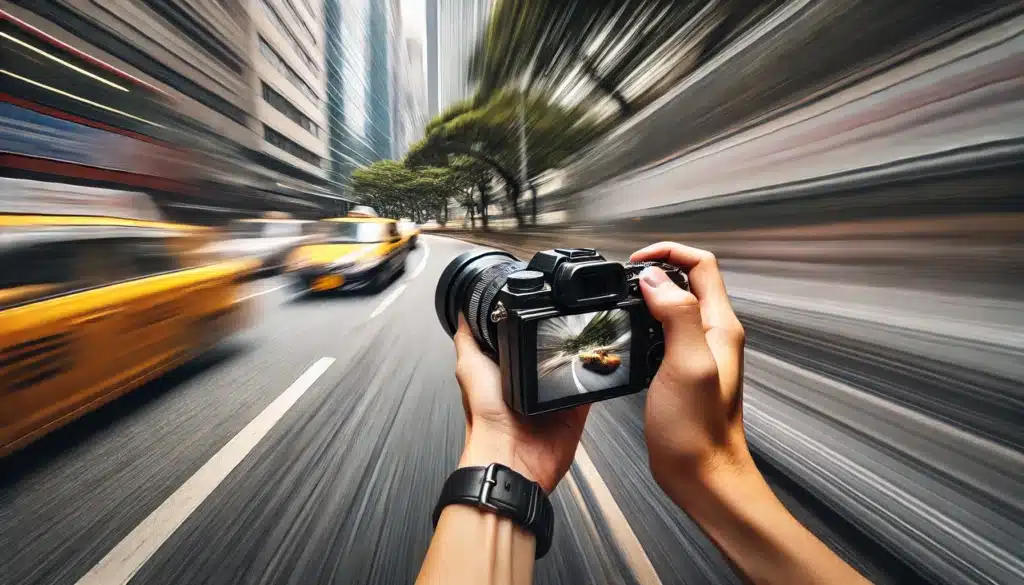
The rolling shutter effect happens when a camera captures an image line by line instead of all at once. This can make fast-moving objects look distorted. For example, if you take a picture of a speeding car, it might look like it’s leaning or stretched.
Moreover, rolling shutter can make videos look wobbly or jello-like. If you move the camera quickly or if something moves quickly across the frame, the image gets warped. This can be very frustrating for photographers and videographers because it ruins the quality of their work.
Why Does Rolling Shutter Occur?
The rolling shutter occurs due to how digital cameras record photos and videos. Rather than capturing the entire scene instantly, the camera scans it in a sequence, usually from top to bottom. This sequential scanning can cause parts of the scene to appear distorted, especially if there is fast motion involved.
Cameras with CMOS technology often experience this issue. These devices read the scene line by line. If an object moves while the camera is scanning, it can appear stretched or squished. This is why it is crucial to prevent rolling shutter when taking photos or videos.
Differences Between Rolling and Global Shutter
Cameras with global shutters reduce rolling shutter issues by capturing the entire scene at once. Global shutters are often used in high-end cameras because they provide clearer and more accurate recordings. However, they are more expensive and use more power than CMOS ones.
Rolling shutters, on the other hand, are cheaper and more energy-efficient. This is why they are common in consumer cameras and smartphones. Knowing the differences between these two types of shutters allows you to choose the right camera for your needs and minimize the rolling shutter effect.
Common Situations Where Rolling Shutter Occurs
The rolling shutter effect is more noticeable in certain situations. For example, if you are photographing a flying bird or a speeding car, the effect can make these subjects appear distorted. The distortion is also noticeable when you pan the camera quickly, such as when following a sports player on the field.
Another common situation is when there are rapid flashing lights, like at a concert. The rolling shutter can make the lights appear to bend or flicker. Understanding how to avoid rolling shutter effect in these situations can enhance the quality of your photos and videos.
Camera Settings to Minimize Rolling Shutter

Adjusting your camera settings can greatly reduce the rolling shutter issue. Different settings can change how your camera photographs scenes while minimizing any distortions. Below is a table comparing the key settings to adjust and their impact on minimizing the rolling shutter.
| Setting | Description | Impact on Rolling Shutter |
|---|---|---|
| Shutter Speed | Adjusts how quickly the shutter opens and closes. | Faster speeds film scenes more quickly, reducing any distortions. |
| Frame Rate | Number of frames captured per second. | Higher frame rates make motion appear smoother. |
| Stabilization | Built-in or added tools that reduce camera shake. | Keeps the camera steady, minimizing unwanted horizontal or vertical movements. |
| ISO Settings | Controls the camera’s sensitivity to exposure. | Higher ISO can compensate for faster shutter speeds, ensuring proper exposure. |
| Aperture | The size of the lens opening, which controls the amount of light entering. | Larger apertures mean brightness, useful when increasing shutter speed. |
How to Avoid Rolling Shutter Effect – Quick Tips and Tricks
Understanding how to avoid rolling shutter effect is vital for anyone committed to high-quality photography or videography. This issue can make your drone shots look warped and unprofessional. Here are a few quick tips to help you minimize this effect and enhance your images.
Choose the Right Angle
Shooting at an angle can fix rolling shutter distortion. For example, instead of shooting a moving object straight on, try a 45-degree angle. This perspective makes the rolling shutter distortion less noticeable. Adjusting your position relative to the subject can significantly improve your shots.
Set Your Shutter Speed
Increase the shutter speed to reduce rolling shutter. Faster speeds capture the scene quickly, fixing distortions. For instance, if you shoot at 1/125 of a second, try 1/250 or higher. This change allows capturing quick actions clearly, but you might need to adjust the ISO or aperture to maintain proper exposure.
Use Image Stabilization
Adjust Frame Rate
Increasing the frame rate reduces rolling shutter. Higher rates film more frames per second, making rapid actions smoother. Capturing at 60 fps instead of 30 fps can significantly lessen distortions. This setting is useful in sports photography.
Use a Camera with Better Technology
Investing in a device with global shutter can eliminate rolling shutter wobble effects. These devices shoot the entire scene at once, rather than line-by-line scanning. This technology is more expensive but beneficial for high-action videography.
Monitor Your Lighting
Proper lighting reduces rolling shutter. Bright, even lighting minimizes the time needed to film each frame. Avoid low light conditions that make it hard for the camera to capture quickly. Use additional lighting if necessary to brighten the scene and reduce distortions. Check out our interesting article about telephoto lens to capture distant subjects with magnification.
Techniques to Fix Rolling Shutter During Editing Process
Correcting the rolling shutter distortion while editing can greatly enhance the quality of your videos. This issue can make your video look unstable and warped, but with the right tools and techniques, you can resolve these problems. Here’s how to avoid rolling shutter effect using an editing software.
Using Video Editing Software
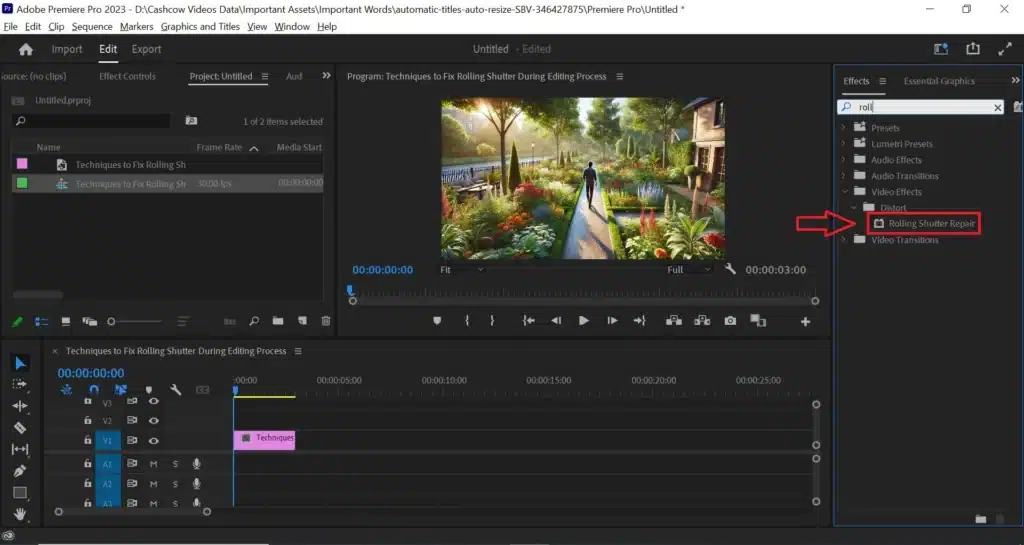
One efficient way to fix the rolling shutter problem is by using video editing software. Adobe Premiere Pro, for instance, includes a tool called “Rolling Shutter Repair.” This feature keeps your shots free of any distortions. By adjusting parameters such as the Rolling Shutter Rate and Scan Direction, you can smooth out the wobble and warp in your footage. This makes your video appear more professional and polished.
Applying the Rolling Shutter Repair Tool
With Adobe Premiere Pro, you can apply the Rolling Shutter Repair effect to your video clips. First, import your image into the software. Then, select the Rolling Shutter Repair from the effects panel. This tool will analyze your footage and make adjustments to correct the distortions. You can fine-tune the settings to achieve the best results for your specific clip. This process reduces the visible effects of the rolling shutter and improves the overall quality of your video.
Fine-Tuning Corrections
Editing with Additional Tools
In some cases, you might need to use additional editing tools such as the Adobe’s Photoshop or Lightroom to fully correct the rolling shutter effect. Moreover, using stabilization tools can reduce any remaining instability in your video clip. Many video editing programs offer stabilization features that can complement the Rolling Shutter Repair effect. By combining these tools, you can achieve a higher level of correction and produce smoother, more professional-looking videos. Learn the art of Lightroom photo editing also.
Using Stabilization Equipment to Reduce Rolling Shutter
Stabilization equipment can greatly reduce the rolling shutter effect, making your videos look smoother and more professional. This equipment keeps your recording device steady, minimizing unwanted movements. Here’s a comparison of different types of stabilization tools and their impact on reducing the rolling shutter issue.
| Equipment | Description | Impact on Rolling Shutter |
|---|---|---|
| Tripod | A three-legged stand that holds the camera steady. | Provides stable support, reducing vertical and horizontal shake. |
| Gimbal | A handheld device that uses motors to stabilize the camera. | Smooths out movements, especially useful for filming while on the move. |
| Steadicam | A harness-based stabilizer that balances the camera with counterweights. | Provides fluid motion, ideal for dynamic shots and filming. |
| In-Body Stabilization (IBIS) | Built-in feature in some devices that adjusts the sensor to counteract movement. | Reduces small, unintended movements, enhancing overall stability. |
| Lens Stabilization | Feature in some lenses that shifts lens elements to stabilize the shot. | Compensates for minor shakes, improving shot clarity and reducing wobble. |
Frequently Asked Questions
In this section, we answer some common questions about how to avoid rolling shutter effect. These solutions will allow you to correct distortions and achieve smoother, more professional-looking pictures and videos.
How do you get rid of the rolling shutter effect?
To get rid of the rolling shutter effect, adjust your shutter to a high speed. Stabilize your camera with a tripod or gimbal. Don’t make quick movements while filming. Better lighting also helps reduce this problem. If it still occurs, you can fix it using an editing software.
How to fix rolling shutter in post?
To fix rolling shutter in post-production, use video editing software. Import your footage into a program like Adobe Premiere Pro. Apply the “Rolling Shutter Repair” effect. Adjust settings like Rolling Shutter Rate and Scan Direction to correct the distortions. This makes your video look smooth and professional.
How do you fix rolling shutter resolve?
In DaVinci Resolve, import your video clip first. Then use the “Stabilizer” tool found in the color tab. Choose the “Rolling Shutter” option. Adjust the settings to fix the distortions. This will help reduce the rolling shutter effect and improve your video quality.
How is the rolling shutter effect correction?
Correcting the rolling shutter involves several tips and tricks. Adjusting your angle can help; try filming from a 45-degree angle instead of straight on. Changing your ISO settings can improve the sensitivity of your lens, allowing to reduce distortions. Increasing your shutter speed is also crucial. Proper lighting is essential to capture scenes more efficiently.
Conclusion
If you want to learn more techniques to enhance your photo and video editing skills, check out our courses. Our Photoshop course and Lightroom course offers comprehensive training for photo editing. Join us today to take your skills to the next level.
Have a nice photoshoot!
Learn more about Photography Techniques:


