| Setting Name | Description | Impact on Use |
|---|
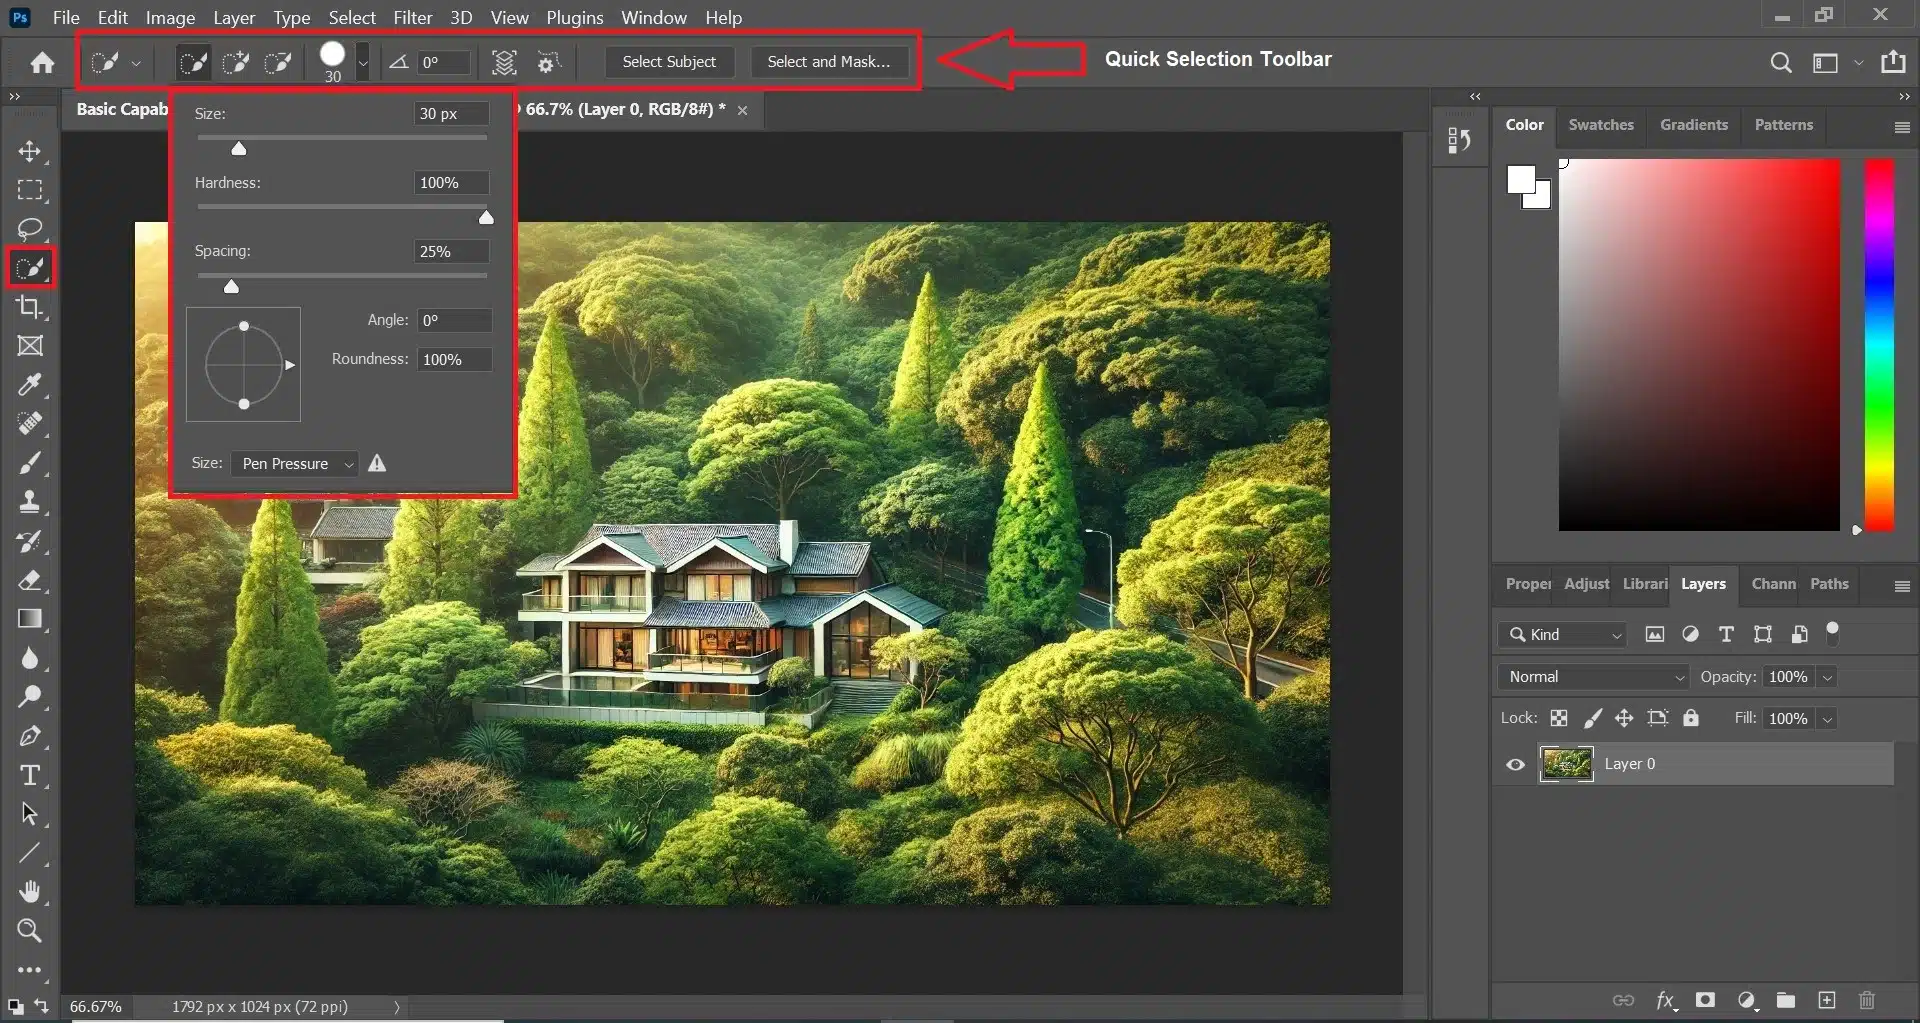
| Brush Size | Modifies the diameter of the tool’s circle. | Bigger size covers more area quickly; smaller size offers more precision. |
| Hardness | Dictates the softness of the tool’s edges. | Softer edges blend better, harder edges create a more defined boundary. |
| Sample All Layers | Lets the tool consider information from all visible layers in the selection. | Useful for maintaining consistency across multiple layers without merging them. |
| Auto-Enhance | Automatically refines the edge of the selection for smoother results. | Enhances accuracy, especially in complex parts with mixed colors and textures. |
| New Selection | Starts a new selection, disregarding previous selections. | Clears existing selections, allowing you to start fresh. |
| Add to Selection | Adds newly selected parts to the existing selection. | Expands the scope of the selection without losing prior selections. |
| Subtract from Selection | Removes areas from the existing selection. | Refines the selection by removing unwanted parts. |
| Mode | Simplifies the tool’s interface and options for faster selections. | Streamlines the selection process, ideal for quick edits or when working under time constraints. |
| Continuous Mode | Keeps the tool active for continuous adjustment as you drag across the subject. | Facilitates ongoing adjustments to the selection, ideal for objects with complex outlines or mixed backgrounds. |