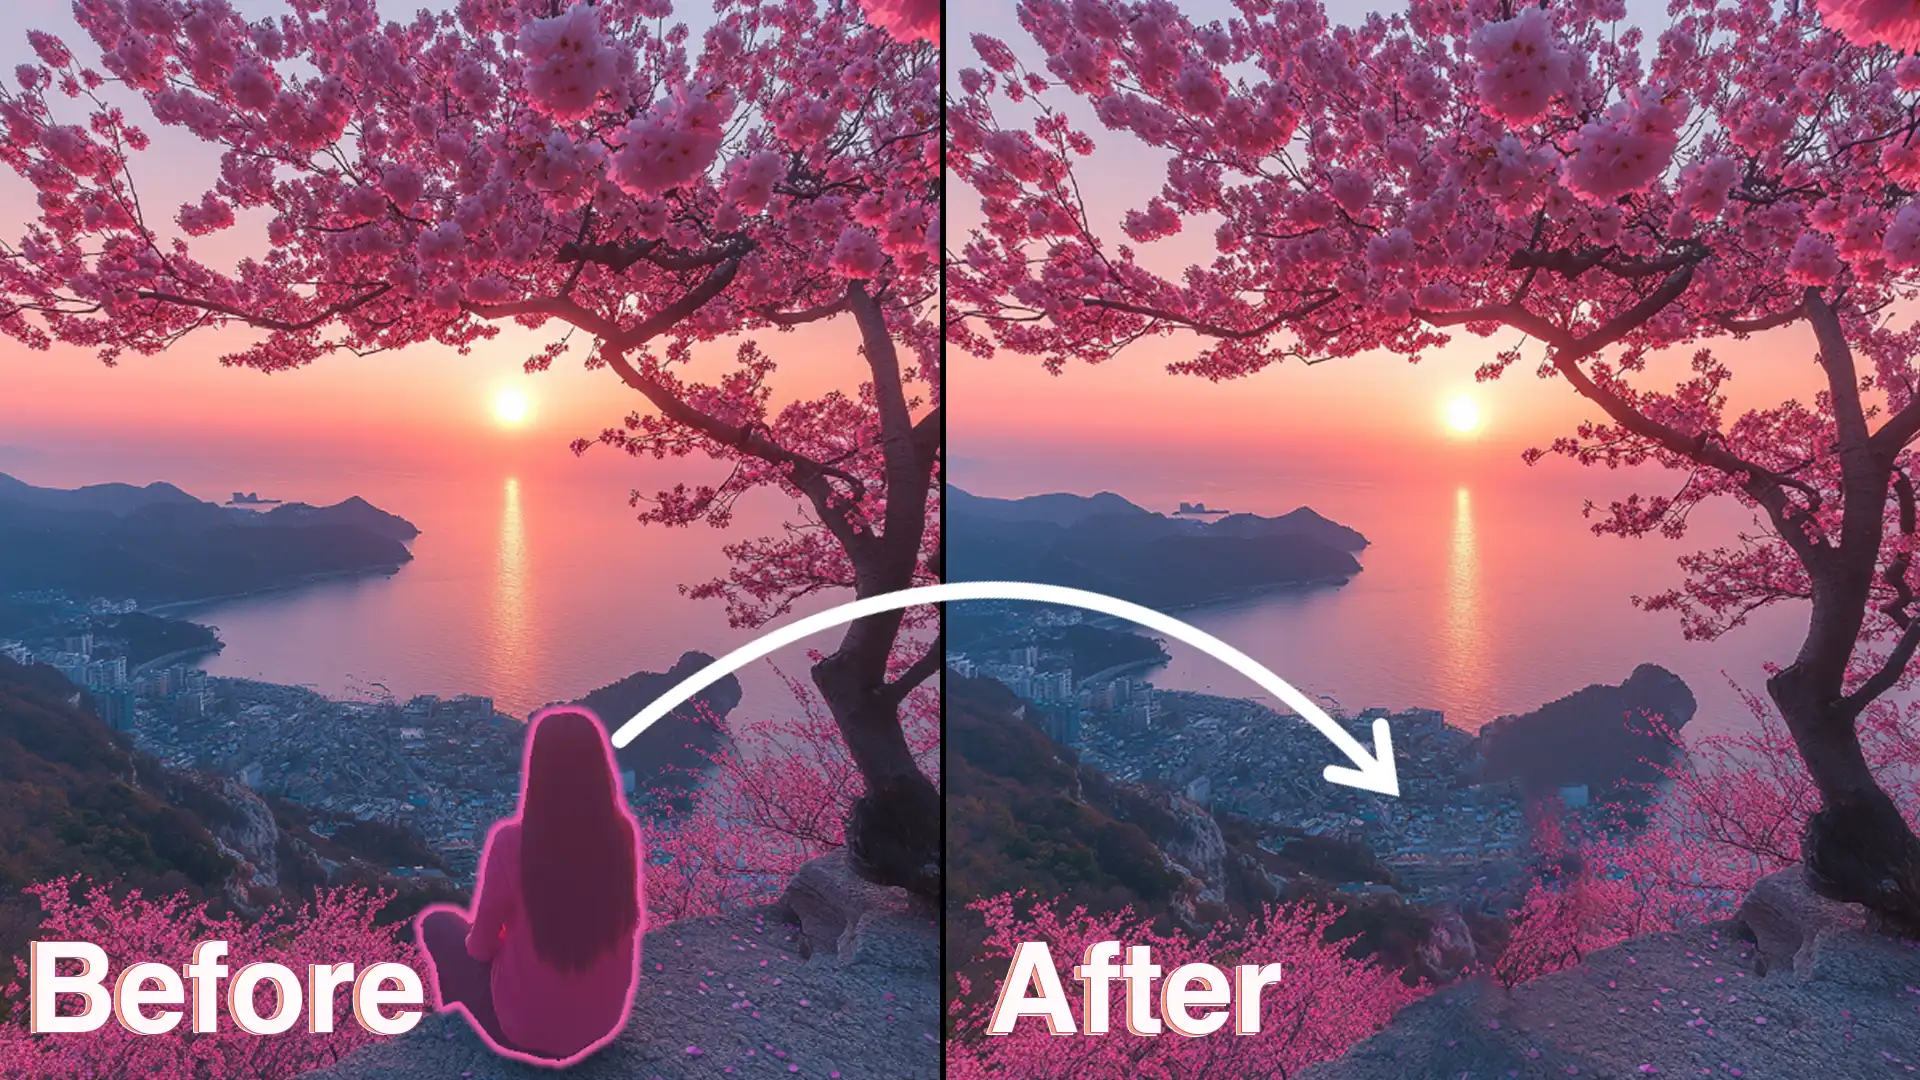
Have you ever wondered how to remove an object in Photoshop, only to be sidetracked by an unwanted element in an otherwise perfect photo? You’re definitely not alone.
Mastering this skill can elevate a good picture to a stunning one. Imagine effortlessly erasing distractions to let your images truly shine. Curious to learn more?
Stick with me, and I’ll walk you through the simple steps to achieve that flawless look.
Ready to jump in? Let’s get started!
Table of Contents
Step-by-Step Guide for Removing Unwanted Objects
To start, open your image in Adobe Photoshop.
Make sure you create a duplicate layer of your original image. This way, you can always revert back if needed.
Here’s how you do it:
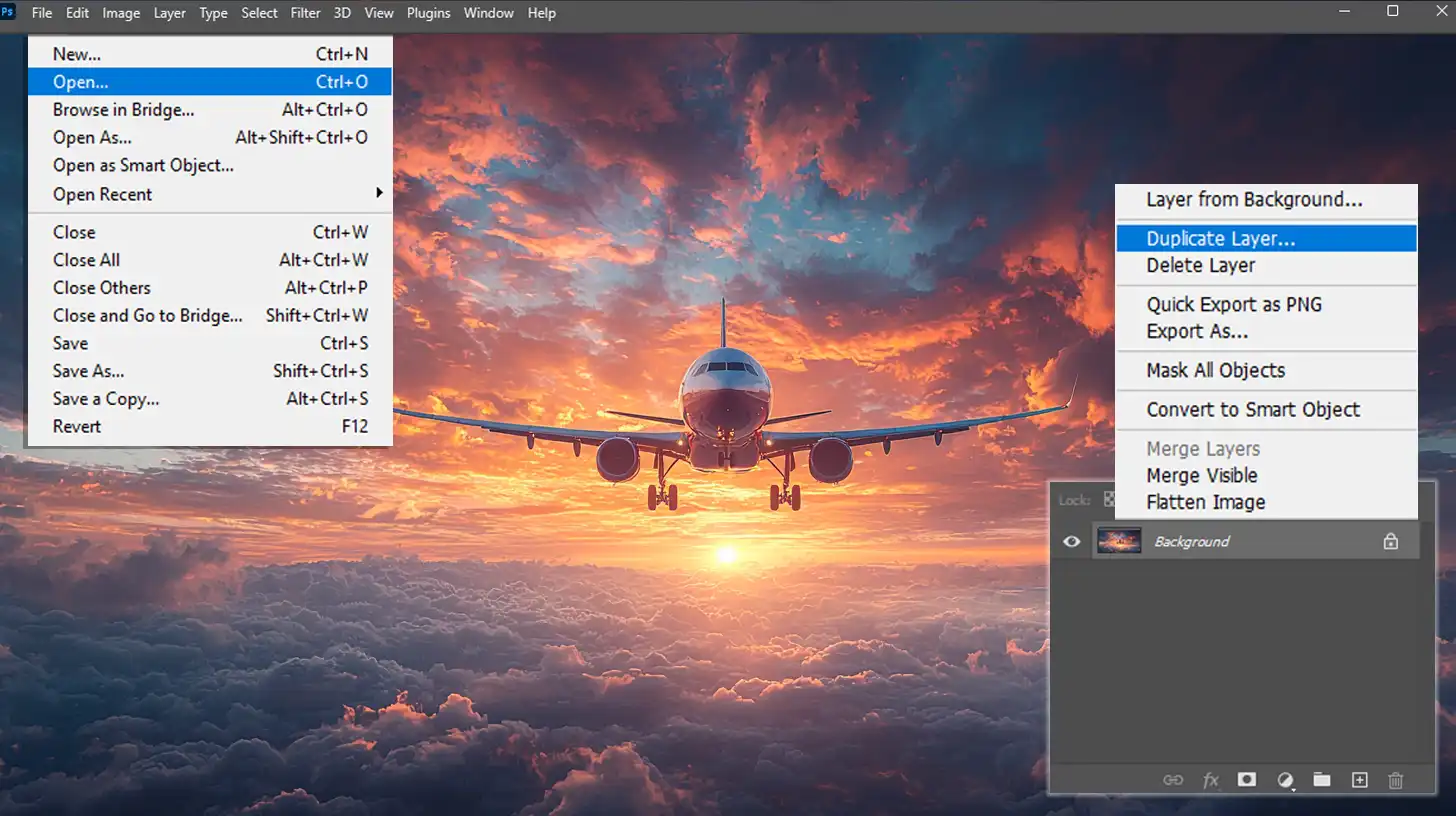
- Select the duplicated background layer in the Layers panel.
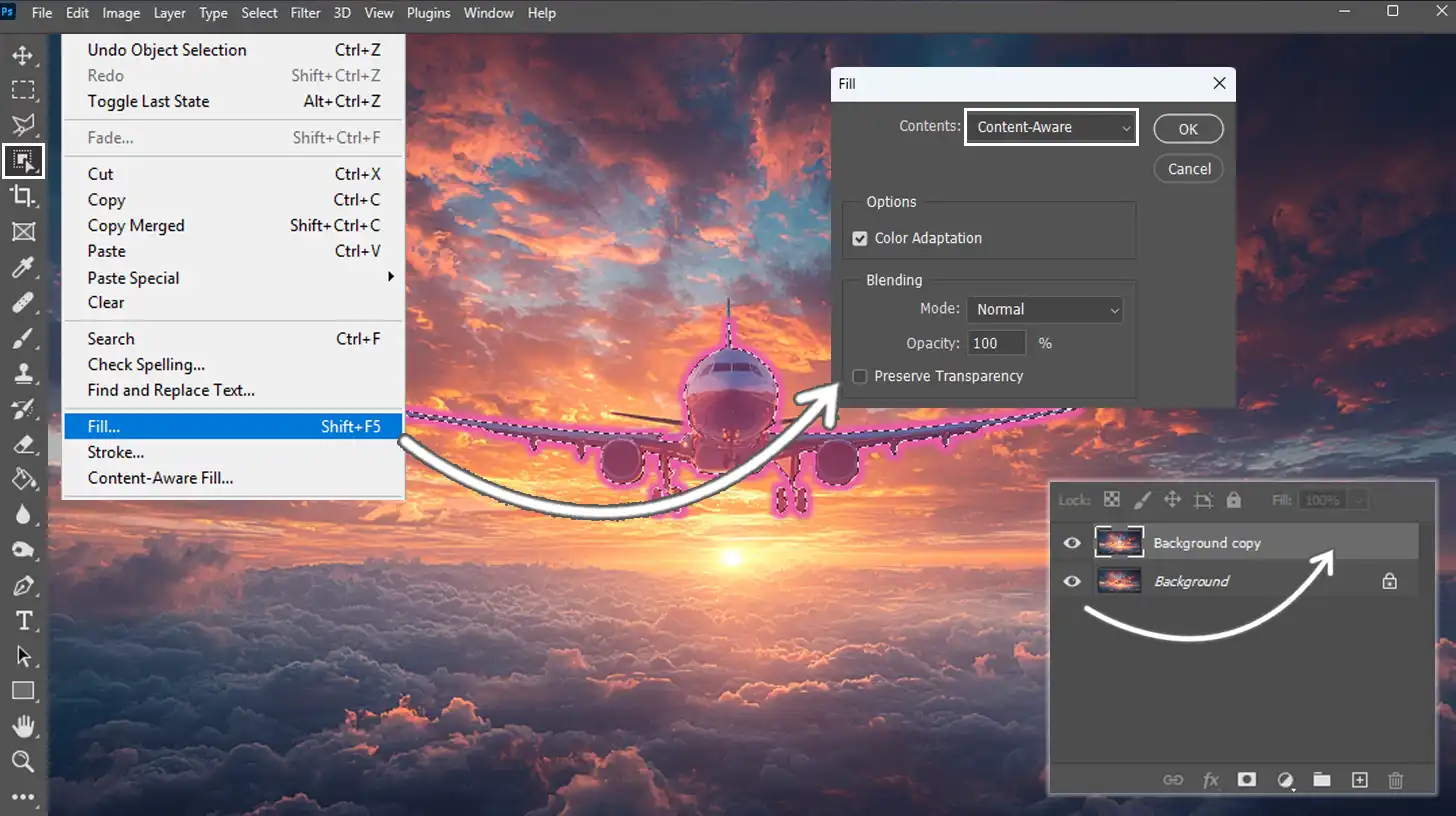
- Use the Object Selection Tool from the left-hand toolbar to trace around the unwanted object. Selecting the object correctly is important, so take your time.
- After selecting the unwanted object, clisk on the Edit in the top menu, then choose Fill. In the Fill dialog box that appears, select "Content-Aware" from the dropdown menu.
The content-aware fill tool analyzes the surrounding pixels and blends the removed object’s area seamlessly.
Pro Tip: To make the most of your edits, consider using the Photoshop remove tool for quick fixes. If you’re looking for guidance on how to Photoshop someone out of a picture, the steps above will help you achieve that seamlessly.
For those using Lightroom, the program also offers a powerful tool to remove a person from your images effectively.
Common Mistakes to Avoid
A common pitfall is rushing the selection process. Ensure you have a neat outline of the object.
Also, using the wrong tool can make the process more complicated. Stick to the appropriate selection tools like the Object Selection Tool, Lasso Tool, or Pen Tool.
Another mistake is forgetting to fine-tune the final result. Use the Healing Brush Tool or Clone Stamp Tool to blend any remaining anomalies.
Don’t skip this step, as it makes a massive difference in how natural the edited image looks.
After removing an object, if the result isn’t perfect, zoom in and use the Spot Healing Brush for precision work. Remember, patience pays off.
Pro Tip: If you’re not satisfied with the content-aware fill result, try the patch tool or sampling brush tool for more control. These can offer a higher degree of precision.
For more advanced techniques, consider learning about the Difference Between Photoshop and Lightroom to understand which software best suits your editing needs.
Additionally, explore Photoshop Shortcuts to speed up your workflow.
Using the Content Aware Fill in Photoshop
The content-aware fill feature in Adobe Photoshop helps simplify object removal. It saves time by intelligently blending the remaining parts of the image.
Users can remove unwanted objects without disturbing the original image. This photo editing software handles complex scenes well, making it ideal for both beginners and experts.
Additionally, it reduces the need for manual touch-ups.
Limitations and How to Overcome Them
Content-Aware Fill isn’t always perfect when you use it to remove objects in Photoshop, especially when dealing with intricate textures or patterns.
Being aware of these limitations helps improve your editing skills and prepares you for more challenging edits.
Steps to Overcome Limitations:
To effectively remove unwanted objects and achieve a polished final image, follow these steps to refine your edits.
- Refine your selection using the object selection tool, lasso tool, or other selection tools for more precise control over the areas being removed.
- Fine-tune the area using the spot healing brush if the result isn’t perfect.
- For detailed touch-ups, use the healing brush tool, clone stamp tool, and patch tool to assist in seamlessly blending the edges. Adjust the brush size as needed to ensure accurate edits.
- Learn how to use a duplicate layer to test edits without altering the original image. This practice provides flexibility to experiment freely and ensures that mistakes can be undone easily.
Pro Tip: When you remove objects and the initial content-aware fill result isn’t perfect, consider using the Photoshop smart fill feature.
The spot healing brush tool with a soft brush can help smooth out inconsistencies and enhance your edits for a polished finish.
Dealing with Unwanted Objects
Recognizing unwanted elements in your photos is the first step toward achieving a cleaner, more professional look.
Whether it’s a person in the background or a small smudge, learning how to remove objects in Photoshop will help you enhance the overall quality of your image.
Here’s a quick overview of these significant methods to guide you in selecting the best approach for each task.
| Technique | Overview |
|---|---|
| Content-Aware Fill | Automatically fills the area of an unwanted object with surrounding pixels for a seamless result. |
| Spot Healing Brush Tool | Quickly removes small imperfections, making it ideal for minor details and touch-ups. |
| Healing Brush Tool | Allows manual control by setting sample pixels, great for precision edits on detailed areas. |
| Patch Tool | Replaces an unwanted area by drawing around it and filling it with a cleaner part of the image, ideal for complex scenes. |
| Clone Stamp Tool | Copies and paints over areas for intricate edits, offering control and consistency in background textures. |
| Lasso Tool | Helps refine selections, especially with complex patterns or textures, for more accurate Content-Aware Fill results. |
| AI-Powered Removal Tools | Advanced tools that automate the removal process, ideal for quick edits in modern Photoshop versions. |
Techniques for Removal
There are several techniques to remove objects in Photoshop.
The most popular is the Content-Aware Fill tool. This tool helps to automatically fill in the area where the unwanted object was with surrounding pixels.
Other useful tools include the spot healing brush tool and the healing brush tool. Both are handy for small imperfections or detailed work.
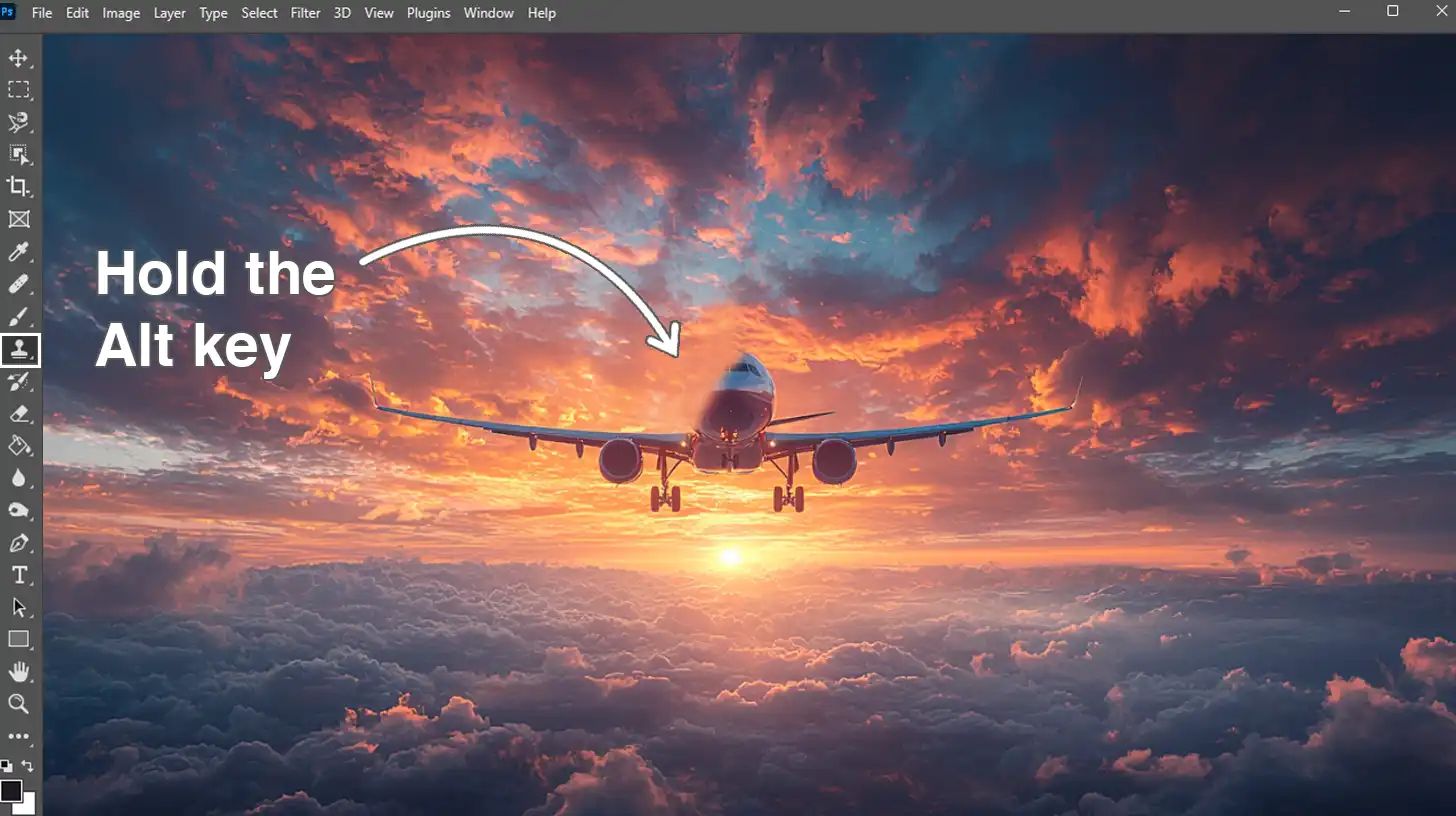
To use the Healing Brush Tool, select the tool from the left-hand toolbar, then set your sample pixels by holding Alt and clicking the desired area.
For more complex scenes, the patch tool comes in handy. With this tool, you can draw around an unwanted object and replace it with a cleaner part of the image.
The goal is to work on a duplicate layer so you can easily undo mistakes.
In the case of intricate patterns or textures, refine your selection using the lasso tool before applying Content-Aware Fill.
If the automatic results aren’t perfect, you can fine-tune manually using healing brushes or the Clone Stamp Tool.
Another advanced tip involves the use of AI-powered removal tools which are increasingly integrated into modern versions of Photoshop.
These tools can make quick work of even the most challenging removal tasks.
Pro Tip: When removing objects, always zoom in to ensure that blending is seamless.
Sometimes, just a few pixels can make a big difference in the final result.
Different Approaches
Removing objects in Photoshop becomes a simple task once you’re familiar with the range of tools and methods available. We’ll go over some effective techniques to help you remove objects in Photoshop, resulting in cleaner and more polished images.
The following table outlines the main approaches, providing an overview of the tools and strategies you can use to achieve clean, polished results in your images.
| Aspect | Overview |
|---|---|
| Object Selection Tool | Use this tool for quick selections by dragging around the object. Photoshop will outline the object automatically. |
| Content-Aware Fill | Fill in the area after object removal with surrounding content for a seamless look. Access via Edit > Fill. |
| Clone Stamp Tool | Ideal for detailed removal; sample areas and paint over objects to blend them with the background. |
| Zoom for Accuracy | Zoom in for better precision when removing objects to achieve a clean finish. |
| Working on Duplicate Layer | Always work on a duplicate layer to preserve the original image, allowing for easy adjustments. |
| Using the Eraser Tool | Use this tool for refining edges and cleaning up any rough patches after using other tools. |
How to Use the Object Selection Tool in Photoshop
The object selection tool is a powerful feature in Photoshop that makes removing objects easy. Follow these steps:
- Select the tool from the left-hand toolbar.
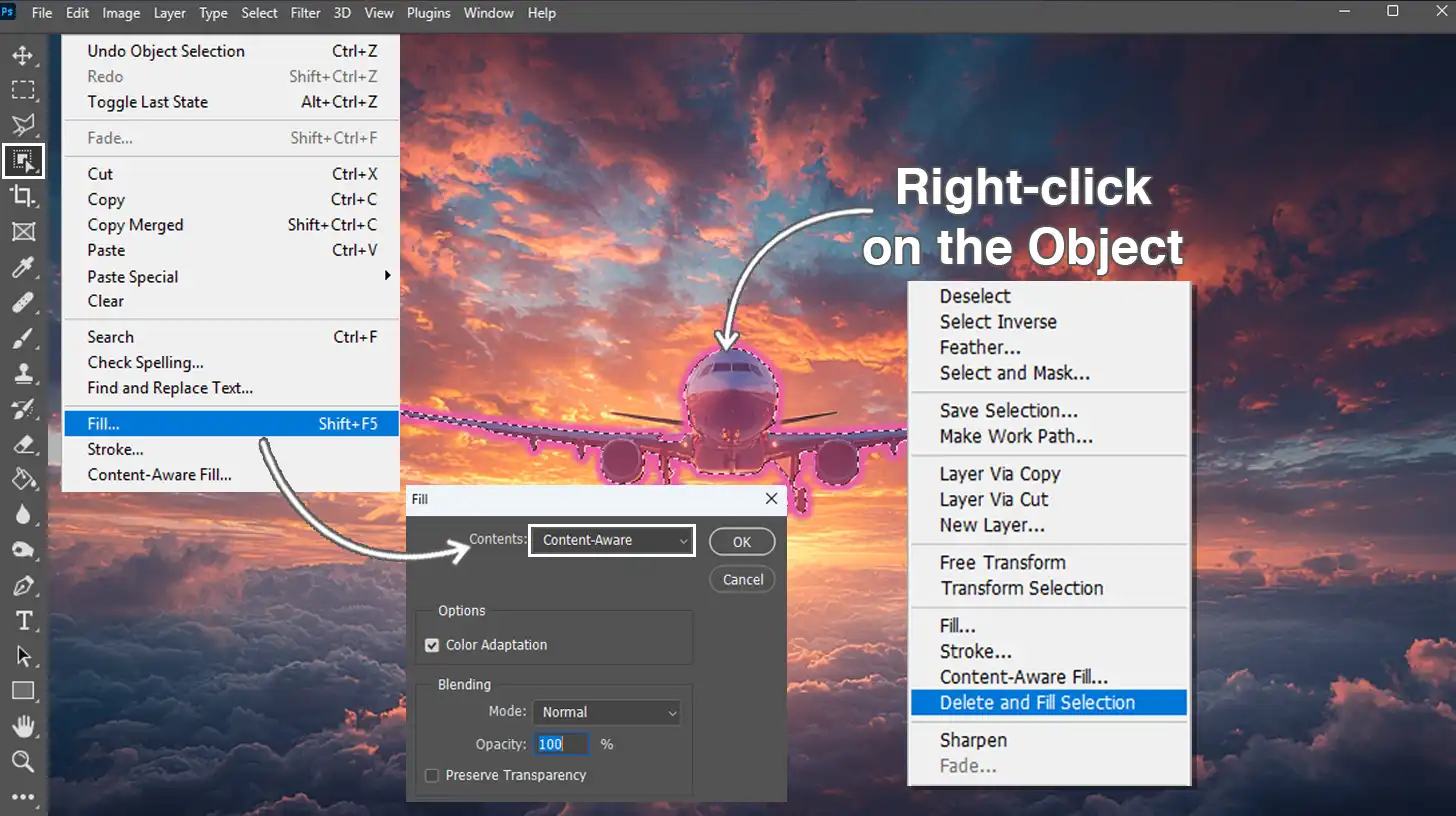
- Drag your mouse around the object you want to select. Photoshop will automatically detect the edges of the object.
- After the object is outlined, right-click and choose "Delete and Fill Selection."
- Use the Content-Aware Fill to fill the selected area with content that matches the surrounding image, creating a seamless look. To access it, go to Edit > Fill, then select Content-Aware by choosing it from the new window.
When to Use the Clone Stamp Tool in Photoshop
The clone stamp tool is another powerful option to remove objects in Photoshop, particularly for more detailed or intricate work. Here’s how to use it effectively:
- Select the Clone Stamp Tool from the toolbar.
- Hold the Alt key and click on the area you want to sample.
- Paint over the object to blend it into the background. Continuously resample different areas to make the removal look more natural and consistent with the rest of the image.
Additional Tips for Object Removal
To enhance your object removal process in Photoshop, consider these additional tips:
- Remove unwanted objects effectively by practicing various methods such as the Content-Aware Tool and Sampling Brush Tool.
- Zoom in on the object you want to remove for better accuracy.
- Always work on a duplicate layer to preserve the original image.
- Use the Eraser Tool for rough patches after using other tools.
Pro Tip: Leverage AI-Powered Tools. With the advent of AI-powered remove tool in modern Photoshop versions, the task of eliminating objects becomes even easier.
These tools analyze the image to provide precise edits with minimal manual input. If a tool isn’t performing as expected, combine methods like Content-Aware Fill and manual adjustments for a perfect result.
Frequently Asked Questions

How do I remove unwanted objects in Photoshop?
- Open your image in Photoshop.
- Select the 'Spot Healing Brush Tool' from the toolbar or press 'J' on your keyboard
- Adjust the size of the brush to cover the object you want to remove.
- Click and paint over the unwanted object. Photoshop will automatically fill in the area.
How do I cut out a specific object in Photoshop?
- Open the image from which you want to cut an object.
- Select the 'Quick Selection Tool' from the toolbar.
- Click and drag to select the object you want to cut out.
- Once selected, right-click the selection and choose 'Layer via Cut' to create a new layer with your selection.
Where is the remove object button in Photoshop?
- In Photoshop, the tool to remove objects doesn't have a specific 'remove object' button.
- Use the 'Content-Aware Fill', 'Spot Healing Brush', or 'Patch Tool' which are effective for eliminating objects.
- You can find these tools in the toolbar on the left side of the Photoshop workspace.
How do I remove an object from a picture?
- Open the photo in Photoshop.
- Select the 'Patch Tool' from the toolbar.
- Draw around the object you wish to remove.
- Drag the selected area to a part of the image that you can use as a fill for the removed object.
- Release the mouse button to apply the fill. Adjust if necessary.

Conclusion
Learning how to remove an object in Photoshop has significantly improved my ability to create polished, professional images.
The process can seem daunting at first, but with practice, it becomes second nature. Personally, mastering this skill has allowed me to elevate my projects and meet client expectations more efficiently.
If you’re ready to improve your photo editing skills, check out my Photoshop Course and Lightroom Course. Both courses break down complex steps into easy instructions that anyone can follow. Plus, they’re packed with the tips and tricks I’ve found helpful in my journey.
For those interested in using professional tools, you can start with Adobe Photoshop or Adobe Lightroom.
Embrace the learning process and watch your editing capabilities soar!
Read more about Photoshop:


