![A photographer captures a double exposure image, blending a sunset with the silhouette of a bird, showcasing the creative potential of photography.](https://lightroom-photoshop-tutorials.com/wp-content/uploads/2021/05/The-Magic-of-Double-Exposure.webp)
Introduction to Double Exposure in Photography
Double exposure in photography is a cool trick that lets you put two pictures into one. Imagine seeing a photo where a person’s face blends into a city skyline. That’s the double exposure effect! It’s like magic for pictures, letting you mix two images to make something new and exciting.
In this article, we will dive into how to create these amazing double exposure photos. We will cover everything from the basics to more advanced tips. You’ll learn not just how to do it, but also how to use superimposition in photography to make your pictures stand out.
Table of Contents
Understanding the Basics of Double Exposure in Photography
![A camera lens merges with a serene landscape, depicting Mmerged scene](https://lightroom-photoshop-tutorials.com/wp-content/uploads/2021/05/Lens-Meets-Landscape-A-Double-Exposure-Journey-1024x585.webp)
Double exposure is a photographic overlapping technique. First, you take one picture and then overlay another image above it without advancing the film or clearing the digital sensor. This crafts a blended image that tells a dual story. Think of it as making a photo sandwich where each layer adds its own flavor!
Key Components
The Right Subjects: The beauty of double exposure effect shines when you select two subjects that complement or contrast each other. For instance, a portrait and a landscape can merge into a surreal scene. The first subject often forms the base of your image, while the second adds layers or depth.
Camera Settings: Some cameras come with specific mode for creating double exposures. But you can also manually control exposure to ensure both images in your double exposure are visible and balanced. Adjusting settings like aperture, ISO, and shutter speed can significantly affect the outcome.
Common Misconceptions
Complexity: Many people think double exposure is complicated. However, with a basic understanding of your camera’s settings and what makes a good pair of images, anyone can create them. It’s more about experimenting and less about perfect precision.
Need for High-End Equipment: You don’t need the fanciest gear to start experimenting with double exposures. Even if your camera doesn’t have a double exposure feature, you can still combine photographs. All you need is a powerful photo editing software that will do the job for you.
Digital vs. Film: Both digital and film cameras can achieve the double exposure effect. The digital cameras offer the convenience of instant previews and adjustments. On the flip side, film cameras offer a unique charm and unpredictability that can add an artistic touch to your photographs.
Popular Cameras and Software for Double Exposure Effect
Creating double exposure in photography has become more accessible thanks to a variety of tools and software available. Let’s look into some of the top tools available today, each offering special features to help you achieve stunning exposures.
Best Cameras for Double Exposure
Canon EOS Series: The EOS 5D Mark IV has a ‘Multiple Exposure Photography’ feature where users can combine photographs directly in the camera roll. This feature allows you to view and adjust the blend before finalizing the image. This is perfect for a photographer who prefers to adjust their photographs as they work.
Nikon DSLRs: The Nikon D850 is another excellent choice for double exposure photography. It features a special mode that overlays pictures automatically as your dual capture. It is a great tool for spontaneous creativity, allowing you to experiment with different compositions in real-time.
Fujifilm X-Series: Fujifilm X-Series stands out due to models like the X-Pro3. X- Pro3 includes settings that replicate traditional film double exposures, adding a vintage feel to your digital shots. This camera is ideal for those who want to merge the aesthetic qualities of film with the convenience of digital technology.
Editing Software for Double Exposure
Adobe Photoshop: Adobe Photoshop is the industry standard for photo editing. It offers unmatched precision and control. It allows users to layer images, use masks to hide and reveal parts of each layer, using various blending modes to achieve the desired double exposure effect.
GIMP: GIMP is a free, open-source image editor with features such as layer management, masks, and custom brushes. However, the tool comes with a complex interface. Moreover, it doesn’t have some of the advanced features that more professional software offers.
Comprehensive Guide to Creating Double Exposure in Photography
Starting to make double exposures opens up a whole new world of creativity. This guide will help you smoothly blend two photos into one, turning simple photographs into powerful stories. By following these steps, you can produce photographs that are visually captivating.
Step 1: Choose Your Subject
Pick a Strong Base: Your first picture should have a clear subject that stands out. For instance, in portrait photography, this could be a person, an object, or even a simple silhouette. Ensure it has a simple background to avoid a cluttered look.
Choose a Complementary Second Subject: This layer should add texture or context to your base. Look for patterns or scenes with contrasting tones. Landscapes, cityscapes, or textured surfaces like walls or foliage work well.
Step 2: Capturing Your Base Photo
Adjust Settings: Set your camera to a low ISO to keep the image clean and free of noise. Then use a wide aperture to blur the background. If your camera allows manual adjustments, underexpose the base to avoid losing details in brighter areas. ​
Capture the Shot: Position your subject against a plain black or white backdrop. This makes it easier to distinguish the subject from the background in the final overlay. Take several captures, so you can choose the best one for overlaying with your second layer.
Step 3: Adding the Secondary Image
Overlay the Images: If your camera supports it, use the double exposure setting to overlay the new capture directly. If not, you can take a new capture separately. Then, combine the two later during post-processing.
Fine-tune the alignment: Finally, align the two captures so that the elements you want to emphasize from both are visible. This might require repositioning the camera or adjusting the zoom. Focus on the areas you want to highlight and try different angles to see which combination work best.
Tips for Mastering Double Exposure Settings
Mastering double exposure in photography involves understanding how to manipulate your camera settings to get great results. Here’s a simple table that explains the different settings you can use to improve your double exposure shots.
Tip | Description | Purpose |
---|---|---|
Manual Mode | Use manual mode to adjust focus, aperture, and shutter speed to match the needs of both layers. | Allows precise control over the camera’s settings. |
Tripod Use | Always use a tripod to stabilize your camera. | Prevents movement while shooting, keeping the frame consistent. |
Low ISO | Set your camera to a low ISO to reduce noise. | Keep both images as clear and sharp as possible. |
Wide Aperture | Use a wider aperture to soften the background. | Affects depth of field and exposure in each image |
Overlay Mode | If available, use the overlay mode to preview how the images will merge. | Allows real-time viewing before taking the next frame. |
Best Practices for Advanced Double Exposure Effects
Exploring advanced double exposure effects allows you to create more complex and visually striking images. This section explores techniques that go beyond the basics, incorporating additional elements and artistic flair to elevate your double exposures.
Manipulating Light and Shadows
Manipulating light and shadows is essential to creating the double exposure effect. Start shooting with a silhouette against a bright background as your first layer, which offers a strong contrast. When adding the second shot, choose settings with notable light patterns. After combining these layers, enhance the contrast between bright and dark areas in editing.
Incorporating Textures
Textures can also add a lot of depth to your double exposures. A strong texture, such as peeling paint, dense foliage, or rippling water, adds complexity and captivates the viewer. When combining layers, adjust the transparency of the textured layer to ensure it enhances rather than overwhelms the base image. Adding motion, like blowing leaves or a waving curtain, adds a dynamic element.
Color Layering
Color plays a significant role in double exposures. Try using complementary colors for a harmonious look, or contrast a colorful foreground with a black-and-white background for drama. Don’t forget to adjust color intensity to balance hues based on the artwork’s message.
Geometric Overlays
Geometric shapes can structure your composition and add a creative twist. Incorporate simple shapes like circles or lines to frame or highlight areas of your base image. Position these geometrical shapes strategically to guide the viewer’s eye and balance them to complement the main object.
Focal Length Tricks
Changing the focal length between frames introduces a unique perspective. Shoot the base layer at a wide focal length and the overlay at a tighter one, or vice versa. This contrast adds depth and a surreal quality to the photograph. Focus on bringing out details in the tighter shot that might be overlooked at wider angles.
Double Exposure vs. HDR Photography
Double exposure and HDR (High Dynamic Range) are two techniques that allow a photographer to capture exceptional and eye catching pictures. Both methods enhance photos but in very different ways. Let’s compare these two methods using a simple table to see how they differ:
Feature | Double Exposure | HDR |
---|---|---|
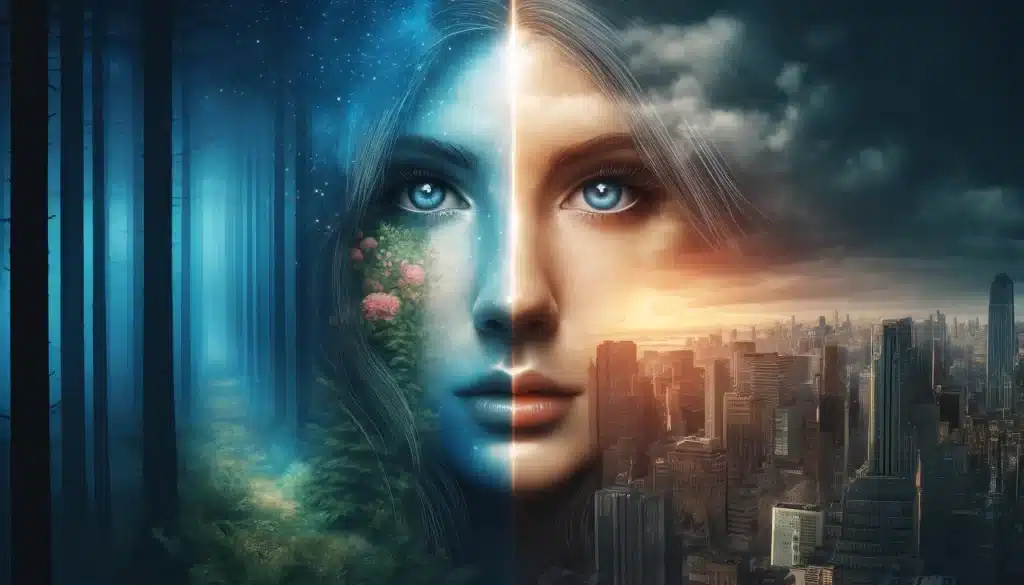
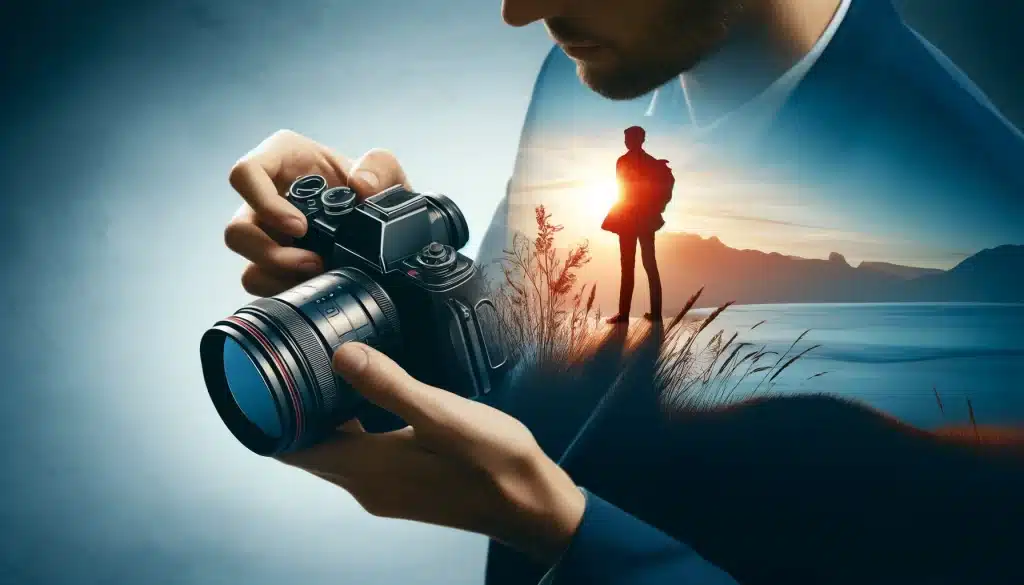
Definition | Combining two different images into one. | Merging multiple photographs of the same scene with different exposures. |
Primary Use | To create artistic, surreal photographs blended together. | To enhance details in shadows and highlights, usually in high contrast scenes. |
Technique | Overlaying two images either in-camera or using editing software. | Taking several shots at different exposure levels and blending them. |
Visual Effect | Produces a composite image that often appears dreamy or abstract. | Produces a more realistic or dynamically enhanced view of the scene. |
Editing Process | Often simpler, involving basic layering and opacity adjustments. | Typically more complex, involving tone mapping and balancing multiple layers. |
Frequently Asked Questions About Double Exposure in Photography
Double exposure in photography can be tricky, especially for beginners. Let’s explore some commonly asked questions and learn more about this amazing effect.
How is double exposure used in photography?
Double exposure involves combining two different snapshots into one. To do this, the camera’s sensor or film is exposed twice to two different scenes. This method lets photographers create dreamy looking fantastic pictures. For example, you might combine a picture of a person with a landscape. This makes it look like the landscape is part of the person.
What is a 2 exposure camera?
A 2 exposure camera is specifically designed to make it easy to create double exposures. These cameras let you take one picture, and then, instead of moving on to the next frame, they allow you to take another picture on the same frame. This feature is especially handy for creating super exposed photos directly from the camera roll without needing to edit them together later.
Why is it called double exposure?
It’s called double exposure because the technique involves exposing the film or sensor to light twice to capture two different scenes. The two exposures are then combined into a single image, which blends elements of both original snapshots.Â
What are doubles in photography?
In photography, “doubles” is another term for double exposures. It refers to the process of superimposing one snapshot on top of another in the same frame, resulting in an image that features elements of both. It is favored among photographers looking to push the boundaries of traditional single-exposure photography.
Conclusion
I recently experimented with double exposure in photography during a beach visit. I merged an image of the setting sun with a silhouette of a passing bird. The double exposure effect made it look like the bird was soaring across the sun, a moment of pure magic. It was an exciting way to blend natural elements in a way that felt both artistic and meaningful.
If you find this technique intriguing and want to learn more about creating such effects, we have the perfect resources for you. Our Photoshop Course and Lightroom course are designed to help you master creative photography techniques, boosting your skills and creativity.
Have a nice photoshoot!Â
Learn more about
Course
Light Effect Photoshop
Lightroom Course 2024
Adobe Photoshop Course
Photo Editing Course
Get the latest version of Photoshop & Lightroom