HDR photography - Guide to Capturing Breathtaking HDR Landscapes
HDR photography – Guide to Capturing Breathtaking HDR Landscapes
Introduction to HDR Photography
HDR (High Dynamic Range) Photography is an innovative approach to capturing images that closely resemble how our eyes perceive light and color in real life. This approach involves taking numerous photographs at different lighting levels and then blending them together to produce a picture with a broad luminous detail. HDR photography allows for an incredible range of brightness, capturing subtle nuances from the deepest shadows to the brightest highlights.
Essence of HDR: It tackles the limitations of standard photography by capturing a broader spectrum of luminosity. This means that the resulting images reveal more details in both the pitch black shaded areas and the brightest highlights, akin to the human eye's perception.
Impact in Various Picturing Genres: The application of HDR is versatile, spanning from landscape photography, where it accentuates the depth and vibrancy of natural subjects, to architectural and real estate photography, where it brings out the details in both well-lit and shadowed areas of a building.
Table of Contents
Evolution of High Dynamic Range: From Niche to Mainstream
The journey of HDR photography from a specialized method to a mainstream tool reflects its growing significance and adaptability in the evolving landscape of photography.
Historical Development: Initially, HDR was seen as a niche approach used by professionals for specific scenarios. However, advancements in digital photography and software have democratized its usage, making it a go-to technique for photographers of all levels.
Technological Influence: Modern DSLRs and even smartphones now offer built-in HDR modes, making it easier to get HDR retakes. Photo editing tools like Adobe Photoshop and Aurora HDR have further simplified merging and tweaking HDR images, allowing for a seamless fusion of many illumination.
High Dynamic Range photography
HDR (High Dynamic Range) photography is a method that allows photographers to take and represent a broad luminosity in their pictures. This approach is particularly effective in portraying a greater spectrum of colors and details in both the unlighted and lightest areas. Whether it’s used in landscape, architectural, or artistic photography, HDR has the power to transform an ordinary image into something truly extraordinary, with a depth and realism that standard photography methods may not achieve.
HDR photography blends scientific principles with artistic creativity, offering photographers a unique medium to express their vision.
Understanding the Technical Aspects
At its core, this photography is a marriage of technology and technique.
The Role of Dynamic Range
The dynamic range in photography refers to the range of light intensities from the pitch black shaded areas to the brightest highlights. HDR extends this value beyond what standard cameras can take in one shot.
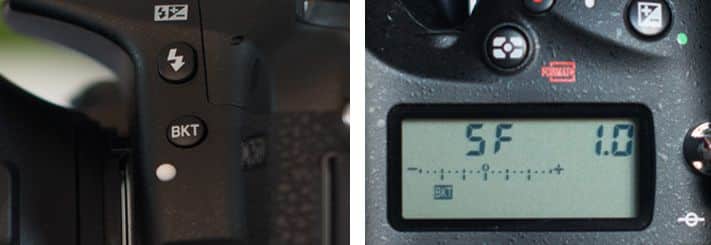
Exposure Bracketing as a Key Technique
This involves taking several shots of the same site at different exposure levels – typically underexposed, correctly exposed, and overexposed or long exposure. These images are then combined to create a photo that is rich in details across its entire tonal range.
The Creative Side of HDR Photography: HDR isn't just about technical mastery; it's also a canvas for creative expression.
HDR as an Art Form :Beyond its ability to get an extended value of light and unlight areas, HDR photography allows for a unique expression of artistic vision. Photographers can manipulate the tone, mood, and atmosphere of their images, creating everything from hyper-realistic to surreal works of art.
Creative Techniques and Examples : The use of HDR in photography can transform ordinary sunjects into extraordinary photos. For instance, in landscape photography, HDR can turn a simple sunset into a vibrant tapestry of colors, while in cityscapes, it can illuminate the intricate interplay of lights and shadows in urban architecture.
In the next sections of the article, we will delve deeper into the professional applications of HDR, its comparison with standard photography, and the best mobile photography accessories for HDR settings and techniques. We will also explore this photography across different devices and its relationship with other image technologies like 4K.
Professional Use of High Dynamic Range Photography
High Dynamic Range in Professional Photography: A Game Changer
HDR photography has become a staple in the toolkit of many professional photographers, transforming how they capture and present their subjects.
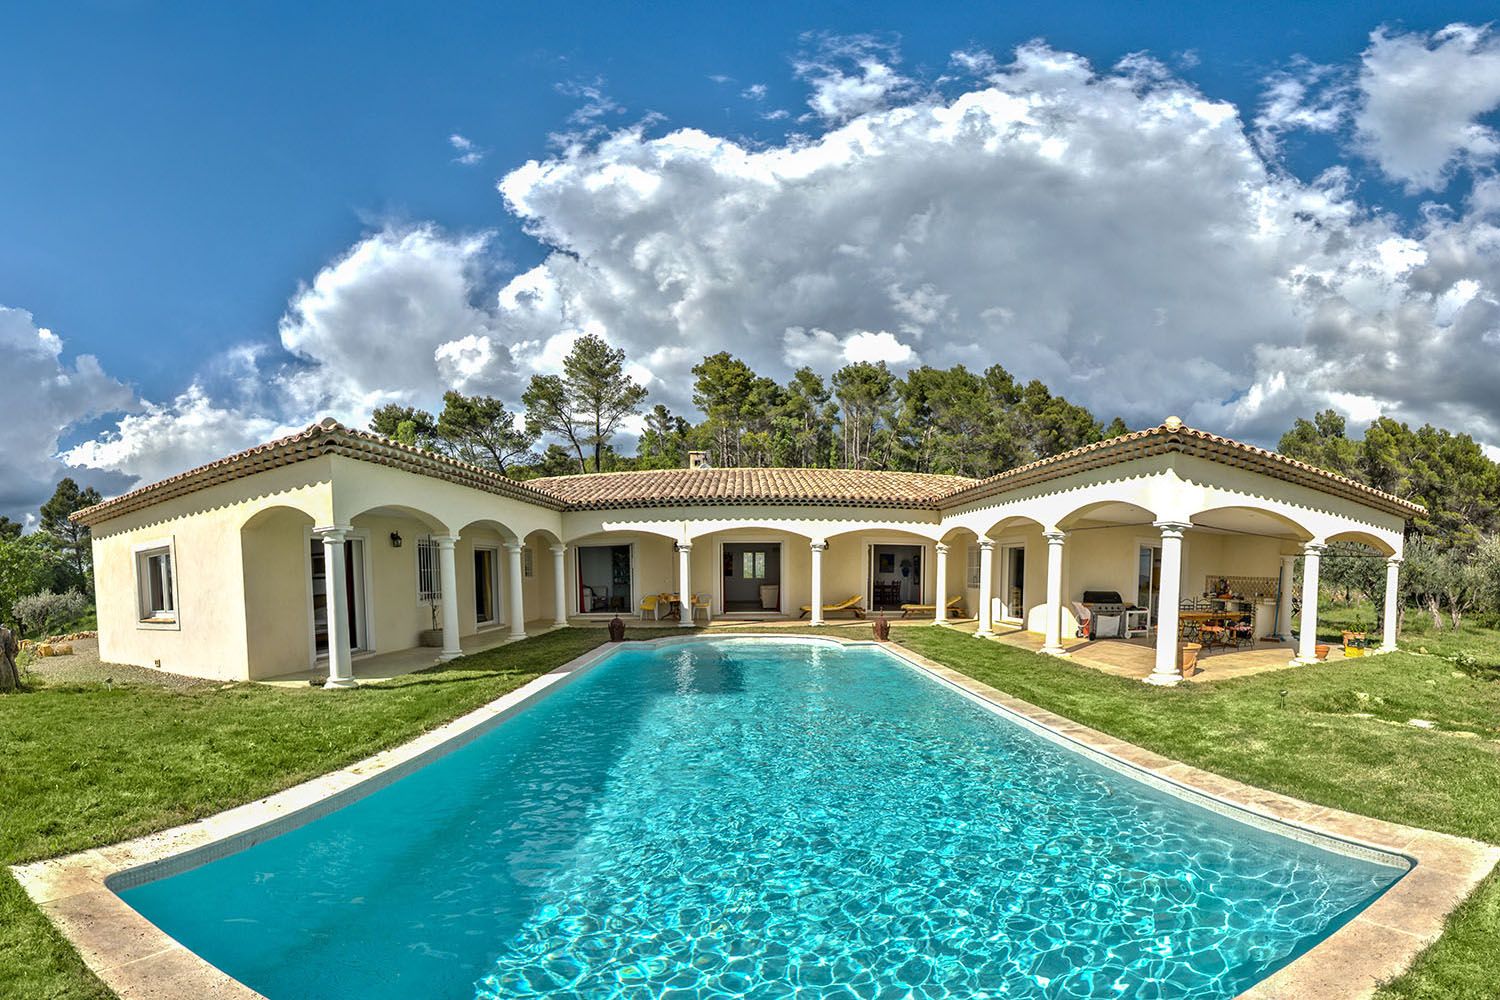
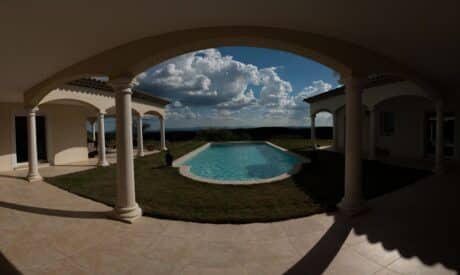
Industries Embracing HDR: Real estate and architectural photography greatly benefit from HDR, as it accurately represents both indoor and outdoor lighting in a single retake. Landscape photographers also use it to have the full tonal range of natural settings, from the dimmest soils to the brightest skies.
Professional Perspectives: Renowned photographers like Trey Ratcliff have advocated for HDR, highlighting its ability to bring a new dimension to photographs. Ratcliff's works showcase how HDR can be used to develop snaps that are both vivid and full of depth.
While it offers numerous benefits, it also presents unique challenges that professionals must navigate.
Overcoming HDR Misconceptions: There's a misconception that HDR always results in unnatural, over-saturated photos. Professionals counter this by using HDR judiciously to enhance, rather than overpower, the natural qualities of the scene.
Balancing Realism and Artistry: The key challenge in professional HDR photography is maintaining a balance between creating a visually striking image and preserving the scene's natural look and feel.
While it offers numerous benefits, it also presents unique challenges that professionals must navigate.
Demystifying HDR: What It Is and What It Isn't
This photography often gets confused with other photographic methods and terminologies. Here, we clarify what HDR truly entails.
HDR Defined: High Dynamic Range photography is the operation of taking multiple photos at different exposure levels. And blending them to formulate a single image that accurately represents the scale of light and dim areas in the subject.
HDR vs. Standard Photography: Unlike standard photography, which captures an exposure level, HDR captures different levels, allowing for greater feature and clarity in both the highlights and shaded areas.
We have compiled a glossary of photography that can help you understand few important terms and concepts.
Key Terms and Concepts
Understanding the terminology is crucial in mastering HDR photography.
Exposure Bracketing: This refers to taking a lot of shots of the same subject at different exposure levels - a standard practice in HDR.
Tone Mapping: A process used in this type of photography to convert the wide dynamic range of captured photos into a range suitable for display on screens or for printing.
Term
Definition
Dynamic Range
The ratio of light to dark in a photograph
Exposure Bracketing
Taking multiple sequential photographs at varying exposure levels
Tone Mapping
The procedure of adjusting the dynamic range of an image for display or printing
In the following sections, we will explore the process of capturing retakes, the differences between HDR and standard photography, and delve into the optimal settings and equipment for HDR photography.
The Photography Process: From taking picture to Output
The process of capturing these types of photos is both a technical and creative endeavor. Here’s a step-by-step guide:
Setting Up the Camera
Choose a photo equipment that supports HDR or bracketing mode. For beginners, many modern cameras and smartphones offer an ‘HDR mode’ which automates this process.
Choosing the Right Subject
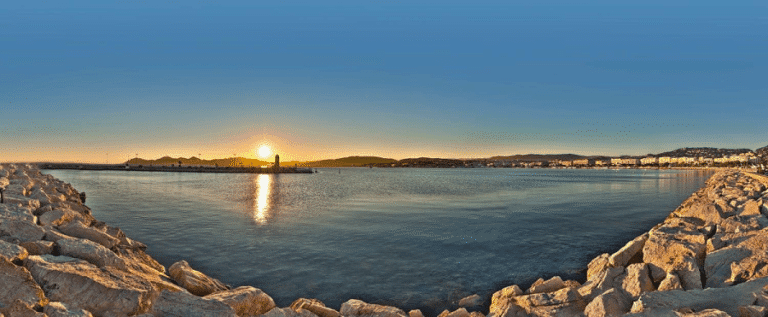
HDR photography excels in scenes with elevated contrast, where there are very bright and very dark areas.
Shooting in Bracketing Mode
Take a number of shots of the same location at different scenes. Typically, this includes an underexposed, correctly exposed, and overexposed photo.
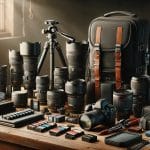
Using a Tripod
For precision and alignment, a tripod is essential to ensure that each shot is identical in framing.
Editing and Merging Photos
Once you’ve recorded your bracketed images, the next step is merging them using HDR tools.
Selecting the Right Software
Adobe Photoshop, Lightroom, and Aurora HDR are popular choices for HDR merging and tone mapping.
Merging Images
Import your bracketed pictures into the tools and use the HDR merging tools to combine them into a single, dynamic range-rich photo.
Fine-Tuning
Adjust the final image to your liking, balancing realism with artistic intent.
While both HDR and standard photography aim to have beautiful snaps, they differ significantly in approach and results.
Dynamic Range: HDR photography records a higher dynamic range compared to standard photography, bringing out more details in shadows and highlights.
Use Cases: Standard snapping is sufficient for well-lit and evenly exposed scenes. HDR is ideal for scenes with high contrast, where standard photography might lose details.
closer representation to how human eyes perceive a subject
may produce unrealistic snaps if overdone
In the next sections, we’ll delve into the optimal settings for this type of filming, its implementation across various devices, and the relationship between HDR and other image technologies like 4K.
Choosing the Right Settings for HDR Photography
Optimal Camera Settings for High Dynamic Range
To achieve the best results in HDR photography, understanding and adjusting your image device settings is crucial.
ISO Settings: Particularly in HDR photography, it's vital to aim for the lowest possible ISO to minimize noise. Higher ISOs can significantly introduce unwanted grain, particularly in the darker areas of the HDR image. In any event, controlling ISO is essential for maintaining photo quality.
Aperture: Consistency is key, so use the same aperture setting for all shots in a bracket to ensure a uniform depth of field. In contrast to varying aperture settings, aperture priority mode can be helpful in maintaining this consistency. Similarly, a consistent aperture contributes to a balanced bracketing sequence for HDR.
Shutter Speed Variations: This is where you formulate the bracketing effect. Adjust the shutter speed to records different lightings - one standard, one underexposed, and one overexposed. In essence, this approach captures the full tonal range of the scene, significantly enhancing the HDR effect.
Shooting in RAW: RAW format retains more information than JPEG, which is crucial for post-refining HDR images. In brief, shooting in RAW allows for a more detailed post-processing experience, ensuring that all nuances of light and color are recorded.
In due time, mastering these settings will greatly improve your HDR photography. Regardless of the challenges in each scene, a thorough understanding and application of these settings will soon lead to consistently better HDR results.
Understanding and Utilizing High Dynamic Range Modes in Cameras and Smartphones
Many modern digital cameras and smartphones come with built-in HDR modes, making it easier to take these photos.
In-Camera HDR: Many DSLRs and mirrorless cameras are equipped with an HDR mode. This mode automatically captures and combines multiple illuminations into one comprehensive photo.
Smartphone HDR: Modern smartphones, including iPhone and Android devices, feature an HDR mode. In this mode, the device quickly records a series of photos at varying exposures. It then automatically blends these photos to make a single, dynamic snap.
HDR in Various Devices: DSLRs, Smartphones, and More
Know the High Dynamic Range Capabilities Across Different Camera Types
The ability to catch HDR photo varies across different devices, each offering unique advantages.
DSLRs and Mirrorless Cameras: These cameras offer the most control over the HDR process, with manual settings for bracketing. Moreover a sophisticated sensors for a greater dynamic range is its notable thing.
Smartphones: While less customizable than DSLRs, modern smartphones have advanced HDR capabilities. It makes them a convenient option for casual photographers.
Examples of HDR Photography in Different Devices
DSLR Example: Consider a Nikon or Canon DSLR set to bracketing mode. This setting is ideal for capturing a diverse landscape scene. It effectively handles various lighting conditions, from the brilliance of bright skies to the subtleties of shaded valleys.
Smartphone Example: Take an iPhone or a high-end Android phone, for instance. These devices can automatically capture a well-balanced image of a sunset. They are adept at preserving intricate details in both the bright sun and the surrounding clouds.
Comparing HDR Quality Across Devices
DSLRs and mirrorless cameras are generally known for their superior HDR quality. This is largely due to their larger sensors and the greater control they offer over the photography process. However, the gap between these cameras and smartphones is narrowing. As smartphone technology continues to advance, the quality of HDR images they produce is steadily improving.
Professional vs. Casual Use: DSLRs remain the preferred choice for professional HDR photography. However, the smartphones are increasingly viable for casual and on-the-go HDR photography.
Convenience vs. Quality: Smartphones offer unmatched convenience and accessibility for HDR photoing. It makes them a popular choice for everyday photography enthusiasts.
I am sure you would like to know more about the best plugins for lightroom. In the next sections, we will explore the relationship between HDR and 4K technology. Furthermore, we will delve into different HDR approaches, and discuss the best picture modes for HDR photography.
To fully grasp the distinction between HDR and 4K, it’s essential to understand what each term represents in the realm of picturing and videography.
HDR (High Dynamic Range)
This refers to an approach used in photography to increase the range of luminosity in an image. It allows them for greater information in both the brightest and darkest parts of the picture.
4K Resolution
In variance, 4K refers to the resolution of an image or display and is primarily associated with the clarity and sharpness of the picture. 4K resolution typically means a horizontal display resolution of approximately 4,000 pixels.
Comparing HDR and 4K in Photography and Videography
While HDR focuses on color and light dynamics, 4K emphasizes resolution and detail.
HDR in filming: HDR enhances the retake's dynamic range, improving color depth and variance, which is vital in high-contrast scenes.
4K in photography: 4K picturing ensures ultra-high resolution in images, offering clarity and detail, especially beneficial for large prints or cropping images without losing quality.
Synergy Between HDR and 4K
In many modern devices, HDR and 4K technologies work together to enhance the overall quality of pictures and videos.
HDR and 4K in TVs and Monitors: Many modern TVs and monitors combine 4K resolution with HDR capabilities. It provides the viewers with high-definition clarity and enhanced color and contrast.
HDR and 4K in Cameras: Some advanced cameras offer both 4K video recording and HDR photo capabilities, allowing photographers and videographers to photograph high-resolution content with rich color dynamics.
Aspect
HDR
4K
Focus
Color Depth and variance
Photo Resolution
Benefit
Enhanced dynamic range in images
Higher clarity and feature in images
Ideal Usage
High variance photography scenes
Large prints and detailed photography
Conclusion
As we conclude our exploration of HDR Photography, I reflect on my personal journey with this transformative technique. I remember vividly the first time I merged a series of bracketed shots from a bustling cityscape at dusk using the tips for merging photos in Lightroom. The final HDR image was not just a photograph; it was a vivid portrayal of that moment, capturing the subtle play of twilight on the buildings and the vibrant city lights coming to life. This experience solidified my belief in the power of HDR Photography to bring a site to life, revealing nuances of light and color that would otherwise go unnoticed.
Whether you’re a budding photographer or a seasoned professional, mastering HDR Photography can elevate your work. I encourage you to explore our comprehensive Lightroom course. You’ll find invaluable insights and hands-on techniques to enhance your HDR skills there. With this course, Lightroom Course, you’ll discover creative ways to apply these techniques to your projects.
$2,061.00Original price was: $2,061.00.$1,061.00Current price is: $1,061.00. 27635
Download Your Free Guide Now!
Discover the secrets of photography with our printable guide! Master essential techniques like aperture, shutter speed, and ISO to create stunning images. Get your free printable PDF now and start turning your snapshots into masterpieces!