Master Photoshop's Color Matching: Enhance Your Images with Precision
Master Photoshop’s Color Matching: Enhance Your Images with Precision
Want to get the hang of the Photoshop match color feature? I’ve got you covered!
In this guide, I’ll cover all the essentials and basics, sharing some tips and advice for a better understanding.
Let’s get started!
Table of Contents
Step-by-Step Guide to Color Match in Photoshop
Learning how to use the color match feature in Photoshop can elevate your editing skills. This step-by-step guide will walk you through the process, ensuring you can seamlessly match colors between different images.
Follow the table below for a concise and easy-to-understand breakdown of the steps involved.
Step
Description
Open Images
Load source and target images in Photoshop.
Access Match Color
Go to Image > Adjustments > Match Color.
Choose Source and Target
Select source and target images for color adjustment.
Adjust Settings
Modify color and luminance for perfect match.
Apply Changes
Click OK to apply adjustments and save your work.
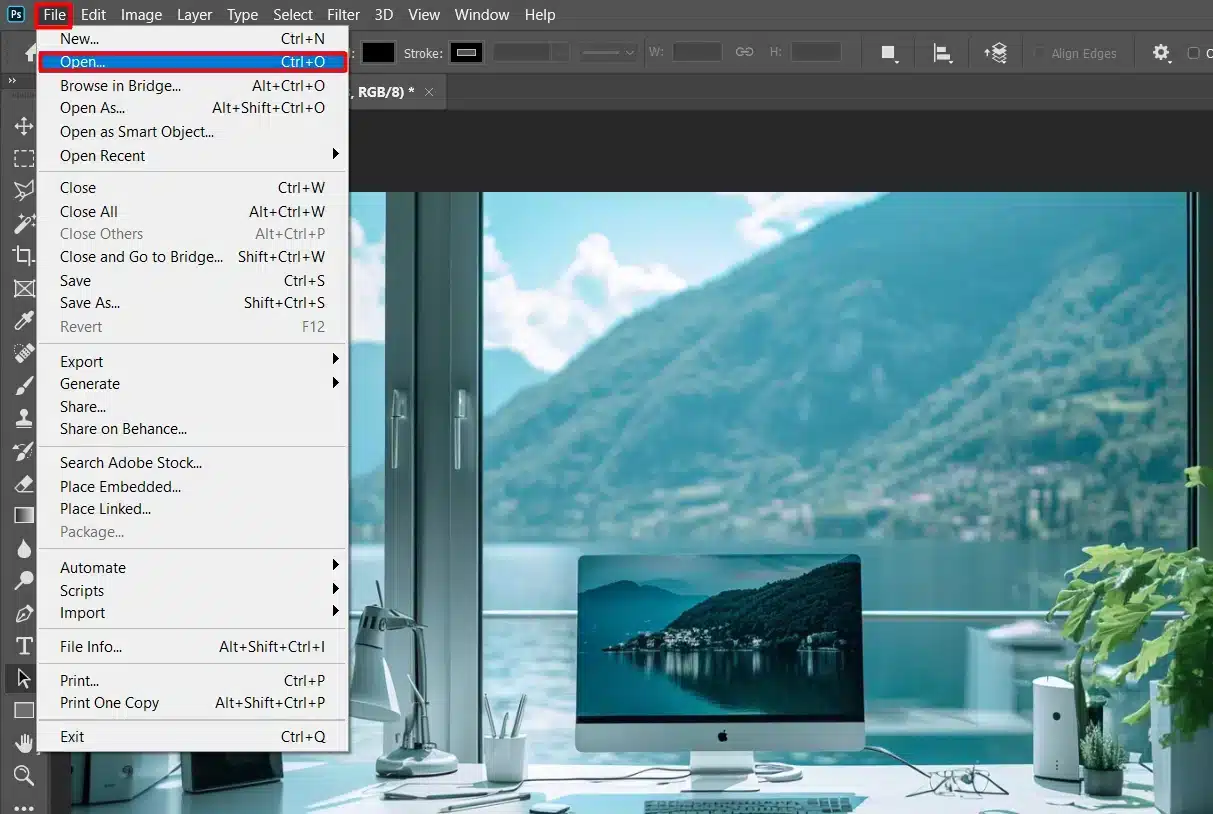
Step 1: Open Your Images
First, open Photoshop and load your images.
Go to File > Open and select your source image and target image. Make sure both are ready for the Photoshop match color process.
Step 2: Select the Image to Adjust
Click on the target image that needs color adjustment to match the source image.
Ensure it’s the active background layer in the Layers Panel. If you have multiple layers, select the one to adjust.
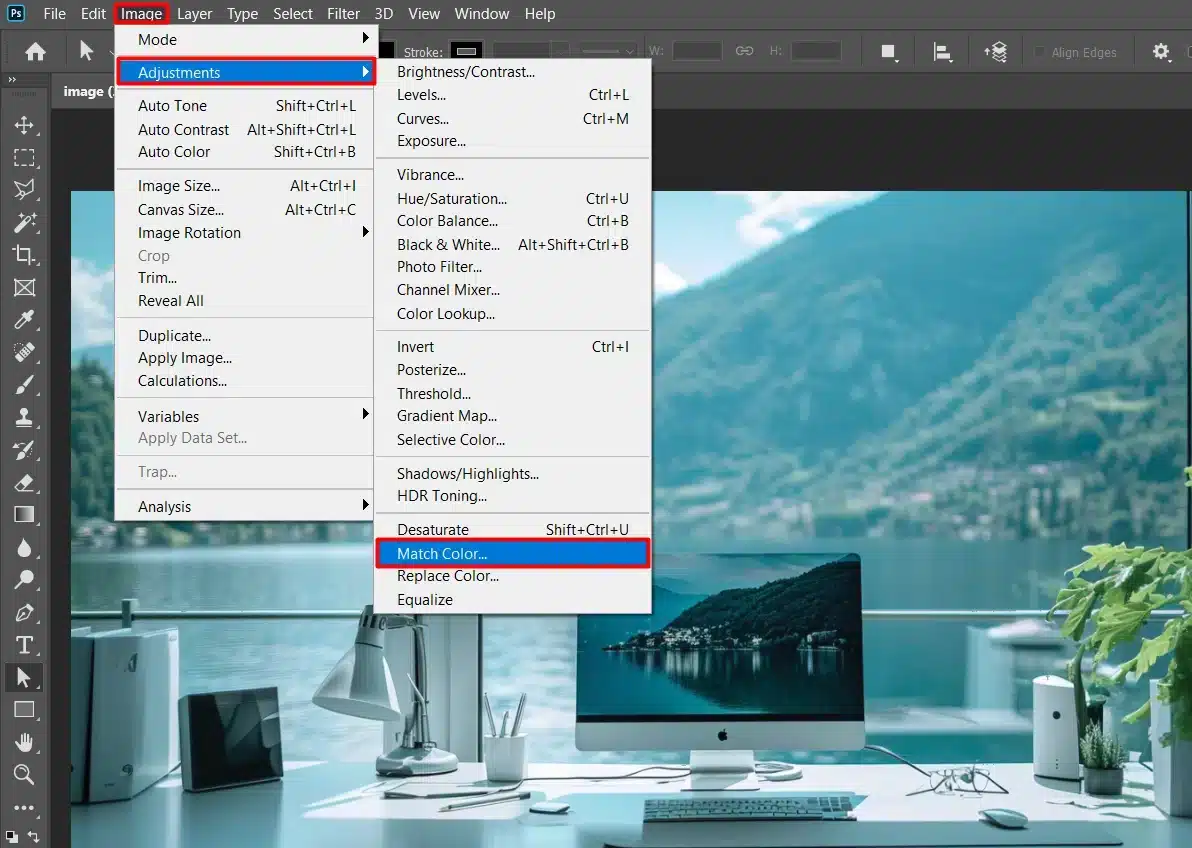
Step 3: Access the Match Color Command
Next, navigate to the Image menu at the top of the screen.
From there, go to Adjustments and then selectMatch Color. This will open the match color dialog box, where all the magic happens.
Step 4: Choose the Source Image in the Match Color Dialog box
In the match color box, you’ll see an option labeled Source.
Click on the dropdown menu and select the source image. This tells Photoshop which image to use for the color blending process.
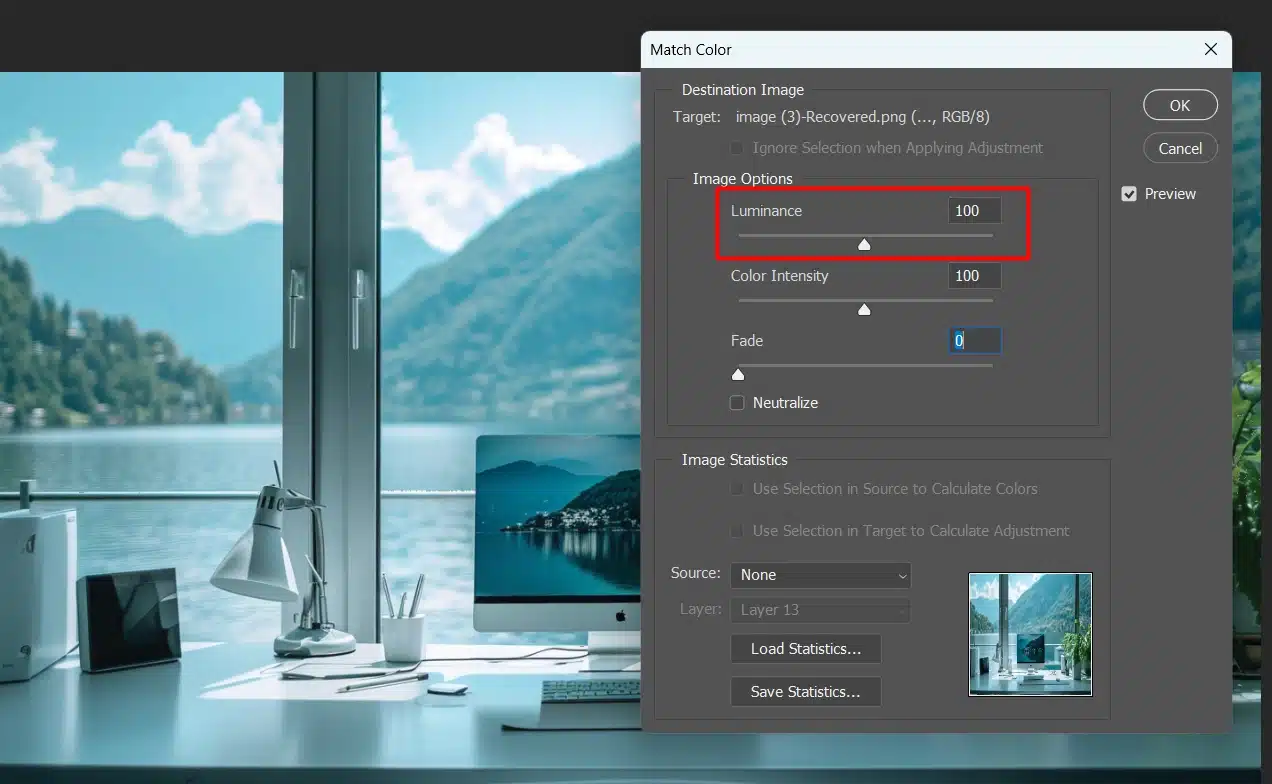
Step 5: Adjust the Luminance and Color Intensity
In the match color dialog box, adjust the luminance slider for brightness and the color intensity slider for vividness.
Check the image statistics and tweak until the target image matches the source image.
Step 6: Fine-Tune the Color Adjustment with Photoshop Color Match
For precise control, use the fade slider in the match color dialog box. It blends the target image’soriginal colors with the source image’snew colors.
Adjust it for the perfect balance.
Pro Tip: If you want to match only the colors and not the brightness, check the Neutralize box. This can help remove any color cast from the target image, especially when dealing with shadows.
Step 7: Apply the Changes
Once you’re happy with the adjustments, check the image statistics, then click OK.
Your target image should now have colors that closely match the source image.
Pro Tip: Save your work frequently! Use Photoshop shortcuts such as Ctrl+S (or Cmd+S on Mac) to save your progress. This way, you won’t lose any of your hard work.
Why Use Photoshop Match Color Feature?
Now, let’s dive into why color blending in Photoshop is a game-changer.
Imagine you have two images to blend seamlessly, like a family photo with consistent lighting or a composite image combining different photos.
This is where the match color command works its magic.
Consistency in Your Photos
Using the match color feature ensures consistency across your photos. Whether it’s a photo album, collage, or professional project, consistent colors make a huge difference.
For example, in a family vacation photo book, you want all images to have the same color tone for a cohesive and professional look.
Fixing Lighting Issues
Photos taken at different times or lighting can look mismatched. The match color command fixes this.
For example, you can use the match color dialog window to make a morning photo and an afternoon photo look like they were taken at the same time.
Using the match color feature simplifies your workflow.
Instead of manually adjusting colors, quickly match colors between two images with this tool. It’s especially useful for large projects with multiple images.
Pro Tip: Understanding the Patch Tool can aid in your workflow.
For example, imagine you’re editing wedding photos with different lighting. Use the match color command to make indoor photos match the outdoor lighting.
Enhancing Product Photos
Use the match color command to ensure uniform color tone across online product photos, making your product look professional.
Pro Tip: Learning how to use camera tethering can improve your shooting workflow.
In the match color dialog box, use the slider to blend the target image’soriginal colors with the source image’snew colors. This helps fine-tune and achieve the perfect balance.
Color blending isn’t just for fixing photos; it’s great for artistic effects too.
For example, you can match the colors of a sunset photo to a portrait for a unique effect. The possibilities are endless when experimenting with color blending.
Pro Tip: If you find a perfect color match setting, save it! In the match color dialog box, adjust the settings and save them for future use.
This way, you can easily apply the same settings to other photos.
To master more essential editing features in Photoshop, check out our guides such as the one on the Clone Stamp Tool.
Tips for Better Color Matching
Now, let’s dive into some tips for better color blending in Photoshop.
Understand Your Source and Target Images
Before you start, know your source and target images.
The source has the colors you want, and the target is the one you adjust.
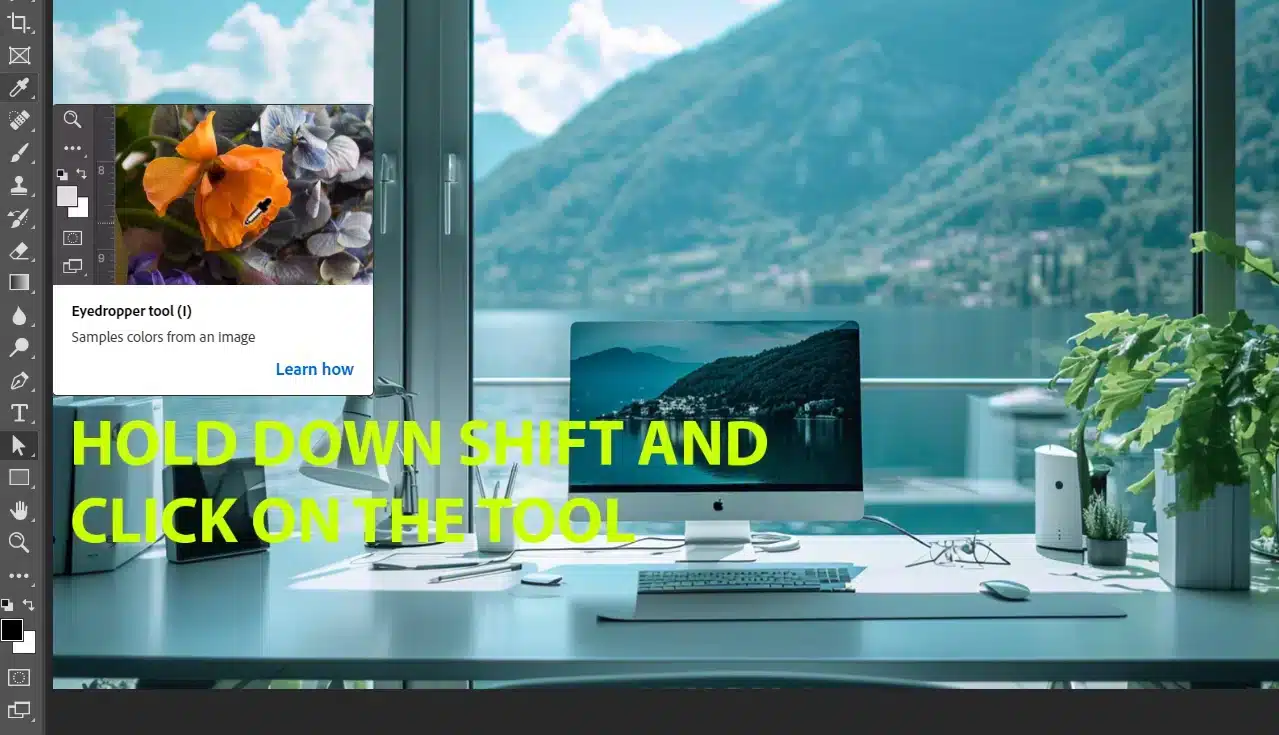
Use the Eyedropper Tool
The Eyedropper Tool is great for color blending. It lets you pick colors from your source image and apply them to your target image, useful for fine-tuning adjustments.
Understanding the importance of white balance in photography can further enhance your ability to achieve accurate color representation across your images.
Pro Tip: Hold down the Shift key while using the Eyedropper to sample multiple colors at once. This can help you get a more accurate color match.
Adjust the Luminance Slider
The luminance slider in the match color dialog box adjusts the brightness of your target image.
Use it to match the brightness levels of your source and target images, especially if taken under different lighting conditions.
Use Adjustment of Layer mask
These layers allow you to tweak the colors without affecting the original image. Simply add an adjustment layer mask and use the Match Color feature to get the perfect look.
Pro Tip: Use a background layer mask with your adjustment layer to apply the color changes only to specific parts of your image.
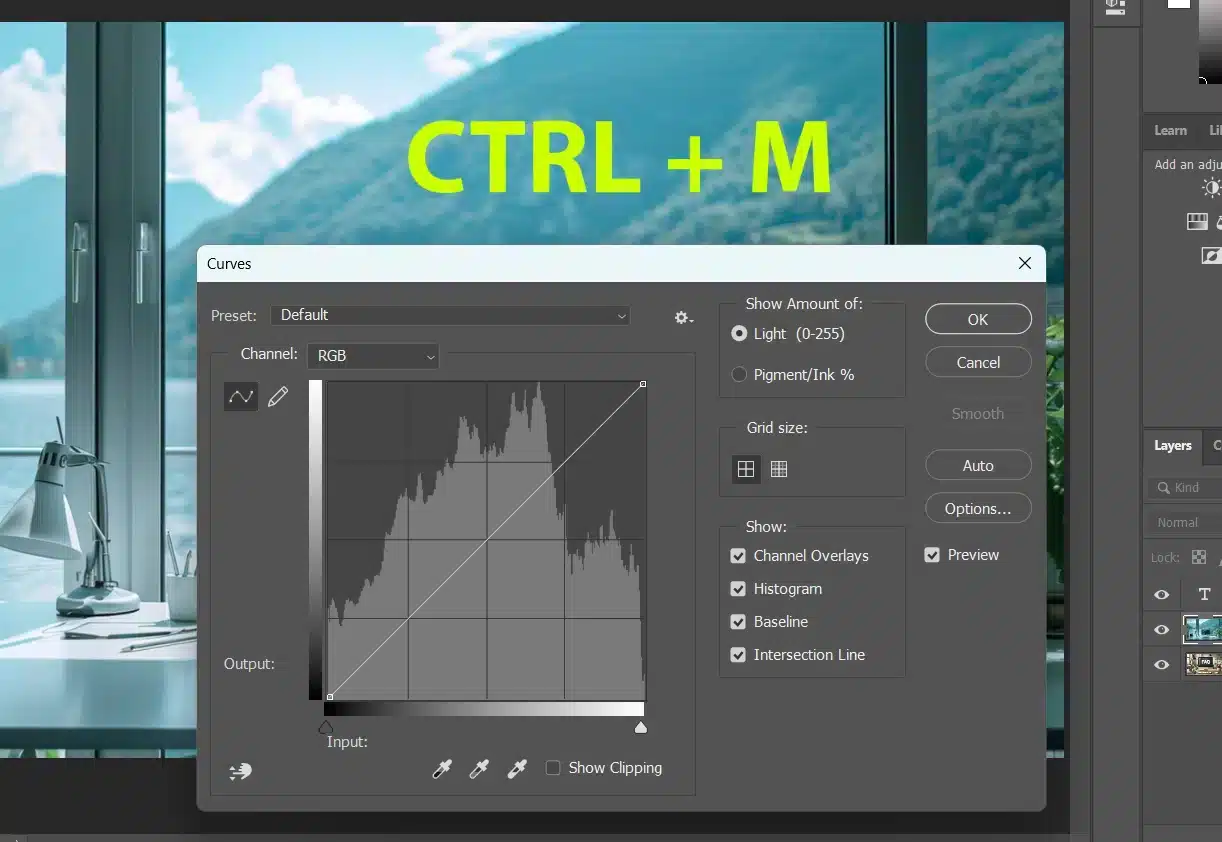
For example, pressing Ctrl+M (or Cmd+M on Mac) will open the Match Color dialog window. Familiarize yourself with these shortcuts to make your editing process more efficient.
Advanced Techniques for Color Matching in Photoshop
Color blending can elevate your images to a professional level. Let’s check out some advanced techniques to achieve perfect color harmony.
Using Adjustment Layers for Precise Control
These layers allow you to tweak colors without altering the original image.
I often use Curves and Hue/Saturation layers to match colors accurately.
Experiment with modes like Multiply and Overlay to see how they affect your image.
Leveraging Color Lookup Tables (LUTs)
Color Lookup Tables (LUTs) are powerful for color grading.
They can apply complex color adjustments quickly. I often use LUTs to maintain consistent color tones across multiple images.
Troubleshooting Color Matching Issues in Photoshop
Color blending can be tricky in Photoshop. Sometimes, colors don’t look right, and it can be frustrating.
Let’s dive into some common issues and how to fix them.
Dealing with Color Casts
Color casts can ruin your photos. They make the image look unnatural.
I usually start by identifying the color cast. Then, I use the Color Balance tool to adjust the tones.
This helps to neutralize the unwanted colors.
Correcting Over-Saturated Colors
Over-saturated colors can be overwhelming and make the image too vibrant.
I use the Hue/Saturation adjustment layer to reduce saturation without affecting other aspects.
It’s a quick and effective fix.
Addressing Inconsistent Lighting
Inconsistent lighting can make a photo look uneven, especially in outdoor shots.
I use the Levels adjustment to balance the lighting and create a more uniform look.
This can be useful for situations where you want to edit the sky.
Frequently Asked Questions
How to Match a Color in Photoshop?
Matching a color in Photoshop is a handy skill for various design projects. Here’s a straightforward way to do it:
Use the Eyedropper Tool: Select the Eyedropper from the toolbox and click on the color you want to match.
Copy the Color Code: After using the Eyedropper, the color code will appear in the color palette. You can copy this code.
Apply the Color: Use the copied color code to apply the same color to another area or object in your project.
How to Match Two Colors?
To match two colors in Photoshop, follow these steps:
Select the First Color: Use the Eyedropper tool to select the first color.
Find the Second Color: Open the color palette and manually adjust the color sliders until you match the second color closely.
Adjust Using Layers: Create a new background layer and fill it with the second color. Adjust the layer’s opacity and blending modes to see how closely it matches the first color.
How Do I Find the Exact Complementary Color in Photoshop?
Finding the exact complementary color in Photoshop can enhance your designs by adding visual interest. Here’s how:
Select Your Base Color: Use the Eyedropper to select the base color.
Open Color Wheel: Go to the Color palette and open the Color Wheel.
Locate the Complementary Color: Complementary colors are directly opposite each other on the color wheel. Simply look across the wheel from your selected color to find its complement.
How to Match Exposure in Photoshop?
Matching exposure in Photoshop helps in blending different elements seamlessly. Here are the steps:
Select the Exposure Tool: Go to the ‘Image’ menu, select ‘Adjustments’, and then choose ‘Exposure’.
Adjust Exposure Levels: Use the sliders for ‘Exposure’, ‘Offset’, and ‘Gamma Correction’ to match the exposure levels of different parts of your image.
Use the Histogram: The histogram provides a visual guide for adjusting exposure. Aim for a balanced histogram that doesn’t skew too far to the left or right.
These simple steps should help you effectively use Photoshop for matching colors and exposures.
In conclusion, mastering the match color feature in Adobe has changed the way I edit my projects.
And I am confident it will do the same for you. Use all the knowledge you’ve gained from this guide and experiment with all of these settings to bring your vision to life!
$2,061.00Original price was: $2,061.00.$1,061.00Current price is: $1,061.00. 27584
Download Your Free Guide Now!
Discover the secrets of photography with our printable guide! Master essential techniques like aperture, shutter speed, and ISO to create stunning images. Get your free printable PDF now and start turning your snapshots into masterpieces!