How to Merge Photos in Lightroom: Tips and Tricks to Merge Photos
How to Merge Photos in Lightroom: Tips and Tricks to Merge Photos
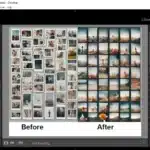
Introduction to How to Merge Photos in Lightroom
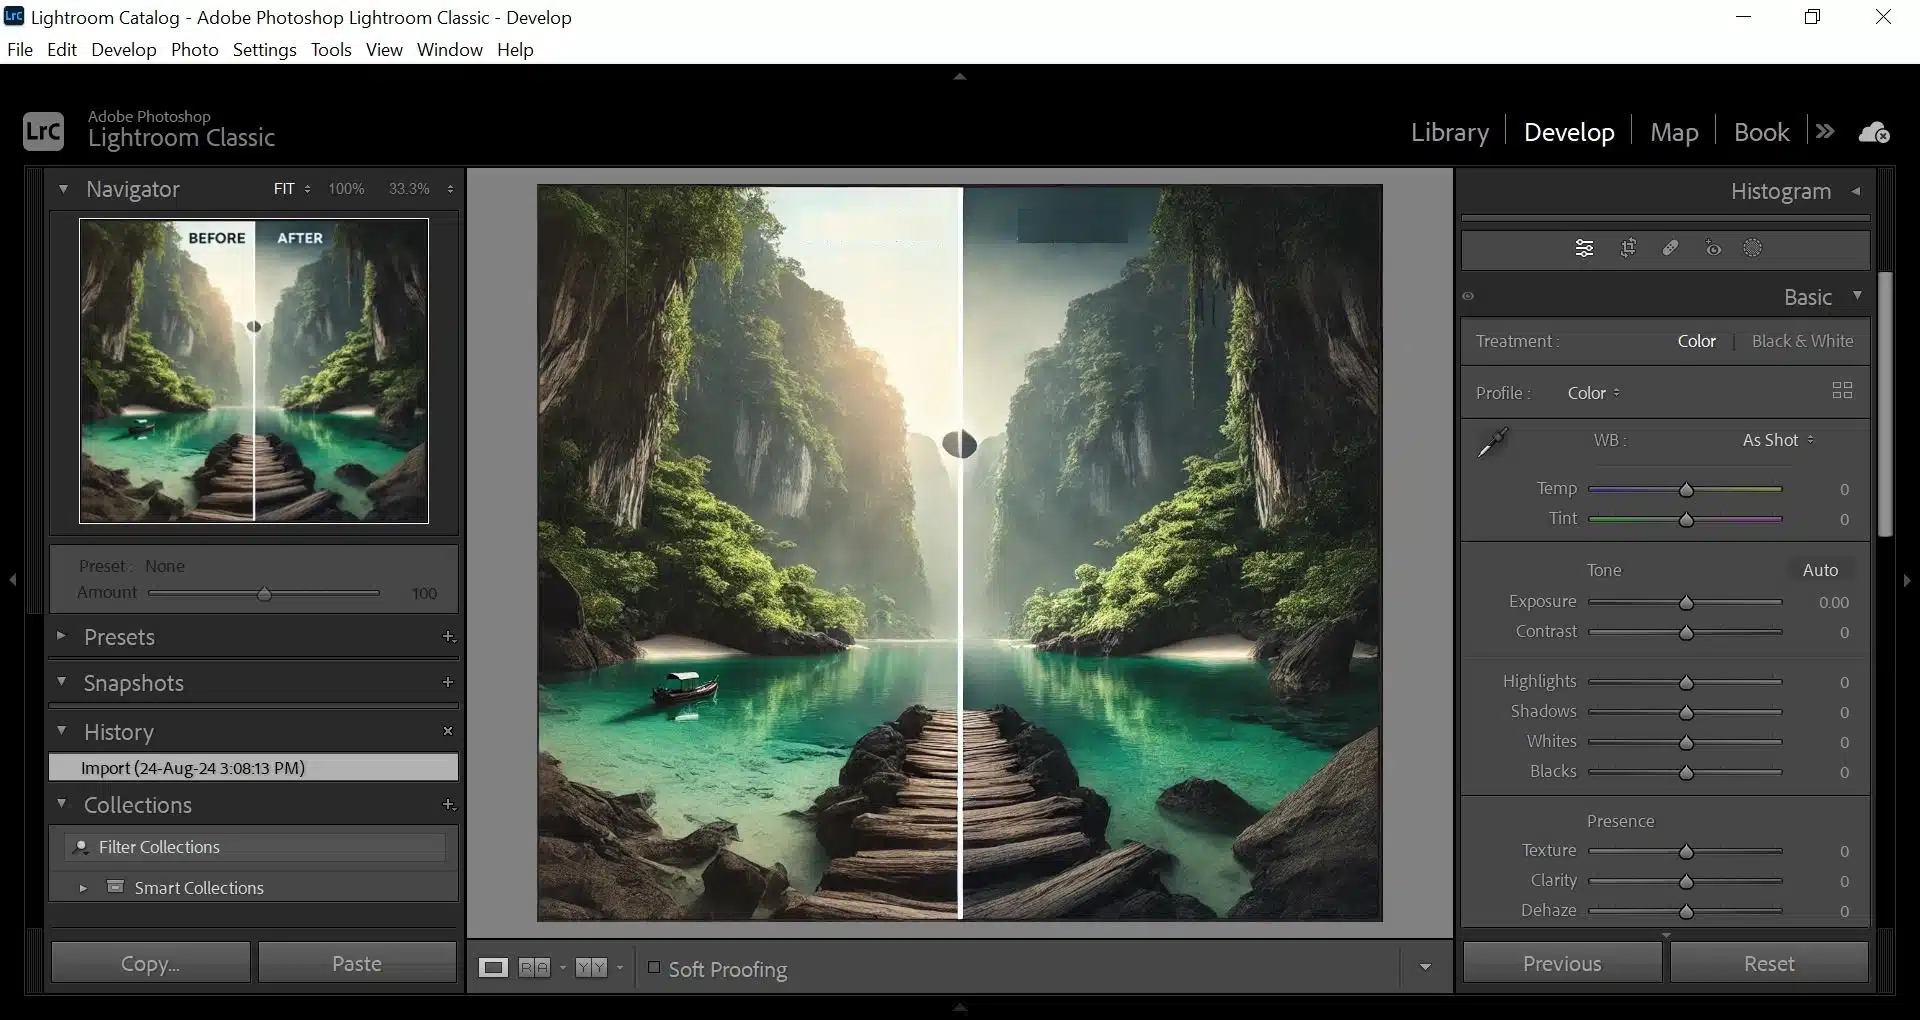
How to Merge Photos in Lightroom is a fundamental skill for photographers looking to enhance their images and create stunning composites. Whether you’re combining multiple exposures for a high dynamic range (HDR) merge or stitching together several shots for a sweeping panorama, Lightroom provides powerful tools to seamlessly merge photos. In this guide, we will explore various techniques to merge portraits in Lightroom, including all instructions and practical tips.
Merging snapshots in Lightroom not only enhances the final output but also simplifies the editing process. With just a few clicks, you can align and blend snapshots, making it easier to achieve professional-quality results. Whether you’re a seasoned photographer or a hobbyist, understanding how to merge photos in Lightroom will elevate your modification skills and help you make visually compelling portraits. Let’s dive into the techniques and best practices for portrait combining in Lightroom.
Table of Contents
Grow Understanding About How to Merge Photos in Lightroom
What is Portrait Merging/Combining in Lightroom?
Portrait combining in Lightroom involves combining multiple images into a single, cohesive photo. This process is commonly used to produce HDR snapshots, by using HDR photography, or panoramas. By doing this , you can extend the dynamic range, capture more detail, and produce stunning visual effects that would be difficult to achieve with a single shot. Lightroom offers intuitive tools that make the snapshot combining straightforward, even for beginners.
Why Merge Photos in Lightroom?
Merging snapshots in Lightroom allows photographers to handle complex lighting situations and expansive scenes effectively. For example, HDR combining combines portraits taken at different exposure levels, preserving details in both the shadows and highlights. This technique is perfect for high-contrast scenes like sunsets or interior shots with bright windows. Panorama combining, on the other hand, stitches together multiple snapshots to make wide, sweeping landscapes that showcase the grandeur of a location.
Key Features of Lightroom's Photo Merge
Lightroom’s photo merge feature is equipped with several key functionalities that enhance the combining process:
Auto Align: This feature ensures that your portraits are perfectly aligned, even if there was slight movement between shots. This is particularly useful for self portrait photography.
Deghosting: Deghosting helps to remove artifacts caused by moving objects within the frame, such as people or trees blowing in the wind. Lightroom offers different levels of deghosting to suit the extent of motion in your portraits.
Boundary Warp: When creating panoramas, it helps to fill in the edges of your merged snapshot, reducing the need for extensive cropping and preserving more of your original composition.
Practical Example of Snapshot Combining
Consider a scenario where you’re photographing a cityscape at dusk. The bright lights of the buildings contrast sharply with the fading natural light. By taking multiple exposures photography, one to capture the lights, another for the sky, and a third for the midtones. And combining them in Lightroom, you can make an snapshot that beautifully balances all elements. This merged portrait assists you to display the city lights vividly while retaining the rich colors of the twilight sky, offering a more dynamic and detailed representation of the scene.
Step by Step Guide: How to Merge Photos in Lightroom
1: Import Your Photos
The first step in the Lightroom merge photos process is to import your images in this software. Open Lightroom and press on the “Import” button located in the lower-left corner. Choose the images you want to merge from your computer or memory card. Ensure that the photos you plan to merge are part of a series, such as different exposures for HDR or sequential shots for a panorama.
2: Choose the Photos to Merge
Once your photos are imported, navigate to the Library module. Here, you can Choose the photos you want to merge. Select the first image, hold down the “Shift” key, and then select the last image in the sequence. This usually highlights all the photos you intend to combine.
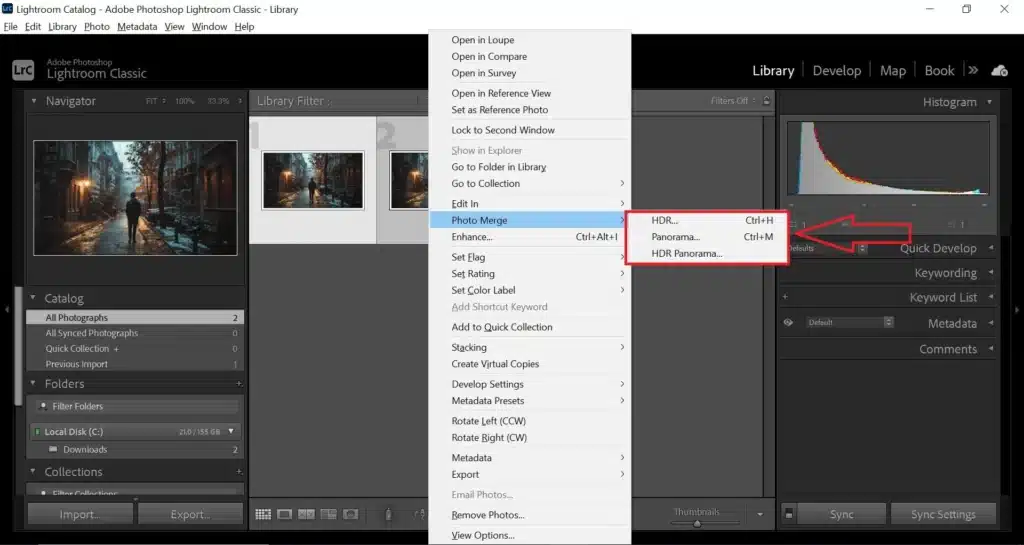
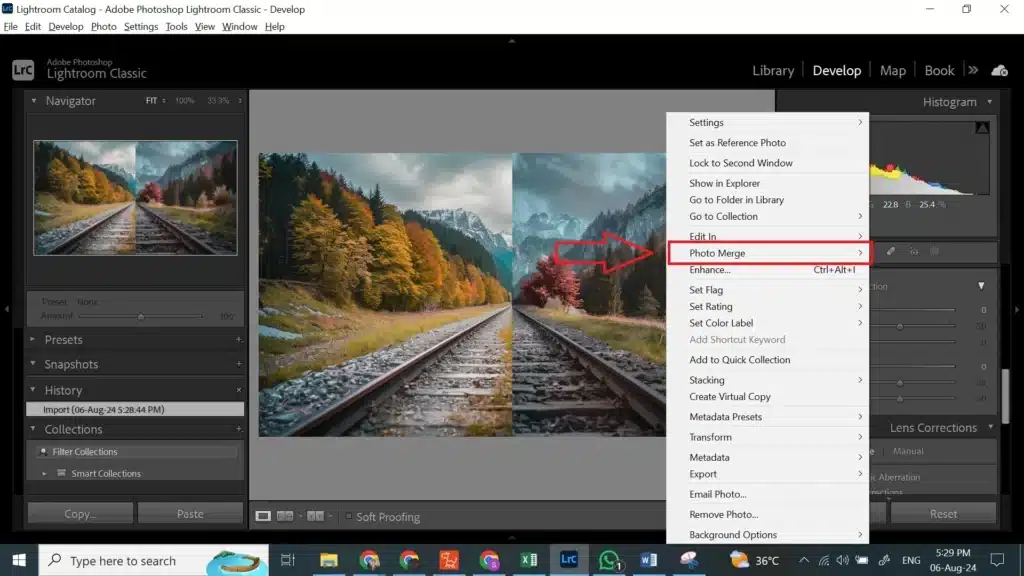
3: Initiate the Photo Merge
With your photos selected, right-click on any of the highlighted images and navigate to photo Merge. You can see options for HDR, Panorama, and HDR Panorama here. Choose the appropriate option based on your project. For HDR combining, choose “HDR,” and for combining multiple images into a wide shot, choose “Panorama.” Let’s dive into one of our article about Landscape Photography.
4: Adjust the Merge Option
A new dialog box should appear, allowing you to apply the suitable options for your Lightroom merge photos. For HDR, you can enable “Auto Align” to ensure your images are perfectly aligned and “Auto Settings” for basic tone adjustments. Use the “Deghost Amount” slider to correct any ghosting caused by moving objects. For panoramas, you can choose from different projection methods like Spherical, Cylindrical, or Perspective.
5: Complete the Merge
After adjusting the options to your preference, press the “Merge” button. Lightroom will process the images and make a new merged photo. Now, this new file should be saved in your catalog with the original images stacked underneath. You can now move to the Develop module to make any further edits to your merged photo.
Imagine you’re photographing a high-contrast scene, such as a sunset. You take three exposures: one for the sky, one for the foreground, and one balanced exposure triangle. Upload these images into Lightroom, choose them, and choose “HDR” under Photo Merge. Enable Auto Align and adjust the Deghost Amount if there was movement in the scene. Go to Merge, and Lightroom helps to produce a single image that captures the full dynamic range of the scene, ready for final adjustments.
Practical Example: Panorama Merge
If you’re photographing a sweeping landscape, take a series of overlapping shots from left to right. Upload these into Lightroom, choose them, and choose “Panorama” under Photo Merge. Experiment with the different projection options and use Boundary Warp to fill the edges. Go to Merge, and Lightroom stitches the images together into a seamless panorama, preserving the expansive view of your scene.
Feature
HDR Merge
Panorama Merge
Purpose
Combine different exposures into one image
Combine multiple images into a wide scene
Settings
Auto Align, Auto Settings, Deghost Amount
Projection type, Boundary Warp
Output
HDR image with full dynamic range
Wide, seamless panorama
Advanced Portrait Merging Techniques
Using HDR Panorama Merge
Combining HDR and Panorama: Lightroom Merge photos feature allows you to combine HDR and Panorama techniques into a single workflow. This is particularly useful when you want to capture a high dynamic range scene in a wide format. Start by taking multiple exposures of each segment of the panorama using your camera's bracketing mode. We can utilize different image types to achieve this.
Combining HDR Segments: Upload your images into Lightroom and make HDR images for each segment. Right-click on the selected set of bracketed photos and choose Photo Merge > HDR. Repeat this for all segments of your panorama.
Creating the Panorama: Once you have all your HDR images, choose them, right-click, and choose Photo Merge > Panorama. Lightroom will stitch these HDR images into a seamless panoramic view, maintaining the dynamic range and details throughout the entire image.
Focus Stacking for Macro Photography
Capturing Focus Stacks: Focus stacking involves taking multiple photos of the same scene at different photo focus distances. This technique is essential for macro photography where the depth of field is shallow. Use a tripod and a camera in manual mode to ensure consistent framing.
Combining Focus Stacks in Lightroom: While Lightroom itself doesn’t support focus stacking directly, you can use it to prepare your portraits. Upload your snapshots into Lightroom and make initial edits to one snapshot. Sync these edits across all portraits in the stack.
Final Stack in Adobe Photoshop: Export your photos to Adobe Photoshop. Now, use Auto-Blend Layers feature to combine the portraits into a single, sharp snapshot. This technique leverages the detail from each focus plane to make a fully focused portrait.
Using Mobile Devices for On-the-Go Combining
Lightroom Mobile: Lightroom cellphone app supports basic snapshot combining capabilities with different blending modes, making it a convenient tool for photographers on the move. Capture a series of photos with your mobile camera, ensuring some overlap for panoramas or bracketed exposures for HDR.
Mobile HDR and Panorama: Import your photos into Lightroom cellphone. Use the HDR and Panorama merge functions available within the app to combine your snapshots. This allows you to quickly produce merged photos without needing a computer, ideal for travel or quick shoots.
Syncing with Desktop: Edits and merged photos on Lightroom cellphone sync automatically with your Lightroom desktop application. This ensures you can continue refining your portraits with advanced tools available on your computer.
Refining Merged Photos: After using the Lightroom Merge photos feature, move to the Develop module for detailed edits. Adjust exposure, contrast, and clarity to enhance your photo. Use local adjustments like the graduated filter to tweak specific areas.
Adobe Photoshop Integration: For more complex edits, export your merged portrait to Adobe Photoshop. It offers advanced tools for skin retouching, compositing, and fine-tuning that go beyond Lightroom’s capabilities. This is particularly useful for high-end professional work where detailed control is essential.
Video Tutorials and Guides: Enhance your skills by watching video tutorials on advanced snapshot combining techniques. Many professionals share their workflows and tips online, providing valuable insights into maximizing the potential of Lightroom and Photoshop for complex projects.
Common Issues and Troubleshooting
1. Misaligned Photos in Panorama Merge
One common issue when using the Lightroom Merge photos feature is misaligned snapshots, especially in panoramas. This can happen if there was slight movement of the camera between shots. To avoid this, use a tripod to keep the camera steady. In Lightroom Classic, ensure you enable the “Auto Align” option during the merge process. This helps to align the snapshots correctly. If you still face alignment issues, consider re-shooting the series with more overlap between shots.
2. Ghosting in HDR Merges
Ghosting occurs when there are moving elements within the scene, such as people or foliage, causing a ghostly effect in the final portrait. During the HDR merge in Lightroom Classic, you can adjust the “Deghost Amount” to correct this. Check the snapshot with different deghost options (None, Low, Medium, High) to see which level best addresses the issue. If the ghosting persists, try manually aligning and modifying the source file in Adobe Photoshop before combining.
3. Exposure Differences in Merged Photos
Another issue can be noticeable exposure differences between merged photos, leading to an uneven final portrait. When preparing for the Lightroom Merge photos process, make sure all your source files are taken with consistent exposure selections. In Lightroom Classic, you can apply “Auto Settings” to help balance the exposures. If the issue remains, manually edit the exposure levels of each snapshot.
4. Color Inconsistencies
Color inconsistencies can arise when the white balance varies between shots. To avoid this, set a consistent white balance in-camera when shooting. If you encounter this issue after combining, you can edit the white balance in the Lightroom Classic. Sync the white balance options across source file before initiating the merge to ensure uniformity. Taking the professional photos is helpful to counter this problem easily.
5. Preview and Performance Issues
Sometimes, Lightroom might struggle to generate a preview or may slow down significantly during the merge process, especially with high-resolution file. Ensure your computer meets the recommended specifications for running Lightroom Classic. You can also increase performance by reducing the file size of your source snapshots or by combining fewer files at a time. If issues persist, check for software updates or consider reinstalling Lightroom.
Yes, you can merge two photos in Lightroom using the Lightroom Merge photos feature. This process is particularly useful for editing portraits or panoramas. After importing your photos, make your selection by clicking on both portraits while holding down the “Ctrl” key (or “Cmd” on Mac). Then, right-click on one of the selected photos and choose “Photo Merge” from the dropdown menu to start the this process.
How do I Layer Photos in Lightroom?
Layering photos directly in Lightroom is not supported, as Lightroom focuses on non-destructive modification and organizing. However, you can achieve a similar effect by making your selection of photos and then exporting them to Adobe Photoshop. Now here, you can stack the layers, apply blending modes, and make detailed adjustments. Once done, you can save and upload the layered file back into Lightroom for further modification.
How do I Paste Multiple Photos to Merge into Lightroom?
To paste multiple photos to merge in Adobe Lightroom, first upload the photos into your Lightroom catalog. Make a selection of the photos you want to merge by clicking the first photo, then holding down the “Shift” key and clicking the last snapshot in the series. After making your selection, right-click on any of the selected photos, choose “Photo Merge,” and choose either “HDR” or “Panorama” based on your needs. In this way, Lightroom processes and merges your selected photos into a single snapshot.
How do I Combine Two Lightroom Presets to Merge?
Combining two Lightroom presets directly isn’t possible within Lightroom. Instead, you can apply one preset to your portrait and then manually adjust the options to incorporate elements of the second preset. Start by making a selection of your snapshot and applying the first preset. After applying it, go into the Develop module and adjust the sliders to add features from the second preset. Save this combination as a new custom preset for future use. This method allows you to merge the desired effects of both presets in a single workflow.
Conclusion: How to Merge Photos in Lightroom
Merging photos in Lightroom is an essential skill for photographers seeking to enhance their images through HDR, panoramas, or advanced refining techniques. By mastering these processes, you can create stunning visuals that capture the full range of your scenes. For instance, I recently captured a series of sunset photos on a beach vacation. By using Lightroom’s panorama and HDR merge features, I was able to create a breathtaking text portrait effect that showcased the vibrant colors of the sky and the detailed textures of the shoreline, something that would have been impossible with a single exposure.
If you want to dive deeper into these techniques and truly master photo editing, I highly recommend checking out our comprehensive courses on Adobe Photoshop and Lightroom. These courses offer step-by-step tutorials and expert insights to help you elevate your photography skills. Enroll today at our Photoshop course or our Lightroom course and start creating stunning, professional-quality portraits!
If this article has helped you, then Like and Share it with your friends!
Facebook
Twitter
LinkedIn
Pinterest
Have a nice photoshoot!
Learn more about Photo Editing with Lightroom and Photoshop:
$2,061.00Original price was: $2,061.00.$1,061.00Current price is: $1,061.00. 27585
Download Your Free Guide Now!
Discover the secrets of photography with our printable guide! Master essential techniques like aperture, shutter speed, and ISO to create stunning images. Get your free printable PDF now and start turning your snapshots into masterpieces!