Having trouble with how to make transparent text in Photoshop?
This easy trick will add a cool effect to your projects, whether it’s a poster or website banner.
In this guide, I’ll walk you through the steps on how to use this feature so that your designs demand attention.
Let’s get started!
Table of Contents
How to Make Transparent Text in Photoshop
Step 1: Open Your Image
Firstly, open your image in Photoshop. It’s simple, and I’ll guide you step-by-step.
- Launch Photoshop: Open Photoshop on your computer. If you're using Photoshop CC, the interface may look different, but the steps are similar.
- Open Your Image: Click on File in the Menu Bar, then select Open. In the dialog box, find your image file, select it, and click Open.
Pro Tip: If you often work with the same set of images, you can drag and drop them directly into Photoshop to save time. Additionally, you can use Photoshop shortcuts to enhance your workflow.
Understanding the different types of Lenses can also enhance your photography skills, allowing you to capture better images to use in your designs.
Step 2: Duplicate the Background Layer
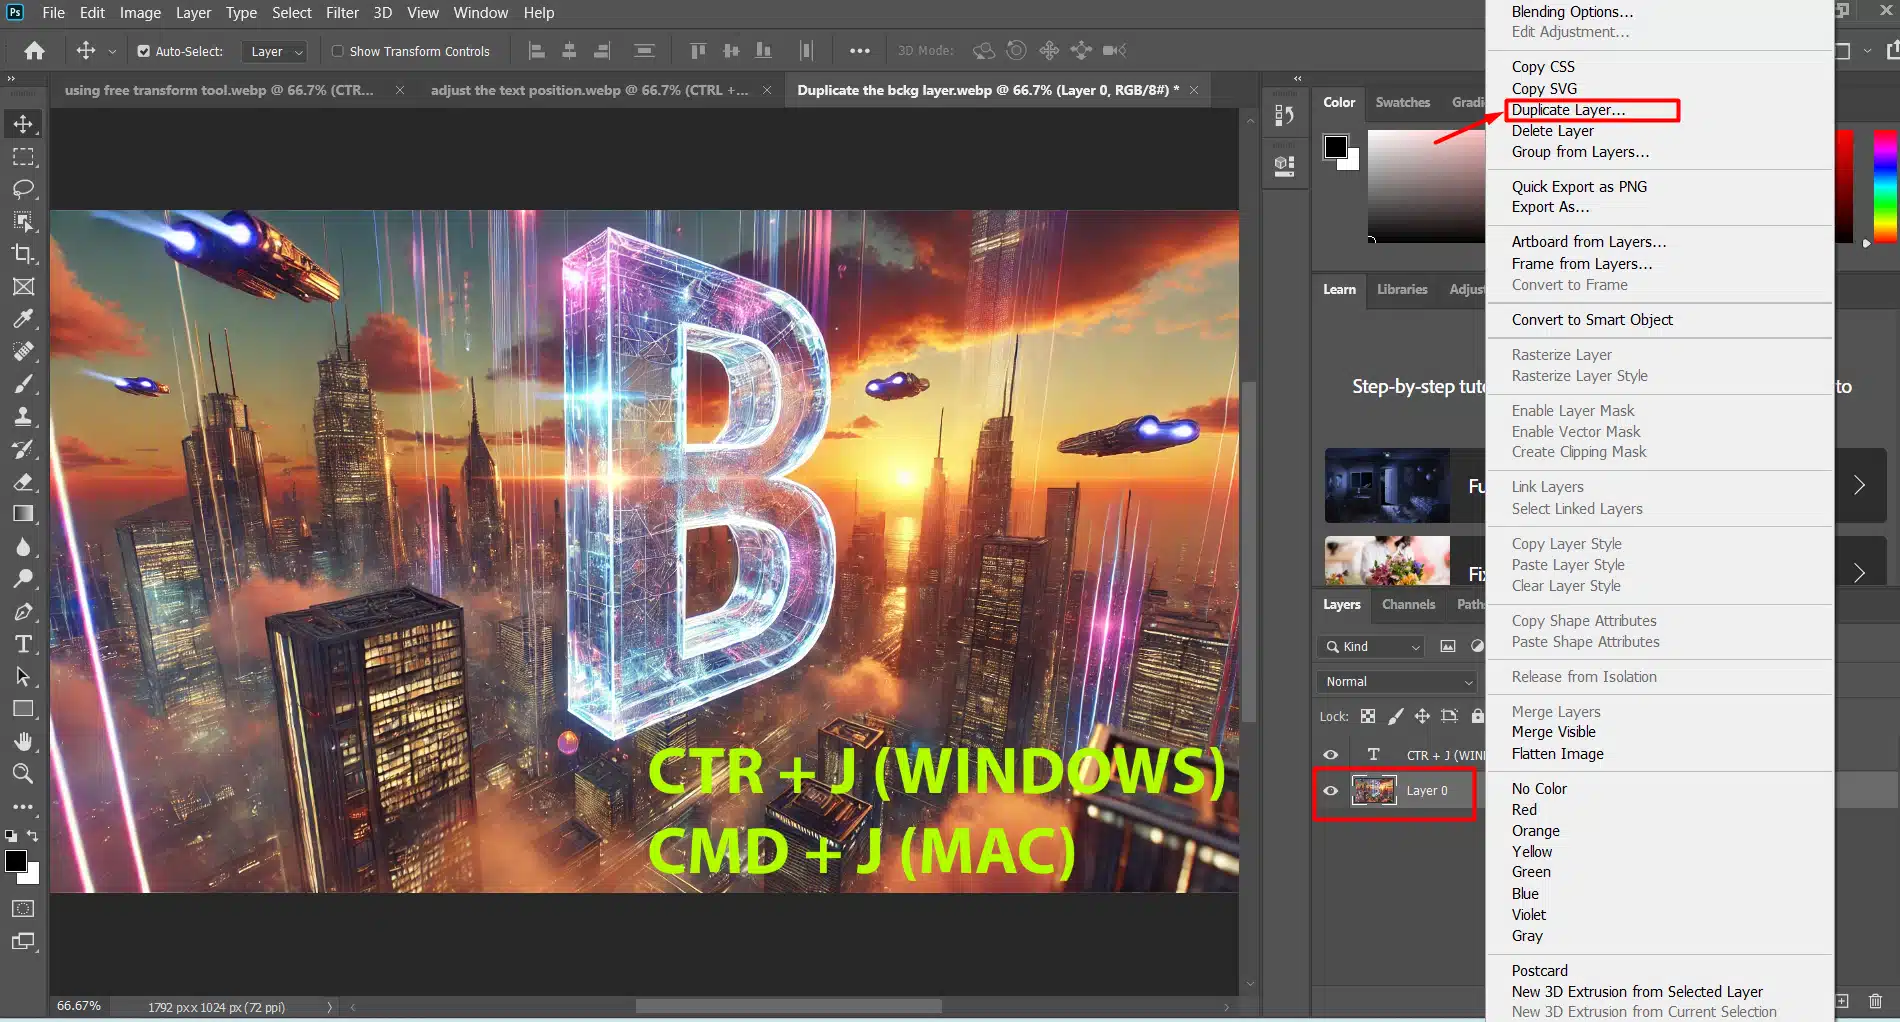
Once your image is open, duplicate the Background Layer. This lets you work without changing the original image, so you can always go back to it if needed.
- Layers Panel: Look at the Layers Panel on the right side of the screen. If you don’t see it, go to Window in the Menu Bar and select Layers.
- Duplicate Layer: Right-click on the Background Layer and select Duplicate Layer. You can also use the shortcut Ctrl+J (Windows) or Cmd+J (Mac). A layer called "Background copy" will appear above the original.
Pro Tip: Rename your layers to keep things organized. Double-click on the type layer name and type something descriptive like “Working Layer.” Utilize Photoshop’s essential tools for a more precise edit.
Step 3: Fill The New Layer With White
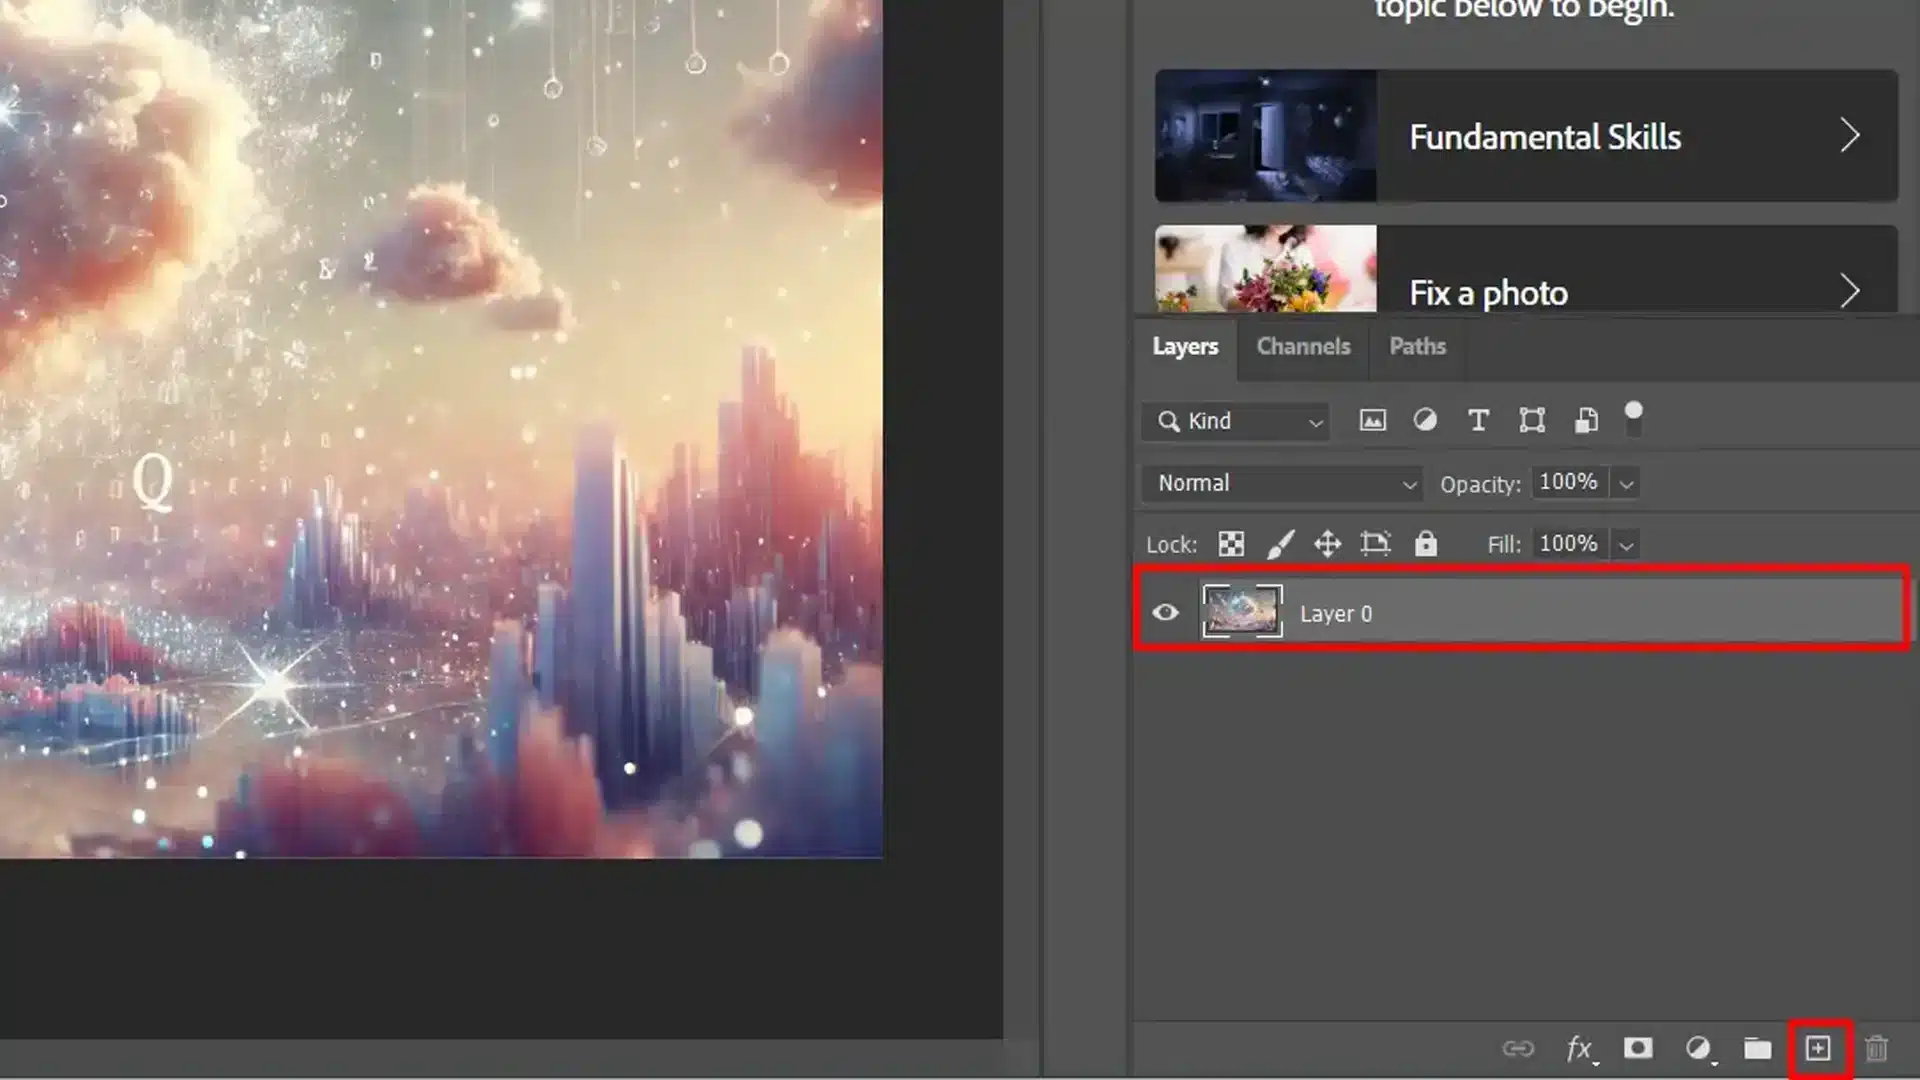
We’ll use this layer to create a white area around the text. To fill the layer with white, go to the Edit menu in the Menu Bar and select Fill.
Alright, now that we’ve got our image open and our background layer duplicated, it’s time to add a new layer.
Utilizing essential tools in Photoshop such as the Patch Tool lets us work on different parts of our image without changing the original.
Pro Tip: Experiment with different Layer Styles like Drop Shadow or Stroke to free transform your text.
Mastering gradient techniques can also further enhance your workflow.
Step 4: Lower The Layer Opacity
Lower the opacity of “Layer 1” to 75%. You can find the Opacity option in the upper right corner of the Layers panel.
Reducing the opacity of “Layer 1” to 75% allows the image to partially show through, making it visible as we add the text.
Once you’ve added your transparent text layer, you might want to adjust its position to fit perfectly within your image.
Now follow theese extra steps for your transparent text:
| Step | Description | Pro Tip |
|---|---|---|
| Select the Type Tool | Select the Type Tool from the Toolbar. | Use the shortcut T to quickly select the Type Tool. |
| Set Font Size | In the Options Bar, set the font size to 72 pt. We’ll need to resize the text later, but for now, this will give us the largest preset size. | You can also adjust the font size using the Character panel (Window > Character). |
| Set Text Color | Make sure your type color is set to black by pressing the letter D on your keyboard, which resets the color to its default. | Press X to toggle between the foreground and background colors. |
| Add Your Text | Click inside the document and add your text. | Use guides to align your text perfectly. |
| Accept Text | Click the checkmark in the Options Bar to accept it. | Press Enter (Win) / Return (Mac) to quickly accept the text. |
Pro Tip: Hold down the Shift key while resizing to maintain the transparent text’s proportions. Additionally, learning Lightroom shortcuts that allow you to warp your text can significantly aid your editing process later on.
Step 5: Resizing the layer
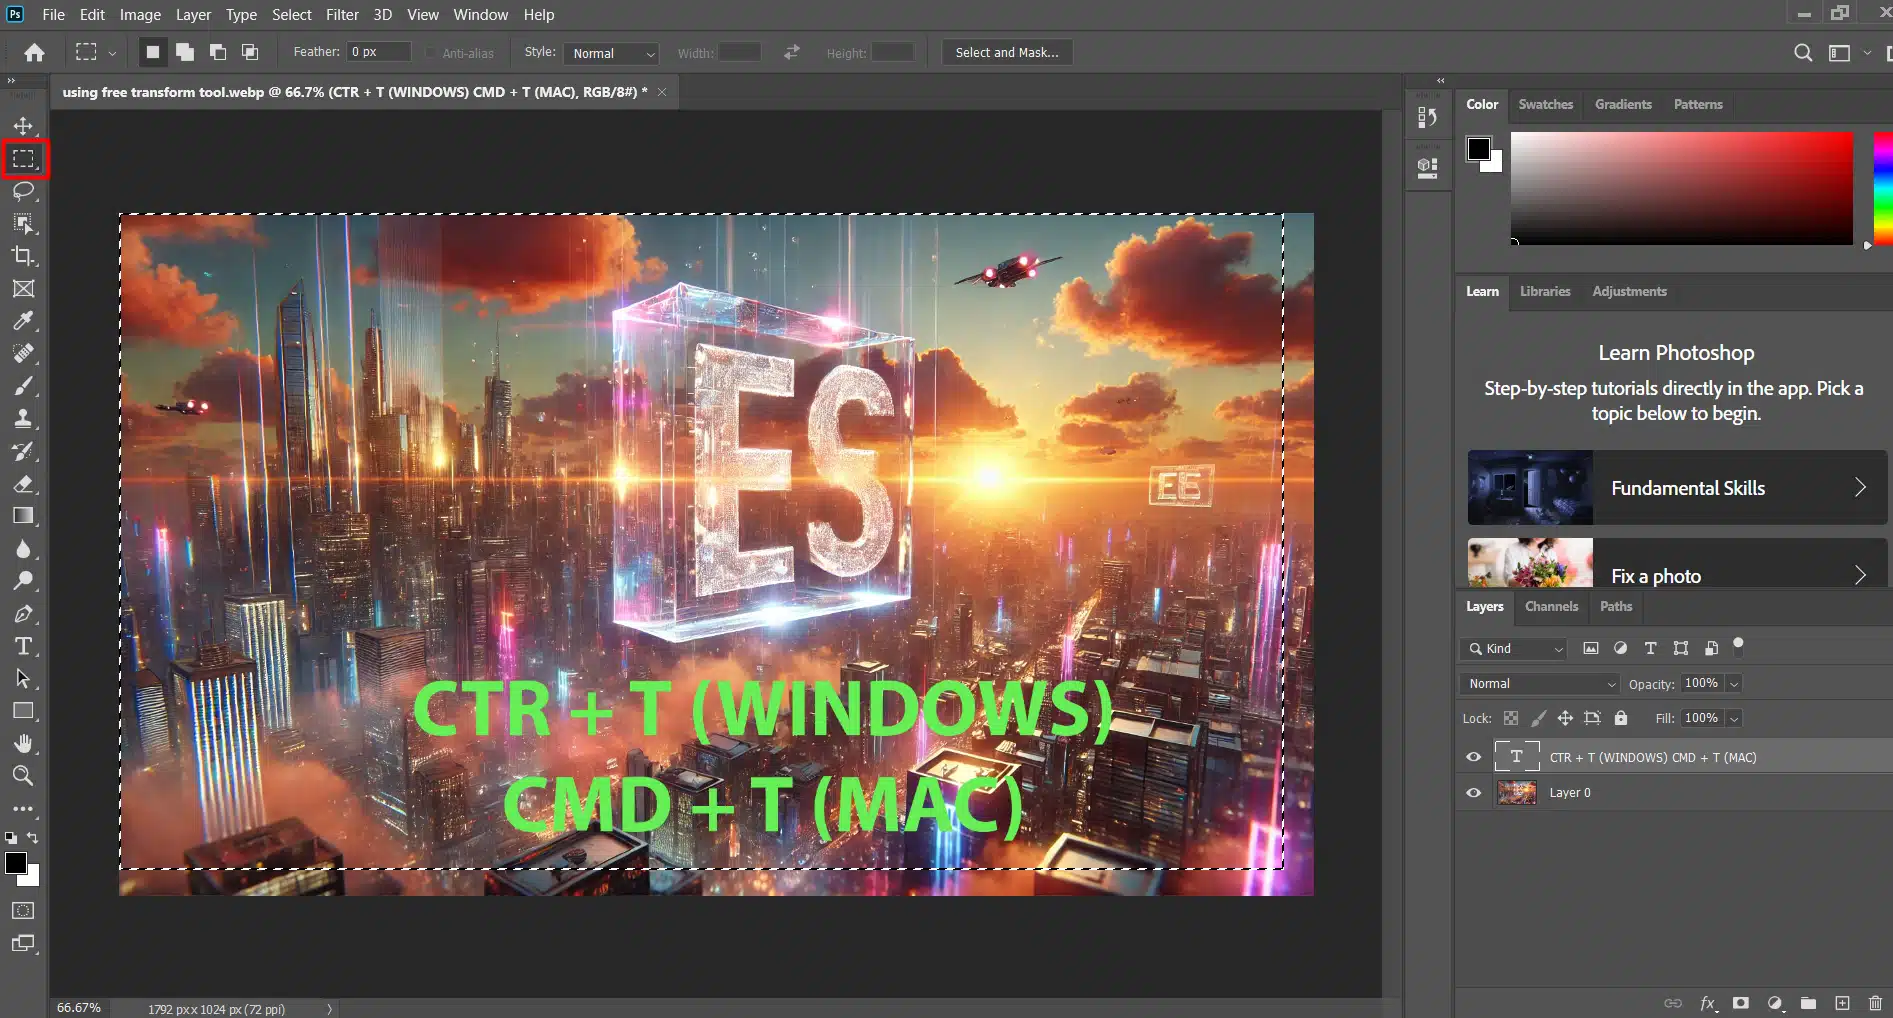
Go up to the Edit menu in the Menu Bar and choose Free Transform
Photoshop surrounds the text with the Free Transform box and handles. Click and drag any corner handle to resize the text as needed. Hold the Shift key while dragging to avoid distorting the letter shapes.
To move the text, click inside the Free Transform box and drag it into position. When you’re done, press Enter (Win) / Return (Mac) on your keyboard.
Pro Tip: Familiarize yourself with the text box from the dropdown menu to make your workflow even easier.
Step 6: Open The Blending Options
With the Type layer selected, click on the Layer Styles icon (the fx icon) at the bottom of the Layers panel.
Choose Blending Options from the top of the list.
This opens Photoshop’s Layer Style dialog box set to the main Blending Options. In the Advanced Blending section, change Knockout from None to Shallow.
This turns the Type layer into a “knockout” layer, allowing Photoshop to use the shapes of the letters to punch through “Layer 1” and reveal the image on the Background layer
To see the effect follow theese steps:
- drag the Fill Opacity slider all the way down to 0%
- Click OK to close the Layer Style dialog box.
- Click on Layer 1 in the Layers panel to select it
- Go up to the Edit menu and once again choose Free Transform
- Drag the top and bottom handles in towards the text. Press Enter (Win) / Return (Mac) on your keyboard when you're done
Step 7: Adjust The Layer Opacity
Adjust the opacity of “Layer 1” to fine-tune the visibility of the text.
Increasing the opacity will make the white area surrounding the text more solid and the type easier to read. Decreasing the opacity will fade the text area into the image.
This process is especially necessary when dealing with text portrait effects in Photoshop.
Step 8: Saving Your Artwork and Exporting
Finally, it’s time to save your work. You don’t want to lose all the effort you’ve put into creating your transparent text effect.
- Save As PSD: Go to File in the Menu and select Save As. Choose Photoshop (PSD) as the file format to keep all your layers intact for future editing.
- Export as JPEG/PNG: If you want to share your image, you can also export it as a JPEG or PNG. Go to File > Export > Export As and choose your desired format.
Pro Tip: For web use, PNG is often better as it supports transparency, while JPEG is great for high-quality images without transparency.
If you’re interested in learning more advanced Photoshop techniques, check out our guide on how to remove an object in Photoshop.
Common Mistakes When Creating a Transparent Effect in Photoshop
Skipping the Knockout Option
One common mistake is skipping the step where you change the Knockout option from None to Shallow.
This step is crucial because it allows the text to punch through the white layer and reveal the image below.
Without it, your text will not become transparent.
Incorrect Layer Order
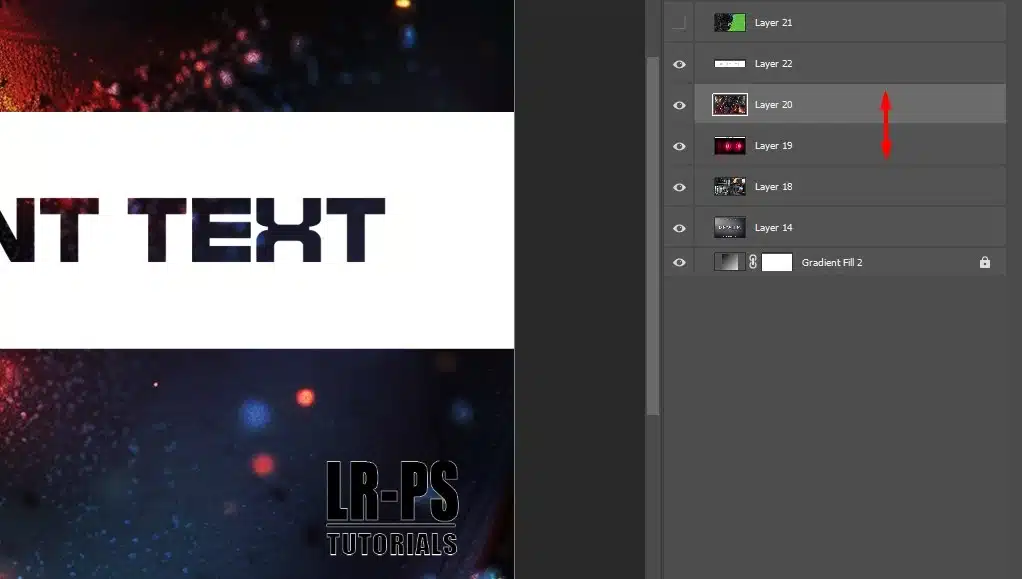
Another mistake is not placing the layers in the correct order.
Ensure that your text layer is above the solid color layer and that both are above the image layer.
This layering order is necessary for the transparent text effect to work properly.
Ignoring Opacity Adjustments
Failing to adjust the opacity of “Layer 1” can also cause issues.
The opacity adjustment helps fine-tune the visibility of the text and the surrounding area.
Ignoring this step may result in text that is either too faint or too overwhelming.
Frequently Asked Questions
How to convert text to transparent in Photoshop?
To make the background of a transparent text, follow these steps:
- Add Transparent Text Effect. Use the Text Tool (T) to type your text on the canvas.
- Rasterize Text Layer. Right-click the transparent text layer and select "Rasterize Type."
- Delete Background. Use the Magic Wand Tool (W) to select the background around the text and press Delete (Backspace).
How to make text fill transparent in Photoshop?
To make the transparent text fill in Photoshop while keeping the outline visible, follow these steps:
- Add Transparent Text Effect. Use the Text Tool (T) to type your text on the canvas.
- Apply Stroke. Right-click the text layer in the Layers panel and choose "Blending Options." Then check the "Stroke" option and customize the stroke settings (size, position, color).
- Make Fill Transparent. In the same Layer Styles dialog, set "Fill Opacity" to 0%.
How to make text with no fill in Photoshop?
Creating empty text involves making it transparent while retaining its outline.
- Add Text. Use the Type Tool (T) to open your text on the canvas.
- Apply Stroke. Right-click the text layer in the Layers Panel, select "Blending Options," and check "Stroke. Then customize the stroke settings (size, position, color).
- Remove the Fill. In the same Style dialog, set "Fill Opacity" to 0%.
How to clear text in Photoshop?
Creating text with no fill in Photoshop involves making the text transparent while retaining its outline.
- Open Photoshop and Create a New Document. Open Photoshop and create a new document (File > New).
- Add Text. Select the Text Tool (T) from the toolbar and type your text.
- Add Stroke to the Text. Double-click the text layer in the Layers Panel to open the Layer Style dialog box, check the Stroke option on the left side and adjust the stroke size and color as desired.
- Remove Fill. In the same Style dialog, set the Fill Opacity to 0%
- Apply and Save. Click OK to apply the changes. Save your file (File > Save As).
For removing unwanted objects from your images, you can use the Content-Aware Fill feature in Photoshop, which seamlessly blends the selected area with its surroundings.
Conclusion
In conclusion, learning how to make transparent text in Adobe has made all my projects stand out. I have used this technique for quite a while now and found it useful with many different design types.
And now, you have all the knowledge at your disposal. Experiment with all the settings and look through different digital cameras to find which ones works best for you.
For more tips, check out my Photoshop course and Lightroom Courses.
Good luck!
Read more about Photoshop:


