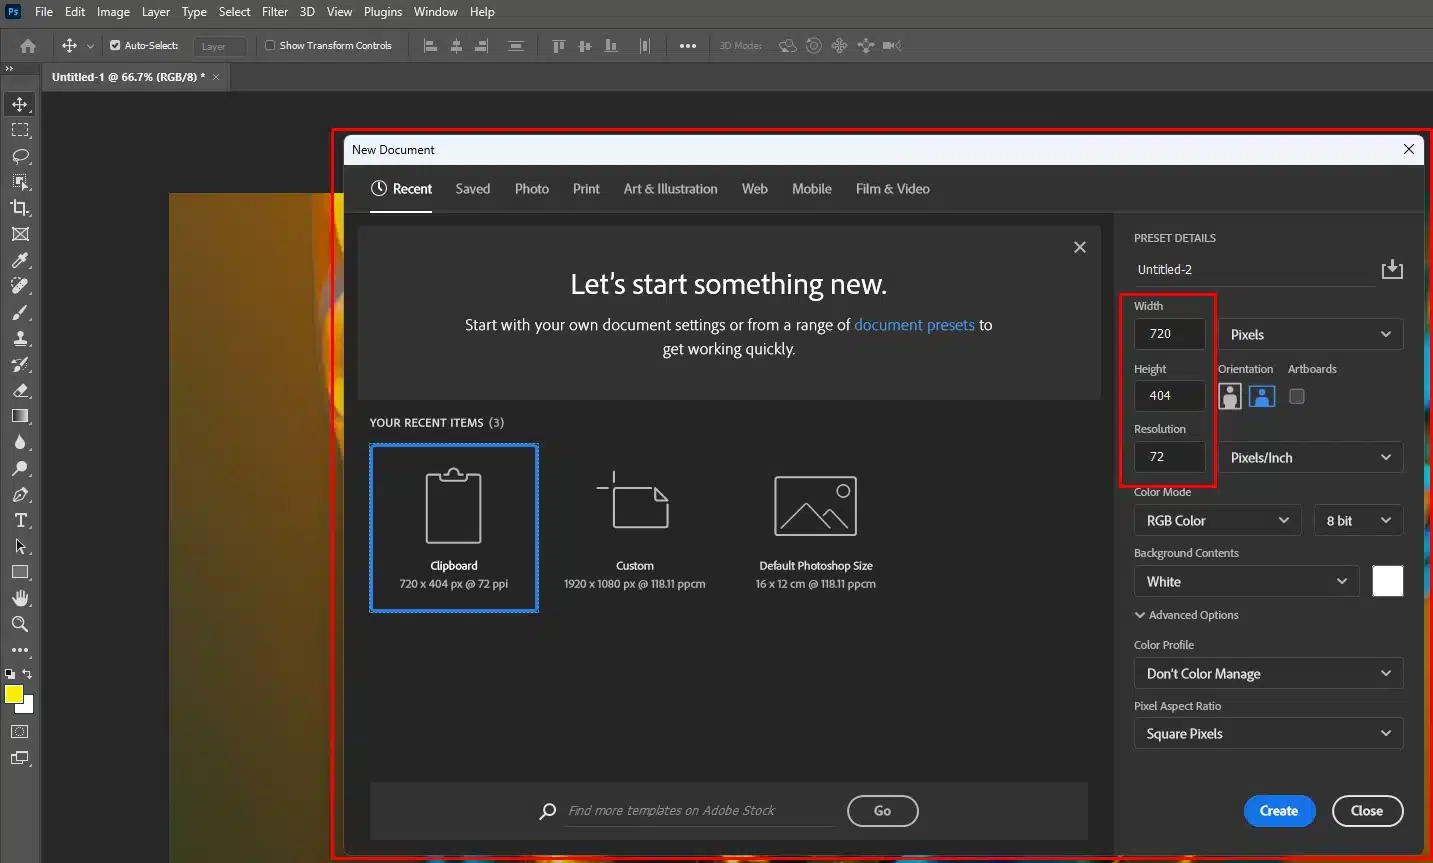
Pick a canvas size. Bigger canvases need more resources. Adjust as needed; resize later via Image > Canvas Size. If you need to crop or adjust the aspect ratio, you can use the Crop Tool in Photoshop for precise modifications.
Pro Tip: Name your layers clearly. Group similar ones together. It makes editing easier.
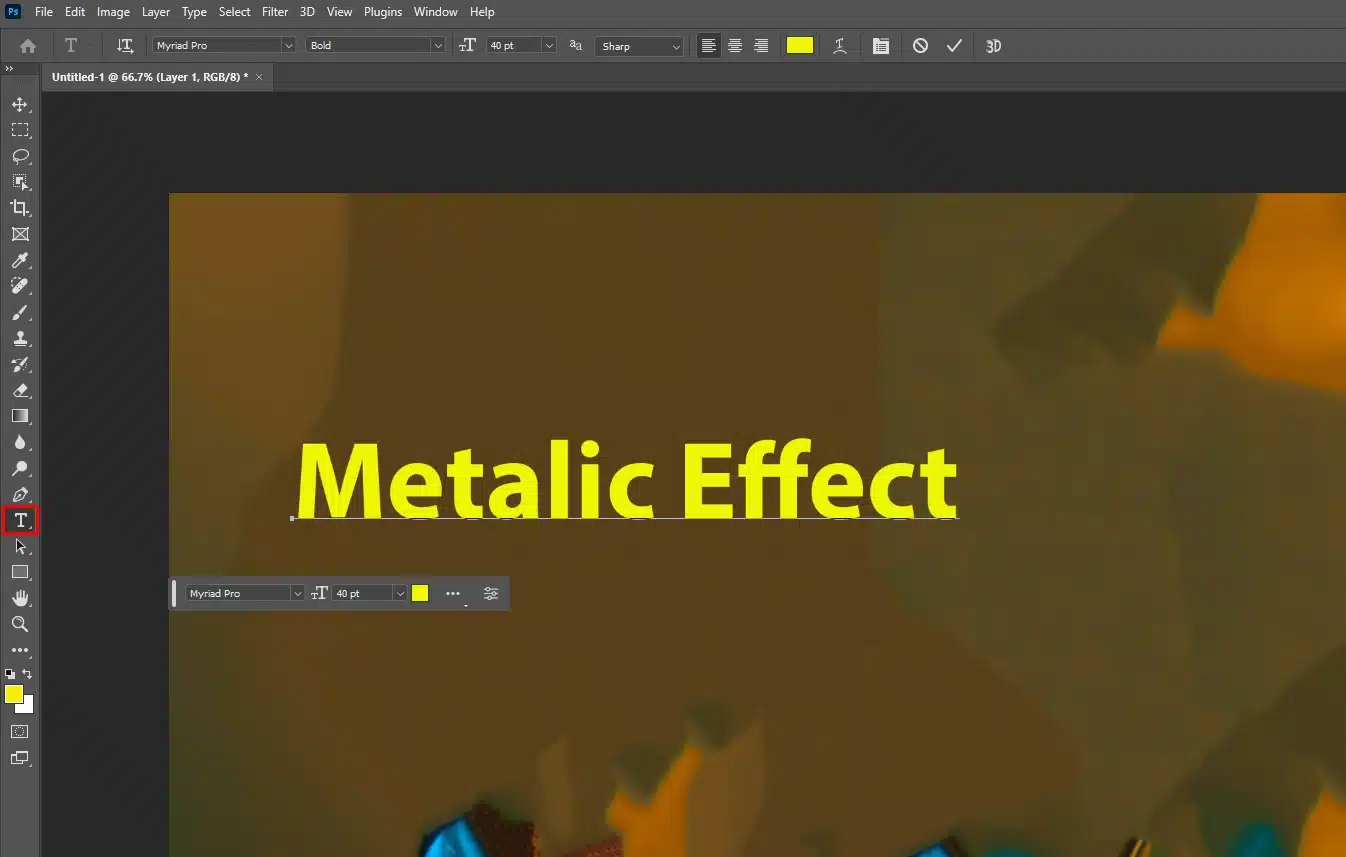
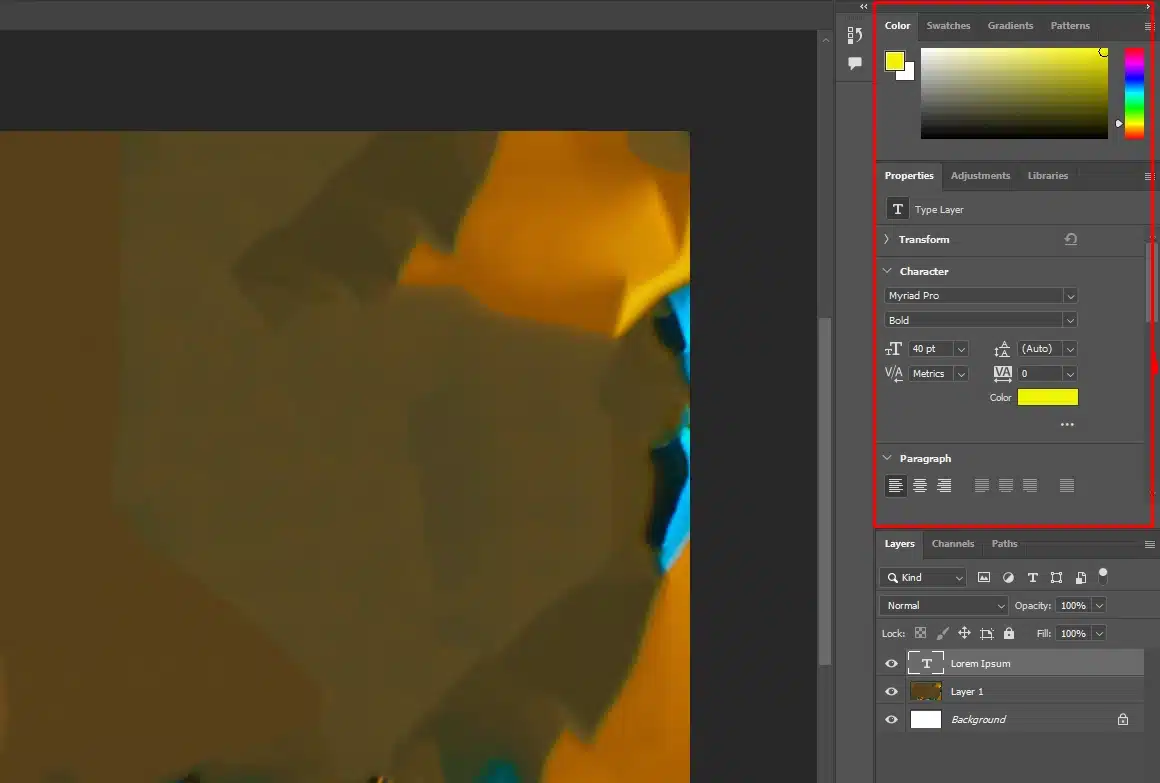
Once your Photoshop workspace is set up, the next step is to create your text layer. This involves selecting the Type Tool and adding text to your canvas.
The text layer is where you’ll begin crafting your design, choosing the right font, size, and style to match your vision.
Adding Text to Your Canvas
Select the TypeTool in Photoshop.
Click on the canvas to make a new text layer.
Type your text and adjust the font size.
Go to the LayersPanel to add effects like DropShadow or InnerShadow. You can also use the shape tool to enhance your text design.
Selecting the Right Font
Choosing a font matters for impact.
Open the character panel to see different fonts.
Bold fonts work well for metal texture
Try different blend modes for unique looks.
Experiment with different blending modes in Photoshop to achieve creative results.
Pro Tip: Make your text pop with a bevel and emboss effect.
Applying Layer Styles For Metallic Text Photoshop
In Photoshop, mastering layer style opens up a world of design possibilities.
This guide covers three vital aspects: accessing new layer style, using bevel and emboss, and adding a gradient overlay.
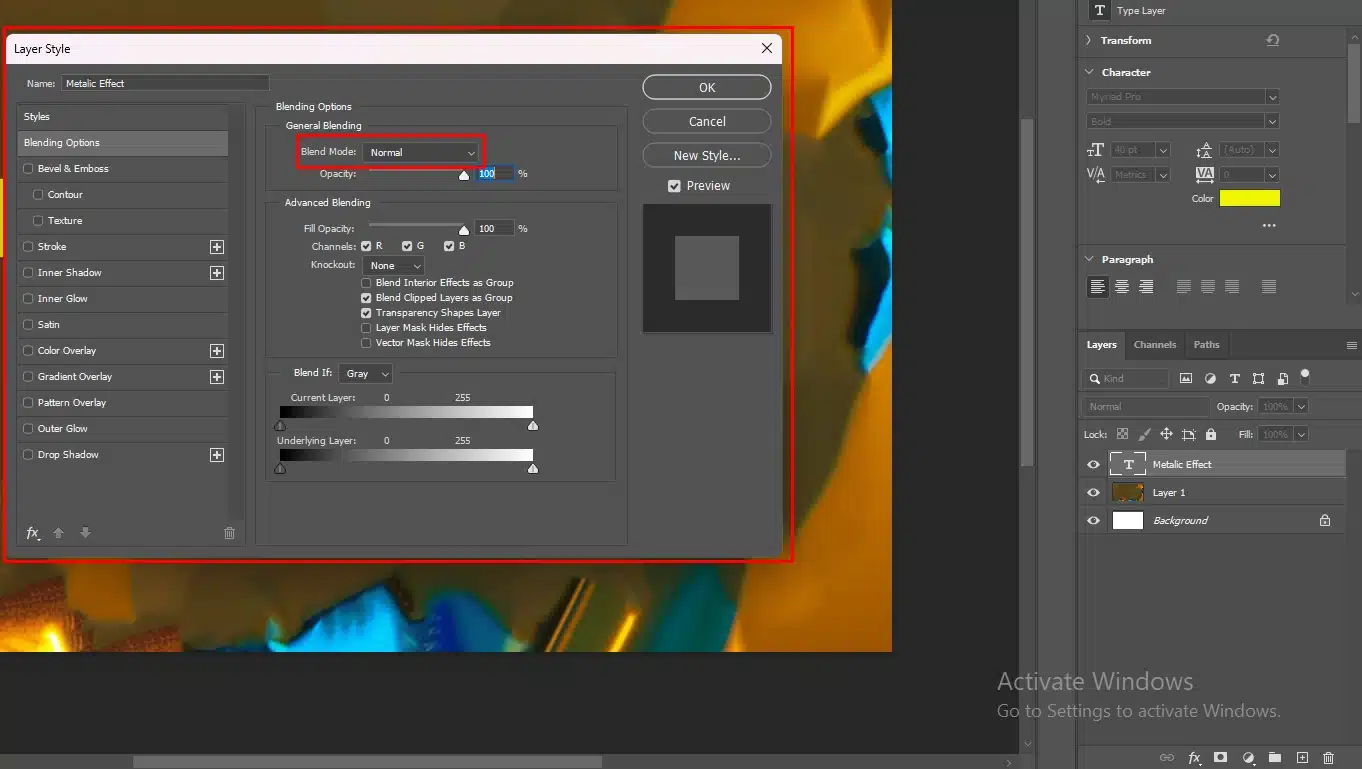
Accessing Layer Style
To apply a new layer style:
Locate your desired layer in the layers panel.
Double click the layer icon to open the new Layer Style dialog box.
Add effects like drop shadow or inner shadow with just a click.
Using Bevel and Emboss For Metallic Text Photoshop
For a metal texture effect:
Select bevel and emboss in the Layer Style dialog box.
Adjust settings like gloss contour and global light to achieve a shiny look.
This makes your text layers visually appealing.
Adding a Gradient Overlay to the Metallic Text
A gradient overlay can give your text more depth:
Select gradient overlay in the Layer Style dialog box.
Customize the gradient's colors and opacity according to your needs.
Use blend mode to further enhance the visual same effect.
Pro Tip: Use smart objects to apply layer styles non-destructively. It makes future edits easier!
For more advanced techniques, consider exploring Photoshop shortcuts to speed up your workflow and the content-aware fill feature for seamless edits.
Enhancing the Metallic Effect Photoshop
To truly make your metallic text shine and stand out, you need to go beyond the basics.
This section covers advanced techniques for refining the metallic look, including adjusting blend modes, adding highlights and shadows, and utilizing tools like Free Transform.
By fine-tuning these elements, you can achieve a more realistic and eye-catching metallic effect that adds depth and sophistication to your design.
Adjusting the Blend Mode
First, pick your text layer and go to the layers panel. Try blend modes like ‘Overlay’ ‘Soft Light‘ or ‘Color Burn’ Each gives a different shine.
Play around and see what you like! For more advanced effects, consider using blending modes in Photoshop to achieve the perfect metal effect.
Adding Highlights and Shadows
Add highlights and shadows to make the text pop. Double-click the layer icon to open Layer Style. Add an inner glow or shadow for depth.
Adjust the global light for realistic lighting. If you’re looking to refine your highlights and shadows further, using the Dodge and Burn tools in Photoshop can help you achieve a better metallic text in Photoshop.
Using Free transform tool
To resize and rotate your text, use the Free Transform tool in Photoshop.
Final Touches
As you near the completion of your metallictext design, it’s time for the final touches. This stage focuses on making those last adjustments that can elevate your project to perfection.
Refining the Metallic Effect Photoshop
Try different blend mode like ‘Overlay’ or ‘Color Burn’ for your metal text in Photoshop. Blending modes can significantly enhance the metallic effect, making it look more realistic.
Add inner glow or drop shadow for depth. These effects can help create a more three-dimensional appearance.
Use dodge and burnfeatures to refine highlights and shadows. These tools are essential in Photoshop for adding intricate details and enhancing the metallic text Photoshop.
Pro Tip: Use smart objects for easy future edits. Smart objects allow you to make non-destructive changes, which is particularly useful for complex designs.
Tips and Tricks for Better Results
To achieve the best results with your metallic text design, it’s helpful to incorporate some extra tips and tricks.
This section provides practical advice and creative suggestions to enhance your design process.
Whether it’s experimenting with different fonts, using custom gradients, or applying additional effects, these insights can make a significant difference in the final outcome.
Experimenting with Different Fonts
Choosing the right font impacts your design. Open Photoshop and create a new document.
Try different fonts to see how each one changes the look of your metal text.
Adjust settings like size and alignment inside the text box. Simple changes create a significant new style.
Using Custom Gradients
Gradients add depth to your background layer. Select your text layer and double-click to open the layer style. Apply a gradient overlay.
Customize colors to improve the metal effect. Experiment with different blend mode for various looks. Use the color overlay option for extra enhancement.
Pro Tip: To add depth, apply an inner bevel and outer glow. It makes your metal text stand out and look more realistic.
Additional Tips in Metallic Text
If you’re looking to refine your designs further, consider using the Content-Aware Fill in Photoshop to seamlessly remove unwanted elements from your images.
To enhance your metallic text, consider using the warp text feature for a dynamic effect. Warp text helps mold your metallic text into unique shapes, adding depth and creativity.
Additionally, mastering Photoshop Shortcuts can significantly speed up your workflow and enhance productivity.
Common Photo Editing Mistakes to Avoid
As you work on perfecting your designs, it’s important to be aware of common mistakes that can undermine your efforts.
This table highlights frequent mistakes that many editors make and provides straightforward advice on how to correct them.
Mistake
What to Avoid
Better Approach
Overusing Layer Styles
Using too many effects like shadows and glows
Apply one or two styles for a clean, polished look
Ignoring Blend Modes
Not experimenting with blend modes for layer interactions
Test different blend modes to achieve desired effects
Neglecting Lightroom Shortcuts
Failing to use shortcuts for efficiency
Learn and use shortcuts to speed up your editing process
Forgetting Content-Aware Fill
Missing out on removing unwanted elements
Use Content-Aware Fill for seamless edits
Overusing Layer Styles
Layer styles are fantastic for adding depth and effects to your designs, but it’s easy to go overboard.
Using too many background layer styles can make your design look cluttered and overwhelming.
To avoid this, start with one or two styles and see if they achieve the desired effect.
Remember, simplicity often creates a more polished and professional look.
Pro Tip: Duplicate a background layer to compare different style choices without losing your original work. This way, you can easily revert or adjust as needed.
Ignoring the Blend Mode
Blend modes in Photoshop control how layers interact with each other, dramatically affecting the final image.
Commonly used modes like Overlay, Multiply, and Screen can significantly alter the appearance of your project.
Experiment with different blend modes to find the perfect balance for your design. Don’t be afraid to try multiple settings until you get the look you want.
Pro Tip: Use a new layer for each major change. This approach allows you to tweak or remove adjustments without affecting the rest of your work.
Neglecting Lightroom Shortcuts
Lightroom shortcuts are designed to make your editing process faster and more efficient.
Familiarizing yourself with these shortcuts can save you a significant amount of time.
Essential tools in Lightroom, such as the Crop Tool and Adjustment Brush, have dedicated shortcuts that can streamline your workflow.
Pro Tip: Customize your shortcuts for frequently used actions to tailor your workflow to your specific needs.
This can enhance your productivity and make your editing sessions smoother.
Forgetting to Use Content-Aware Fill in Photoshop
Content-Aware Fill is an incredibly powerful feature in Photoshop that allows you to seamlessly remove unwanted elements from your photos.
Whether it’s an object in the background or a blemish on a portrait, Content-Aware Fill can handle it with ease.
Don’t forget to utilize this tool when you need a clean and polished edit.
Pro Tip: Use the Patch Tool in Photoshop for more precise control when removing objects.
This tool allows you to select the area you want to remove and replace it with a better-suited part of the image, ensuring a flawless edit.
By avoiding these common mistakes, you can significantly improve the quality of your photo edits and create more professional and polished images.
Keep these tips in mind as you work, and you’ll find your editing process becoming more efficient and effective.
Frequently Asked Questions
How to Make Text Metallic in Photoshop?
Step-by-step how to add metallic text:
Open your Photoshop project and select the Text Tool to type your desired text.
Right-click the text layer in the Layers panel and choose 'Blending Options.'
Go to 'Bevel & Emboss' and select 'Chisel Hard' under the Style options.
Adjust the Depth and Size to suit your taste for a metallic look.
Click on the 'Gloss Contour' and choose a contour that enhances the metallic effect.
Apply a gradient overlay by selecting 'Gradient Overlay' in the Blending Options. Choose a metallic gradient or create your own.
Click 'OK' to apply the changes.
How to Make Text Shiny in Photoshop?
Making the text shiny by following this steps:
Start by creating a new text layer in your Photoshop project.
Access the 'Blending Options' by right-clicking the text layer in the Layers panel.
Select 'Bevel & Emboss' and then choose 'Smooth' from the Style dropdown.
Adjust the settings for Depth and Size to get a subtle or pronounced shine effect.
Increase the 'Highlight Mode' opacity and choose a bright color to enhance the shine.
Add a 'Satin' effect from the list and adjust the settings for a glossy finish.
Finalize your shiny text by clicking 'OK.'
How Do You Make Metallic Gold Font in Photoshop?
Gold font in photoshop step-by-step:
Create your text using the Text Tool in a new Photoshop file.
Open 'Blending Options' for the text layer by right-clicking it in the Layers panel.
Select 'Gradient Overlay' and then click on the gradient bar to edit the colors.
Create a gradient with shades of gold; start with a darker gold color on one end and a lighter gold towards the other end.
Adjust the Angle and Scale to fit the text appropriately.
Enhance the metallic feel by adding 'Bevel & Emboss.' Choose 'Chisel Hard' and adjust Depth and Size.
Click 'OK' to see your golden metal text.
How Do I Add Metallic Effects To an Image in Photoshop?
Adding Metallic Effects :
Open the image you want to edit in Photoshop.
Duplicate the layer by right-clicking the original layer in the Layers panel and selecting 'Duplicate Layer.'
With the new layer selected, go to 'Filter' then 'Noise' and choose 'Add Noise.' Adjust the amount to around 10% to 15%.
Apply a 'Gaussian Blur' from the 'Filter' menu to soften the noise.
Change the blending mode of the layer to 'Overlay' or another that provides a metallic look.
Adjust the layer opacity to get the desired metallic intensity.
If needed, add a 'Hue/Saturation' adjustment layer to tweak the color overlay to make it look more metallic.
Creating a stunning metallic text Photoshop effect can really elevate your designs.
From setting up your workspace to applying layer styles and using the warp text feature, every step helps make your text look more realistic and impressive.
I’ve found that experimenting with different techniques, like adjusting blend modes and adding highlights, can make a big difference.
$2,061.00Original price was: $2,061.00.$1,061.00Current price is: $1,061.00. 27585
Download Your Free Guide Now!
Discover the secrets of photography with our printable guide! Master essential techniques like aperture, shutter speed, and ISO to create stunning images. Get your free printable PDF now and start turning your snapshots into masterpieces!