
Have you ever wondered how the shape tool can transform your digital artwork or design projects?
This incredibly versatile tool is not just a staple in our graphic design arsenal for anyone looking to draw a shape with clean, precise lines and perfect geometric forms; it’s practically a magic wand for anyone looking to create clean, precise lines and perfect geometric forms.
Whether you’re a budding artist or an experienced designer, mastering the shape tool can help elevate your projects to new heights of creativity and professionalism.
Let’s dive into how this simple yet powerful feature can make a big difference in your work.
Table of Contents
Resizing Images with the Shape Tool in Photoshop
Using the shape tool in Photoshop offers a versatile and precise method for resizing images. This functionality is essential for designers aiming to maintain resolution quality while modifying image dimensions.
Step-by-Step Guide to Resizing Images
First, let’s dive into how you can effectively draw a shape using the shape tools to resize your graphics:
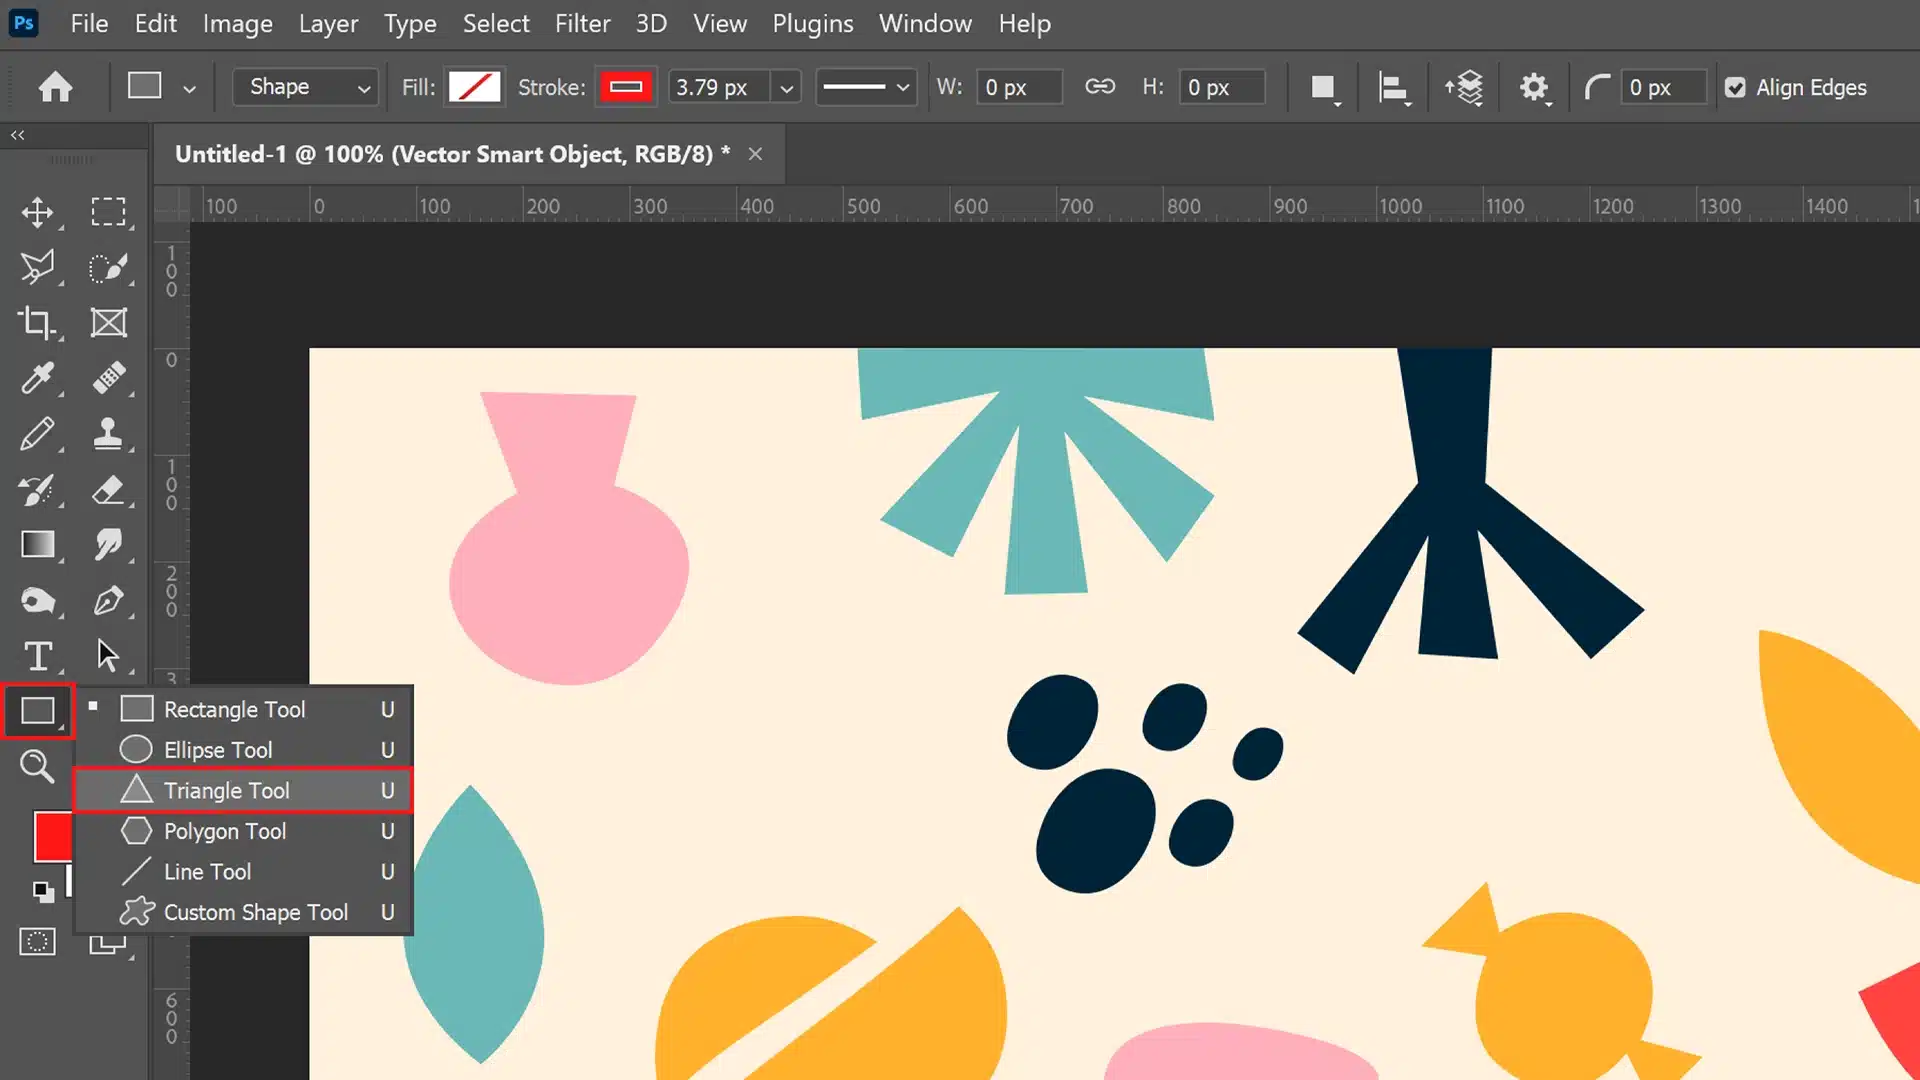
- Select the Shape Tool: Choose the appropriate shape tool from the toolbar. If you need a specific form like a rectangle shape or a polygon shape, select it directly or choose from the custom shapes available.
- Create or Select Your Shape Layer: If you are working on a new project, draw your desired shape using tools like the polygon tool or line tool. For existing images, simply select the shape layer where your specific design element is located.
- Access Transform Controls: Press Ctrl+T (Cmd+T for Mac) to activate transform controls, which enable resizing. The bounding box will appear around your selected shape.
- Resize Using Handles: Click and drag the handles of the bounding box to resize your shape. Hold down the Shift key to maintain the aspect ratio.
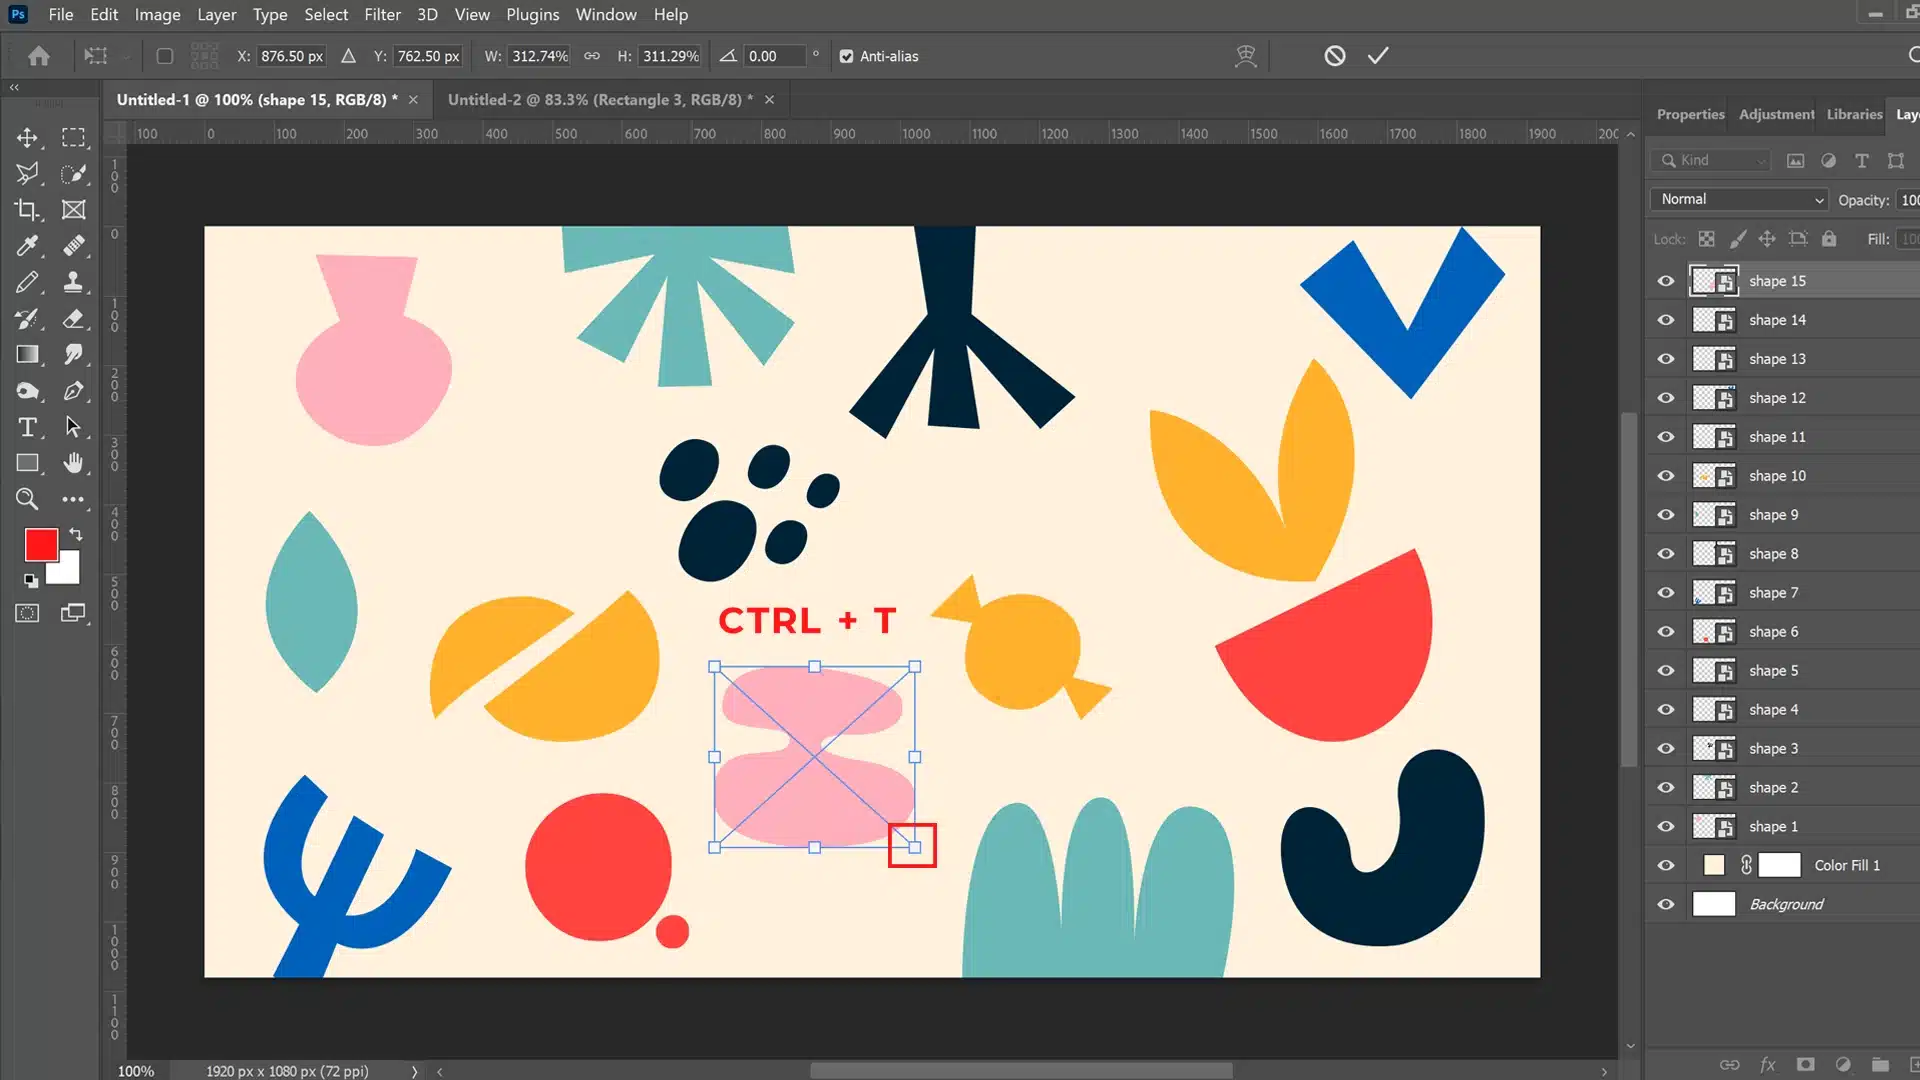
Remember, if specific proportions are needed, input values directly into the options bar, particularly in fields under “Width” and “Height.”
Common Issues and Solutions in Image Resizing
Resizing images can present certain challenges, but here’s how to effectively address them:
- Loss of Quality: When enlarging images too much, pixelation may occur. To prevent this, ensure that a high-resolution source file is always used when possible or use vector-based shapes created by tools like the line tool or custom shape tool.
- Aspect Ratio Distortion: Incorrect handling might distort your image proportions significantly. Always use transformation controls properly hold down that useful Shift key as you adjust!
By understanding features such as fill and stroke options, activating snapping via view settings, or creating linked layers for complex compositions using multiple shapes. You’ll streamline every resizing task efficiently while preserving aesthetic appeal.
How to Finish a Job Using the Shape Tool in Photoshop
Finishing a project in Photoshop and learning to draw a shape using various shape tools can transform your creative ideas into polished, professional artwork.
Whether you’re utilizing the rectangle shape, polygon tool, or even crafting your own custom shapes, understanding how to properly save and revise your design ensures top-notch results.
Saving and Exporting Final Designs
- Go to 'File' and select 'Save As'. Choose the PSD format to preserve layers for future edits.
- To export for web or print, go back to 'File,' select ‘Export,’ and click on 'Export As' to choose from PNG, JPEG, or other formats, depending on your needs.
- Ensure that all fill and stroke options align with your design requirements during this final step.
Expert Tip: Always save a backup version of your PSD file before starting the exporting process. This action prevents any loss of hard work due to unexpected software issues.
Quality Checks and Revisions
Before finalizing your graphic:
- Review each shape outline and ensure that all bounding boxes are perfectly aligned.
- Use the line tool on your shape layer if you need clean, straight lines, ensuring the modifications are precise.
- Utilize the zoom feature to inspect small details within complex custom shapes like new custom shapes or distinct star shapes.
If adjustments are needed:
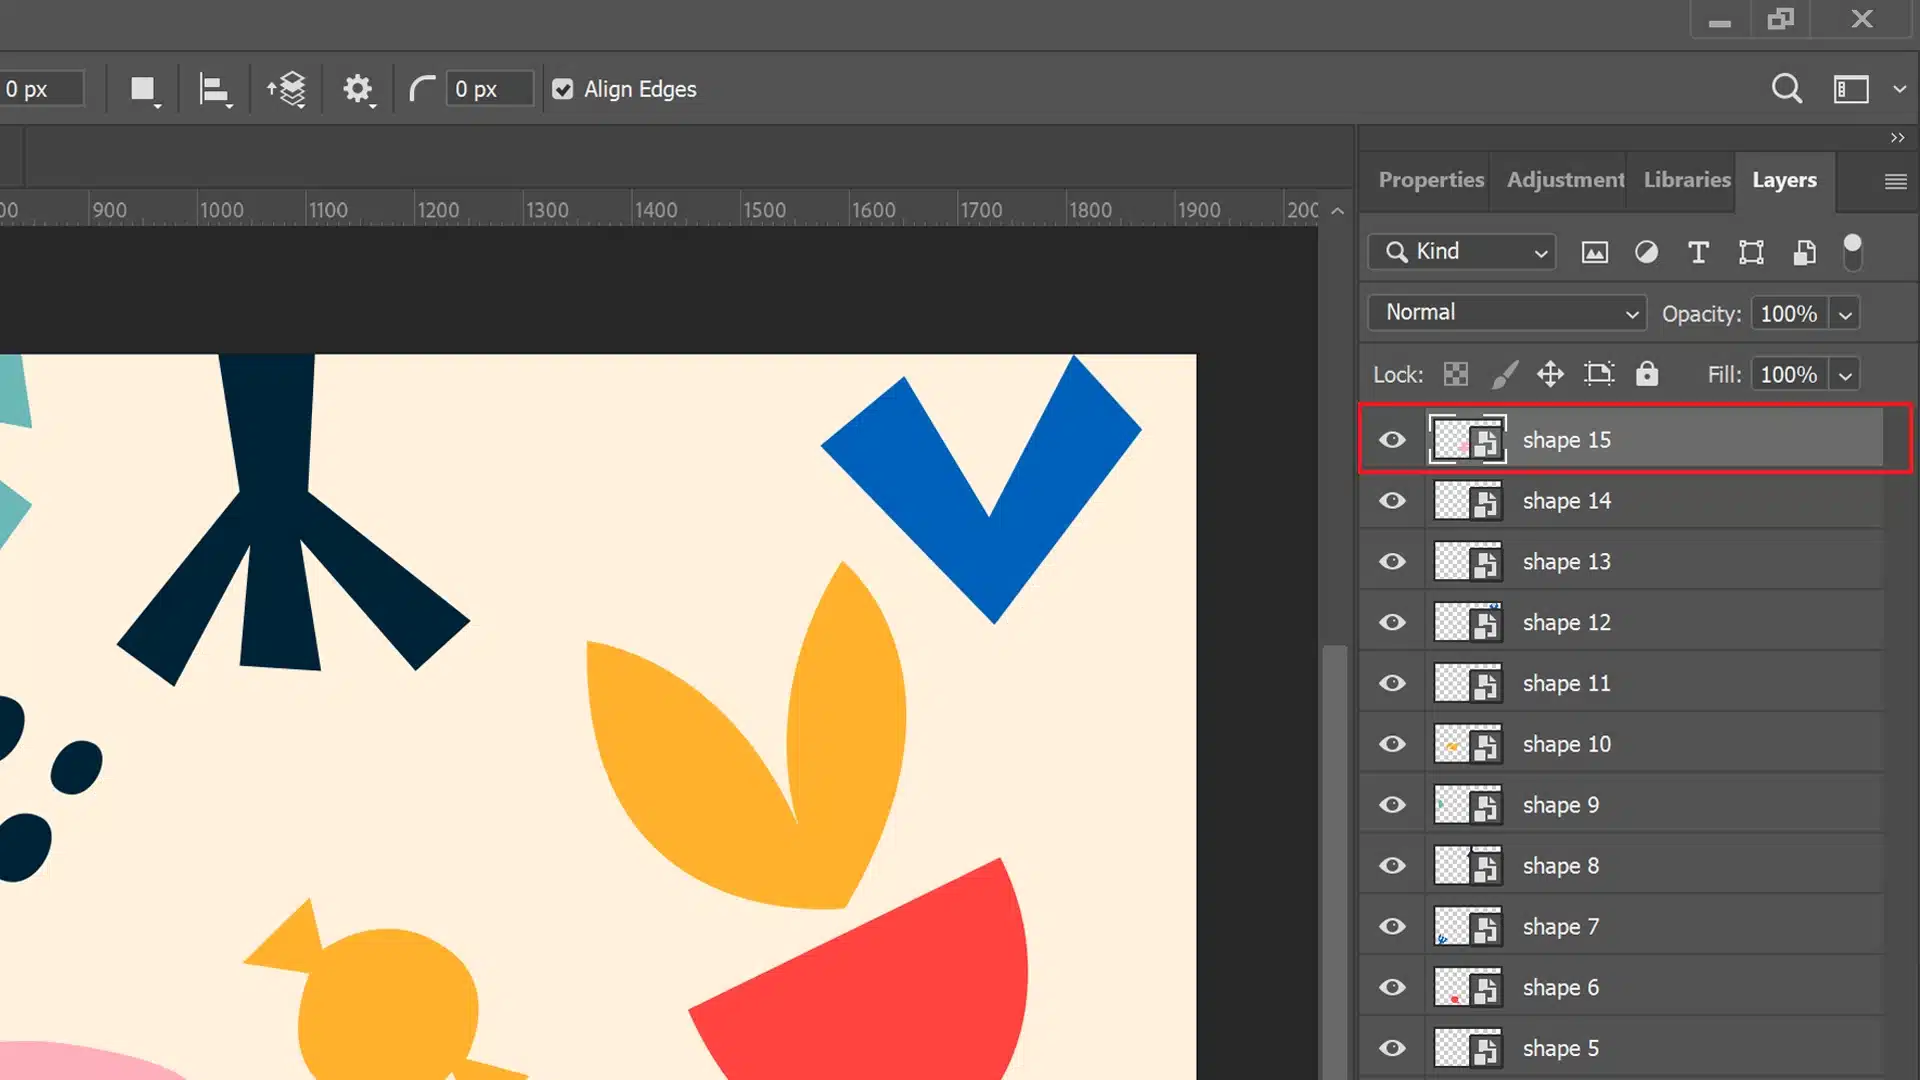
1. Select the specific shape layer from the Layers panel where the shape appears.
2. Use tools like the direct selection tool (white arrow) or pathfinder options by clicking right on shape layers for modifications.
By conducting these final quality checks, any necessary revisions can be identified swiftly, ensuring that every element of your design whether they are basic shapes, overlapping shapes, or intricate vector shapes is flawless for delivery.
Pro Tip: Check out Lightroom’s selection tools for an even better understanding of the process.
Creating Custom Shapes in Photoshop
Creating custom shapes in Photoshop offers limitless possibilities for graphic designers, digital artists, and anyone looking to enhance their visual projects.
With the use of various shape tools and leveraging Adobe’s library, you can transform simple ideas into intricate designs.
Designing Shapes from Scratch
Starting with the basics ensures a strong foundation for advanced creativity. Photoshop’s shape tool options include the Rectangle Tool, Ellipse Tool, Polygon Tool, and more. Each one provides unique customization features to craft nearly any shape you need.
To draw a shape from scratch:
1. Select the shape tool of your choice from the toolbar and start to draw a shape.
2. Click and drag on the canvas to define the shape’s size and orientation.
3. Use the options bar to customize properties like color, stroke thickness, and fill.
Remember, using the Shift key while drawing maintains proportions, ensuring perfect circles or squares. More complex creations can be made by adding multiple shape layers; each new shape layer can then be transformed independently without affecting others.
By adjusting fill and stroke options, as well as experimenting with opacity and blending modes, your custom creation begins to take life.
Using Predefined Shape Libraries
For those who prefer a quicker workflow or need inspiration, Photoshop also includes pre-made libraries stocked with a variety of ready-to-use custom shapes. From basic geometric figures like triangles and circles to more complex icons, begin to draw a shape quickly and efficiently.
Accessing these assets is straightforward:
- Select the Custom Shape Tool from the toolbar ( hidden under Rectangle or other shape tools ).
- In the Options bar at the top of the screen where "Custom Shape Picker" appears,
- Scroll through different categories to find your desired figure
Each vector-based asset within these libraries is fully scalable without loss of quality invaluable for projects that need resizing across different platforms like web devices.
Overall, whether opting to forge a completely new design using powerful editing features found within Photoshop’s toolkit or select a subject from a preexisting batch of options.
Manipulating Shape Layers for Complex Designs

In digital design, mastering the manipulation of shape layers is crucial for building intricate and visually compelling graphics.
Whether you are working in Adobe Photoshop or another graphic software, understanding how to effectively manage and style these layers can elevate your design work.
If you want to learn more about which software fits you best, you can check our in-depth guide about Photoshop vs Lightroom.
Layer Management Techniques
Proper layer management begins with a well-organized workspace that allows for easier edits and adjustments. One effective technique involves harnessing the power of the shape tool, offering multiple shape tool options, such as the rectangle shape, polygon shape tool, or even more specialized forms like a star shape.
- Start by creating a new shape layer as you draw a shape for each unique element in your design, allowing for distinct manipulation and styling of each shape.
- Utilize groups to maintain organization among related shapes.
- Regularly rename layers to reflect their purpose, helping you and any collaborators avoid confusion.
For dynamic compositions, make use of the overlapping shapes technique, where different elements underlie one another to create depth.
Remember to play around with the stacking order using shortcuts or options within your toolkit.
Layers tagged clearly the names could vary from Background for primary shapes to for intricate additions help streamline this process dramatically.
Advanced Layer Styling Tips
Beyond basic management, advanced styling is about pushing boundaries creatively while maintaining quality aesthetics and efficiency, from shadow effects with a custom shape brush to vibrant gradients using fill and stroke options on any canvas size.
Exploit the custom shapes available or create your new custom shapes with tools such as the custom shape picker, which offers a myriad of possibilities right at your fingertips:
- Leverage advanced blending modes for sophisticated visual effects, which range from subtle texture overlays using light blend modes to dramatic color shifts with contrast-heavy settings.
- Experimenting with opacity settings can yield subtle textural contrasts within a single layer.
- Use strokes or outlines (employing tools like the line tool or shaping commands) on vector designs for crisp, sharp edges that stand out against blurred backgrounds.
Integrating the Shape Tool with Other Photoshop Features
Combining Shapes and Text
When blending textual content with graphics, using the Shape Tools proves instrumental. Start by creating a new shape using either the Rectangle Shape or the more intricate Custom Shape Tool.
Once your desired shape layer is properly configured on your canvas:
1. Select the Text Tool.
2. Click on the path of the created shape, which will automatically align your text with the shape outline.
3. Adjust text properties such as font size and kerning for optimal alignment and aesthetics.
This method doesn’t just preserve visual integrity but also keeps your layers uncluttered is a crucial consideration in intricate projects involving multiple elements.
Layer Masks and Shape Interaction
Layer masks offer a powerful means to blend and control visibility between different elements in your composition, particularly with shapes.
To effectively use layer masks with shapes:
- Ensure you have an established base layer; this might be a filled shape layer, for example.
- Add a new shape that overlaps or interacts with your base using tools like the Polygon Tool or a tailored Star Shape from the Custom Shape Picker.
- Apply a layer mask to this top shape, ensuring it's selected in the Layers Panel.
- With a soft brush or gradient tool, paint on the mask where you want to blend or hide parts of this top shape, enhancing depth and dimensionality within your artwork.
These techniques allow an artist to experiment dynamically with form and opacity, offering nuanced control over how two or more shapes interact visually on canvas will be perfect for creating standout digital artistry.
Optimizing Your Workflow with Custom Shape Tool Shortcuts
Using shape tool shortcuts can significantly enhance your efficiency while working on graphic projects. By mastering these quick key commands, you can reduce the time it takes to create and manipulate shapes in your digital art software, allowing for a smoother creative process.
Essential Keyboard Shortcuts
Understanding the essential keyboard shortcuts for the shape tool can dramatically speed up your design process when you draw a shape. Here are some crucial ones:
- Rectangle Tool: Press 'U' to switch quickly between shape tools, and use 'Shift+U' to cycle through rectangle, rounded rectangle, ellipse, polygon, and line tools.
- Custom Shape Tool: Access this tool by pressing 'U' until it toggles.
- Bring Forward/Backward: Use Command + [ or ] (Mac) or Ctrl + [ or ] (PC) to move the currently selected shape layer up or down one level.
Customizing Toolbars for Efficiency
To further enhance workflow efficiency, customizing your toolbar to suit your graphic design needs is paramount. Adobe applications allow you to modify and save toolbar setups per project basis ensuring that the most used tools like the shape tools, and specifically tools like the polygon shape tool or line tool, are readily available.
Follow these steps:
1. Right-click on the toolbar area and select ‘Edit Toolbar…’.
2. Drag and drop your frequently used tools like the star shape, rectangle shape, or any other specific shape tool options into the toolbar.
3. Save this setup by clicking “Done,” which lets you swiftly return them during any phase of work.
By adjusting your software setup based on project requirements, you can make each selection, from creating a new polygon shape to outlining with a custom shape.
Thus integrating effective keyboard shortcuts and customizing your toolbar setup will lead not only to improved productivity but also increased creative satisfaction.
Color Management in Shape Design

Applying Color Theories in Shape Tool Usage
Utilizing color theories is fundamental when using various shape tools to create compelling design elements. By integrating color principles, you can ensure coherence and vibrancy in your designs.
- Complementary Colors: Utilize the shape tool options to set complementary colors within your design, boosting contrast and visibility.
- Analogous Scheme: For a more harmonious design, select adjacent colors on the color wheel while creating a new shape, which results in natural and cohesive visuals.
Color Palettes and Theme Consistency
Ensuring consistency in your color palettes across various designs strengthens brand identity and reinforces thematic depth.
- Brand Alignment: Use consistent colors across all design elements by applying preset palettes on every new custom shape layer you introduce, ensuring uniformity and coherence in your design work.
- Mood Setting: Choose your palette based on the mood or tone you want to convey with each individual shape layer.
| Design Element | Color Strategy |
|---|---|
| Logo | Brand-specific hues |
| Background | Neutral tones |
| Focus Shapes | Bold accent colors |
Employing these techniques ensures every piece has its place within a broader aesthetic framework, making your creations not just distinctive but memorable.
Utilizing Vector Shapes for Scalable Graphics
Benefits of Vector Over Raster
- Scalability: Unlike raster images that pixelate when scaled up, vector graphics retain crispness because they are based on mathematical equations rather than fixed pixels.
- Editability: Vectors are easier to edit; each shape tool maintains its properties and can be adjusted without loss of quality.
- File Size: Generally smaller in size compared to raster images, especially beneficial for web use where speed and bandwidth are considerations.
When utilizing tools such as the custom shape tool, designers achieve precise control over each vector-based shape layer, maintaining quality across various design applications. Each shape layer acts independently, allowing endless modifications without degrading the original image quality.
Converting Shapes to Vector Paths
Converting existing shapes into vector paths is an essential skill in digital design. This process enhances versatility, allowing detailed editing via points and curves. Here’s how to convert a drawn figure using Adobe software:
1. Select the shape using the shape tool options.
2. Right-click on the layer containing your shape (e.g., a rounded rectangle shape or a star shape) and choose ‘Convert to Path.’
3. Use the Direct Selection tool (white arrow) or Pen Tool to tweak the new path.
This conversion is particularly useful when dealing with complex designs where precision is paramount, like intricate logos or icons made from multiple layers of shapes.
As vectors maintain high-quality output across different scales from giant billboards right down to smartphone icons their utility in professional graphic design is unmatched. Employing these techniques ensures your creations are not only visually appealing but also versatile across various applications.
Creating Transparent Backgrounds with Shape Tool Options
Creating transparent backgrounds with shapes in graphic design software like Photoshop not only highlights your main elements but also provides a sophisticated layering effect that enhances the overall visual appeal. This technique is particularly valuable in designing logos, web graphics, and other marketing materials where clarity and aesthetics need to be balanced perfectly.
Techniques for Transparent Design Elements
When looking to integrate transparency using various shapes, mastering certain methodologies can significantly streamline your workflow and enhance the final product.
Utilizing Shape Layers:
Always initiate by creating a new shape layer for each shape involved in your design. This maintains organization and ease of editing later on. For a more complex design, you might add multiple shape layers, which help manage different elements efficiently without altering the originality of others.
Here is an example table summarizing techniques to overlay transparent designs using Adobe Photoshop:
| Issue | Solution |
|---|---|
| Color Bleed | Set the ‘Tolerance slider’ at lower numbers to preserve more border definition, ensuring original hues remain intact through multiple layers and merge seamlessly on the final canvas. |
| Inconsistent Brush Strokes | Practice applying the brush steadily and take time to allow the natural flow of the process to build up gradually, creating a grand and memorable display. |
| Unwanted Residuals post resize | Make adjustments to remove stray pixels on a clear canvas, reclaiming the pristine base for a magical creation journey. |
Animating Shapes in Photoshop for Dynamic Content
Animating shapes in Photoshop opens up endless possibilities for dynamic and engaging content. Whether you’re creating digital advertisements, website elements, or just adding motion to your graphics, using the timeline feature alongside various shape tool options can transform static images into lively animations.
Timeline Animation with Shapes
When you start with timeline animation in Photoshop, first ensure your document is set up correctly. To animate a shape layer, add a new shape, maybe a rounded rectangle shape or a sophisticated custom shape to your canvas. Here’s how you can do it:
1. Select the Shape Tool from the toolbar.
2. Choose your desired shape from the shape tool options, such as a star shape for more complex projects.
3. Draw a shape onto the canvas. As you adjust its size and position, observe how seamlessly these adjustments reflect in the timeline, enhancing the animation process.
Steps to animate:
1. Open the ‘Timeline‘ window under Window > Timeline.
2. Click ‘Create Frame Animation’ if it hasn’t already been selected.
3. With your shape layer selected, manipulate properties like position and opacity over time by setting keyframes.
To create movement, drag the end point of each property’s keyframe to your desired frame.
Remember to preview your animation regularly by pressing the spacebar; This allows you to watch how smoothly your shapes drawn flow throughout the sequence.
Exporting Animations for Web Use
After creating an eye-catching animation with shapes like a new sleek new custom shape like the rounded rectangle shape, exporting it effectively is crucial for web use.
Steps to export:
- Go to File > Export > Save for Web (Legacy).
- Choose GIF or HTML5 video based on where you plan to use your animation since both formats are commonly supported across browsers but have different strengths ( GIFs are simpler and typically load faster).
- Ensure that during export settings correct dimensions are set and reduce colors if necessary, which helps maintain a balance between quality and file size optimized for web usage without losing visual impact.
By leveraging Photoshop’s robust features, such as multiple layers of animated shapes, designers can produce striking visual narratives ready-to-use online which makes every frame count!
This high-level exploration of animating and exporting ensures that any piece becomes not only more engaging but also primed for practical application across various digital platforms.
Frequently Asked Questions

What is the shape tool?
The shape tool is a versatile feature in graphic design software, enabling users to create a wide range of geometric and custom shapes effortlessly. With options like the rectangle, ellipse, and custom shape tools, designers can craft complex designs and execute their creative visions with precision.
What tool is used to make shapes?
The shape tool is utilized within graphic design programs to make shapes. This includes specific variants such as the rectangle, ellipse, customized polygon, and line tools, allowing for the quick and efficient creation of both basic and complex shapes.
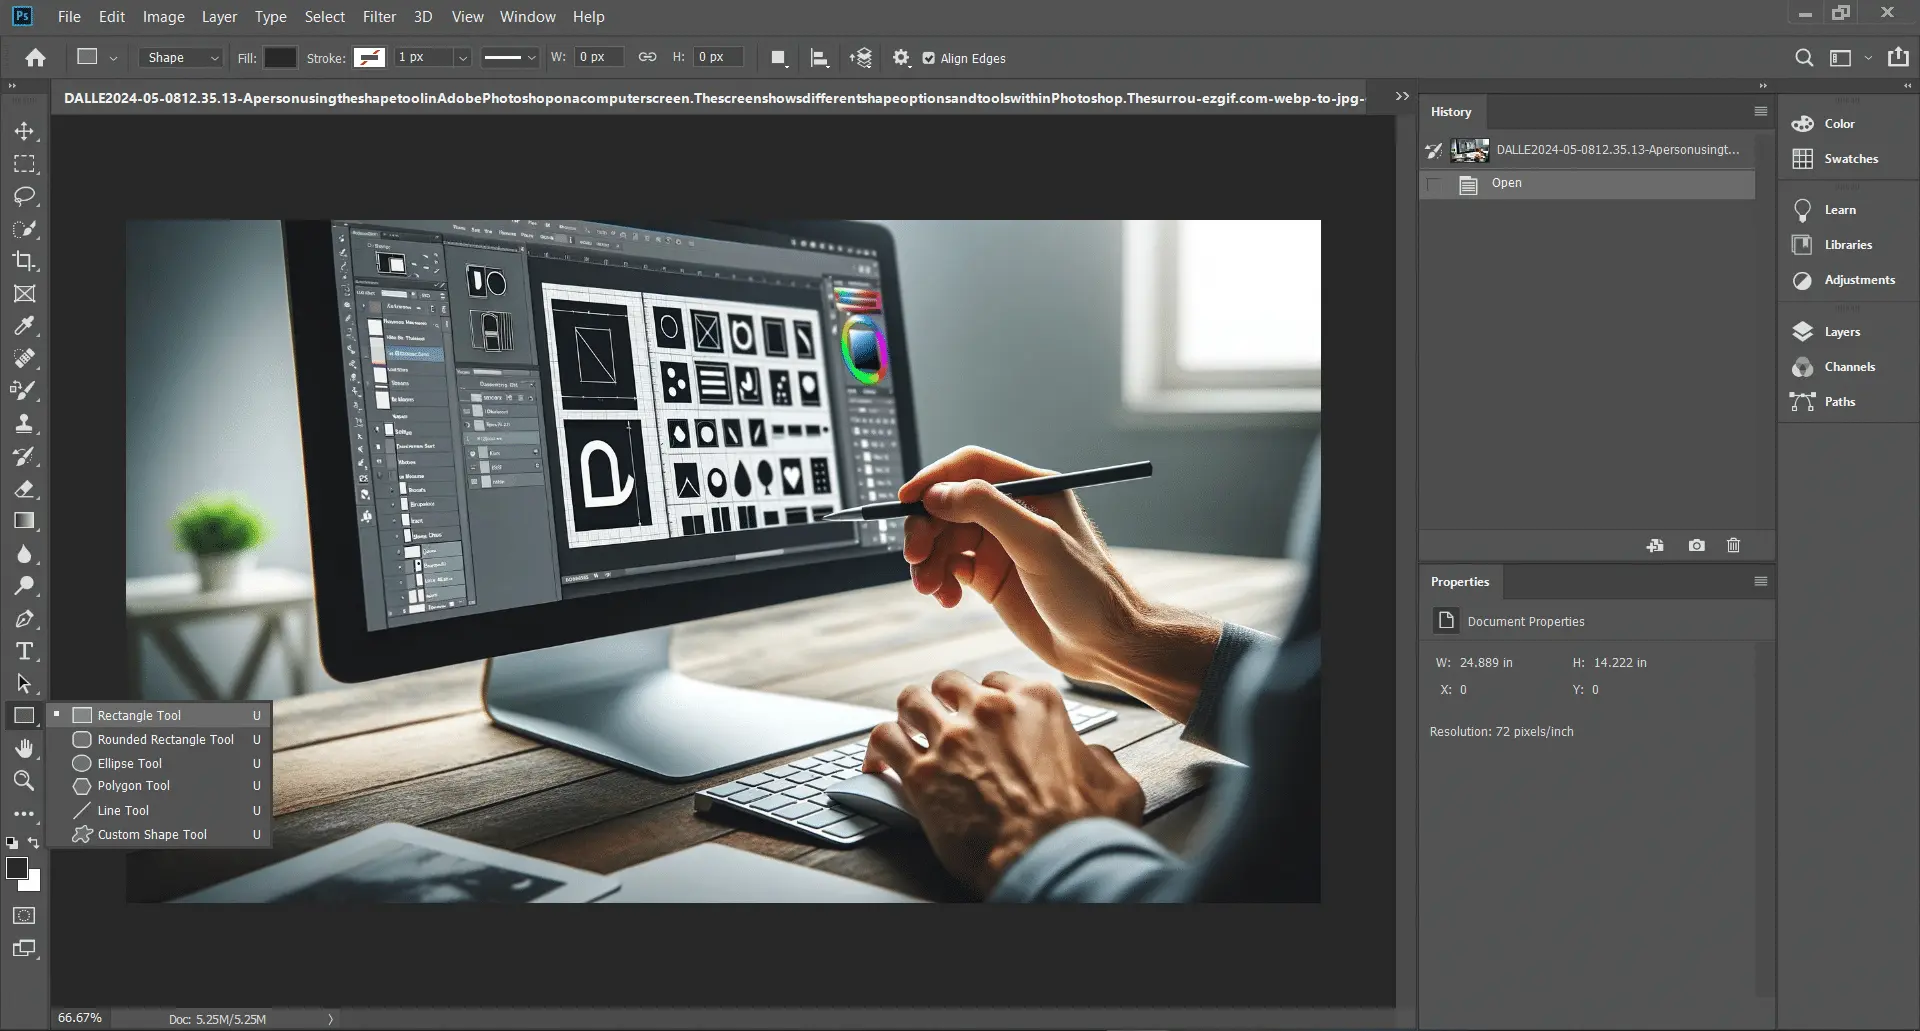
Where is the shape tool in Photoshop?
The shape tool in Photoshop is located in the tools panel on the left side of the interface. If it is not immediately visible, it might be nested under another tool like the Rectangle Tool.
You can access additional shape tools by clicking and holding the Rectangle Tool icon, which will reveal the other shape tool options. Alternatively, you can use the shortcut “U” to cycle through the different shape tools
Where is shape tool Photoshop?
The Shape Tool in Photoshop can be found in the Tools panel, usually located on the left side of the workspace. To access the Shape Tool, look for an icon that looks like a rectangle or another shape.
If you don’t see it directly, it might be hidden under the Rectangle Tool. To reveal it, click and hold the Rectangle Tool icon to bring up more shape tool options like the Ellipse Tool, Polygon Tool, Line Tool, and Custom Shape Tool

Conclusion
I’ve personally experienced the transformative power of the shape tool in Photoshop.
During a recent project, I used the custom shape tool to design a logo that perfectly captured a client’s vision.
This experience highlighted the tool’s versatility, allowing me to manipulate and combine shapes to create a unique and visually engaging design.
The ability to refine and adjust each element with such precision made the final outcome not only meet but exceed expectations.
If you’re inspired to elevate your design skills or want to explore the expansive capabilities of Photoshop and Lightroom, consider enrolling in our comprehensive courses.
Start your creative journey today and unlock your potential with our Photoshop Course and Lightroom Course
Read more about Photoshop:


- Scalability: Unlike raster images that pixelate when scaled up, vector graphics retain crispness because they are based on mathematical equations rather than fixed pixels.
- Editability: Vectors are easier to edit; each shape tool maintains its properties and can be adjusted without loss of quality.
- File Size: Generally smaller in size compared to raster images, especially beneficial for web use where speed and bandwidth are considerations.