| Technique |
Tool/Software |
Benefit |
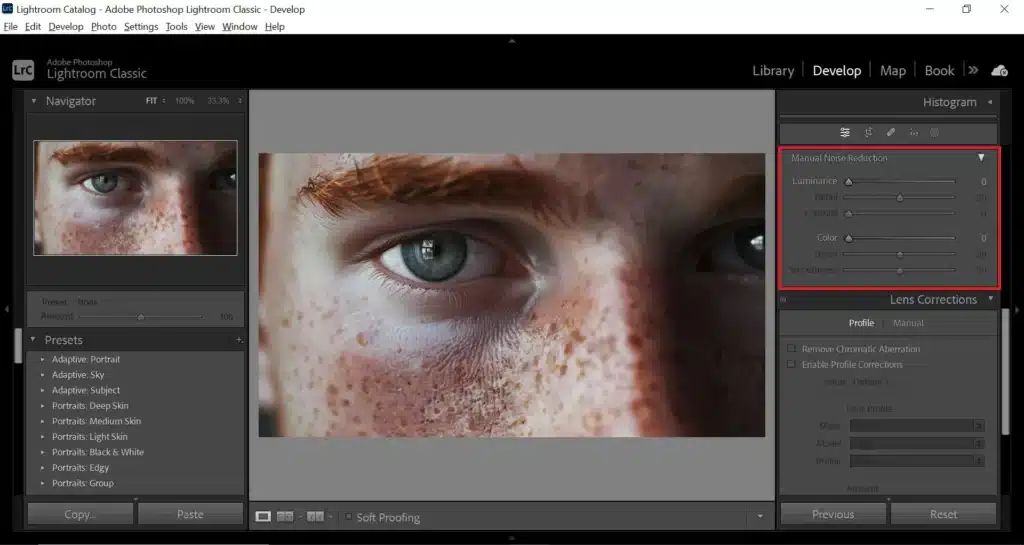
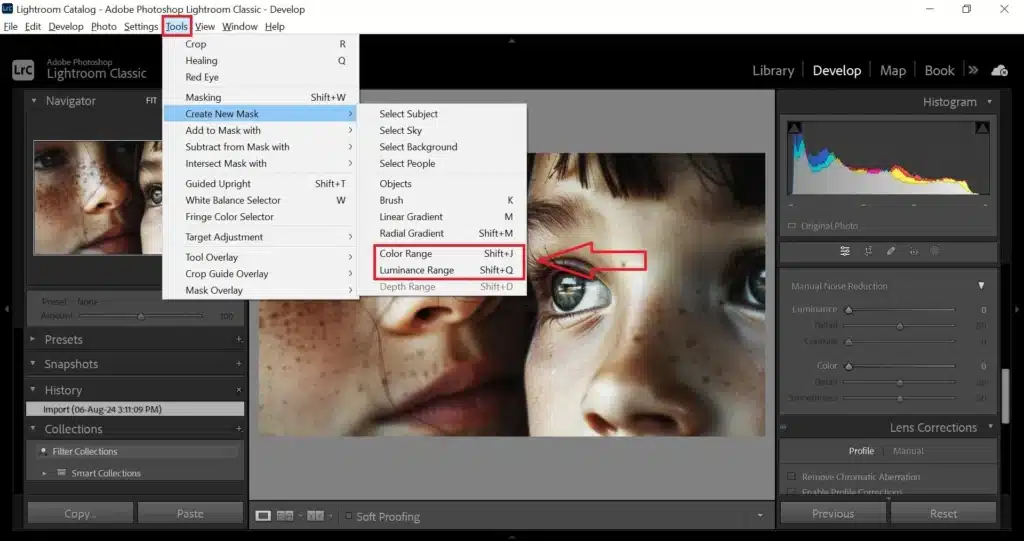
| Selective Noise Reduction |
Lightroom Adjustment Brush |
Targets specific noisy areas |
| Combined Editing |
Lightroom & Photoshop |
Advanced control over noise |
| Sharpening After Reduction |
Lightroom Sharpening Sliders |
Recovers lost details post-noise |
| External Plugins |
Topaz DeNoise AI, Nik Collection |
Advanced algorithms for noise |
| High-Quality Source Maintenance |
Camera settings, shooting in RAW |
Minimizes noise introduction |