Editing photos in Photoshop is a must for photographers and designers to produce amazing images. Whether for print or web, knowing the key tools and techniques will keep your images looking great.
This tutorial covers everything from resolution and aspect ratios to brightness, contrast and sharpening.
Follow these steps and turn ordinary photos into works of art.
Table of Contents
Resizing Images in Photoshop
Resizing images is a crucial skill for photographers and graphic designers. The ability to resize effectively while maintaining high image quality is essential.
Let’s explore some key tools and techniques.
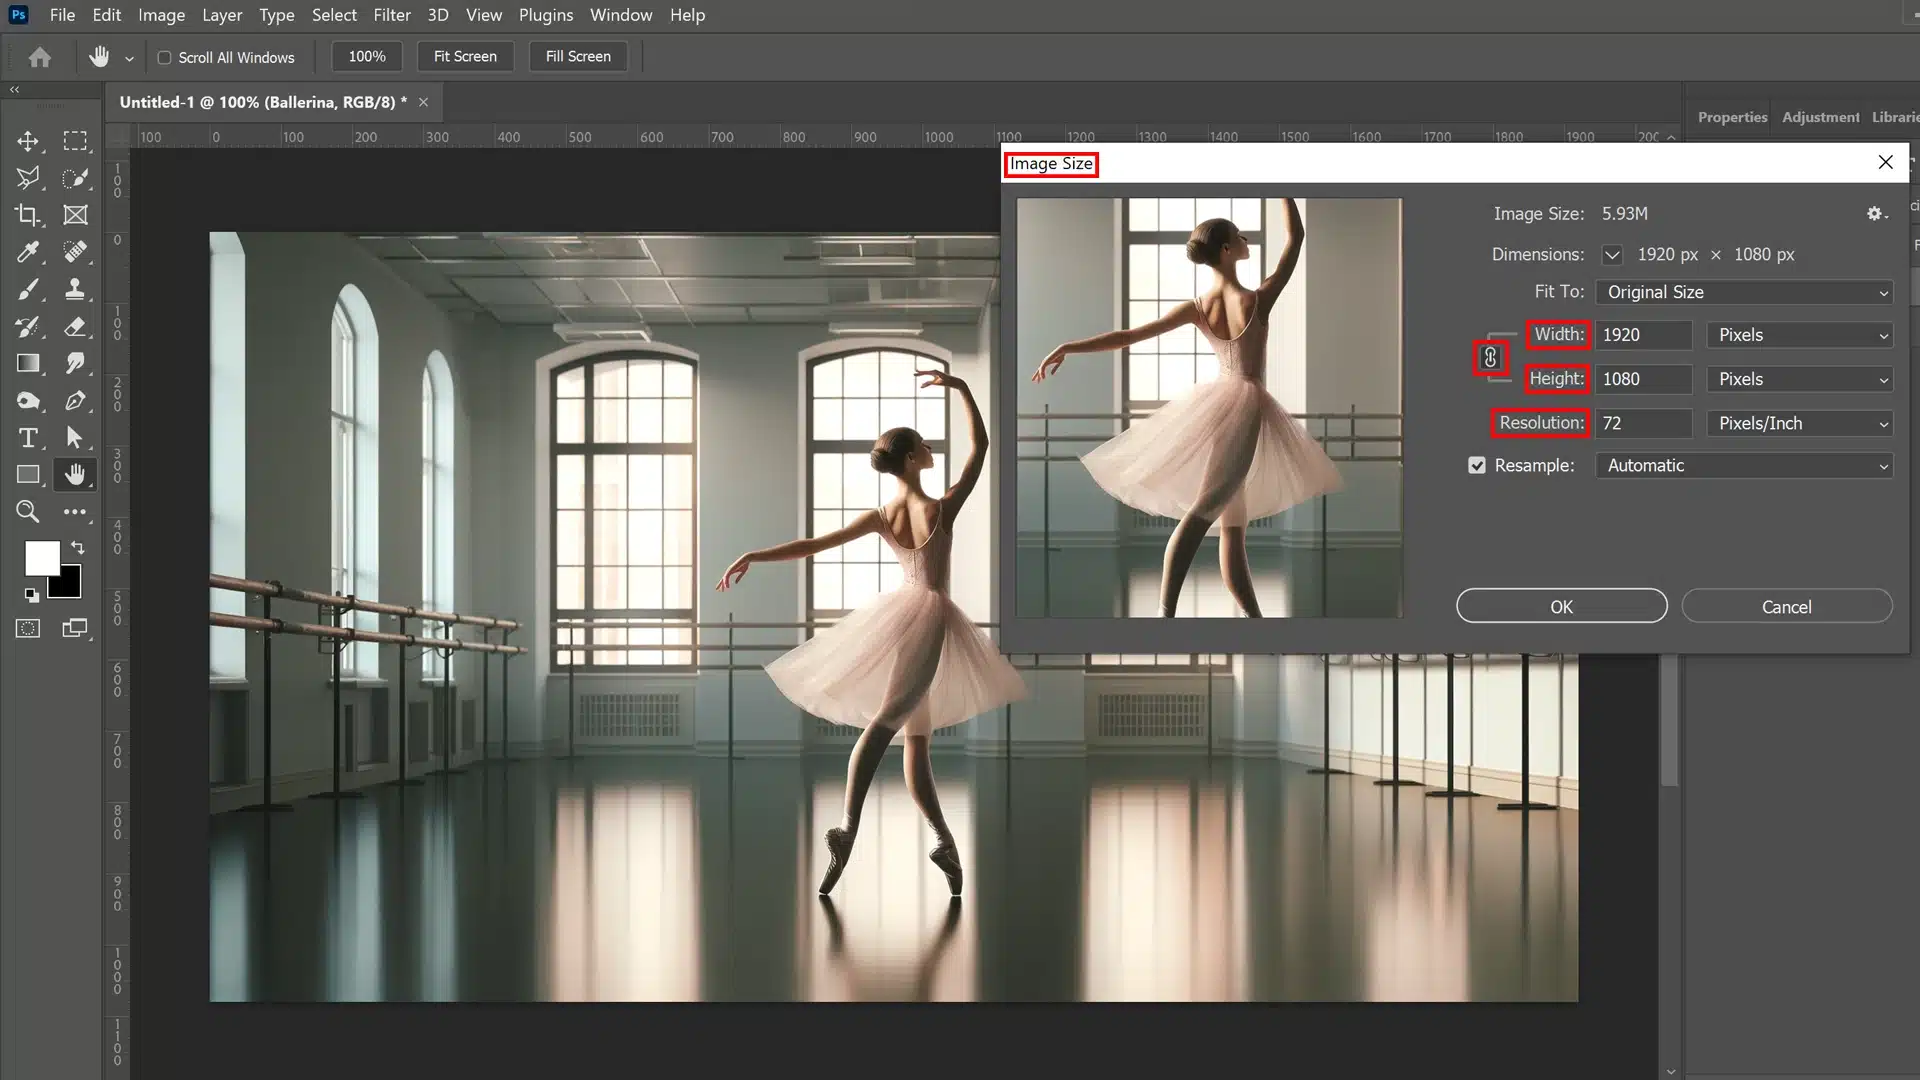
Using the Image Size Tool
The Image Size tool is your go to feature when you need to change the dimensions of your Photoshop image.
To access it, simply go to Image > Image Size.
Here, you can adjust width, height, and resolution.
It’s important to ensure that ‘Constrain Proportions‘ is checked to maintain the original aspect ratio of your image.
Moreover, this prevents any distortion after resizing.
Example:
Original dimensions: 3000x2000 pixels
Desired dimensions: 1500x1000 pixels
In this scenario, reducing the width and height by 50% keeps the proportions intact, ensuring that your photos look natural.
Adjusting Resolution for Various Outputs
The resolution you choose depends mainly on where the photo will be displayed.
For print outputs, a higher resolution (typically around 300 DPI) is preferred to preserve fine details, especially when you want to avoid common photo editing mistakes.
Conversely, digital platforms often require lower resolutions due to file size constraints (usually around 72 DPI).
Output Type
Suggested Resolution
Print
300 DPI
Web
72 DPI
Understanding Aspect Ratios and Scaling for Editing Photos in Photoshop
Aspect ratio is crucial in resizing images in Adobe, ensuring content and aesthetics are preserved.
Common ratios include 16:9 for widescreens and 4:3 for standard prints.
Maintaining these ratios prevents images from appearing stretched or squashed.
The crop tool helps refine image framing, balance composition, and enhance focal points.
Uniform scaling is essential for consistency across different devices and media types, improving visual impact and maintaining brand consistency.
Therefore, mastering these tools and principles boosts photo editing efficiency and ensures high quality results in Photoshop.
Enhancing Photo Quality
Editing photos is key whether you’re using them professionally or personally.
Tools like brightness and contrast, filters for sharpening and noise reduction are all in Photoshop to get you there.
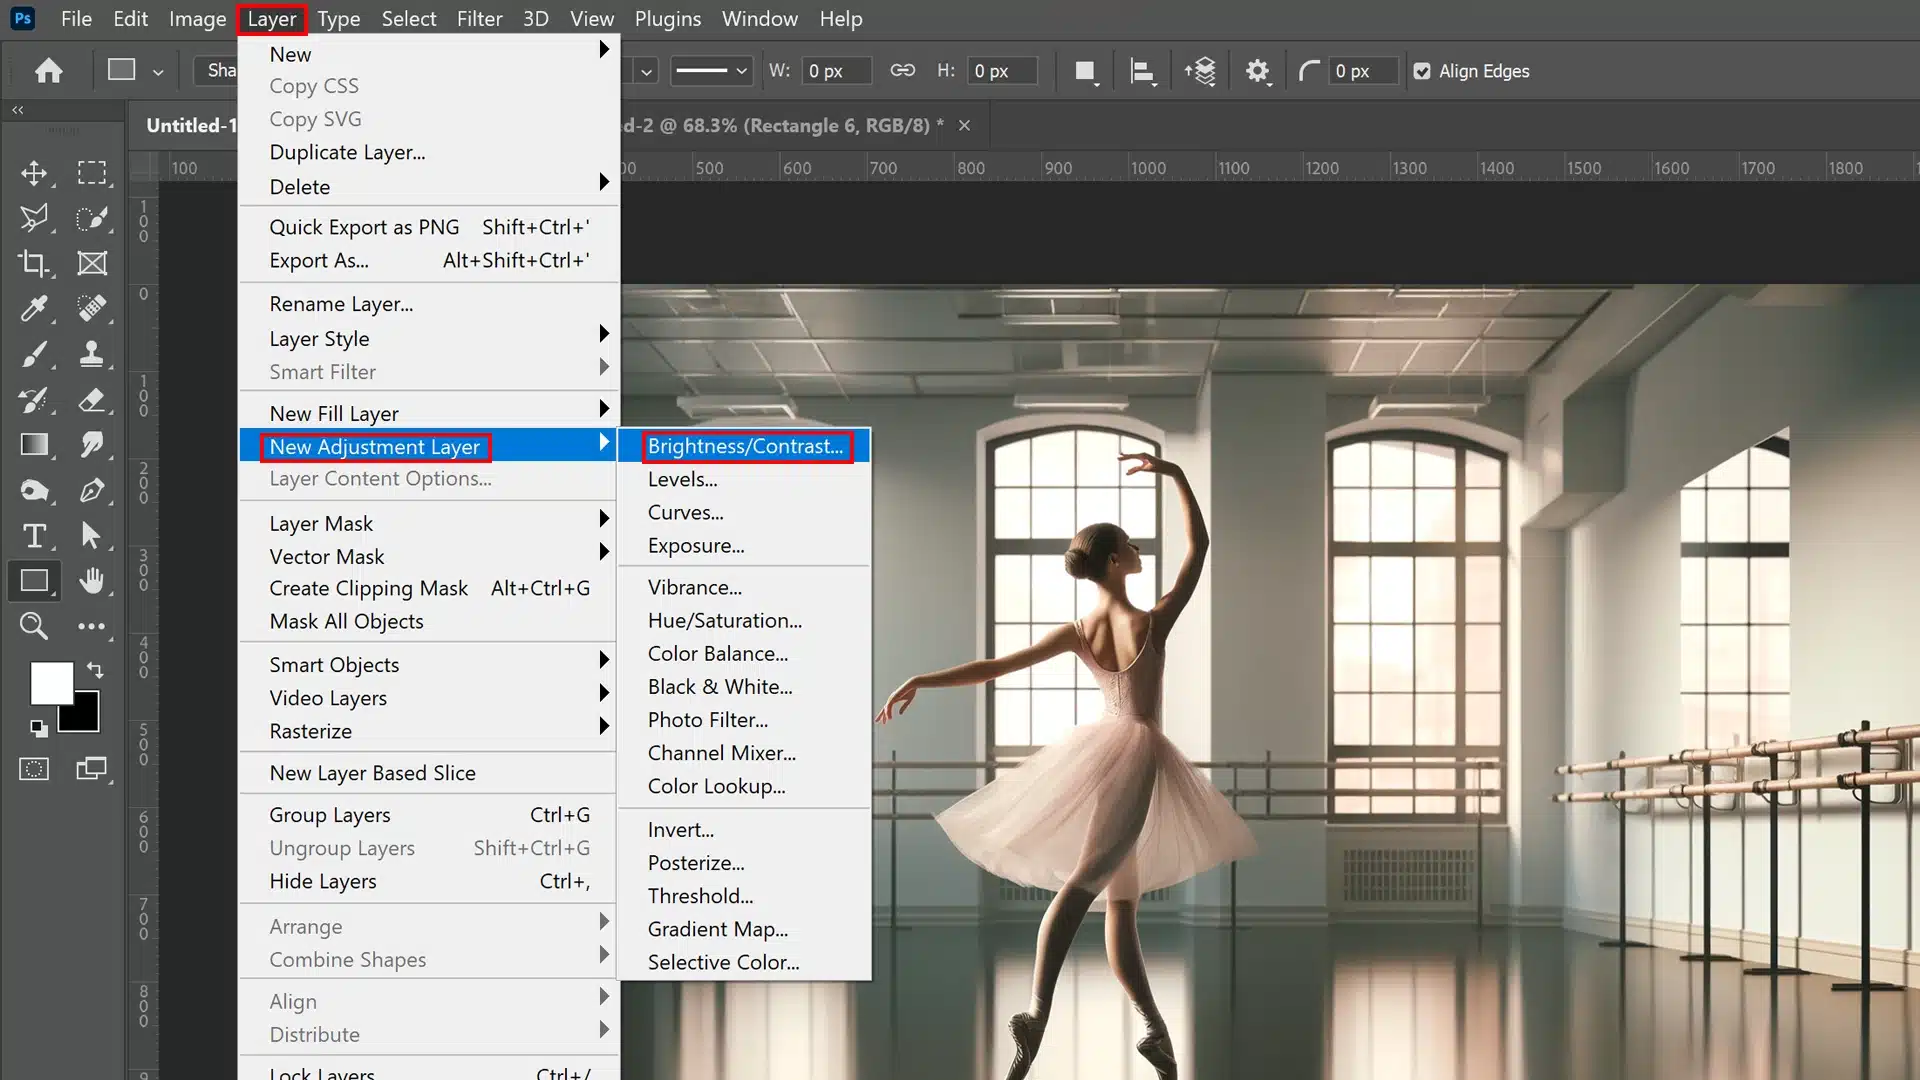
Adjusting Brightness and Contrast
Using the adjustment layer feature in Photoshop allows you to fine tune these settings without altering the original image data, ensuring you can experiment without any permanent changes.
A well balanced adjustment brings out the details and enhances the overall impact of the photo.
Step 1: Open your image in Photoshop.
Step 2: Navigate to Layer > New Adjustment Layer > Brightness/Contrast.
Step 3: Adjust sliders to achieve desired effect.
Utilizing Filters for Sharpening
Sharpening an image can significantly improve its quality by enhancing edge definition and detail clarity.
In Photoshop, you can utilize the ‘Smart Sharpen‘ or ‘Unsharp Mask‘ tools available within the filter gallery.
These tools allow you to control how much sharpening is applied, helping to avoid over processing, which might lead to unwanted artifacts in your photos.
Quick Guide
1. Go to Filter > Sharpen.
2. Choose either Smart Sharpen or Unsharp Mask.
3. Use sliders to adjust Amount and Radius according to the texture needs of the photo.
4. Preview changes and apply.
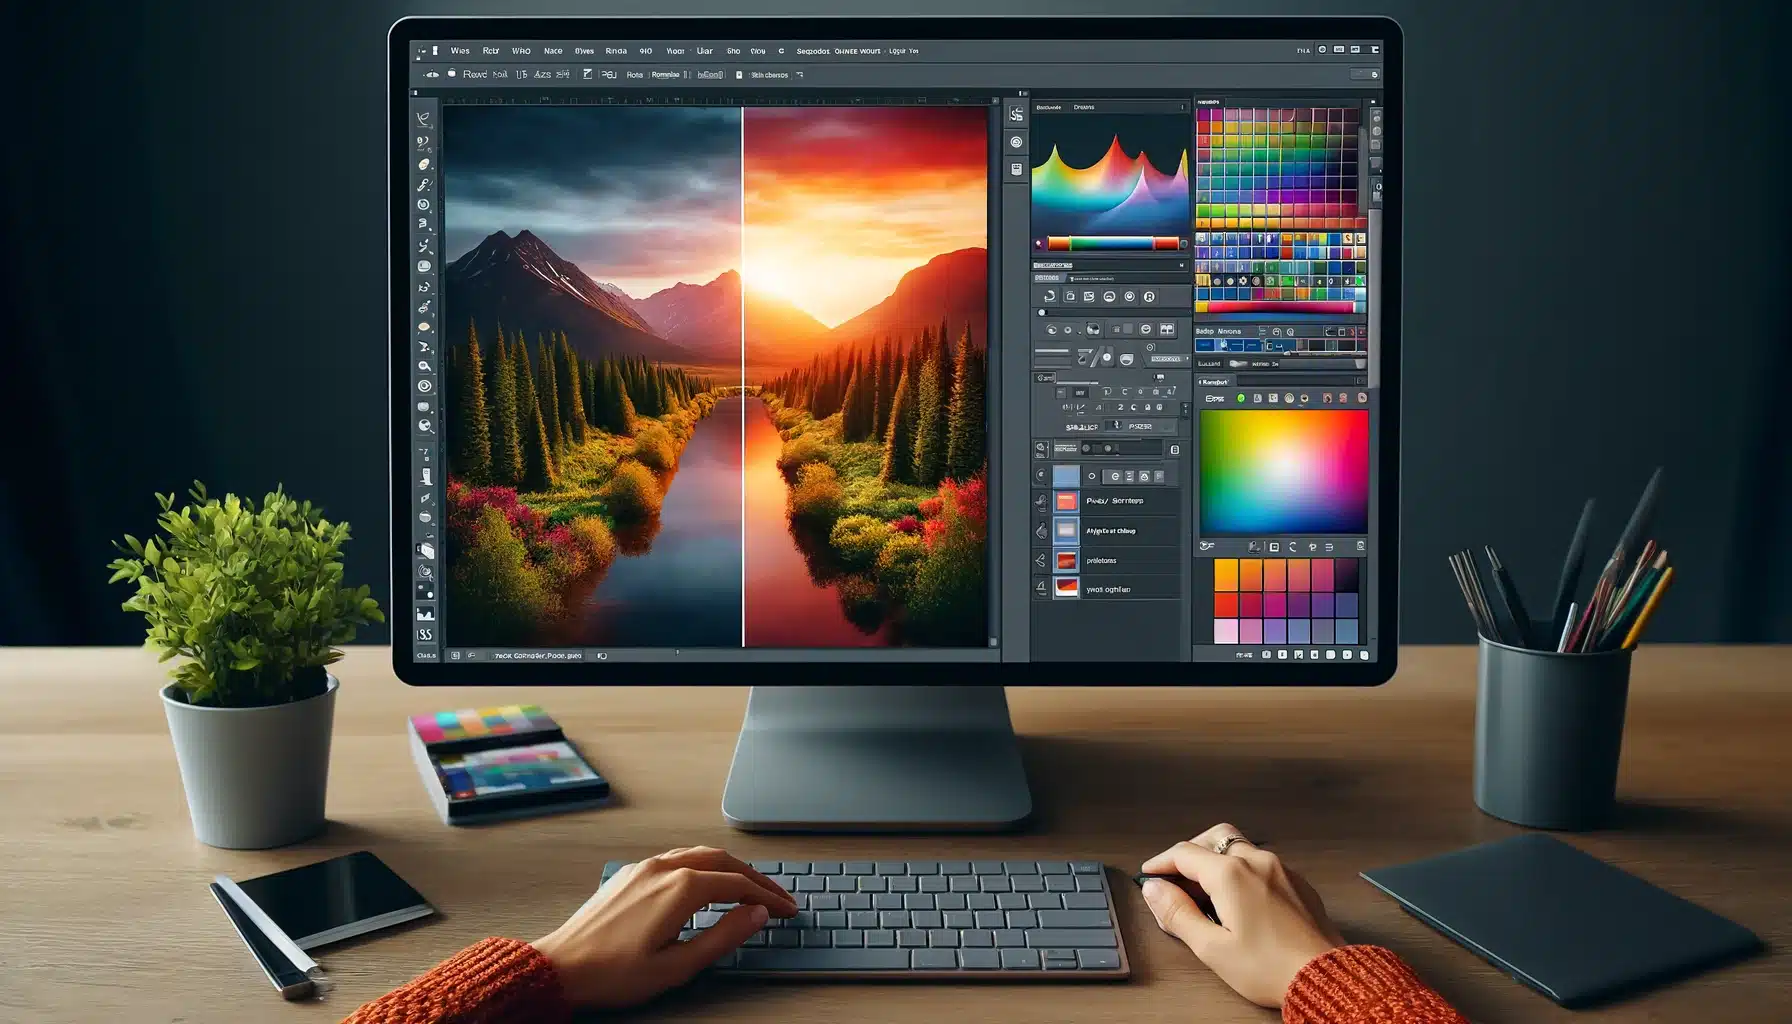
Color Correction Techniques for Editing Photos in Photoshop
It ensures that the colors in your photos appear as they do in real life, which enhances the overall impact of your images.
Working with Curves and Levels
One of the most powerful tools for color correction in Photoshop involves using Curves and Levels.
By adjusting these parameters through curves, you can control the lightness, darkness, and mid tones of different color channels.
Levels Tool: Modify overall contrast and correct tonal range.
Curves Tool: Adjust points throughout an image’s tonal range.
Both tools are pivotal when mastering how to manage shadows, highlights, and mid tones without losing detail.
Color Balancing for Realistic Tones
Achieving realistic tones requires adept color balancing.
This process adjusts the mixture of colors within an image to reproduce a more accurate depiction of real life hues.
For instance, if an image appears too blue (excellent), increasing reds (warm tones) can help neutralize this effect.
Tools like the Color Balance option or Photo Filter can be employed from the tools panel to adjust tones effectively.
Several methods include:
Using sliders for Shadows, Midtones, and Highlights
Adding color filters to shift color temperatures subtly
Selectives Color Adjustment
Selective color adjustment is crucial when certain areas of an image require individual attention without altering other sections.
Learning layering techniques such as using a layer mask or adjustment layers specifically target and modify these areas:
1. Add an adjustment layer: First, choose one for Hue/Saturation or Color Balance.
2. Paint over areas on the layer mask where adjustments are needed.
3. Fine tune settings to make localized changes stand out accurately.
This method offers meticulous control over specific details in an image, enhancing both accuracy and creative flexibility while handling complex aspects like skin tones or skies.
Utilizing Layers for Non Destructive Photo Editing in Photoshop
When digitally editing photos, particularly in software like Photoshop, mastering the layers panel is essential for non destructive Lightroom editing.
This means you can make changes to your photos without permanently altering the original image data.
Understanding Layer Basics
Layers are like transparent sheets stacked on top of each other, where each layer can hold different parts of an image or different effects.
When you edit photos, maybe from your wedding photoshoot, working with layers allows you to isolate specific edits on separate layers without affecting the rest of the image.
For instance, using the spot healing brush tool on a duplicate layer allows spot corrections without touching the original backdrop.
Key Points:
Layers act like transparent sheets.
Isolate edits by using different layers.
Use tools like the spot healing brush tools on separate layers to maintain originality.
Techniques for Blending Layers
Blending layers involves using various modes that determine how two layers interact visually with one another.
Each blending mode changes how pixels are merged based on their color values:
“Multiply” darkens images, while “Screen” tends to lighten them, greatly enhancing creative possibilities.
You might also utilize the smart objects feature in Photoshop when aiming to blend texture or exposure differences seamlessly.
Creating and Managing Layer Masks
These are powerful tools allowing editors to hide and reveal portions of a layer selectively.
Unlike erasing or deleting parts of a layer, masks permit reversible changes; paint black on a mask to conceal areas and white to reveal them back.
These options allow meticulous control over element visibility in complex compositions.
Integrating masks involves understanding familiar tools within Photoshop:
Utilize the brush tool or evengradients to paint on masks and achieve varied transparency levels.
Employ selection tools like the lasso tool, then refine edges to apply masks precisely where needed.
Creating detailed cut outs, blending multiple exposures, or crafting step by step photo manipulations becomes streamlined through effective mask management.
These integral techniques encapsulate non destructive edit practices:
1. Blend diverse visual elements cohesively
2. Adjust exposure across differing landscape shots
Advanced Tools for Professional Touch Ups for Editing Photos in Photoshop
When enhancing images for that polished, professional look, several advanced tools in Photoshop come into play.
Each tool has its specific function, allowing you to tackle complex editing tasks with precision.
Using the Spot Healing Brush Tool and Clone Stamp
Healing Brush Tool: Tackle unwanted spots efficiently. This tool is ideal for cleaning up blemishes and minor imperfections on any photograph. Just select the area where the anomaly appears, and this tool seamlessly blends it into the encircling pixels.
Clone Stamp Tool: For bigger or more complex unwanted elements, utilize the clone stamp tool. This allows you to pick your source point from a cleaner area of your image to replace problem areas with exact detail replication.
With these tools, you can achieve a flawless finish by handling everything from subtle skin imperfections to unwanted objects in your photos in Photoshop.
Twirl: Then, rotate regions to create dynamic effects.
Warp: Lastly, bend edges subtly to enhance angles.
Utilizing Pen Tool for Precise Edits
For edits requiring ultimate accuracy, nothing beats the Pen tool.
Often used to create intricate selections around difficult shapes like hair or fine details on products, this tool can be instrumental:
Path Creation: Click and drag points to bend lines around object contours.
Direct Selection: Adjust existing paths by manipulating anchor points for better alignment.
Conversion Point: Switch between curved and sharp segments effortlessly.
By mastering the Pen tool, you ensure that every selection is sharp and every vector path is flawless, preparing your images perfectly for further editing or compositing work.
Harnessing these advanced tools enhances your capability to edit photos professionally directly within Adobe Photoshop’s powerful environment.
Frequently Asked Questions
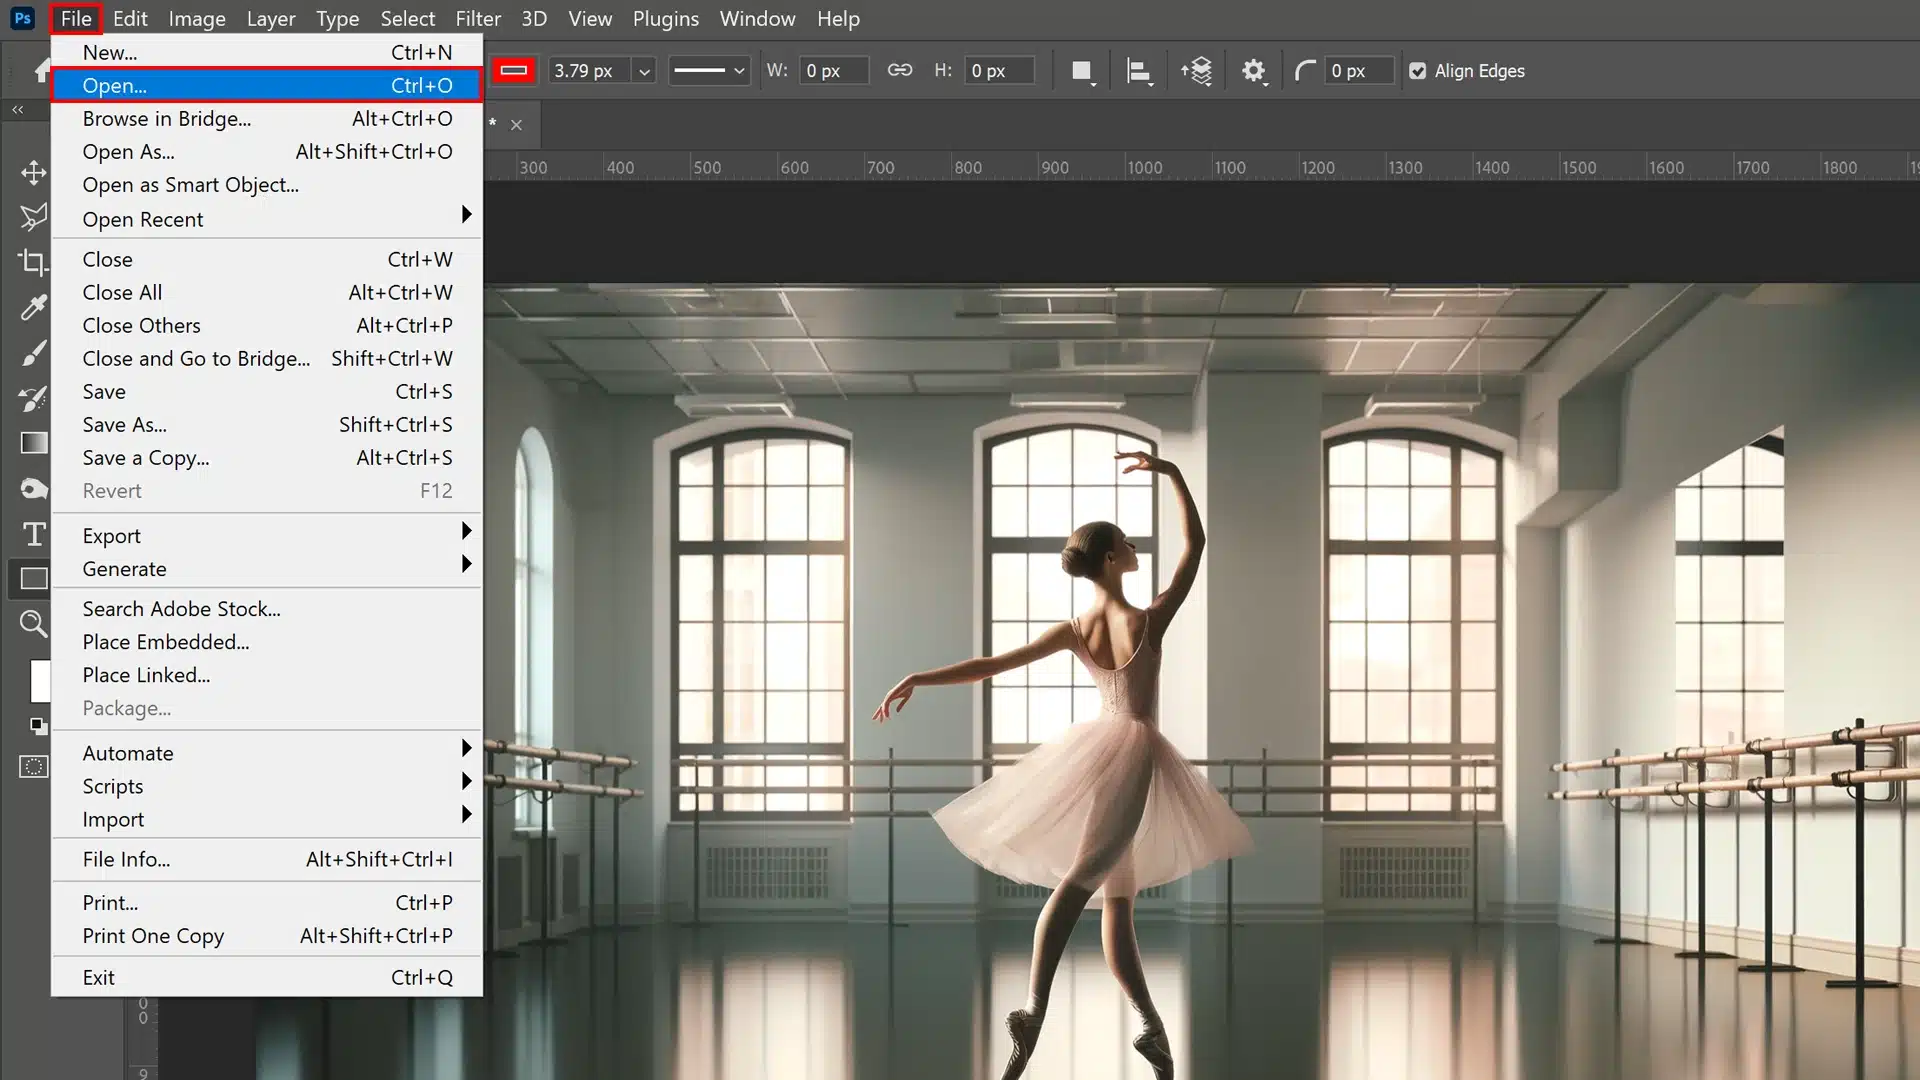
How do I start editing photos in Photoshop?
Open your image in Adobe Photoshop.
Utilize the tools panel to select the crop tool for framing, spot healing brush and eraser tool for removing any unwanted objects from the background layer, and adjustment layers for color correction. Save the file to retain the edits.
Is Photoshop good for editing photos?
Adobe Photoshop is highly regarded for editing pictures.
It offers comprehensive tools, including the crop tool, brush, and clone stamp tool, making photo editing versatile and detailed. Whether for professional or personal use, Photoshop enhances quality with precision.
How do you edit photos in Photoshop to make them look professional?
Start by using the duplicate layer option to preserve the original. Employ adjustment layers for non destructive color adjustments.
Use the spot healing brush tool for flawless corrections and the clone stamp tool for intricate editing. Professional results come from meticulous layer management and attention to detail.
How do I edit and retouch an image in Photoshop?
Use the spot healing tool for quick fixes on skin or surfaces. The clone stamp tool helps duplicate elements or remove flaws.
For delicate edits, utilize level masks to blend adjustments seamlessly. Retouching in Photoshop allows for enhanced control over the final photo’s appearance.
$2,061.00Original price was: $2,061.00.$1,061.00Current price is: $1,061.00. 27584
Download Your Free Guide Now!
Discover the secrets of photography with our printable guide! Master essential techniques like aperture, shutter speed, and ISO to create stunning images. Get your free printable PDF now and start turning your snapshots into masterpieces!