Understanding the importance of mastering Photoshop’s masking tools, including how to effectively mask images, is a journey every creative should embark on to enhance their digital editing skills.
According to statistics, over 60% of professional graphic designers regularly use functions like blending modes, layer vectors, mask tool and keyboard shortcuts while editing, proving their immense value in today’s creative landscape.
This enlightening guide will provide practical insights into mastering key processes, such as creating and utilizing masks correctly with mask tool Photoshop panel vectors or cloud documents.
Table of Contents
Why is Photoshop Masking a Game-Changer?
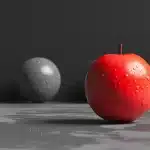
When it comes to editing in Adobe Photoshop, the ability to seamlessly blend and control elements within an image is paramount. Therefore, this feature is pivotal to achieving such finesse, allowing users to manipulate and refine their visuals with precision.
Understanding Masking in Photoshop
Masking in Photoshop is like having a meticulous editor at your fingertips, enabling you to deftly reveal or conceal parts of your visuals.
It’s like having a digital brush where each stroke can dictate the transparency and visibility of the layer it’s applied to.
Whether you’re working with intricate graphics or delicate photo edits, masking equips you with the control to apply edits exactly where they’re needed.
- Grasp the nuances of gradient masks to create natural-looking transitions.
- Explore the possibilities of using brush tools for intricate editing within areas that demand high precision and detail. This approach allows for refined adjustments and customization, enabling you to address the complexities of your project with greater control and creativity.
- Leverage channel selections to precisely target and adjust specific color ranges within your image. This method is invaluable for isolating hues for manipulation, providing an effective way to enhance or alter particular elements of your composition without affecting the overall balance.
The Impact of Photoshop Masking on Digital Art
Masking is a technique that can transform a simple image into a work of art. It’s a tool that allows artists to layer various components, therefore, creating depth and dimension.
- Layer multiple images for a composite that tells a unique story.
- Combine textures and patterns to add depth to digital illustrations.
- Control light and shadow to enhance the mood of your artwork.
Mask Layers and Their Functions
Each mask layer in Photoshop serves a specific purpose, whether it’s adjusting exposure in a photo or adding a splash of color to a graphic.
These layers act as non-destructive tools where the original image remains intact while you explore creative edits.
- Use layer masks to non-destructively hide and reveal sections of your image.
- Apply vector masks for crisp, resolution-independent shapes.
- Explore the use of clipping masks to bind images to text or shapes.
Incorporating these techniques into your workflow can significantly alter the way you approach image manipulation, therefore giving you the flexibility to produce intricate designs and photo edits without permanently altering your original files.
Mastering this tool opens up a world of creative possibilities in Photoshop, from subtle corrections to transformative visual effects.
Moreover, exploring the Essential Tools in Photoshop or Blurring a Background can provide additional guidance for those looking to refine their masking skills further.
As you become more adept at using these tools, consider how Types of Filters in Photoshop can complement your techniques to create even more dynamic and impactful images.
Remember, the key to mastering this feature lies in practice and experimentation, therefore, grab your digital brush and start painting a world of visual magic in Photoshop.
Mastering Layer Masks for Professional Results

Understanding the power of layer masks is fundamental to truly excelling in Photoshop.
These tools are not just about hiding and revealing parts of an image; aft
er all, they’re about control and precision in your editing workflow.Therefore, let’s delve into advanced techniques that will refine your skills and bring a professional polish to your work.
- First, open your chosen image in Photoshop.
- Then, select the layer you wish to mask.
- At the bottom of the layers panel, click the "Add layer mask" icon.
- Use the brush tool to paint over the areas you want to mask. Remember, painting with black conceals and white reveals.
- Lastly, fine-tune the mask using the properties panel to set the mask edge and feathering for a seamless blend.
Techniques for Refining Layer Masks
Once your mask is in place, refining it is key to achieving a realistic and professional result.
Here are some techniques:
Edge Detection: Use the ‘Select and Mask’ workspace to refine the mask edges, ensuring a smooth transition between the subject and the background.
Feathering: Increase the feather amount to soften the mask’s edge, which can help blend the masked area with the rest of the image.
Density and Flow: Set these settings in the brush tool options to control the transparency of the mask application, allowing for more nuanced editing.
Using Layer Masks with Adjustment Layers
Adjustment layers paired with masks offer a powerful way to apply color and tonal adjustments.
Here’s a quick guide:
- First, add an adjustment layer above the layer you want to affect.
- Then, the adjustment layer will come with its own mask. Paint on the mask to dictate where the adjustment is applied.
- Lastly, experiment with different adjustments like Levels, Curves, or Hue/Saturation to target and enhance specific areas of your image.
To ensure you’re getting the most out of these techniques, consider exploring resources like Adobe Photoshop for the latest updates or Dodge and Burn in Photoshop to add depth and dimension to your masterpiece.
When incorporating selective adjustments or compositing multiple images, layer masks become indispensable. By mastering these tools, you’ll be able to create stunning visual effects and image manipulations that stand out.
Remember to keep your mask edges refined and to use adjustment layers creatively to bring your vision to life.
Be sure to check out our dedicated guide for a deeper dive into the essential tools that complement layer masks, such as the Selection Tools in Photoshop.
And if you’re looking to remove backgrounds with precision, our tutorial on How to Remove Background in Photoshop is a must-read, providing step-by-step instructions for clean and professional results.
By following these advanced techniques and leveraging the full range of Photoshop’s masking capabilities, you’re well on your way to producing images that not only captivate viewers but also showcase your meticulous attention to detail and technical proficiency.
Vector Masks: Precision in Photoshop Masking

Precision is paramount in digital image manipulation. Vector masks stand out as a sophisticated feature in Photoshop that allows for crisp, clean edits where pixel-based layers fall short.
Let’s delve into the intricacies of vector masks and how they can transform your editing workflow.
Differences Between Vector and Layer Masks
Vector masks harness the power of paths to define edges in an image.
Unlike layer masks, which hide and reveal parts of an image based on pixel data, vector masks use mathematical equations to create smooth, scalable outlines.
This difference is pivotal when resizing elements in a composition; vector masks maintain their crispness at any scale, ensuring your edits remain sharp and clear.
- Vector masks are resolution-independent, perfect for graphics that need scaling.
- They provide a non-destructive way to alter visibility without affecting underlying layers.
- Best suited for images with clearly defined shapes and hard edges.
Crafting Vector Masks for Crisp Edges
To achieve the sharpest edges possible, creating a vector mask is your best bet.
- First, use the Pen tool to draw accurate paths.
- Then, right-click and select 'Make Vector Mask.'
- Lastly, adjust the path as needed for perfect edges.
Integrating Vector Masks in Complex Compositions
Vector masks shine when it comes to complex compositions involving multiple layers and intricate designs. They allow you to isolate and protect certain areas of your artwork without the fear of pixelation.
Therefore, when working with typography or logo design, vector masks offer the control needed to edit with precision.
Combine them with adjustment layers to apply color corrections or effects to specific parts of your vector-based artwork without affecting the rest of the image.
- Ideal for typography, logos, and intricate designs.
- Combine with adjustment layers for targeted adjustments.
- Preserve the quality of your work across various media formats.
By understanding and utilizing vector masks, you can improve your Photoshop skills and ensure that every edit is as sharp and refined as possible. Remember, while layer masks are invaluable for photo editing, vector masks are your go-to for graphics that demand precision.
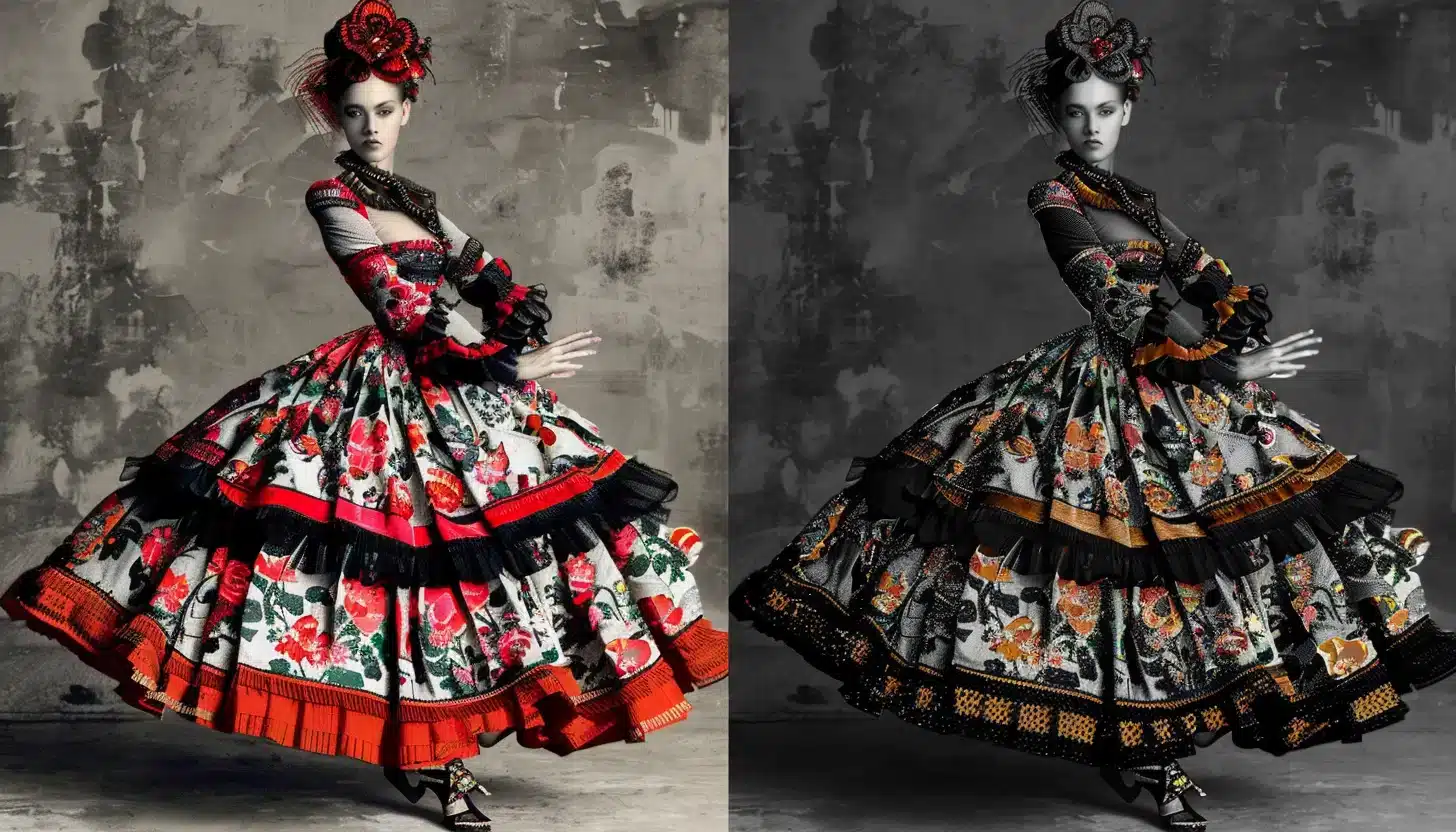
For visual enhancement, consider placing an image here showing a side-by-side comparison of a graphic with and without the use of a vector mask.
As you continue to refine your Photoshop techniques, don’t forget to explore the various Types of Filters in Photoshop and how they can complement your work.
Moreover, with the right combination of tools and knowledge, your digital art will not just capture attention but hold it with its professional-grade precision and clarity.
Harnessing the Power of the Brush Tool for Photoshop Masking
The Brush Tool in Adobe Photoshop is a versatile player in the digital artist’s toolkit, especially when it comes to masking. It can be your ally in achieving seamless, natural-looking masks.
Therefore, it allows you to subtly blend and control opacity and flow. Let’s expand our skill set by exploring advanced techniques and shortcuts to streamline your workflow.
Brush Tool Basics for Photoshop Masking
Before we dive into the advanced stuff, let’s make sure we’ve got the basics down. The Brush Tool is fundamental for creating detailed masks.
By using a soft-edged brush, you can gently fade between the masked and unmasked areas, giving you a high level of control over the transition.
- Use a soft brush to blend edges seamlessly.
- Adjust the brush's opacity to control the intensity of the mask.
- Remember to frequently switch between black and white to add or subtract from the mask.
Custom Brushes for Advanced Masking
Moving beyond the basics, did you know you can design your own brushes for specific masking needs?
Custom brushes can replicate textures and patterns, making them perfect for complex subjects like hair, fur, or foliage.
Delving deeper than the foundational techniques, the creation of custom brushes in Photoshop opens up a realm of possibilities for tailored solutions.
These specialized brushes can mimic a wide array of textures and patterns, rendering them indispensable for intricate subjects such as hair, fur, or the delicate veins of leaves.
The ability to craft brushes that precisely match the texture of your subject not only enhances realism but also injects a unique flair into your work.
This customization empowers artists to achieve unparalleled detail and artistic vision, pushing the boundaries of digital creativity and expression.
- Experiment with different brush shapes and textures to match your subject.
- Save your custom brushes for consistent results across projects.
- Use the Brush Presets to manage your custom tools efficiently.
Extra tip: Utilizing the Brush Presets allows for quick access to your custom brushes, ensuring they are always at your fingertips when needed. Organizing your brushes into well-defined categories or sets based on their use case or texture type can save you valuable time during the editing process.
Brush Tool Shortcuts and Tips
Speed up your masking process with these handy keyboard shortcuts and tips. Knowing these will help you stay focused on the creative process without breaking your flow.
- First, press 'X' to quickly switch between your foreground and background colors.
- Then, use the '[' and ']' keys to set the brush size on the fly.
- Lastly, hold the 'Shift' key while painting to create straight lines.
Incorporating these advanced techniques and shortcuts will not only refine your masking skills but also save you precious time in your editing workflow.
Whether you’re working on isolating subjects for composite images or applying creative filters, these Brush Tool strategies will elevate the precision and quality of your work.
Remember, while the Brush Tool is powerful, it’s also just one part of the masking equation.
Therefore, combine it with other tools such as Lightroom selection tools and adjustment layers for a robust and dynamic approach to masking in Photoshop.
Advanced Techniques with the Pen Tool and Paths

The Pen Tool in Photoshop offers unparalleled precision for transitioning from basic masks to more intricate paths. It’s a versatile feature that can elevate your work to new levels of refinement.
Pen Tool Essentials for Photoshop Masking
Mastering the Pen Tool is a game-changer for creating detailed masks.
Let’s dive into the essentials:
- First begin by selecting the Pen Tool from the toolbar or pressing 'P' as a shortcut.
- Second, click to create anchor points and construct your desired path around the selected object or area you wish to mask.
- Then, to modify the curvature between points, adjust the handles that appear when creating or clicking on an anchor point.
- Lastly, close the path by clicking on the initial anchor point to create a complete shape.
Incorporate the shape tool into your tool kit for an even easier workflow!
Converting Paths to Vector Masks
Once your path is created using the path selection tool, converting it to a vector mask is straightforward:
- First ensure your path is finalized, and then select the layer to which you wish to apply the mask.
- Next, navigate to the 'Paths' panel, right-click on the work path, and choose 'Create Vector Mask.'
- Lastly, this action applies your path as a mask, revealing only the portion of the layer within the path.
Vector masks maintain crisp, clean lines, which are ideal for images with sharp edges or for scalable graphics.
Combining Pen Tool with Other Photoshop Masking Methods
The integration of the Pen Tool with other Photoshop techniques showcases the versatility and depth that can be achieved in digital editing. While the Pen Tool allows for the creation of precise, clean shapes and selections, the incorporation of tools like the Brush and Lasso Tools opens up a world of creative possibilities, enabling more nuanced and complex masks that cater to the unique demands of each project.
- Use the Pen Tool to define the primary shape of your mask.
- Add to or subtract from the mask using other tools like the Brush Tool or the Lasso Tool for more complex masks.
- Experiment with different opacity levels and feathering to blend the mask seamlessly with the rest of the image.
Incorporating these advanced techniques with the foundational use of the Pen Tool and other masking methods not only enhances the quality and detail of your edits but also expands your creative toolkit, enabling you to approach each project with confidence and innovation. As you continue to experiment with combining these tools and techniques, you’ll discover new ways to express your artistic vision, pushing the boundaries of digital art and photo editing.
Color Correction Techniques with Masks
As we venture further into the realm of Photoshop mastery, it’s imperative to understand the transformative power of color correction techniques when combined with masking. Color correction is not merely about adjusting the overall tone of an image; it’s an art that requires precision and subtlety, achievable through the adept use of masks.
Fine-Tuning Colors with Layer Masks
if you wish to enhance the sunset sky in a landscape photo without altering the foreground, a layer mask applied to a color balance or hue/saturation adjustment layer is your tool of choice. By painting on the mask, you can dictate exactly where and how intensely the color changes occur.
Selective Color Enhancements: Utilize adjustment layers like Curves or Levels, targeting specific color channels for precise adjustments. Use a soft brush to gently apply the effect through the mask, focusing on areas that need a pop of color or a subtle tone shift.
Matching Colors Between Composite Images: When blending multiple images, color mismatches can disrupt the visual harmony. A layer mask on a color adjustment layer helps unify the disparate elements, making the composite appear more cohesive.
Harnessing Gradient Masks for Smooth Transitions
Gradient masks are particularly useful for creating natural-looking transitions in color correction tasks. Whether you’re enhancing the sky or creating a vignette effect, the gradient tool, when used on a mask, offers a smooth blend that can elevate the mood and depth of your imagery.
Creating Atmospheric Depth: Apply a gradient mask to an adjustment layer aimed at darkening the edges of your frame, drawing the viewer’s eye toward the central subject. This technique is invaluable for portraits and landscapes alike, adding a layer of emotional intensity to your work.
Balancing Light and Shadow: In scenes with challenging lighting, use gradient masks to selectively adjust exposure, brightening shadowed areas or toning down highlights. This method ensures your images retain detail and depth without the need for extensive retouching.
Creating Dynamic Composites with Textural Masks
For those venturing into the realm of composite imagery, textural masks offer a pathway to achieving seamless, dynamic blends between elements. Using textures as masks themselves can introduce organic, unexpected transitions that challenge the boundaries of conventional photo editing.
Layering Elements with Textural Integrity: Utilize a high-contrast texture as a mask on one of your composite layers. This approach allows the underlying layer to peek through in a manner dictated by the texture, lending a tactile quality to the composite.
Learn layering in Photoshop to further enhance your workflow.
Custom Brushes for Textural Masks: Create or download brushes that mimic specific textures and use them to paint your masks. This technique affords you the artistic freedom to apply texture in a more controlled, deliberate fashion, perfect for adding touches of realism or fantasy to your work.
By exploring these advanced techniques in color correction and creative texturing, you’re not just editing images; you’re crafting visual stories that resonate with depth, emotion, and authenticity. As you continue to experiment and refine your skills, remember that the true magic of Photoshop lies in its ability to translate your vision into reality, one mask at a time.
The Select and Mask Workspace Explained
Transitioning from the basics of layer masking and vector paths, we now turn our attention to the Select and Mask workspace in Adobe Photoshop.
This dedicated environment offers a suite of tools specifically designed to fine-tune selections and create sophisticated masks with precision and ease.
Moreover, we will explore the nuances of this workspace and uncover strategies for making the most of its features.
Navigating the Select and Mask Interface
The Select and Mask interface presents a streamlined layout that prioritizes accessibility to its various tools and settings.
When you first open the workspace, you’re greeted with a properties sidebar that includes essential functions like view modes and edge detection.
Familiarizing yourself with this interface is key to mastering the art of masking.
- View Modes: Toggle between different backgrounds to assess your mask's quality.
- Edge Detection: Fine-tune the edges of your selection for a seamless blend.
- Global Refinements: Adjust the smoothness, feathering, and contrast of your mask.
Properties Panel
The Properties Panel is your control center within the Select and Mask workspace.
Here, you can adjust the radius to expand or contract the selection edge, employ the Smart Filters for intelligent edge detection, and utilize the Refine Edge Brush Tool to perfect the mask’s border by painting over complex areas like hair or fur.
Toolbox
The Toolbox within the Select and Mask workspace is home to several vital tools.
The Quick Selection Tool allows for rapid selection of areas with similar color and texture, while the Refine Edge Brush Tool is excellent for capturing fine details.
The Brush Tool lets you manually paint your selection, and the Lasso Tool provides the ability to freely draw selections.
Refining Selections for Accurate Photoshop Masking
Accurate masking hinges on the ability to refine selections down to the pixel.
In the Select and Mask workspace, the use of the Refine Edge Brush Tool is pivotal.
This tool excels at detecting and capturing intricate details often missed by other selection methods.
- Adjust Brush Size: Use the bracket keys to resize your brush for detailed work.
- Edge Contrast: Increase this setting to define harder edges within your selection.
- Smooth and Feather: These sliders help soften the edges for a more natural transition.
Decontaminating Colors
When refining selections, especially against contrasting backgrounds, a color spill can be a problem.
The Select and Mask workspace offers a ‘Decontaminate Colors’ option, which helps to remove any color bleed and ensure the integrity of your mask’s edges.
Output Settings
Once you have refined your selection, the output settings in the Select and Mask workspace provide several options.
Therefore, you can output your selection as a new layer mask directly or create a new layer or document entirely, giving you flexibility in how you manage your editing workflow.
Outputting Selections as Masks
The final step in the Select and Mask workspace is to convert your refined selection into a usable mask.
Moreover, the workspace offers multiple output options to integrate your selection into your project seamlessly.
- Output To: Choose where to place your refined mask, whether it be a layer mask, a new layer, or even a new document.
- Remember Settings: Save your settings for future use to maintain consistency across projects.
- Review and Adjust: Before outputting, take a moment to review your mask from different perspectives to ensure quality.
The Select and Mask workspace is a powerful feature of Adobe Photoshop that, when navigated and utilized effectively, can greatly improve the quality and efficiency of your masking tasks.
By understanding and applying the tools and techniques outlined above, you can achieve precise and professional results in your digital artwork.

Frequently Asked Questions
What is Masking in Photoshop?
Masking is a pivotal feature in Photoshop that allows you to control the visibility of different parts of your image without permanently altering or deleting any part.
Think of it as a digital stencil that can hide or reveal elements in your artwork, offering a non-destructive editing workflow.
- Use the Add Layer Mask button to introduce a mask to your layer.
- Paint with black on the mask to conceal or white to reveal.
- Utilize gradients on your mask for smooth transitions.
- Remember, masks can be linked or unlinked to layer content, affecting how they move and scale together.
How do I Mask and Edit in Photoshop?
Editing with masks in Photoshop involves manipulating which parts of an image are visible.
This is especially useful when making adjustments or applying effects to specific areas.
- Begin by adding a mask to your layer where the edits are needed.
- Use the Brush tool with a soft edge to paint over the areas you want to affect.
- Adjust the brush opacity to control the intensity of the effect.
How do I Hide Part of an Image in Photoshop?
Hiding part of an image is a common task in Photoshop, and masks are the tool for the job.
Whether you’re cleaning up a composition or focusing attention on a subject, masks offer a flexible way to hide unwanted elements.
- Add a mask to your layer and paint with black over the parts you wish to hide.
- For a more automated approach, use the Quick Selection tool to make a selection, then click the 'Add Layer Mask' icon to hide the unselected areas.
- Use the brush on the mask to fine-tune the hidden areas for a perfect finish.
How do Clipping Masks Work in Photoshop?
Clipping masks allow you to use the content of one layer to determine the visibility of another.
This is great for text effects or when you want to confine an image within a shape.
- Place the layer you want to clip above the layer that will serve as the mask.
- Hold down Alt (Option on Mac) and click between the two layers in the Layers panel to create the clipping mask.
- The upper layer will now only be visible where there is content on the base layer.

Conclusion
The journey of mastering Photoshop masking was a transformative experience for me. I recall working on a project that seemed insurmountable, with intricate details demanding precise editing.
It was my deep dive into Photoshop’s masking capabilities that turned the tide. Utilizing layer masks, I could non-destructively tweak the visibility of various parts of my artwork, achieving a level of detail and finesse I previously thought unattainable.
This experience underscores why mastering masking in Photoshop is not just a skill but a necessary toolset for anyone serious about digital artistry.
It is crucial to seamlessly blend, modify, and enhance elements within an image, and masking provides the pathway to accomplish these tasks with sophistication and subtlety.
I encourage you to embrace the world of Photoshop masking, whether you’re a novice eager to explore or a seasoned professional looking to refine your craft.
Our comprehensive Photoshop Course and Lightroom Course are tailored to guide you through every nuance of these powerful tools, ensuring you gain the proficiency and confidence to transform your creative visions into compelling realities.
Read more about Photoshop: