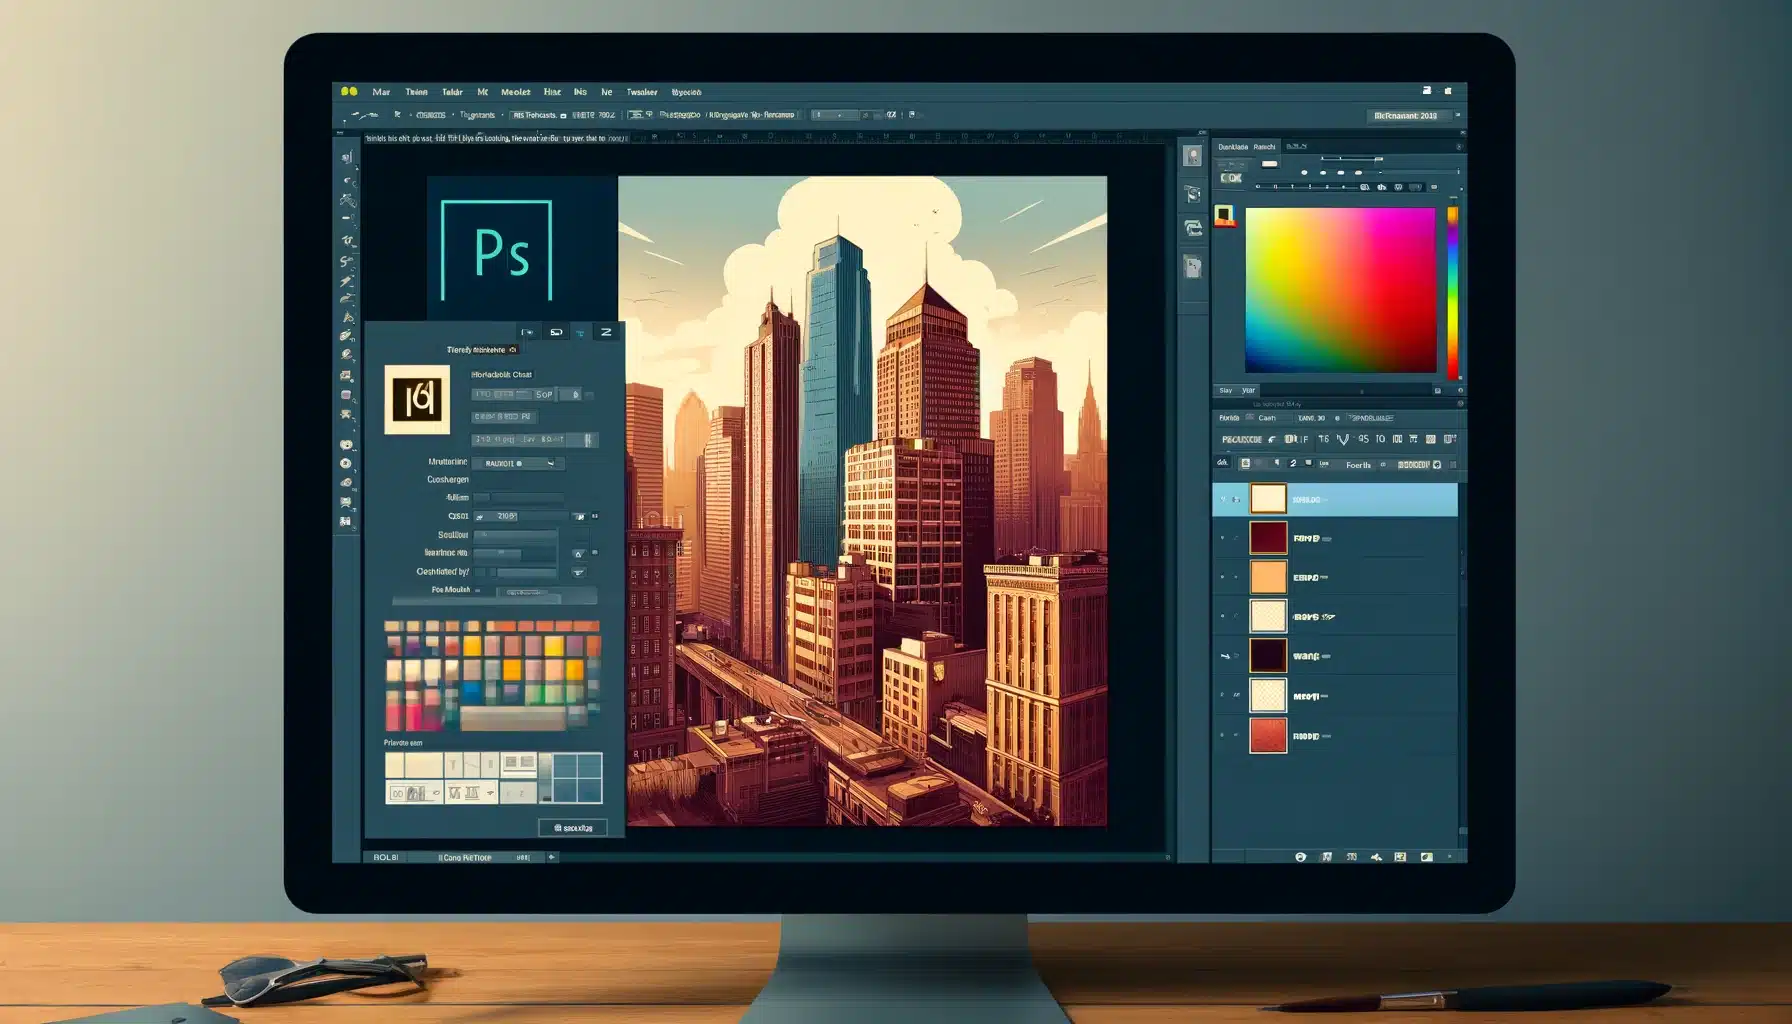
Have you ever wondered how adjusting the color profile in Photoshop works?
When you’re in Photoshop, colors do more than just look pretty. They set the mood of your images.
Knowing how to use these settings can make all the difference in honing your design skills and getting great results in every project.
Let’s get started with this simple but powerfultool. It might just be what you’re missing!
Table of Contents
How to Resize and Manage Color Profiles in Photoshop for Optimized Output
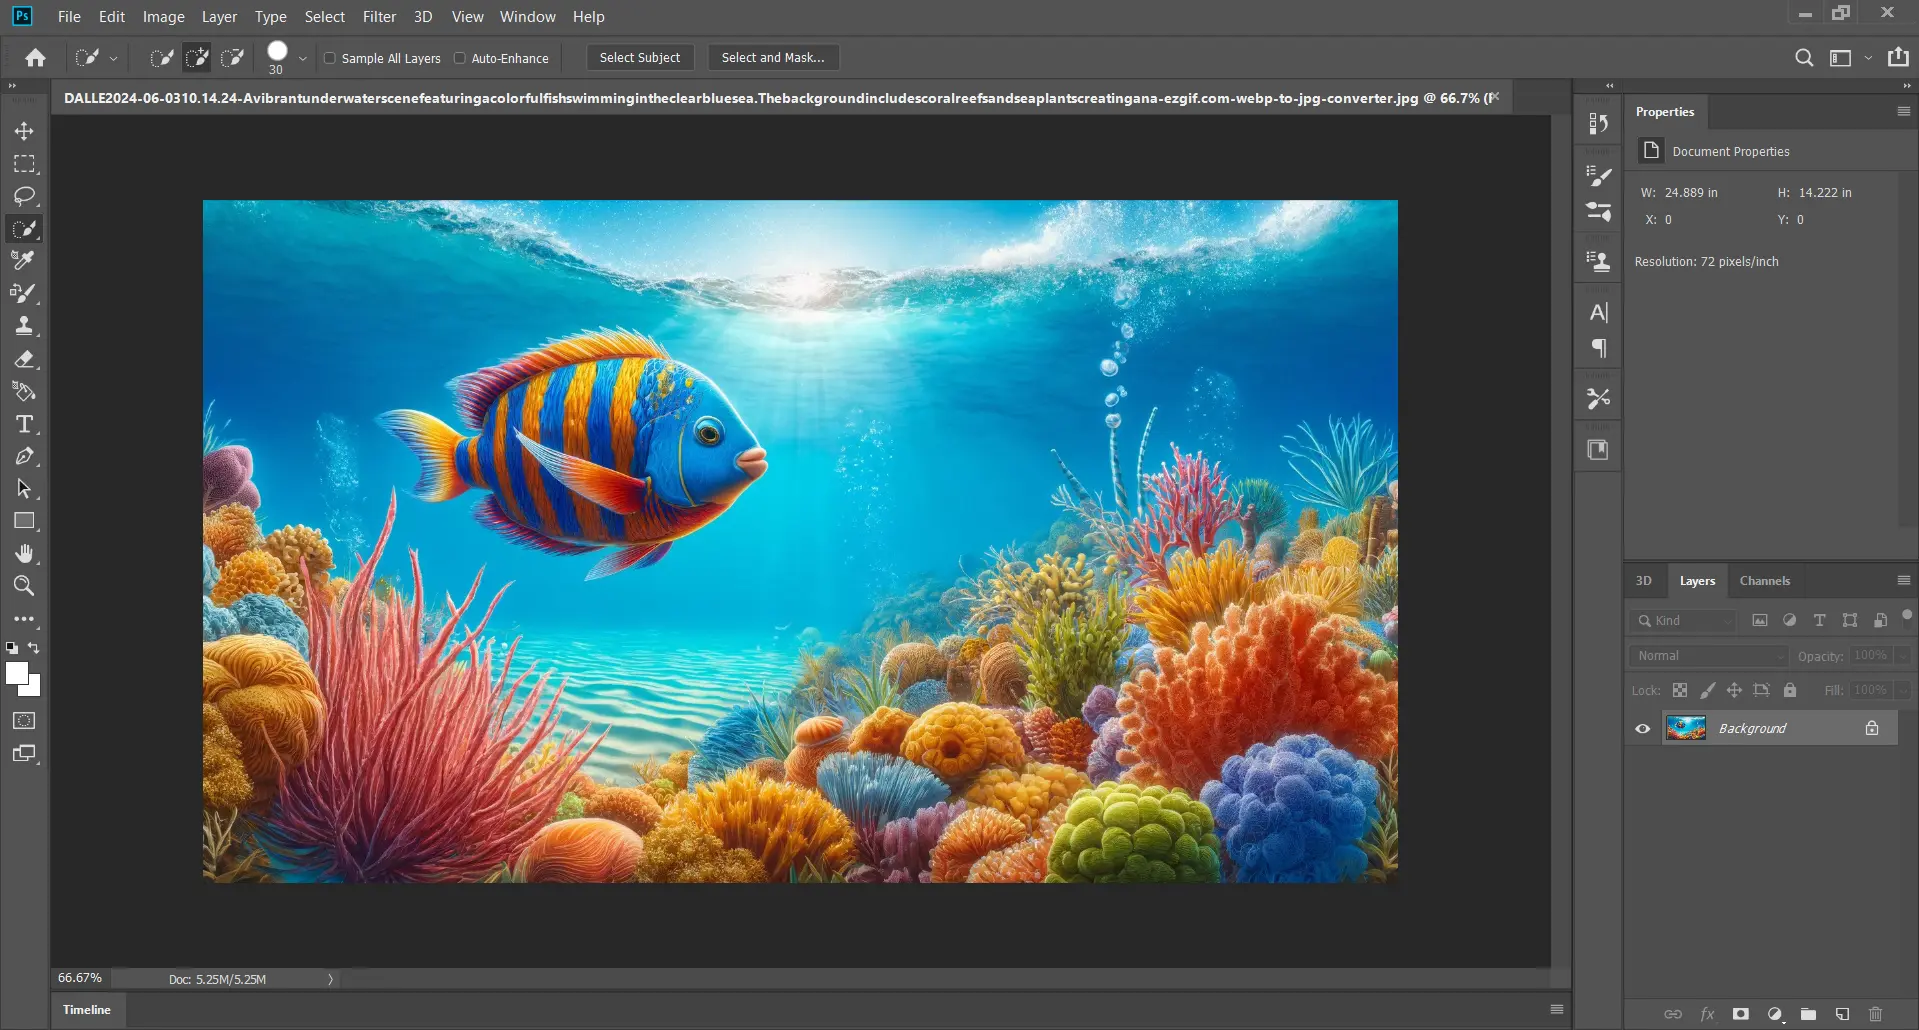
Photoshop offers powerful tools to resize images while managing color profiles. This ensures your edited photos look stunning on a screen or printed.
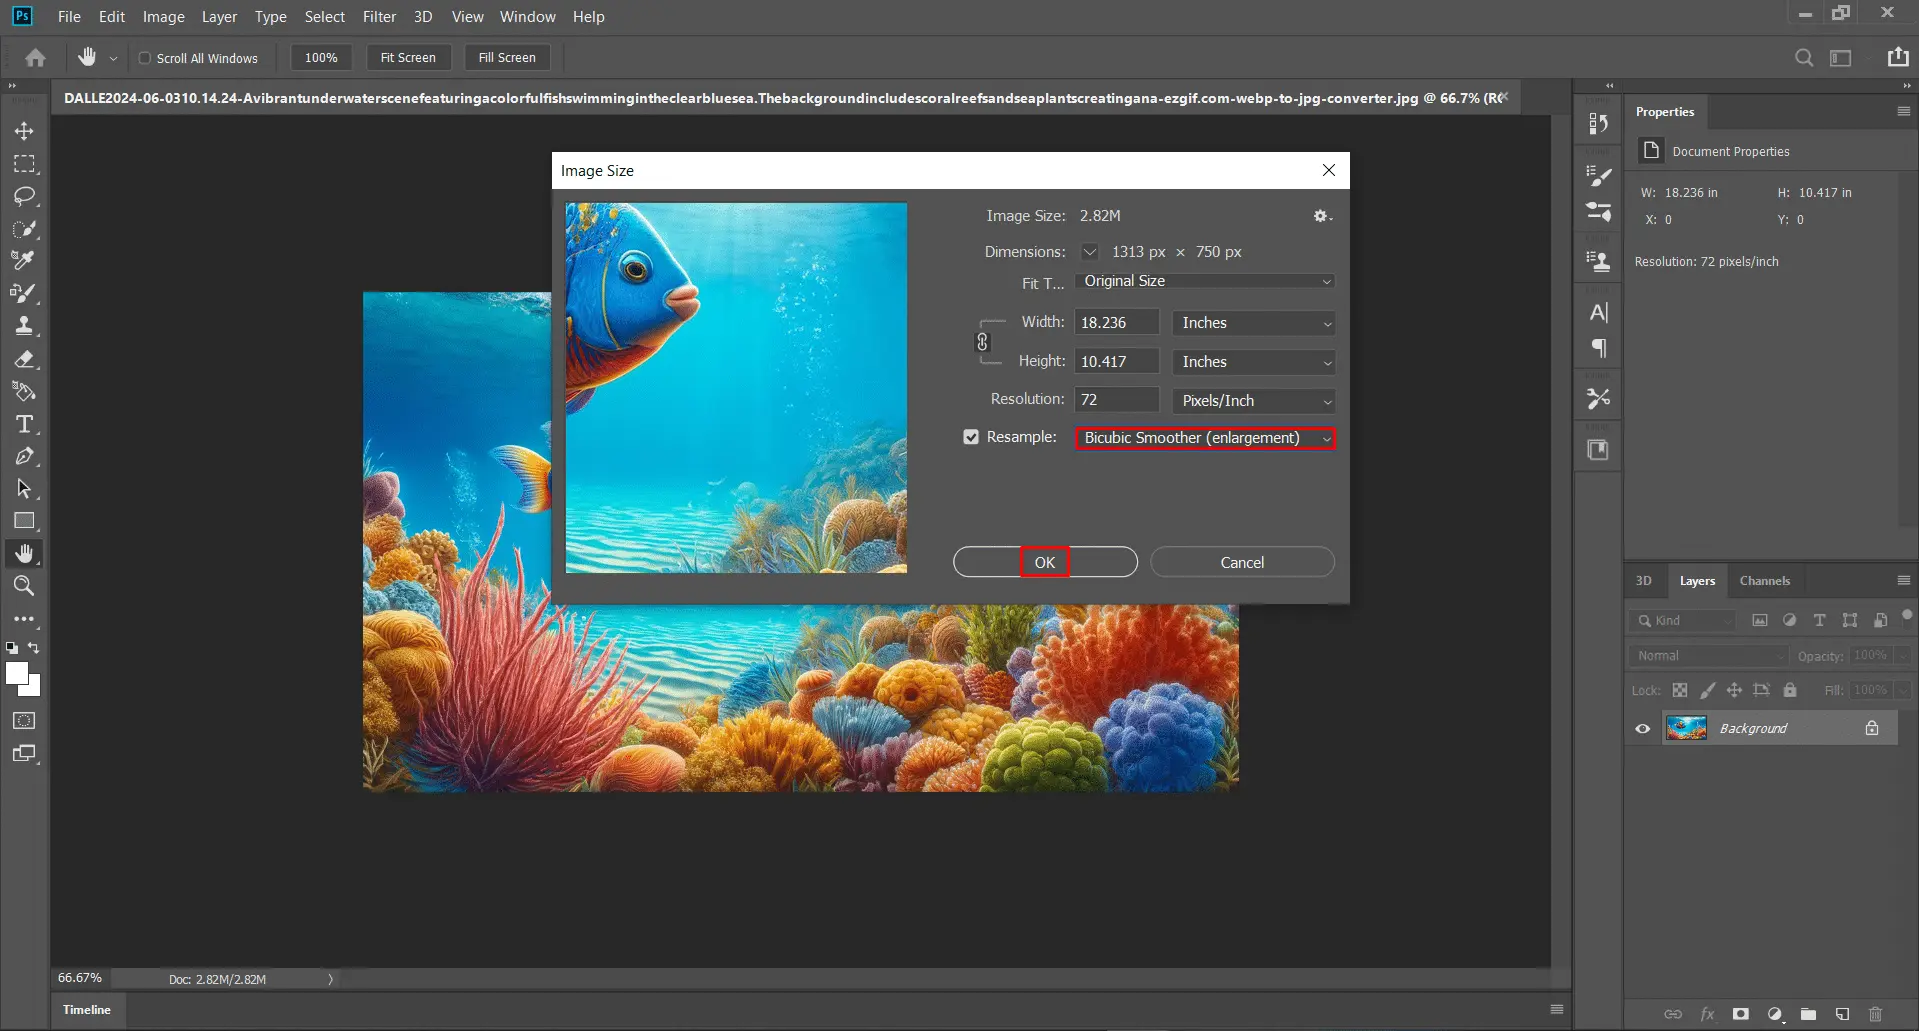
Step-by-Step Guide to Resizing Images in Photoshop
Resizing images is essential when preparing them for different media. Follow these steps for an optimal resizing process:
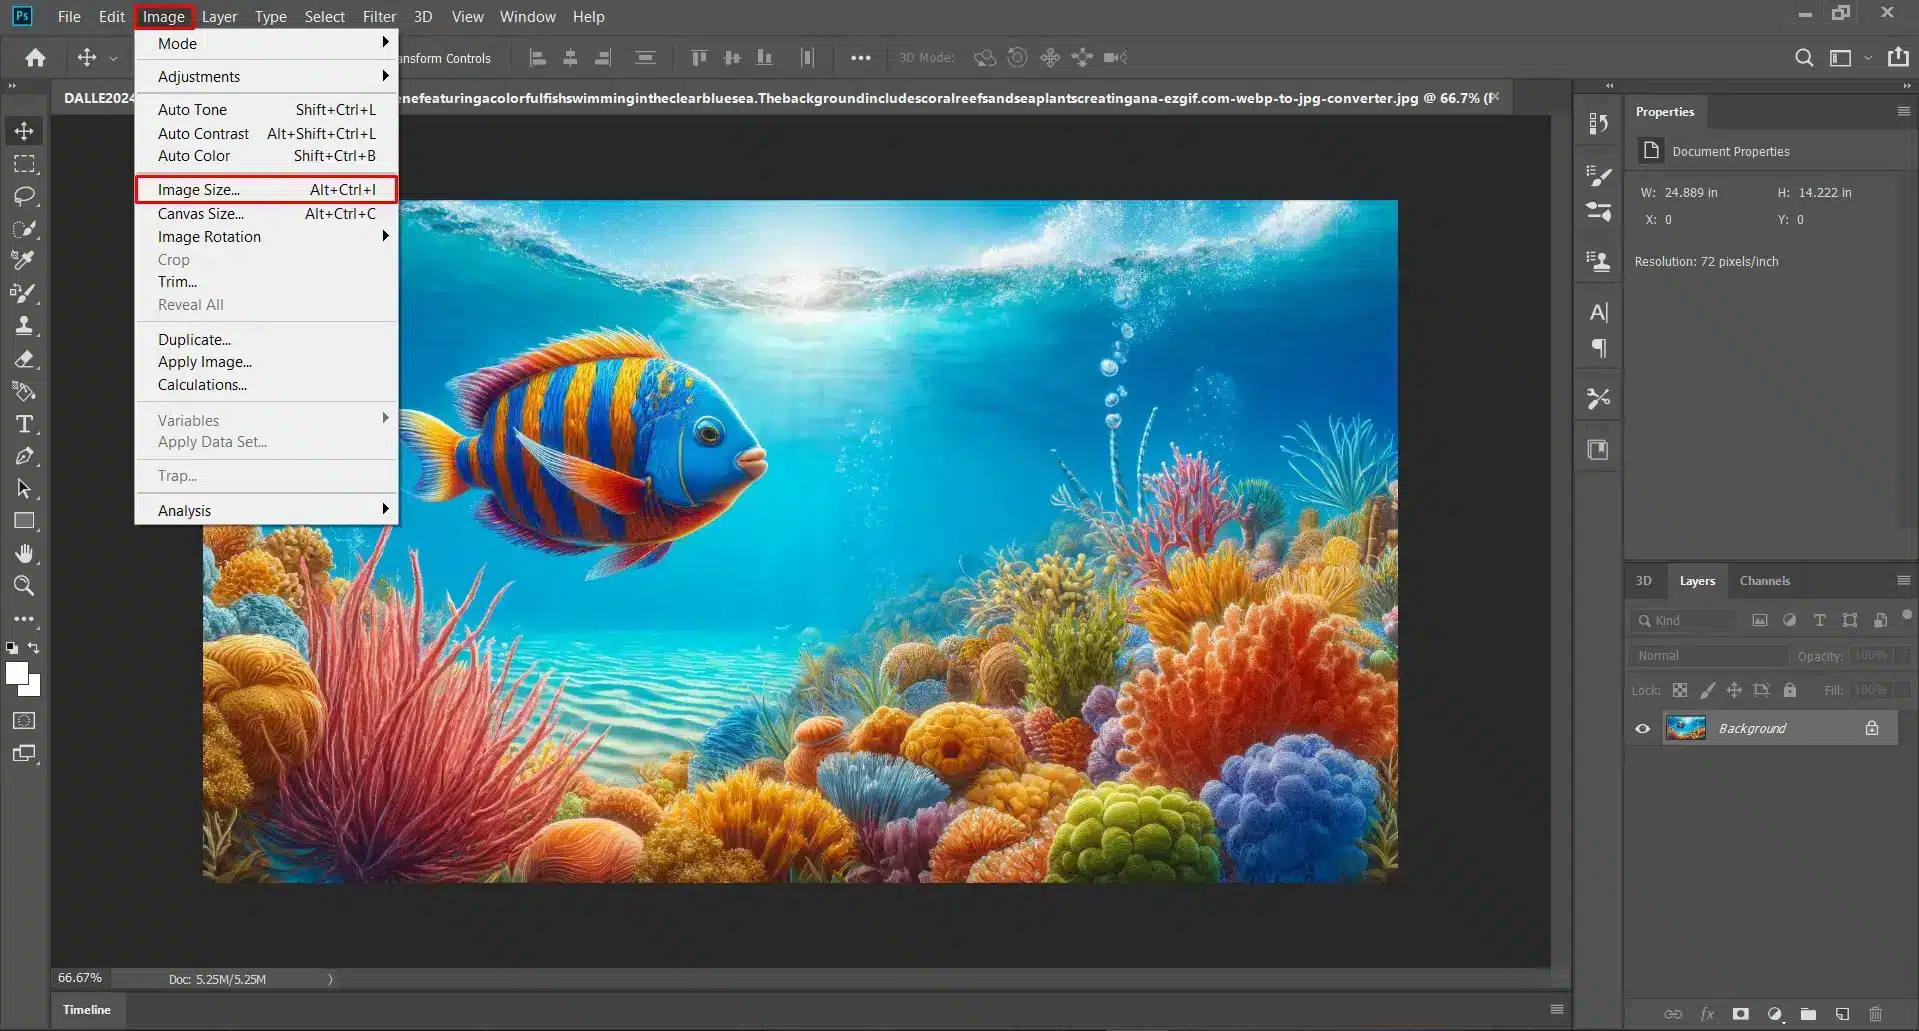
Open your image: Start by opening the image file in Photoshop.
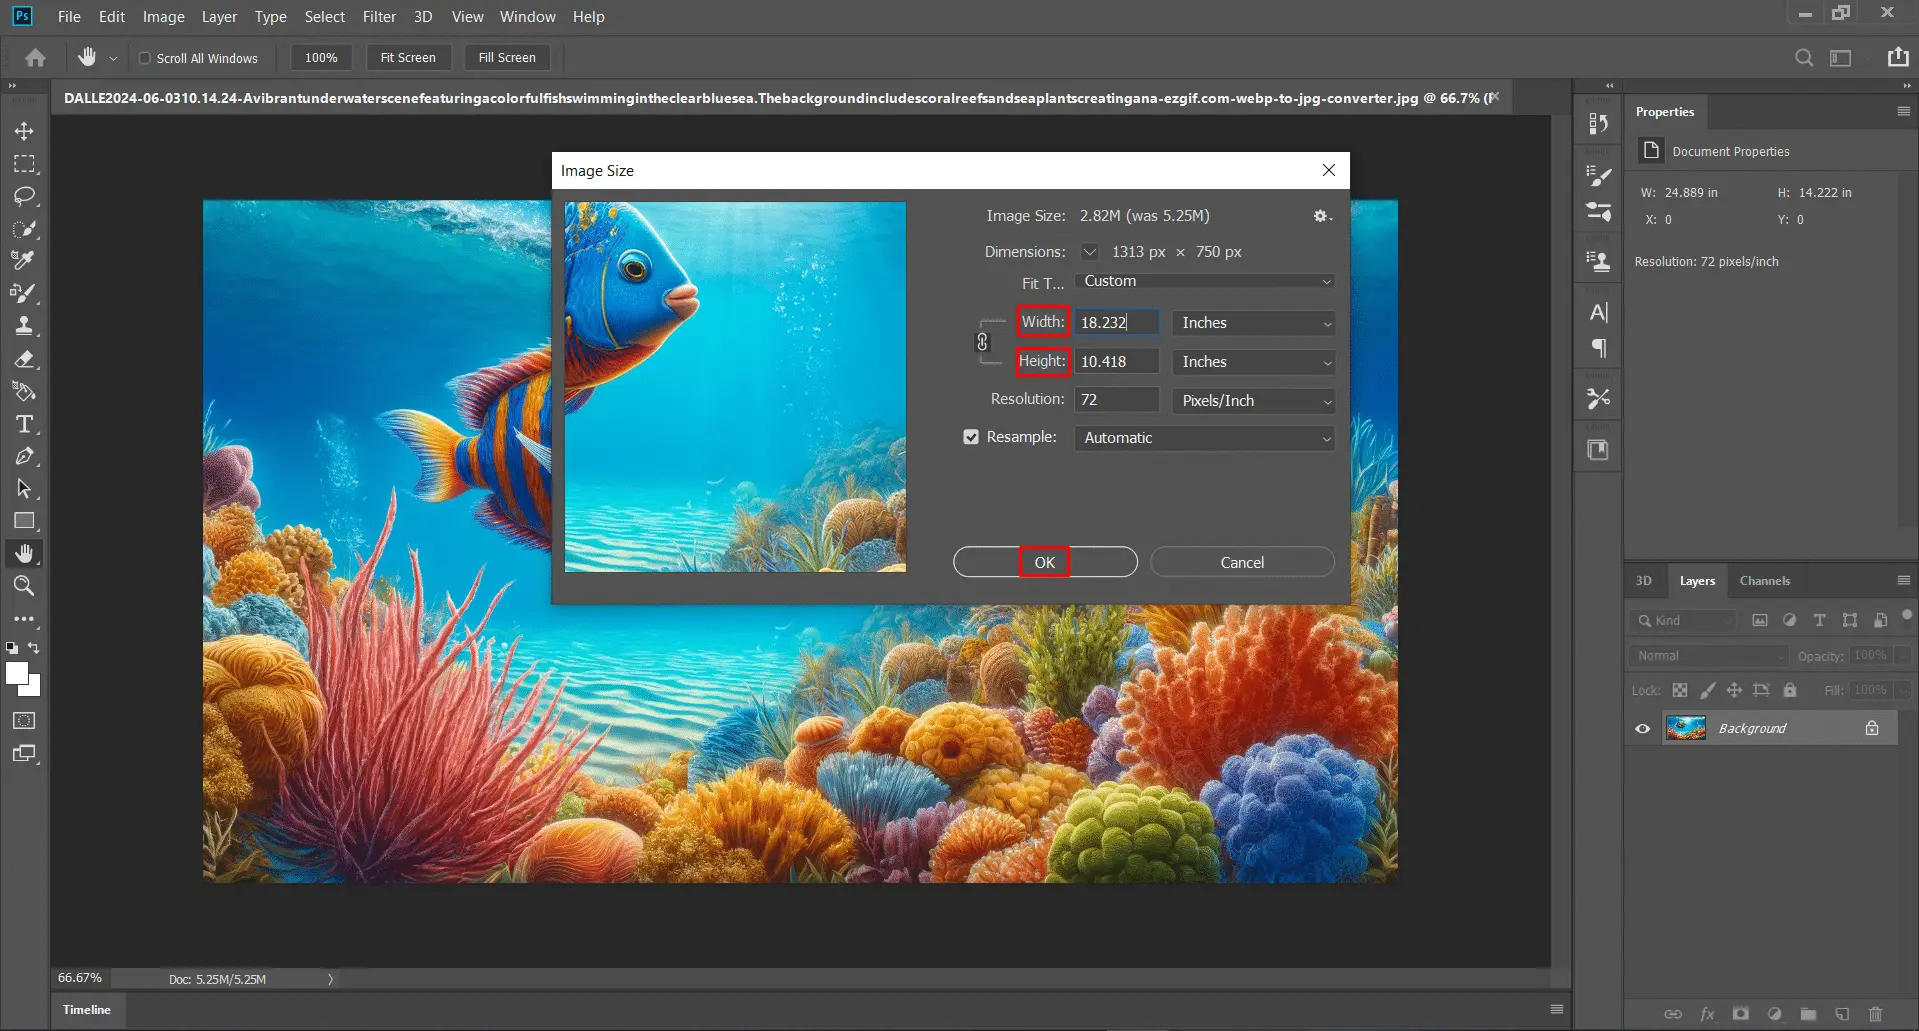
Navigate to the Image menu: Click Image > Image Size.
Adjust dimensions: Set the new width and height to maintain the aspect ratio.
Select a resampling method: Choose from Bicubic Smoother or Preserve Details for best results.
Adjusting Color Profile for Different Media Output Devices
Ensuring your pictures have consistent color across various devices involves setting the correct color profiles and lens correction.
Open the Edit menu and select Color Settings.
Based on your output device, choose a suitable RGB working space. For instance, select "Adobe RGB" for print.
Use appropriate ICC profiles to sync with different devices like printers or monitors.
In the past, I have adjusted the color profiles while preparing wedding photos for digital display and printing, specifically using different color filters available at my disposal.
Best Practices for Combining Image Resizing and Color Adjustments
Combining resizing with accurate color management creates high quality outputs familiar to most users.
Here are some tips:
Task
Recommended Setting
Resizing
Use Preserve Details
Working Space
Set default to Adobe RGB
Printing
Sync printer profile
Web
Use sRGB
Always calibrate your monitor first using a custom monitor profile.
When working with layered documents, ensure all layers adhere to the same embedded profile.
Convert to profile before final export; this will embed necessary data specific to each output device.
Setting Up the Right Color Profile for Your Project in Photoshop
Choosing the appropriate color profile is crucial when aiming for accurate color representation.
Proper color management ensures your images look consistent across various devices.
These simple steps help you align with your project needs efficiently.
Tips for Choosing the Correct Profile Based on Project Needs
Your project’s end use dictates which embedded profile should be used. Here are some tips:
Web Projects
Opt for sRGB since all web browsers universally support it.
Print Projects
Use Adobe RGB. It covers more greens and blues, making it perfect for quality prints.
High-End Photography
Pick ProPhoto RGB if you're looking at top tier results with extensive post-production edits.
Project Type
Recommended Profile
Web Images
sRGB
Print Photography
Adobe RGB
High-End Edits
ProPhoto RGB
Proper settings enhance workflow efficiency and final output quality. Keep experimenting with different profiles until you find what’s best for your specific task!
By integrating the right monitor profiles and utilizing efficient conversion options, you’ll achieve an excellent balance of precision and performance in any project undertaken within Photoshop.
Advanced Techniques: Managing Color Consistency Across Different Devices
Techniques for Ensuring Color Accuracy on Various Monitors
Achieving consistent color accuracy across multiple monitors can be challenging but manageable with the proper techniques. The first step is calibrating each monitor.
Using the ICC profiles ensures that your display accurately reflects the colors in your images.
Steps to ensure color accuracy:
1. Calibrate your monitor using a calibration tool.
2. Apply the correct monitor profile.
3. Confirm the correct color settings in your software.
It’s also helpful to set your working color space to the same standard, like Adobe RGB, across all devices.
Benefits of Using a Monitor Profile
Consistent Colors: Ensures that colors remain consistent across screens and print media.
Accurate Editing: Helps you make precise adjustments, knowing that the colors are true to life.
Professional Results: Reduces the risk of color discrepancies, leading to professional quality outputs.
Color Management Across Digital and Print Media
Consistency between digital screens, like when shooting a long exposure phone photography, and print resizing is crucial for photographers. Implementing effective color management practices helps bridge this gap seamlessly.
Important steps include:
Understanding the differences in how screens (RGB) and prints (CMYK) render colors.
Adjust your photography software to match these differences using appropriate color settings, including assigning a specific CMYK working color space when preparing files for print.
Utilizing an accurate ICC profile specifically for your inkjet printer.
Furthermore, ICC profiles are used regularly since they slowly shift over time due to environmental effects such as temperature, light, etc.
We recommend checking them periodically when dealing with particularly sensitive projects.
Utilizing Proofing Tools to Preview Accurate Colors
To achieve actual color previews before finalizing any project:
Enable soft proofing within Photoshop or Lightroom.
Choose an appropriate render intent, usually relative colorimetric or perceptual, depending on the project's needs.
Use actual printed media against digital previews, adjusting until matches appear perfect, based on maintaining overall quality even slightly compromised during transforms.
Troubleshooting Common Issues with Color Profiles in Photoshop
Let’s address some common issues and show you how to correct them.
This guide targets print mismatches, screen-to-product variations, and restoring settings.
Solving Mismatched Colors After Printing
You printed your image, but the colors areoff.
Here’s how you can fix this:
1. Check your color profile: Ensure that the same profile used during editing is applied for printing.
2. Proof Setup: Go to View > Proof Setup and choose the appropriate printer profile.
3. Rendering Intent: Under Print Settings, select the correct rendering intent (like Perceptual or Relative Colorimetric).
I faced this once while printing a client’s poster. Switching from an sRGB to an Adobe RGB color profile drastically improved my results.
Fixing Color Variations Between the Screen and the Final Product
Do the colors look different on your screen compared to the final print?
Here’s how to fix this:
1. Calibrate Your Monitor: Use tools like SpyderX Pro for calibration.
2. Use Consistent Working Spaces: Stick with Adobe RGB or sRGB based on your project needs.
3. Soft Proofing: Before finalizing your work, soft proof images using View > Proof Colors.
Steps
Action
1
Calibrate Monitor
2
Select Working Space
3
Soft Proofing
How to Restore Default Color Settings in Photoshop
Have you mixed up too many changes in your color settings and blending modes?
Sometimes, resetting back to default settings best solves these challenges.
Go to Edit > Color Settings.
Select “Reset” or adjust individual profiles as needed.
Verify all other preferences match standard industry practices.
Remember: Correctly managing your color profiles ensures consistently brilliant results across various devices and media formats!
Utilizing tools like the Dodge and Burn in Photoshop can also enhance your images, maintaining consistency and quality.
Optimizing Photoshop Workflows for Faster Color and Size Adjustments
Streamlining your Photoshop workflows can save a significant amount of time.
We will now explore three essential techniques: creating custom presets, automating tasks with actions, and batch processing images.
Creating Custom Presets for Repeated Use
Custom presets are lifesavers when dealing with multiple images that require the same settings.
By creating a preset, you ensure that each photo has consistent adjustments without needing to redo them manually.
Open an image in Photoshop.
Adjust the settings as desired (e.g., brightness, contrast).
Go to the Settings Dialog box, and click "Save Preset".
Name your preset and click "Save".
For instance, I frequently adjust the brightness and contrast for portrait photos. Using my “Portrait Enhance” preset, and not just the portrait filter, every image instantly looks professional.
Automating Tasks with Photoshop Actions
Autonomous task handling with Photoshop actions can drastically reduce editing time.
Automation benefits repetitive workflows like watermarking or converting images into specific formats.
Navigate to “Actions” panel from the Window menu.
Click “Create New Action”.
Perform the series of tasks you want to automate.
Hit the stop button once done.
I apply this process on occasions when I need to add a watermark to hundreds of travel photos, I record an action to apply a watermark and then run this action over all the photos simultaneously.
Batch Processing Images for Uniform Color Profiles and Size
Batch processing enables uniformity across multiple images using predefined settings like color profiles or dimensions.
1. Open Photoshop and go to File > Automate > Batch.
2. Select the source folder containing your images.
3. Choose an action created earlier (like resizing or changing color space).
Steps
Task
1
Select Source Folder
2
Choose Action
3
Specify Destination Folder
Remember to choose the appropriate color profile in Photoshop settings during batch processing.
Frequently Asked Questions
What color profile should I use in Photoshop?
For most users, Adobe RGB mode offers a wider color gamut and is ideal if your final output includes print materials. sRGB is better suited for web images.
Choosing the right color profile in Photoshop depends on your project’s needs and the intended output device.
How do you get the color profile in Photoshop?
You can access color profiles in Photoshop through the Edit menu. Choose Color Settings and explore the available profiles under Working Spaces.
This section allows users to pick their preferred RGB, CMYK, and other color space settings tailored to their project requirements, ensuring optimal color management.
Does Photoshop use sRGB or Adobe RGB?
Photoshop supports both sRGB and Adobe RGB, empowering users to select the most appropriate RGB color space for their projects.
The choice between sRGB and RGB depends on the project’s final display. sRGB is often used for web images, while Adobe RGB profile is preferred for its broader color gamut in print materials.
What is the best Adobe color profile?
The best color mode in Photoshop depends on your project:
Adobe RGB: Best for print projects due to its wide color gamut.
sRGB is ideal for digital and web-based projects because it is compatible with various devices and accurately represents colors across digital platforms.
Choosing the color modes ensures your work appears consistent and professional, whether in print or online.
$2,061.00Original price was: $2,061.00.$1,061.00Current price is: $1,061.00. 27584
Download Your Free Guide Now!
Discover the secrets of photography with our printable guide! Master essential techniques like aperture, shutter speed, and ISO to create stunning images. Get your free printable PDF now and start turning your snapshots into masterpieces!