Are you looking to master Photoshop and take your editing skills to the next level? In this article, I’ll share some of the best Photoshop how-to videos that will guide you through important techniquesand tips.
Whether you’re a beginner or looking to refine your skills, these videos offer clear, step-by-step instructions that make learning easy and fun.
Imagine creating stunning visuals that captivate your audience and bring your creative visions to life.
Let’s explore these invaluable resources that will transform your Photoshop experience.
Table of Contents
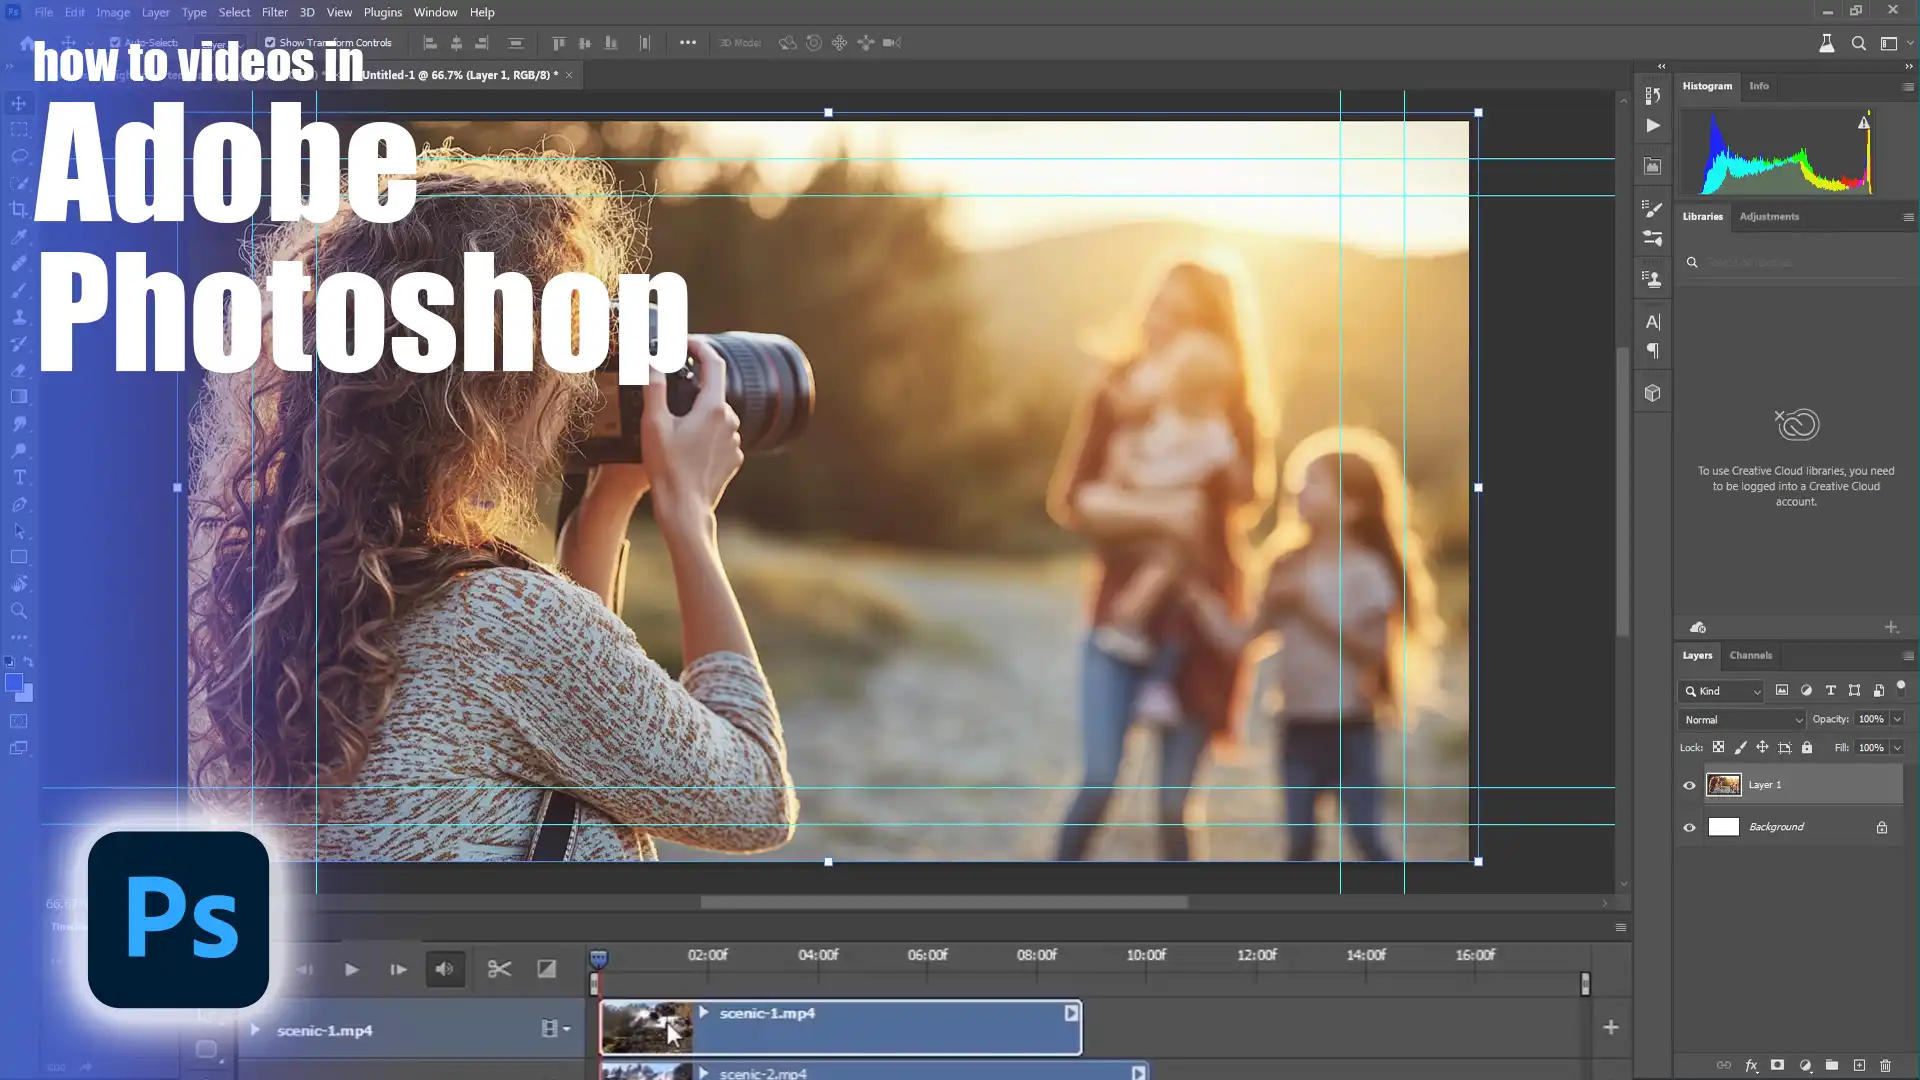
How to Work With Videos in Photoshop?
Learning Photoshop can feel overwhelming, especially if you’re just starting out. But don’t worry, you’re in the right place. If you’re eager to master Photoshop, you should consider photoshop how-to videos.
Why Photoshop How-To Videos Matter
Learning through videos can make complex concepts easier to understand. Videos break down intricate steps into manageable parts, helping you to grasp new techniques.
When you see someone demonstrate a technique, it sticks better than just reading about it.
Video tutorials inject visual learning into your experience.
Benefits of Learning Through Videos
Video tutorials offer step-by-step guidance, which is important when learning new skills. You get to follow along and pause as needed, ensuring you don’t miss any detail.
With video editing examples, you’ll see how a simple drag and drop can transform your layer.
Not only do you get visual aid, but many tutorials also include audio, explaining every action. Imagine trying to remove backgrounds from your images without any help versus having a video tutorial walk you through it.
The latter is certainly more reassuring. Additionally, you can replay videos as many times as you need, fixing concepts firmly in your mind.
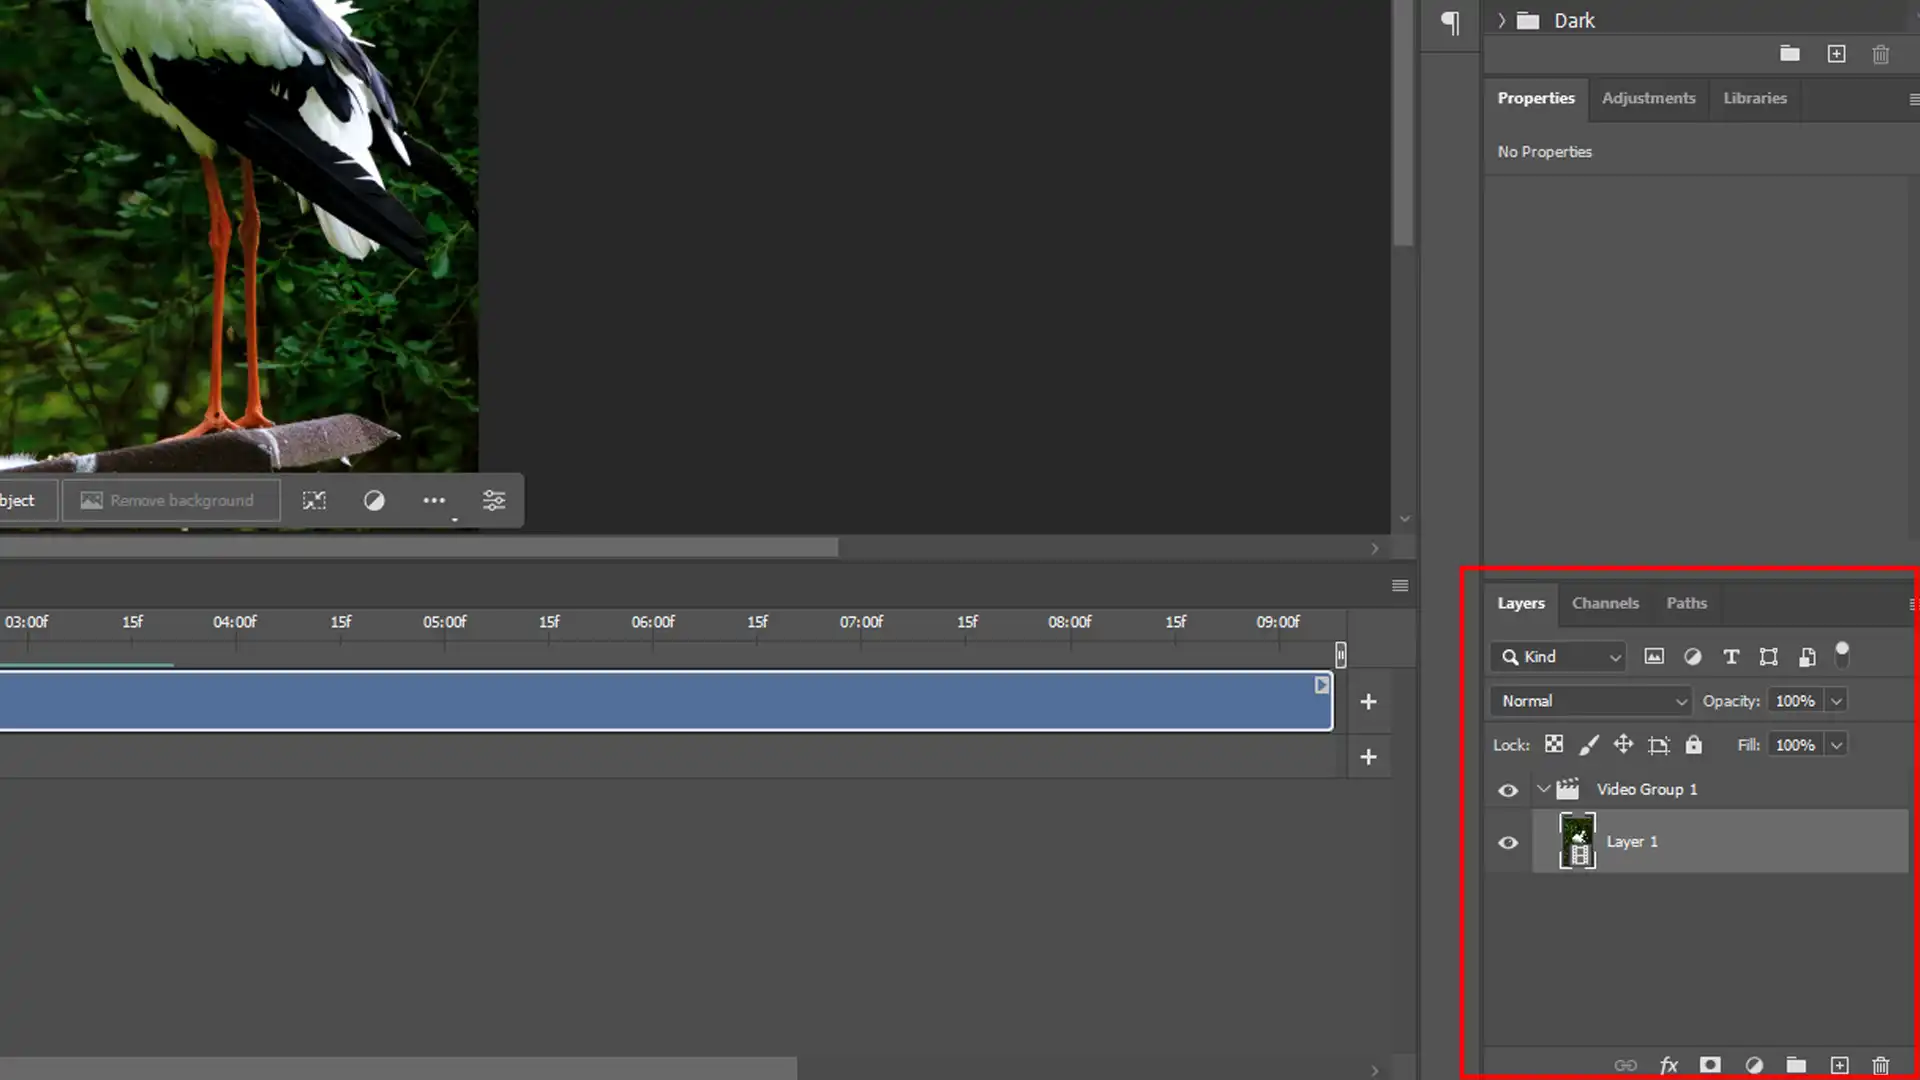
Getting Started with Video Layers
Creating video layers is both useful and simple.
In your layers panel, you can drag and position video clips similarly to pictures and text. You can then export your work in various formats.
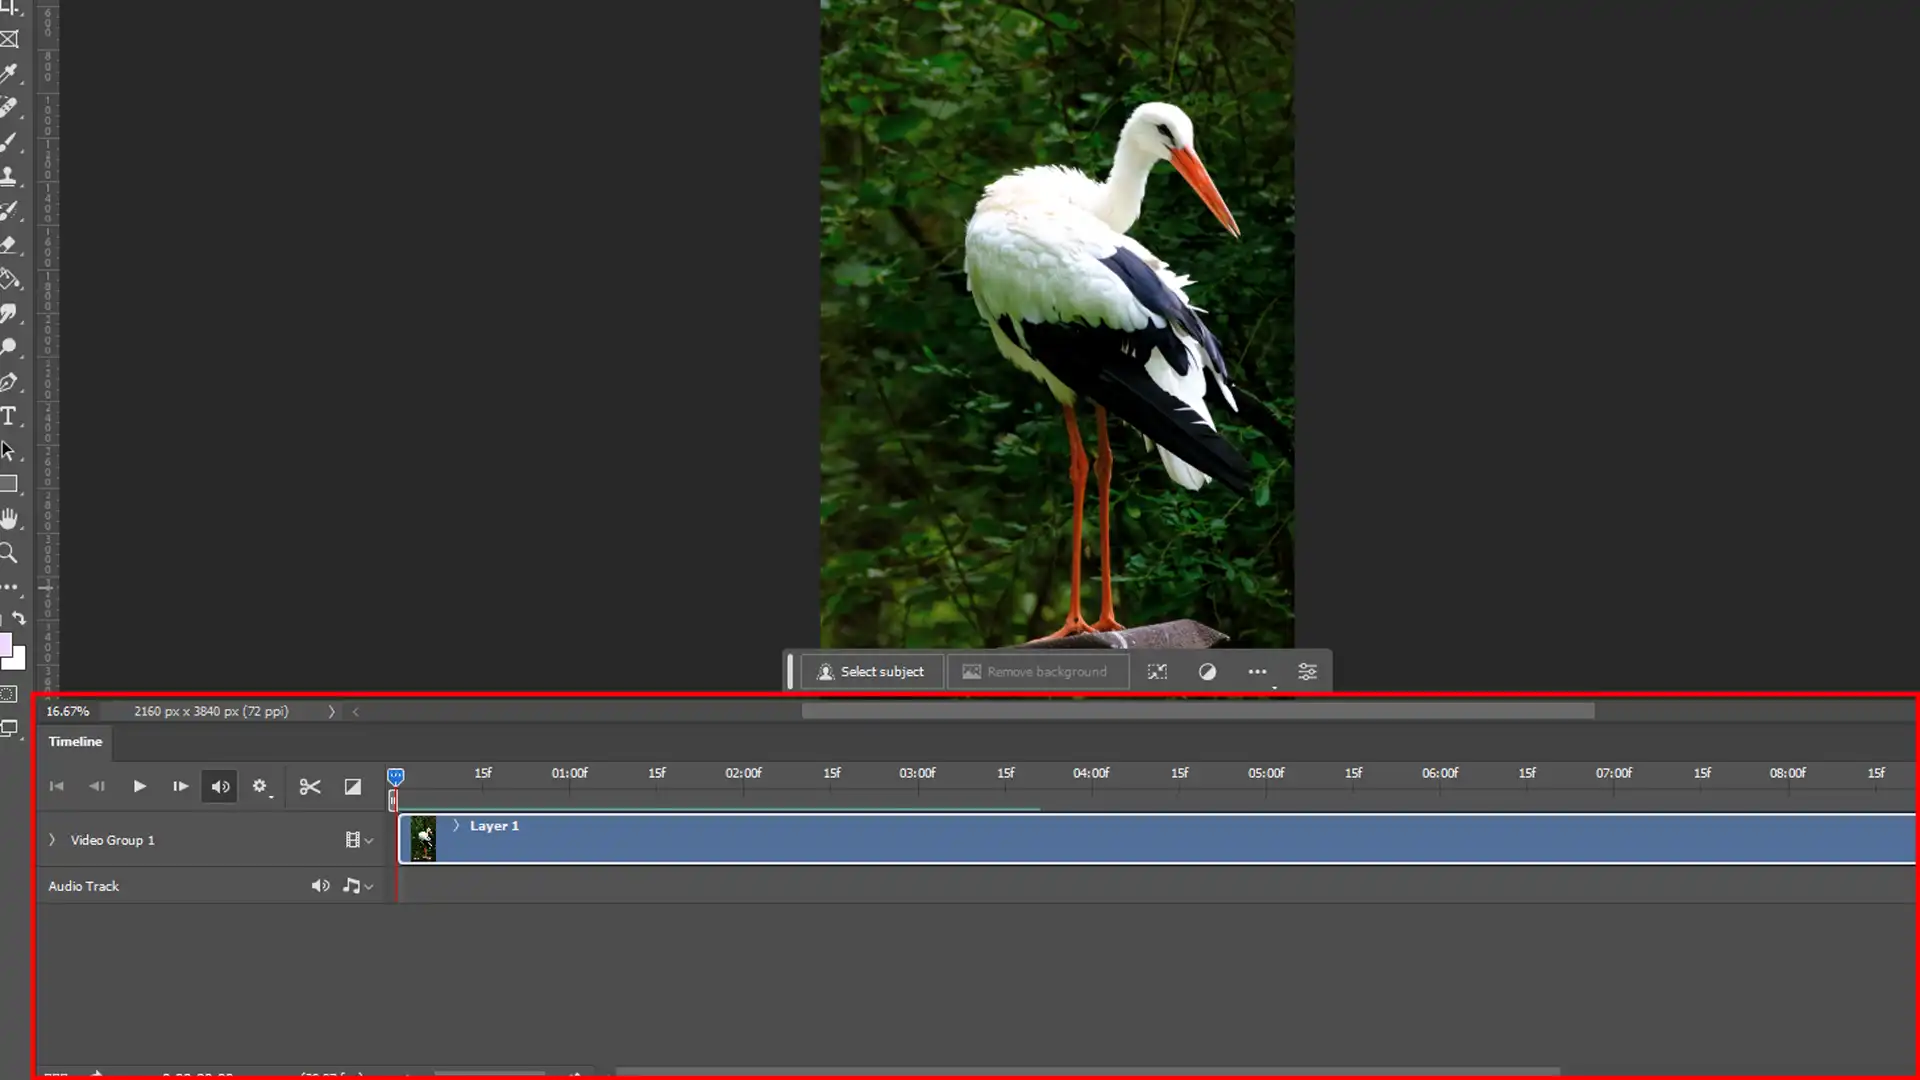
Utilizing the Timeline
Integrating timeline into your edits opens up endless possibilities.
Experimenting with fade transitions or timing effects can add depth to your projects.
This feature allows precise control over the sequence and timing of your video components.
Creating Great Edited Images
Photoshop enables you to bring still photos to life by introducing video elements.
Edit and blend multiple layers to achieve an impeccable composite image. Incorporate forms, objects, and even audio to add a dynamic quality to your work.
Combining Basics with Advanced Techniques
Even as you learn the basics, you can start exploring some advanced techniques.
Don’t shy away from experimenting with filters in Photoshop or adding fadeeffects to your layers. Remember, every edit is another layer of creative learning.
Saving and Exporting Your Projects
After you’ve finished editing, don’t forget to save and export your work. Choose the format that suits your needs, whether for online sharing or print purposes.
Make sure to note and store your projects in an organized manner for future use.
Pro Tip: Always keep a backup of your original files before making extensive edits. This way, if something goes wrong, you can always revert to the original version.
Getting Started with Adobe Photoshop
Dive into the world of Photoshop with confidence. Today, I will guide you through the essentials. This powerful tool will let you bring your creative ideas to life.
Setting Up Your Photoshop Workspace
First things first, let’s set up your workspace correctly. Photoshop offers customizable workspaces that help you focus on various tasks like retouching or video editing.
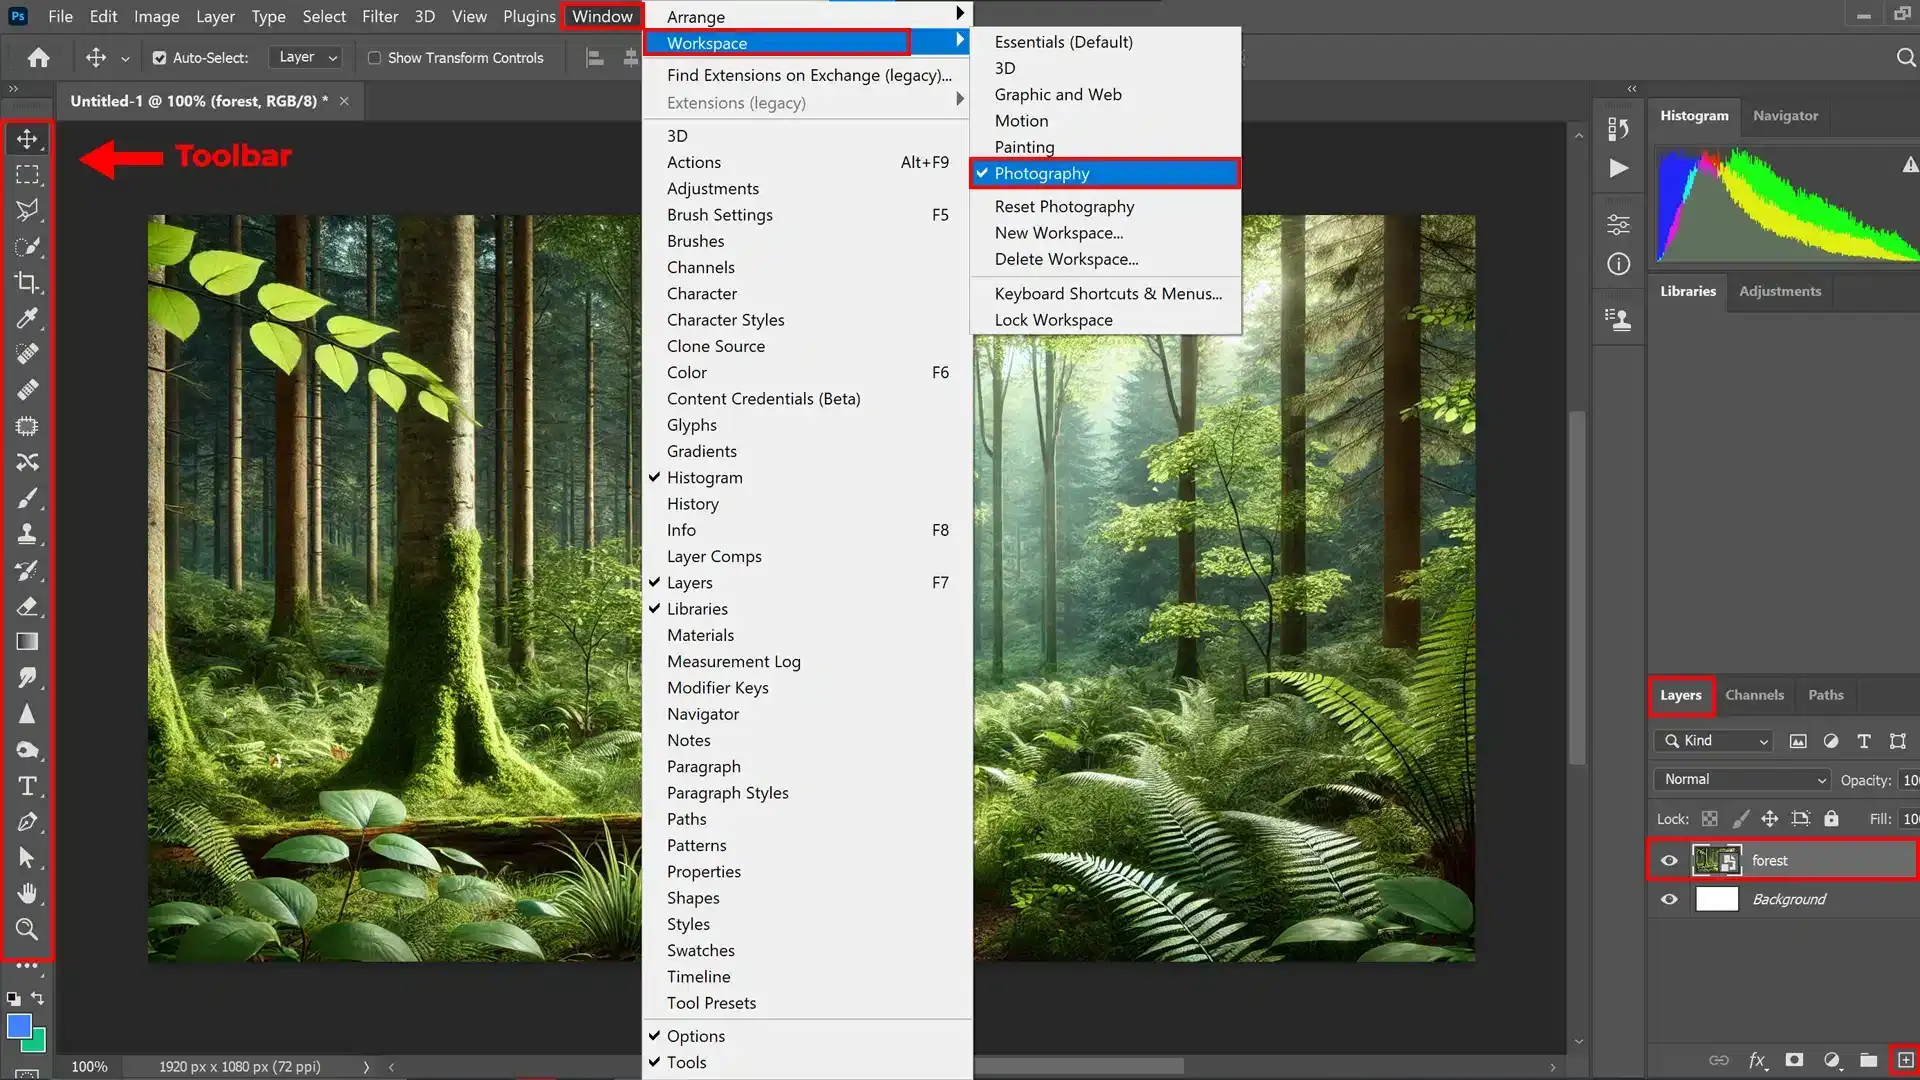
Follow these steps:
Open Photoshop.
Go to Window > Workspace.
Select Photography if you're working with images or select another as needed.
Arrange your tools and panels to match your workflow.
With this setup, you can access everything you need quickly and easily.
Important Tools for Beginners
Next, let’s explore essential tools in Photoshop that you’ll frequently use. Knowing these will streamline your creative process.
Brush Tool
Use this to draw and paint on your photos and layers.
Move Tool
This tool lets you move objects and layers around. Select and drag to reposition.
Layers let you stack different elements. They are like sheets of glass stacked one upon another.
Create Layers:
Click the New Layer iconat the bottom of the Layers panel.
Name your layer to keep track.
Drag to arrange them.
Masking
Use layer masks to hide or reveal parts of a layer. Great for blending photos and creating smooth transitions.
Understanding these basics will provide a strong foundation for further exploration. Whether you’re working on photos or video editing, these tools are important.
Pro Tip: Regularly save your projects.
Go to File > Save As and choose the format. Keep multiple versions as backups.
Also, consider using smart objects in Photoshop to maintain the quality of your layers while applying transformations.
These steps simplify the learning process, emphasizing what’s important.
Creating Engaging Video Tutorials
Content is most important. Start with a clear outline of what you want to cover. Think about the important points and sequence them logically.
Ask yourself, “What should the viewer learn first?” This step ensures your video flows smoothly. List the significant tools and features you’ll discuss.
Keep the list concise. Select topics that are both valuable and easy to understand for beginners.
Don’t overwhelm them with too much information at once. Break down your tutorial into sections. Use headings to divide the material.
This makes it easier for viewers to follow along. Remember, a well-organized tutorial keeps the audience engaged and learning.
Recording High-Quality Videos
Quality matters. Use a good microphone to record clear audio. Background noise distracts viewers. Consider using a script to stay on point.
Practice makes perfect. Ensure your screen recording software is up-to-date. Capture high-resolution footage of your Photoshop interface. Clarity helps viewers understand your actions.
Light your workspace properly. Natural light works best, but softbox lights are a good alternative. Avoid harsh shadows.
They can make your video look unprofessional. Engage your audience. Speak clearly and naturally. Imagine you’re talking to a friend. A relaxed tone makes your video more relatable.
Recording high-quality videos starts with the right gear. Choosing the best camera for professional photography ensures sharp footage, making your video editing more effective and enhancing overall content quality.
Editing and Enhancing Your Videos
Edit effectively. Import your footage into Adobe Premiere Pro. Arrange clips on the timeline in the order you’ll discuss them. Trim unnecessary parts.
Keep your videos concise and to the point. Add transitions between clips to smooth cuts. Use the fade effect to create seamless transitions.
Add text effects for important points. This reinforces learning. Insert relevant images or objects to highlight important details.
Adding Captions and Subtitles
Accessibility is important. Adding captions makes your video tutorial accessible to a wider audience.
Use Adobe Premiere Pro’s captions feature. Type out your script or summary of each section. Sync captions with the audio for accuracy.
Subtitles not only help those with hearing impairments but also non-native speakers.
Clear, readable text enhances understanding and retention. Ensure subtitles don’t obscure important parts of your video.
Exporting and Sharing Your Finished Tutorial
Share your work. After editing, export your video from Adobe Premiere Pro. Choose the right format for your platform, usually MP4.
The high resolution ensures good visual quality. Consider exporting a lower-resolution copy for quick previews or social media teasers.
Upload your video to platforms like YouTube or Vimeo. Optimize the title and description with relevant keywords.
This helps people find your tutorials easily. Sharing on social media platforms like Instagram, Facebook, or Twitter reaches a broader audience.
Engage with viewers by responding to comments and questions.
Pro Tip: Use keyboard shortcuts in Adobe Premiere Pro to speed up the video editing process. Familiarize yourself with these shortcuts for efficient editing!
Advanced Techniques in Adobe Photoshop
Welcome to the advanced level of Photoshop, where we uncover the secrets of creating and editing like a pro.
If you’ve ever wondered how experts manage to create stunning images, this guide will reveal the tricks.
Mastering Layers and Masks
Layers in Photoshop are like sheets of stacked glass. When you paint on a layer, you’re essentially adding color to that piece of glass without affecting layers below.
This approach keeps your workflow clean and reversible.
Steps to Master Layers:
Open your image and duplicate the background layer. This keeps your original safe.
Create a new layer by clicking on the 'New Layer' icon. You can now edit this new layer without touching the original.
Masks are like magic. They let you hide or reveal parts of a layer without erasing a single pixel. Think of it as an adjustable mask that conceals parts of the layer.
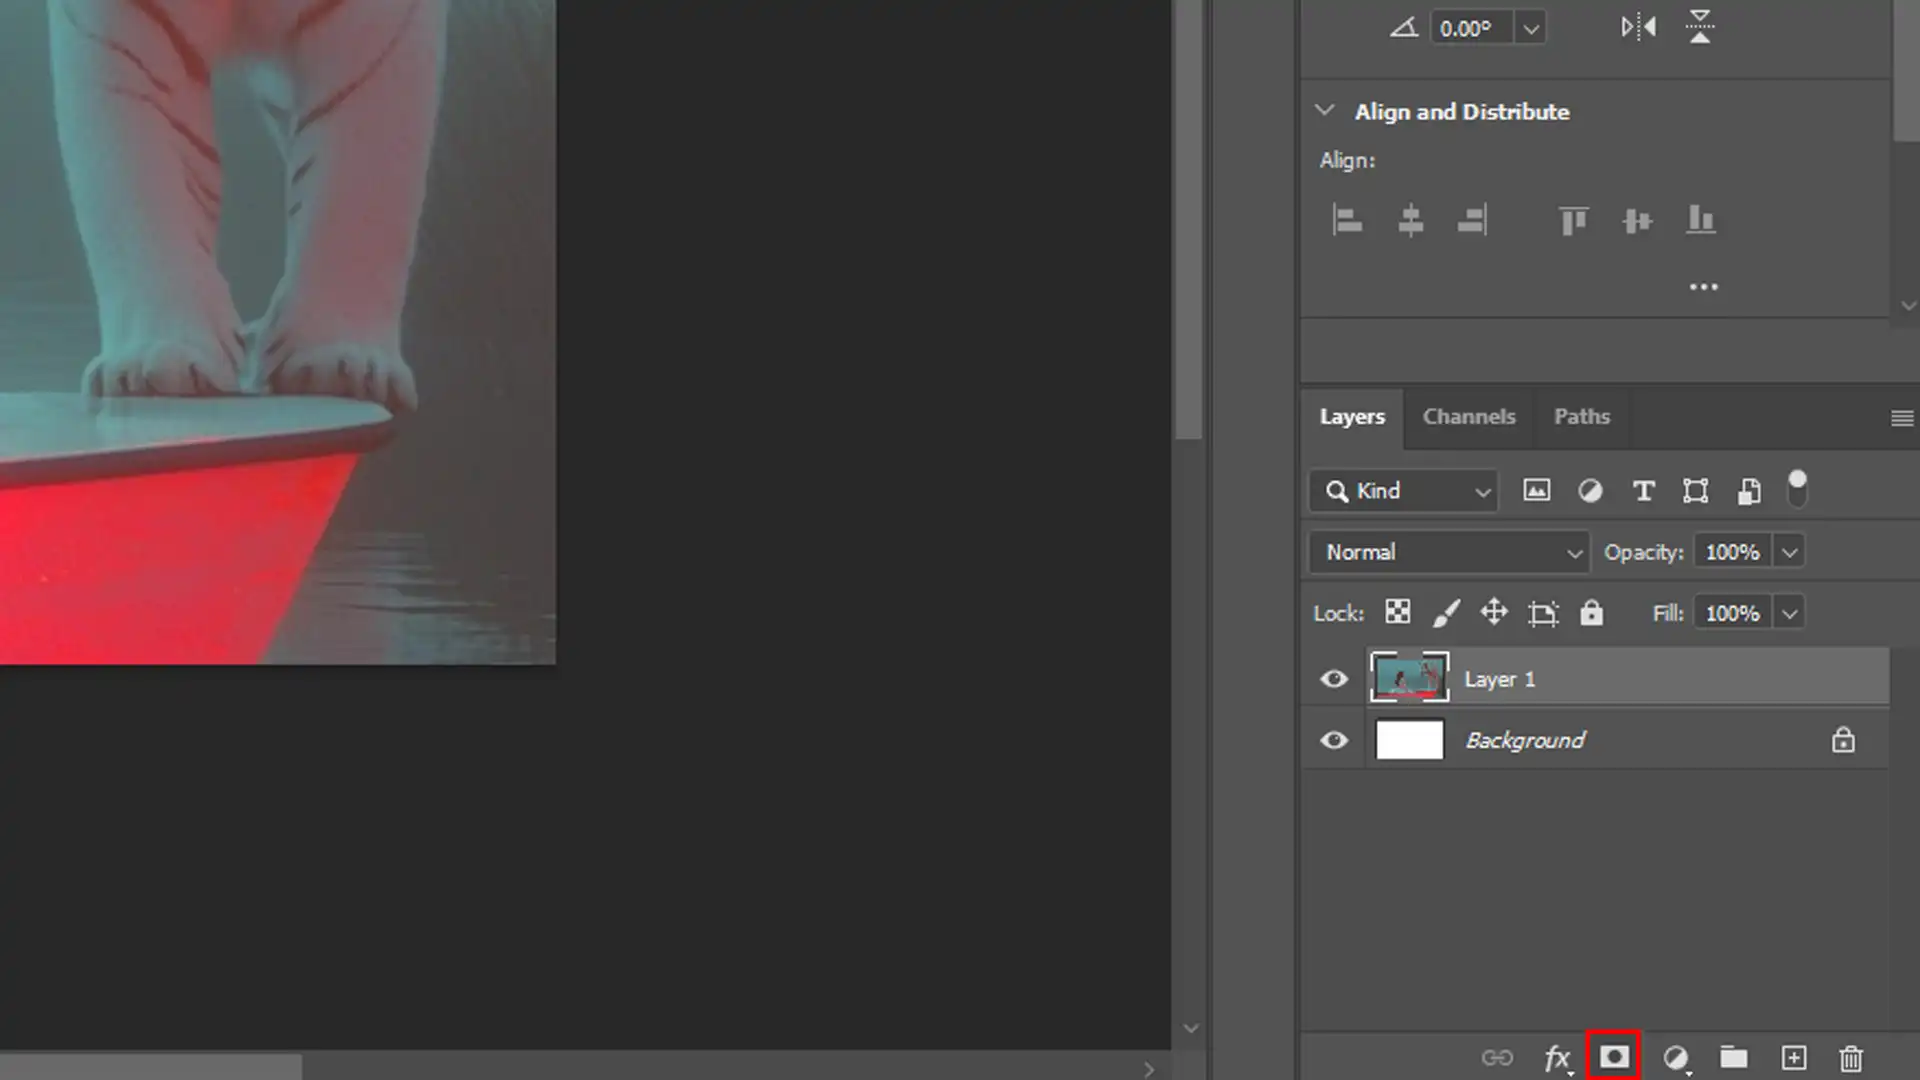
Steps to Use Masks:
Add a layer mask by clicking on the 'Add Layer Mask' icon. Use a black brush to hide parts of the layer and a white brush to reveal them.
This way, you can smoothly blend different parts of your layers and create seamless compositions.
Exploring Creative Effects
Photoshop offers numerous creative effects to enhance your images. Let’s dive into some of these fascinating options.
Exploring creative effects in editing starts with great shots. Using mirrorless cameras allows for sharp, dynamic photos that enhance your edits and make experimenting with effects even more exciting.
Steps to Apply Creative Effects:
Start by selecting a layer you want to apply an effect to. Go to the 'Effects' panel.
Choose 'Filters' to explore options like blur, sharpen, or even artistic effects.
Apply a filter and observe how your image transforms. Play around with settings until you get the desired result.
You can also use adjustment layers to alter colors and contrast, enhancing the visual appeal without damaging the original layer.
Automation and Scripting
Automation saves time, especially when dealing with repetitive tasks. Scripts and actions can handle multiple edits at once.
Steps to Automate Tasks:
Record an action by going to the 'Actions' panel and clicking on the 'New Action' button.
Name your action and hit 'Record.' Perform the steps you want to automate, and then click 'Stop' when done.
Apply this action to any image by selecting it in the 'Actions' panel and hitting 'Play.'
For more complex tasks, scripts can be coded in JavaScript or AppleScript, which can handle batch processing and more.
Pro Tip: Always remember to keep multiple saved versions of your work. This ensures that you can always return to a previous state if needed.
Sharing and Promoting Your Video Tutorial
Proper sharing and promotion of your video tutorial is signficant. We’ll dive into effective strategies.
Optimizing for SEO and Visibility
Let’s talk about search engine optimization(SEO). When you create your tutorial, include relevant keywords like “Photoshop how-to videos” or “Learn Photoshop.”
Make sure your video title is clear and engaging. Include keywords in the description and tags. This helps people find your videos more easily. Incorporate a detailed description.
Use phrases your audience might search for. For example, “Learn the basics of Photoshop with this easy tutorial.” Including timestamps in your description helps, too.
People appreciate references to specific points in the video. Use a custom thumbnail. Thumbnails should be visually appealing and relevant to the material.
A good thumbnail increases the chance of your video being clicked.
Utilizing Social Media Platforms
Social media platforms are important for promoting your work. Share your video on Facebook, Twitter, and Instagram. Each platform has a different audience.
Tailor your posts to fit each one.
Facebook
Join groups related to Photoshop and video editing. Share your tutorials there. Engage with community members by answering questions and providing valuable insights.
Twitter
Twitter requires brevity. Tweet a compelling snippet from your video with a link to your full tutorial. Use relevant hashtags like #HowTo and #Tutorials to reach a broader audience.
Instagram
Instagram is great for visual information. Share short clips or behind-the-scenes images. Use the Stories feature to keep your followers engaged and updated.
YouTube
Consider YouTube. It is the go-to platform for video content. Build a playlist of your tutorials. This improves user experience and keeps viewers on your channel.
LinkedIn
Don’t forget LinkedIn. It’s a professional network and an excellent platform for reaching other educators and professionals.
Share your video collection and ask for feedback.
Pro Tip: Always engage with your audience by responding to comments. This builds a community around your information and encourages repeat viewers.
Engaging with Your Audience
One important aspect of growing your audience is to actively encourage feedback and interaction.
Here are some strategies:
Ask your viewers what they would like to see next.
Give them a simple yet clear call-to-action at the end of your videos. For instance, suggest they leave comments or questions.
Always respond to comments in a timely manner. It shows you care and are invested in your community. A polite response can win you a loyal follower.
Giving shout-outs to loyal viewers can also encourage interaction. Highlight helpful comments or unique examples users share. This recognition fosters a stronger relationship between you and your audience.
Engaging with your audience can be more impactful when you use creative techniques like 360 photography. This interactive style draws viewers in, making them feel part of the experience and boosting engagement through immersive content.
Building a Community Around Your Content
Creating a community is more than just making quality videos. You need to put effort into fostering a sense of belonging among your viewers.
Here are some tips:
Host live sessions occasionally to interact directly with your audience in real time. Live Q&A sessions work great for this purpose.
Create social media groupswhere your viewers can discuss topics related to your videos. Platforms like Facebook, Instagram, and Reddit are excellent choices. These groups can turn into vibrant forums where your viewers can learn from each other.
Share user-generated material. User submissions could be featured in your videos or social media pages. This validation motivates users to stay engaged and contribute more.
Personalize Your Interactions
Address your viewers by name when replying to their comments. A little personal touch goes a long way in making your followers feel valued.
Adjusting video volume before you export will ensure your audience enjoys a seamless viewing experience.
Whether it’s a fade in your audio or masking unwanted noise, attention to detail leaves a lasting impression.
A stunning collection of images can be created by mastering Photoshop’s fade effects.
When you’ve created multiple layers, using a subtle fade can add depth and harmony to your collection, making each piece more captivating.
For those using Lightroom, consider learning some essential tools in Lightroom to enhance your video thumbnails and attract more viewers.
Aligning your material with your audience’s interests makes them more likely to engage with you. If you’re into photography, exploring different types of photography can provide fresh content ideas that resonate with your viewers.
By incorporating the best mobile photography accessories, you ensure that your images are captured with the highest quality, making your editing process in Photoshop and Lightroom even more effective.
Continuous Learning and Improvement
As we all know, continuous learning is important in mastering any skill. Let’s dive into some significant areas to focus on.
Aspect
Photoshop
Video Editing Tools
Feedback Incorporation
Learning Curve
High, frequent updates
Moderate, specialized tools
Moderate, based on viewer input
Skill Enhancement
Advanced editing techniques
Basic video editing capabilities
Improvement through viewer suggestions
Feature Updates
Regular updates with new features
Limited updates, more focused
Enhancements based on feedback
Ease of Use
Complex, requires practice
User-friendly for basic tasks
Adaptable, depends on feedback quality
Application Scope
Broad, photo and video editing
Specific to video editing
Applicable to content improvement
Staying Updated with Photoshop
Keeping up with Photoshop enhances your editing skills. Here are some steps to follow:
Regularly update the software to access new features.
Watch tutorials online for tricks and better editing techniques.
Experiment with different tools within the program.
Practice regularly and preserve your creations to track progress.
Staying updated with Photoshop means mastering basic tools and new features.
Learning how to crop in Photoshop helps keep your skills sharp and efficient, ensuring you’re ready for any editing challenge.
Incorporating Viewer Suggestions
Feedback plays a significant role in growth.
To incorporate viewer suggestions:
Ask your viewers for their opinions.
Read and respond to comments.
Implement suggestions that can improve the material.
Personalize your projects based on feedback.
Mention viewers who provided helpful tips to build a strong connection with your audience.
Using Photoshop for Video Editing
Yes, Photoshop supports basic video editing.
Follow these steps:
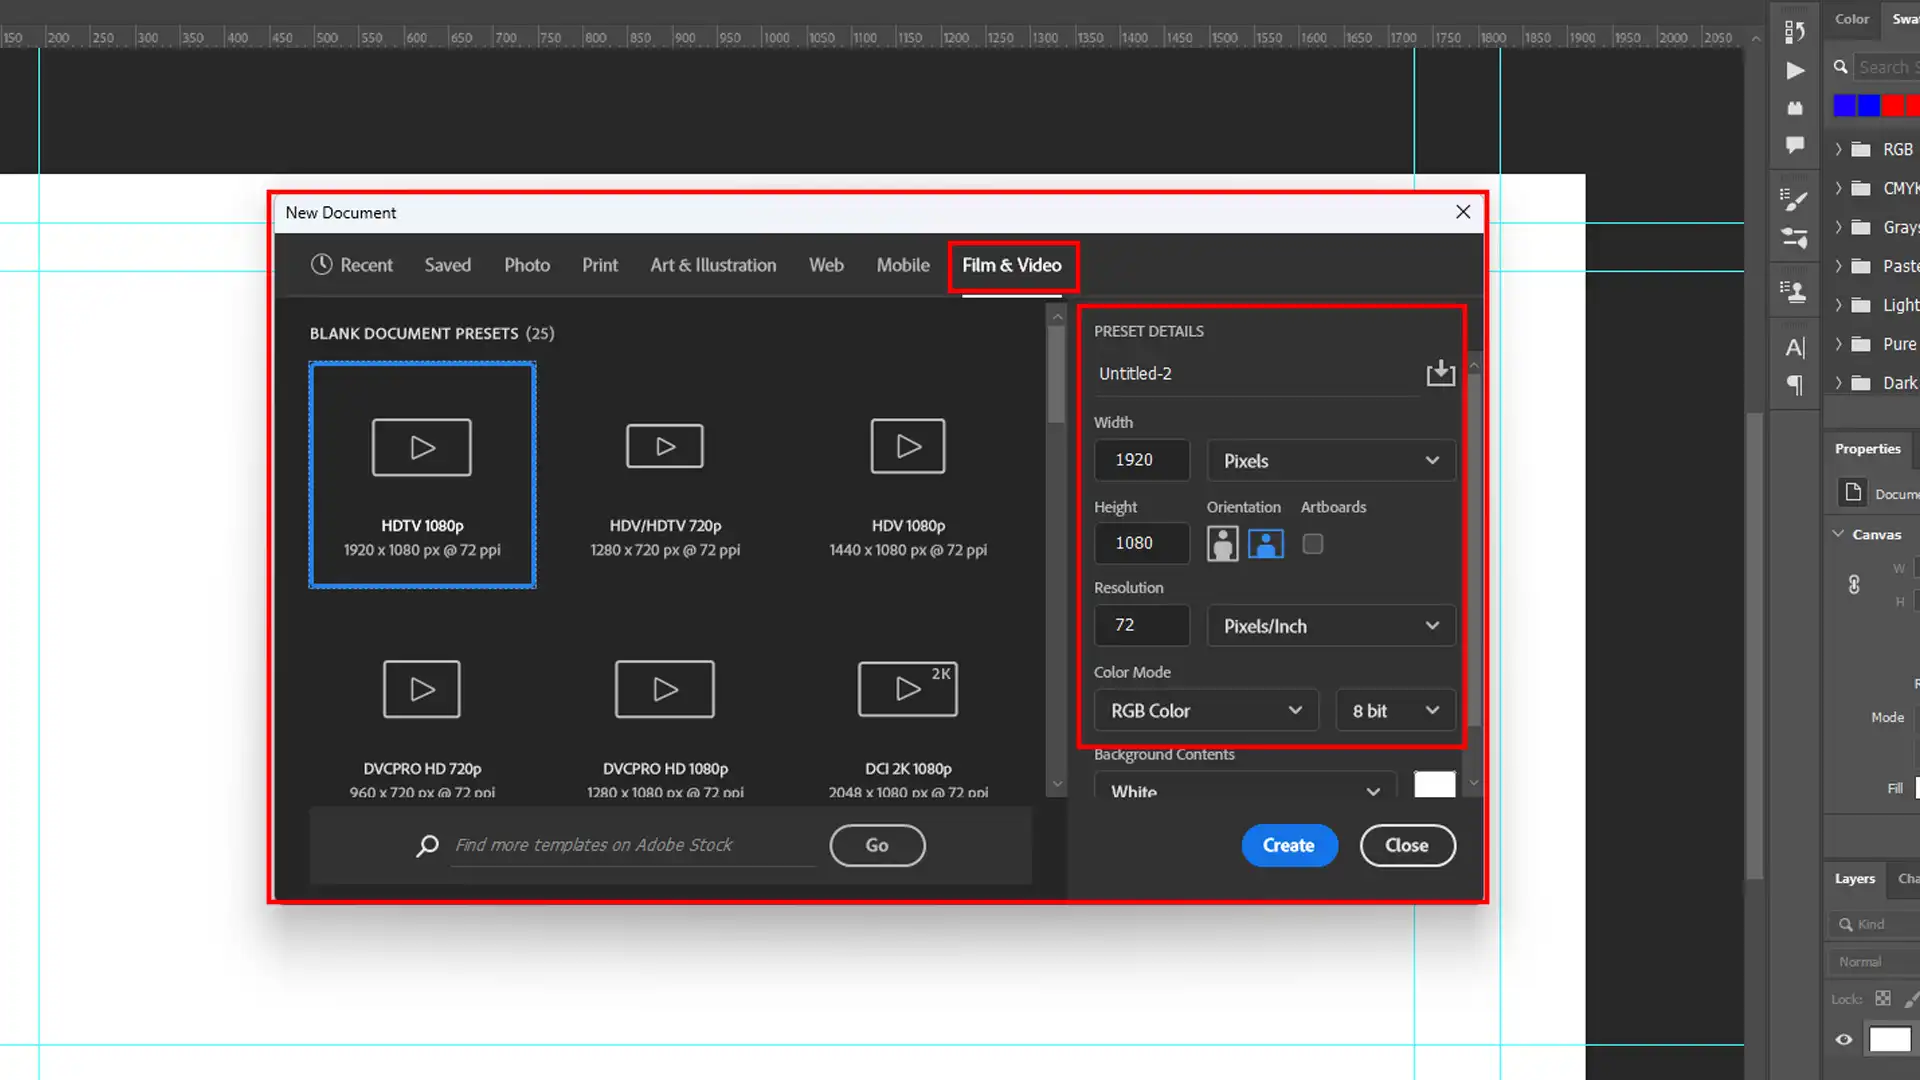
Create a new document, then go to the "Timeline" menu to create frames.
Import your video clips by drag and drop.
Split every videolayer, insert fade-in and fade-out effects, and work with individual frames.
Adding Backgrounds and Shapes
Enhance your projects by adding backgrounds and shapes:
Use the ‘Gradient’ tool or solid colors for simple backgrounds.
Utilize the ‘Shapes’ tool to include various shapes.
Working with Audio
Although not its primary function, Photoshop allows minor audio adjustments:
Import audio files to synchronize with your video layers.
Adjust the audio volume to blend seamlessly.
Final Touches and Exporting
After completing your edits, follow these steps:
Review the entire project to ensure there are no mistakes.
Export the video in your desired format.
Name your file, choose the destination folder, and save it.
Pro Tip: Always maintain a backup of the original files. This practice prevents data loss and protects your creation.
Frequently Asked Questions
Can you do videos in Photoshop?
Yes, Photoshop supports basic video editing functions that allow you to work with video clips. You can open, edit, and enhance video files directly in Photoshop.
How to video edit in Photoshop?
Follow these steps to edit a video in Photoshop:
To edit a video in Photoshop, first open the video file by going to File > Open and selecting the video.
Once the video is open, you can use the Timeline panel to make edits such as trimming the video, adding filters, and inserting text layers.
Tools like the Brush, Clone Stamp, and others can be used directly on video frames.
Adjust the opacity, blending modes, and other settings to enhance your video.
How do I convert a Photoshop file to video?
To convert a Photoshop file (PSD) to a video, make sure your file has multiple layers or frames that can be animated.
Open the Timeline panel by going to Window > Timeline, and create a new video timeline.
Arrange and animate the layers or frames as needed.
Once you're satisfied with the animation, export the project by going to File > Export > Render Video.
How to record video in Photoshop?
Photoshop does not natively support recording video directly within the application. It is primarily designed for editing existing video files.
To work with video in Photoshop, import video files recorded from other devices or software.
Learning Photoshop can seem tough at first, but with the right resources, it gets easier. Watching Photoshop how-to videos really helped me understand important editing techniques.
They break down steps in a way that makes sense and lets you learn at your own pace. If you want to dive deeper, I highly recommend taking my Photoshop Course or Lightroom Course.
Both of these courses provide step-by-step guidance and real-world examples that you can follow.
To make the most of what you learn, check out Adobe’s official tools, such as Photoshop and Lightroom.
These are great for both beginners and those looking to polish their skills.
Keep practicing and exploring new techniques, and soon you’ll be creating amazing edits!
If this article has helped you, then Like and Share it with your friends
$2,061.00Original price was: $2,061.00.$1,061.00Current price is: $1,061.00. 27583
Download Your Free Guide Now!
Discover the secrets of photography with our printable guide! Master essential techniques like aperture, shutter speed, and ISO to create stunning images. Get your free printable PDF now and start turning your snapshots into masterpieces!