Mastering Photoshop: How to Change Hair Color in Photoshop
Mastering Photoshop: How to Change Hair Color in Photoshop
In this quick and easy Photoshop tutorial I’ll show you how to change hair color.
Tint and colorize hair with full control and can always go back and change anytime without starting from scratch!I’ve done this on friends, family and even myself to try out different hair colors.
Let’s get started!
Table of Contents
Preparing Your Hair For Color Adjustment
Moving beyond the basics about the hair hue in Photoshop, we’ll navigate through more nuanced techniques to achieve realistic and striking results.
Whether you’re enhancing a model’s portrait (or just using the portrait filter in Photoshop) or want to experiment with creative color concepts, the following steps will guide you through refining your approach to modifying tresses in your imagery.
Additionally, you can utilize the replacing tool for more precise color adjustments or explore the content-aware-fill to seamlessly blend colors.
Lighting Considerations
Good lighting is pivotal for hair color alteration. It can affect the perception of color and highlight subtleties in hair tones.
For instance, direct sunlight can create a different impression of color compared to artificial indoor lighting.
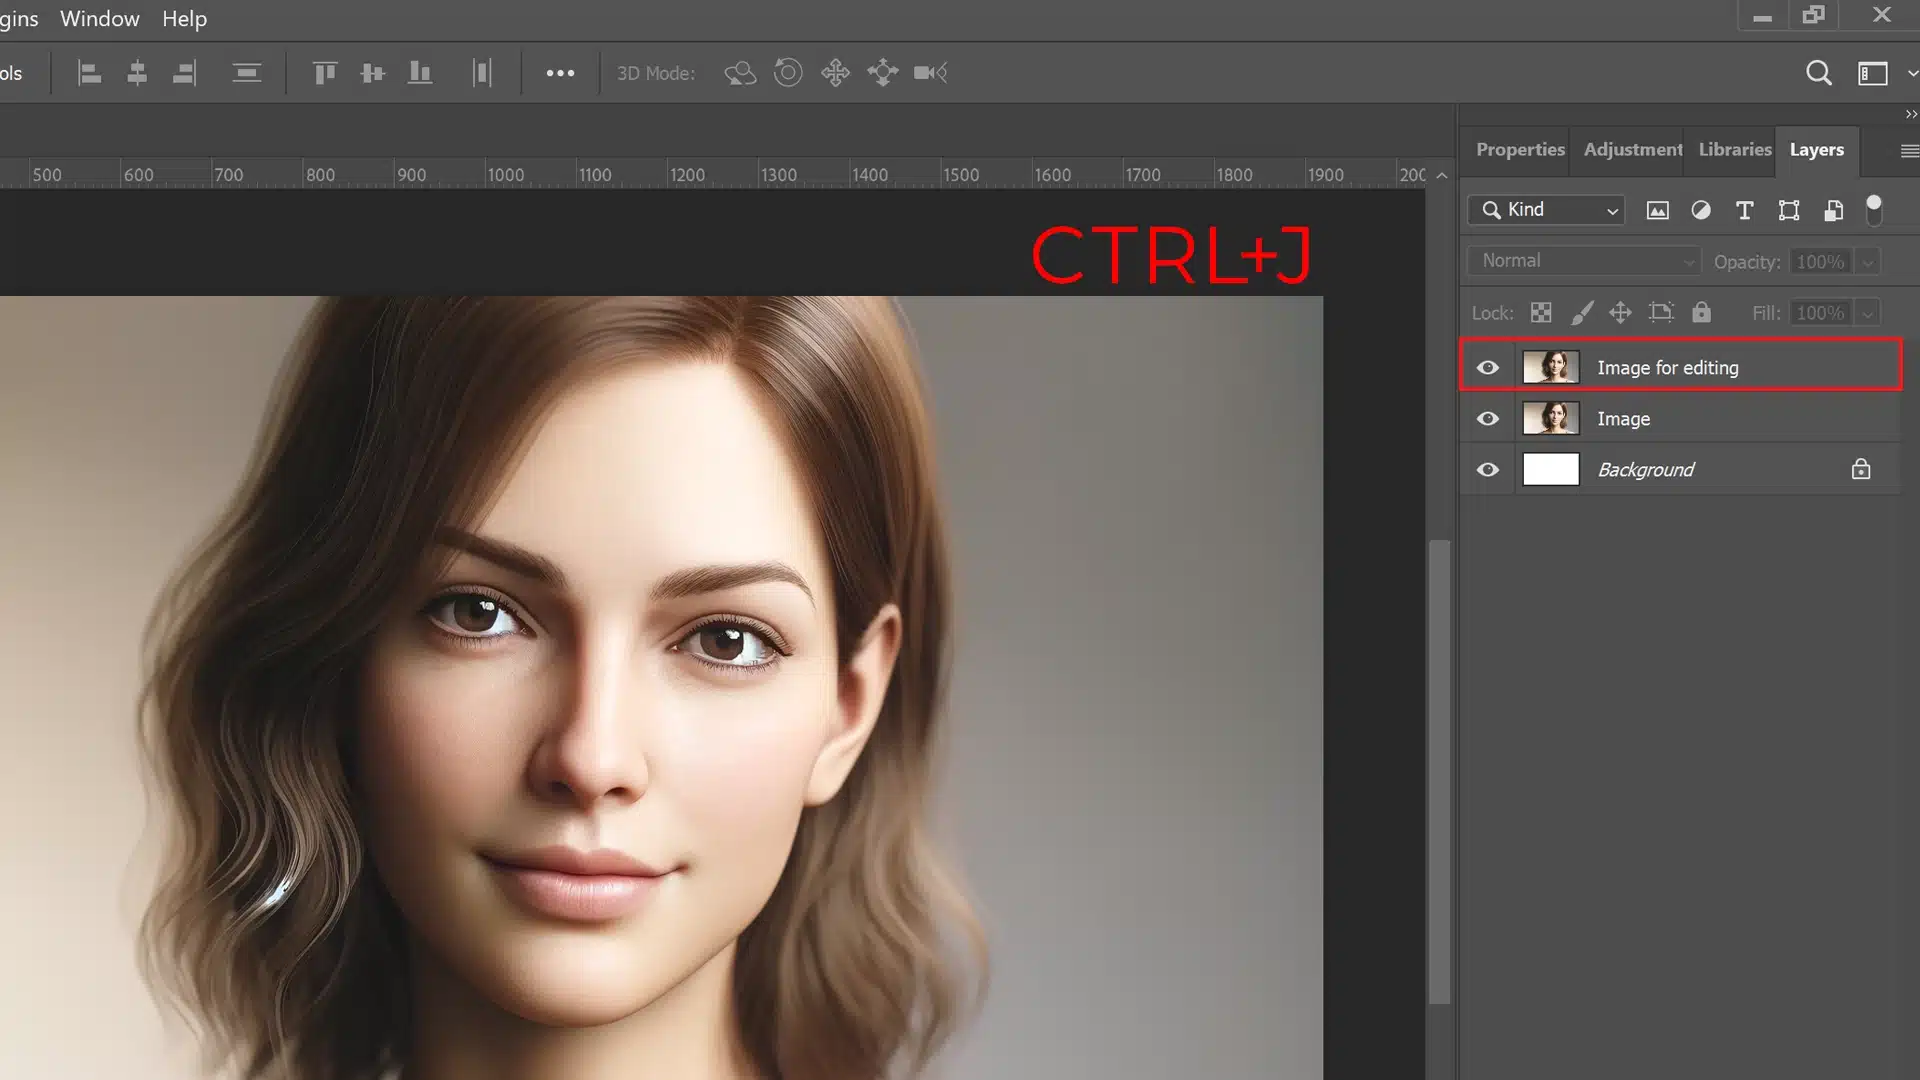
Creating a Duplicate Layer
It’s always wise to work non-destructively by duplicating the original layer. This way, you can freely experiment without altering the original image.
Here’s how you can do it:
1. Press Ctrl+J (or Cmd+J on a Mac) to duplicate the selected layer.
2. Rename the new one to keep your workspace organized.
This duplicated layer will serve as your canvas for color adjustments.
Initial Color Assessment
Take the time to decide on the color direction you want to pursue. Consider the following:
What is the desired end result? Are you aiming for a natural look or something more fantastical?
How will the new hair color interact with the rest of the image, such as the background and the subject's skin tone?
Step-by-Step Hair Color Transformation
Transitioning from the basics of preparing your image, let’s delve into the details of changing hair to your desired shade.
In this section, we’ll guide you through selecting the right tools, resizing layers, and making precise color adjustments to achieve a stunning and realistic hair color transformation using Photoshop.
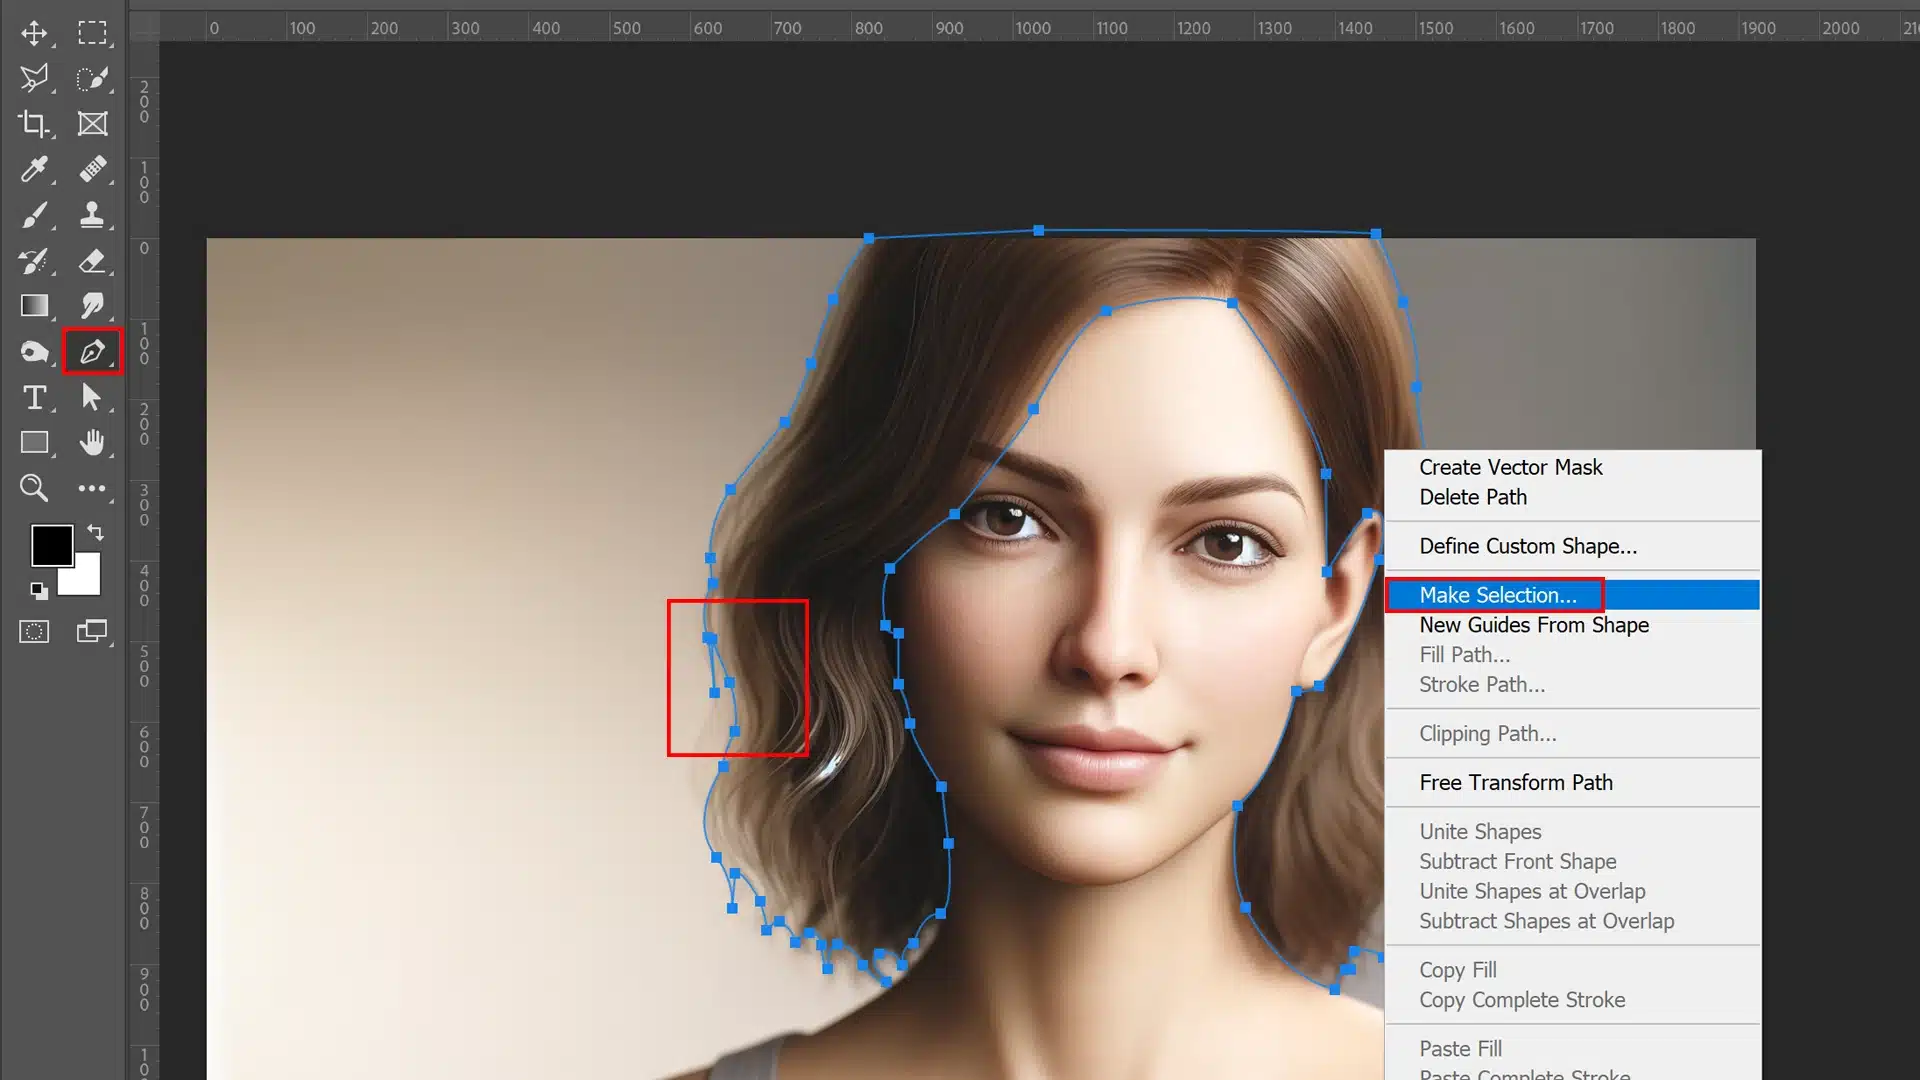
Selecting Hair with the Right Tool
To begin, the key to a successful color modification lies in the precision of your selection. Utilize the object selection tool to isolate the hair area. A popular choice is the quick selection tool, known for its ease of use and effectiveness.
However, for strands that require a more delicate touch, consider the shape tool for its unparalleled accuracy.
Follow these steps: 1. Activate the Quick Selection from the toolbox.
2. Drag over the hair to select it. For stray hairs, use the Refine Edge option.
3. If necessary, switch to the Pen tool for fine-tuning the selected subject.
Remember, the goal is to create a seamless selection that allows for natural-looking color alterations.
Adding an Adjustment Layer
This non-destructive method permits color alterations without permanently altering the original image data.
Here’s how to proceed: 1. With your selection active, navigate to the Layers panel.
2. Click the ‘New Adjustment Layer’ icon.
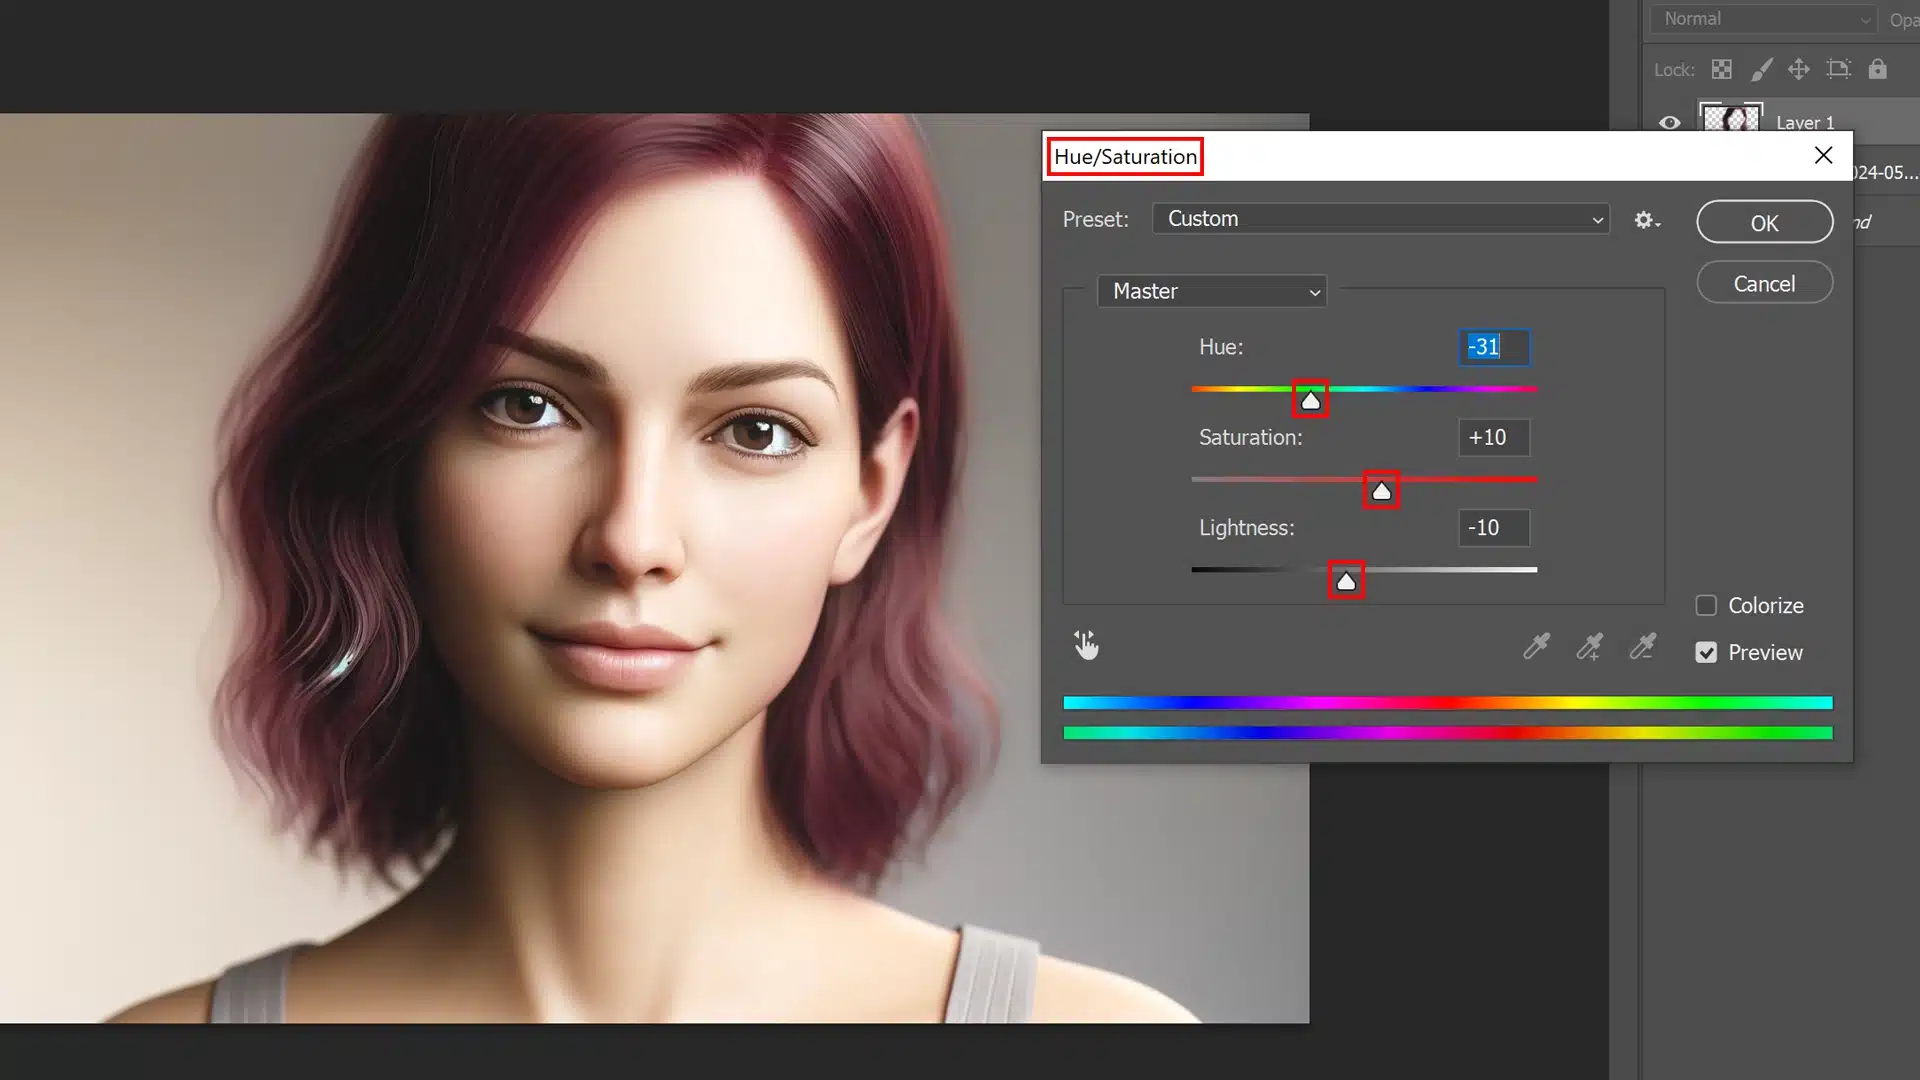
3. Choose ‘Hue/Saturation’ from the list to open the properties menu.
4. Now, you can slide the hue, saturation, and lightness controls to experiment with different colors.
The Adjustment Layer can be revisited anytime, allowing for endless tweaks until you achieve the perfect hue.
To refine your color work, the Blending Options in the Layers panel become your best ally. Blending modes like ‘Color‘ or ‘Soft Light‘ can merge the new color with the original tones for a more natural effect.
Additionally, adjusting the layer’s opacity lets you control the intensity of the color.
Consider these tips for fine-tuning:
Experiment with different blending modes to see how they affect the hair color.
Adjust the layer opacity to increase or decrease the color intensity.
Use a layer mask to remove unwanted color from areas outside the hair.
Crafting visuals with smooth curves can infuse softness and approachability into your designs.
As we explore the nuances of creating round corners in Adobe Photoshop, remember that subtle changes can significantly affect your project’s overall feel.
Whether you’re designing a sleek mobile interface or adding a watermark to graphic elements, mastering round corners is a skill worth refining.
Throughout the process, keep an eye on the overall harmony of the image, ensuring that the new hair color complements the subject’s features and the photo’s lighting.
Mastering hair color transformations in this software requires patience and attention to detail.
By carefully selecting the hair, adding adjustment layers, and fine-tuning the color, you can achieve impressive and realistic results.
Select the hair using the Quick Selection tool or another selection tool.
Go to the Adjustments panel and click on the Hue/Saturation icon.
In the Properties panel, adjust the Hue and Saturation sliders to achieve the desired hair color. You can also find the Colorize option to apply a uniform color.
Refine the mask if needed by painting on it with white or black
Refining The New Hair Color In Photoshop
Transitioning from basic changes to more advanced techniques, our focus shifts to the little details that make the transformation believable and seamless.
Adjusting Layer Masks
Begin by zooming in on your photo to work closely on the hair areas. Here’s how you can refine your masks:
1. Use a soft-edged brush tool to gently paint over the mask, ensuring no strands are left unaltered.
2. Lower the brush’s opacity for a more subtle effect, especially around the hair edges.
3. If you find areas where the original hair color peeks through, simply switch your foreground color to black and paint over to conceal.
4. Conversely, switch to white to restore any color you may have accidentally hidden.
For further refinement, consider using the selection tools to isolate hair strands more precisely.
Frequently Asked Questions
How do I change my hair color in Photoshop for free?
To change your hair color in Photoshop, follow these steps:
First, Select the hair using the Quick Selection tool or another selection tool.
Then Go to the Adjustments panel and click on the Hue/Saturation icon.
In the Properties panel, adjust the Hue and Saturation sliders to achieve the desired hair color. You can also select the Colorize option to apply a uniform color.
Refine the mask if needed by painting on it with white or black
How do I change the hair color in a Photoshop action?
Creating a Photoshop action to change hair color involves recording the steps you take to change the hair color manually:
Start recording a new action by going to Window > Actions, then click the 'Create new action' button.
Select the hair using the Quick Selection or another selection tool.
Then Go to the Adjustments panel and click on the Hue/Saturation icon.
In the Properties panel, adjust the Hue and Saturation sliders to achieve the desired hair color. You can also select the Colorize option to apply a uniform color.
Refine the mask if needed by painting on it with white or black
Follow the steps to change hair color as described above.
Stop recording the action once you are done. You can now apply this action to other images with similar hair selections
How do you make a hair effect in Photoshop?
Creating a realistic hair effect in Photoshop can be done using a combination of the following techniques
Brush Tools: Use custom hair brushes to paint individual hair strands.
Smudge Tool: Use the Smudge tool to blend and soften edges of hair strands, making them look more natural.
Dodge and Burn: Use the Dodge and Burn tools to add highlights and shadows to create depth and dimension.
Filters: Apply filters like Gaussian Blur to soften the hair texture or add noise for a more natural look
How do you manipulate hair in Photoshop?
Manipulating hair in Photoshop can involve several techniques, including:
Selection and Refinement: Use tools like the Quick Selection tool, Refine Edge, or Select and Mask to accurately select hair.
Layer Masks: Apply layer masks to hide or reveal parts of the hair for more precise edits.
Adjustment Layers: Use Hue/Saturation, Color Balance, or Curves adjustment to change color and contrast without altering the original hair layer.
$2,061.00Original price was: $2,061.00.$1,061.00Current price is: $1,061.00. 27584
Download Your Free Guide Now!
Discover the secrets of photography with our printable guide! Master essential techniques like aperture, shutter speed, and ISO to create stunning images. Get your free printable PDF now and start turning your snapshots into masterpieces!