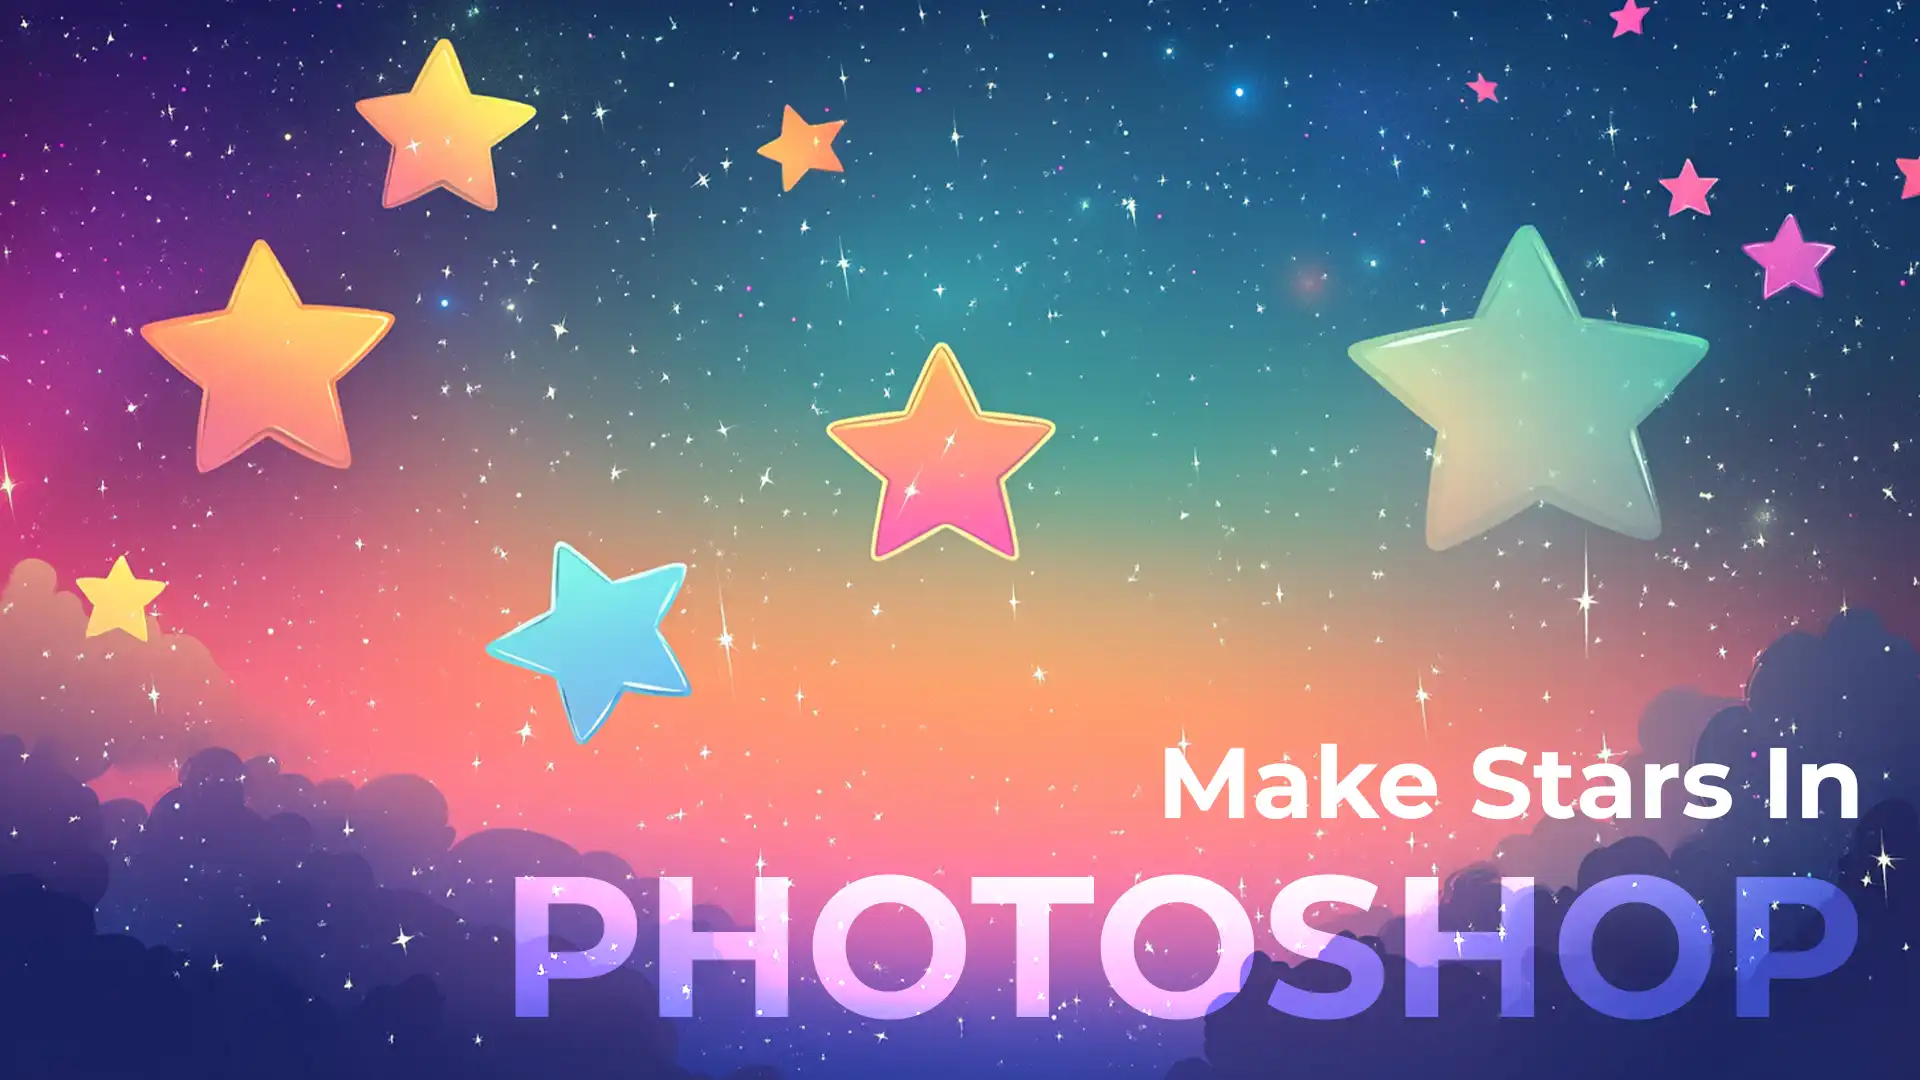
Have you ever wondered how to create twinkling stars in Photoshop for your projects?
Learning this can transform your ordinary images into stunning art pieces with just a few clicks.
Sometimes, all it takes is a sprinkle of starry magic to elevate your visuals, whether for a school project, a personal blog, or even a poster design.
Let’s make this easy and enjoyable as we create dazzling stars that can light up any graphic.
Join me as we explore this simple yet impactful technique!
Table of Contents
Creating Basic Stars in Photoshop
Crafting basic stars in Photoshop is straightforward.
This step-by-step guide will teach you how to create and customize these shapes as per your needs.
Creating Star Shape in Photoshop
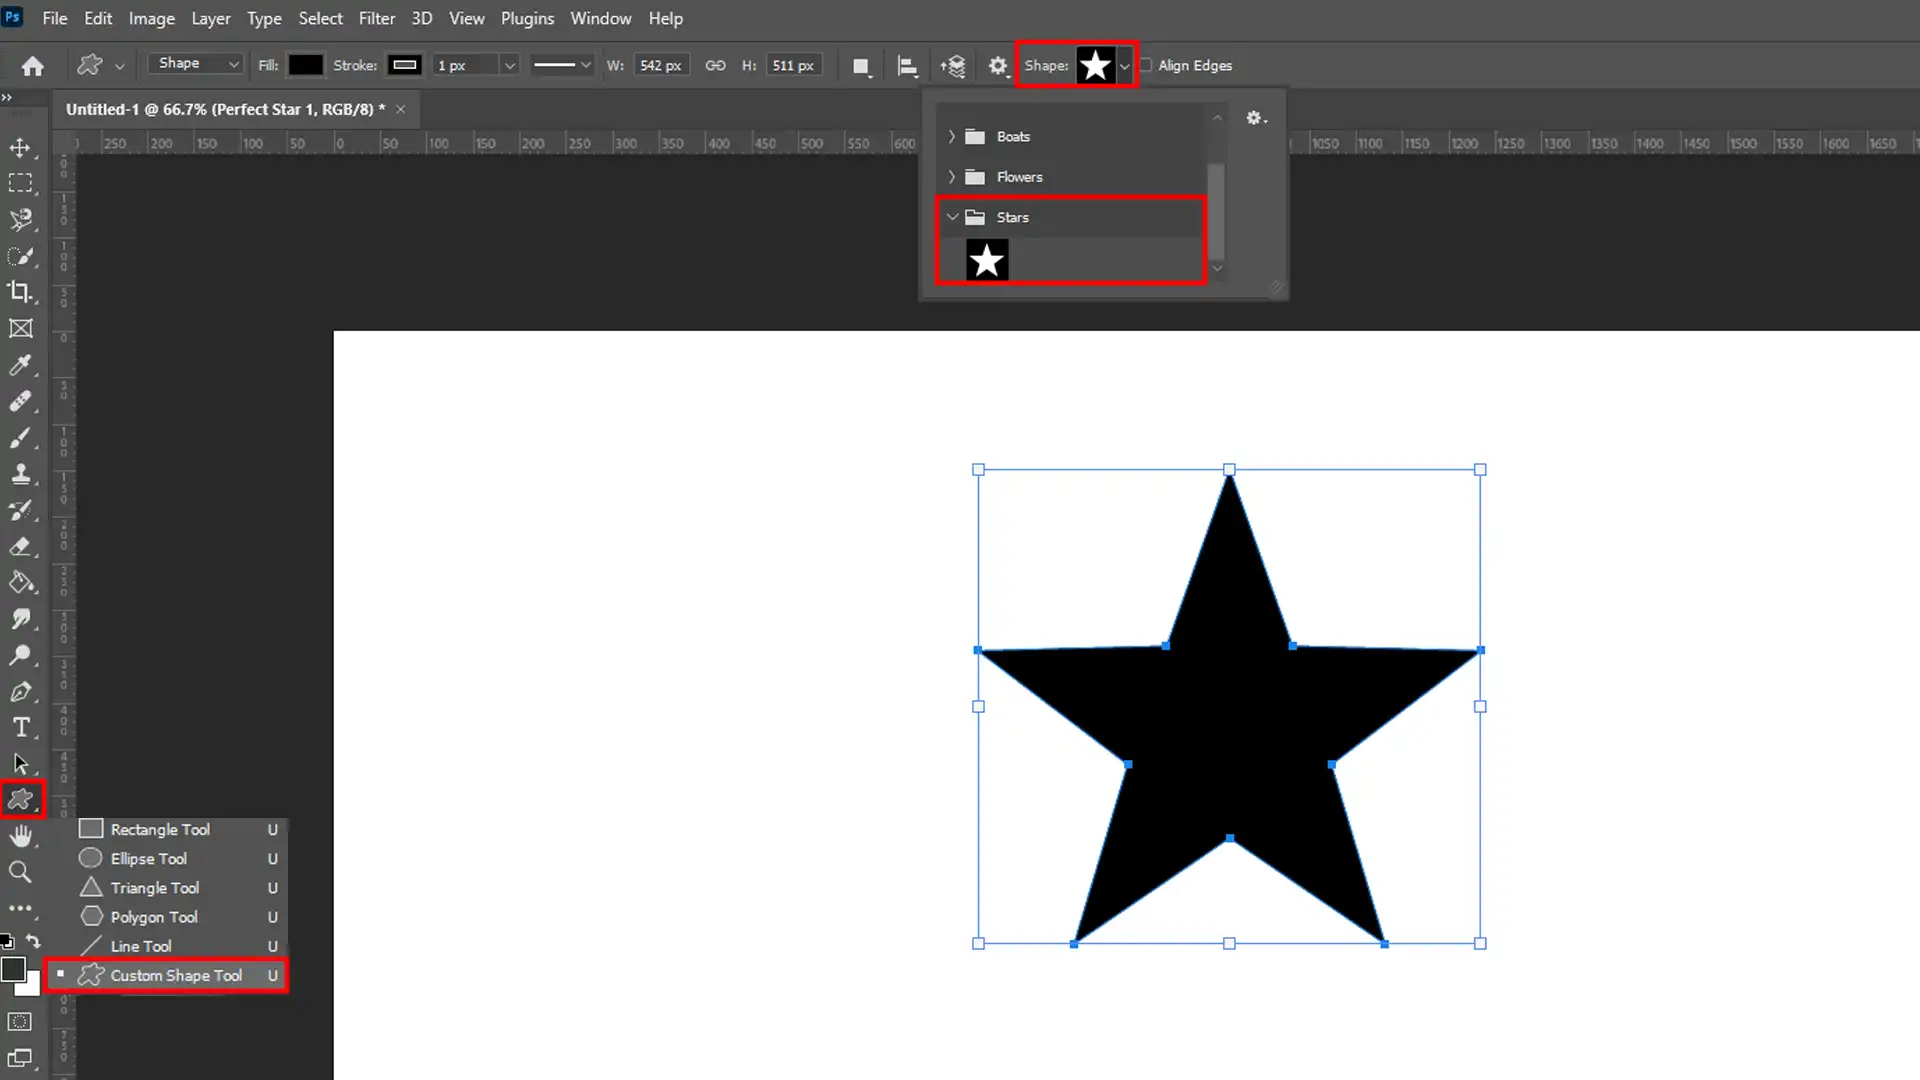
Creating a star shape in Photoshop is straightforward with the custom shape tool.
This tool, represented by a star icon in the toolbar, offers preset shapes, including stars.
Select the custom shape tool, choose ‘Star’ from the shape presets in the options bar, and click and drag on your canvas while holding the Shift key to keep the star symmetrical.
This method ensures perfectly formed star shapes every time.
Bulb mode photography allows for capturing beautiful star trails in night sky shots. To enhance your images, you can create a star shape in Photoshop, blending techniques from both worlds.
How to Use the Custom Shape Tool for Star Shapes
First, we’ll use the Custom shape tool to create a perfect star shape in Photoshop.
This tool, represented by a shape icon, is in the toolbar.
Selecting the Custom shape tool:
- Open Photoshop and start a new document.
- Select the Custom Shape Tool from the toolbar.
- In the options bar at the top, choose 'Star' from the shape presets.
Drawing your star shape:
- Click and drag on your canvas to draw your star.
- Hold Shift to keep it symmetrical.
Customizing your star:
- For further customization, tweak corner points or add effects using the properties panel. Learning how to make stars in Photoshop gains simplicity once you're comfortable with these steps. You’ll soon be introducing stars into any design seamlessly.
Customizing Star Points
Creating a unique star effect involves customizing its points.
Here’s how you can do it efficiently:
Adjusting star ratio:
- Once you have drawn your star shape, select the Properties Panel.
- Adjust various parameters like size, shape, and corners for desired ratios.
Adding layers:
- To bring more life into your stars, think of multiple layers.
- Different blend modes on each layer create dynamic effects (e.g., Lighten or Screen).
Utilizing polygon tool for versatile stars:
- Instead of only using preset shapes, opt for the Polygon Tool under polygon options.
- Set sides to 5 if you want traditional five-point stars; adjust vertices for unique variations.
By following this tutorial section and adjusting settings accordingly, you’ll quickly discover how versatile creating stars can be in photo editing.
Polygon Tool
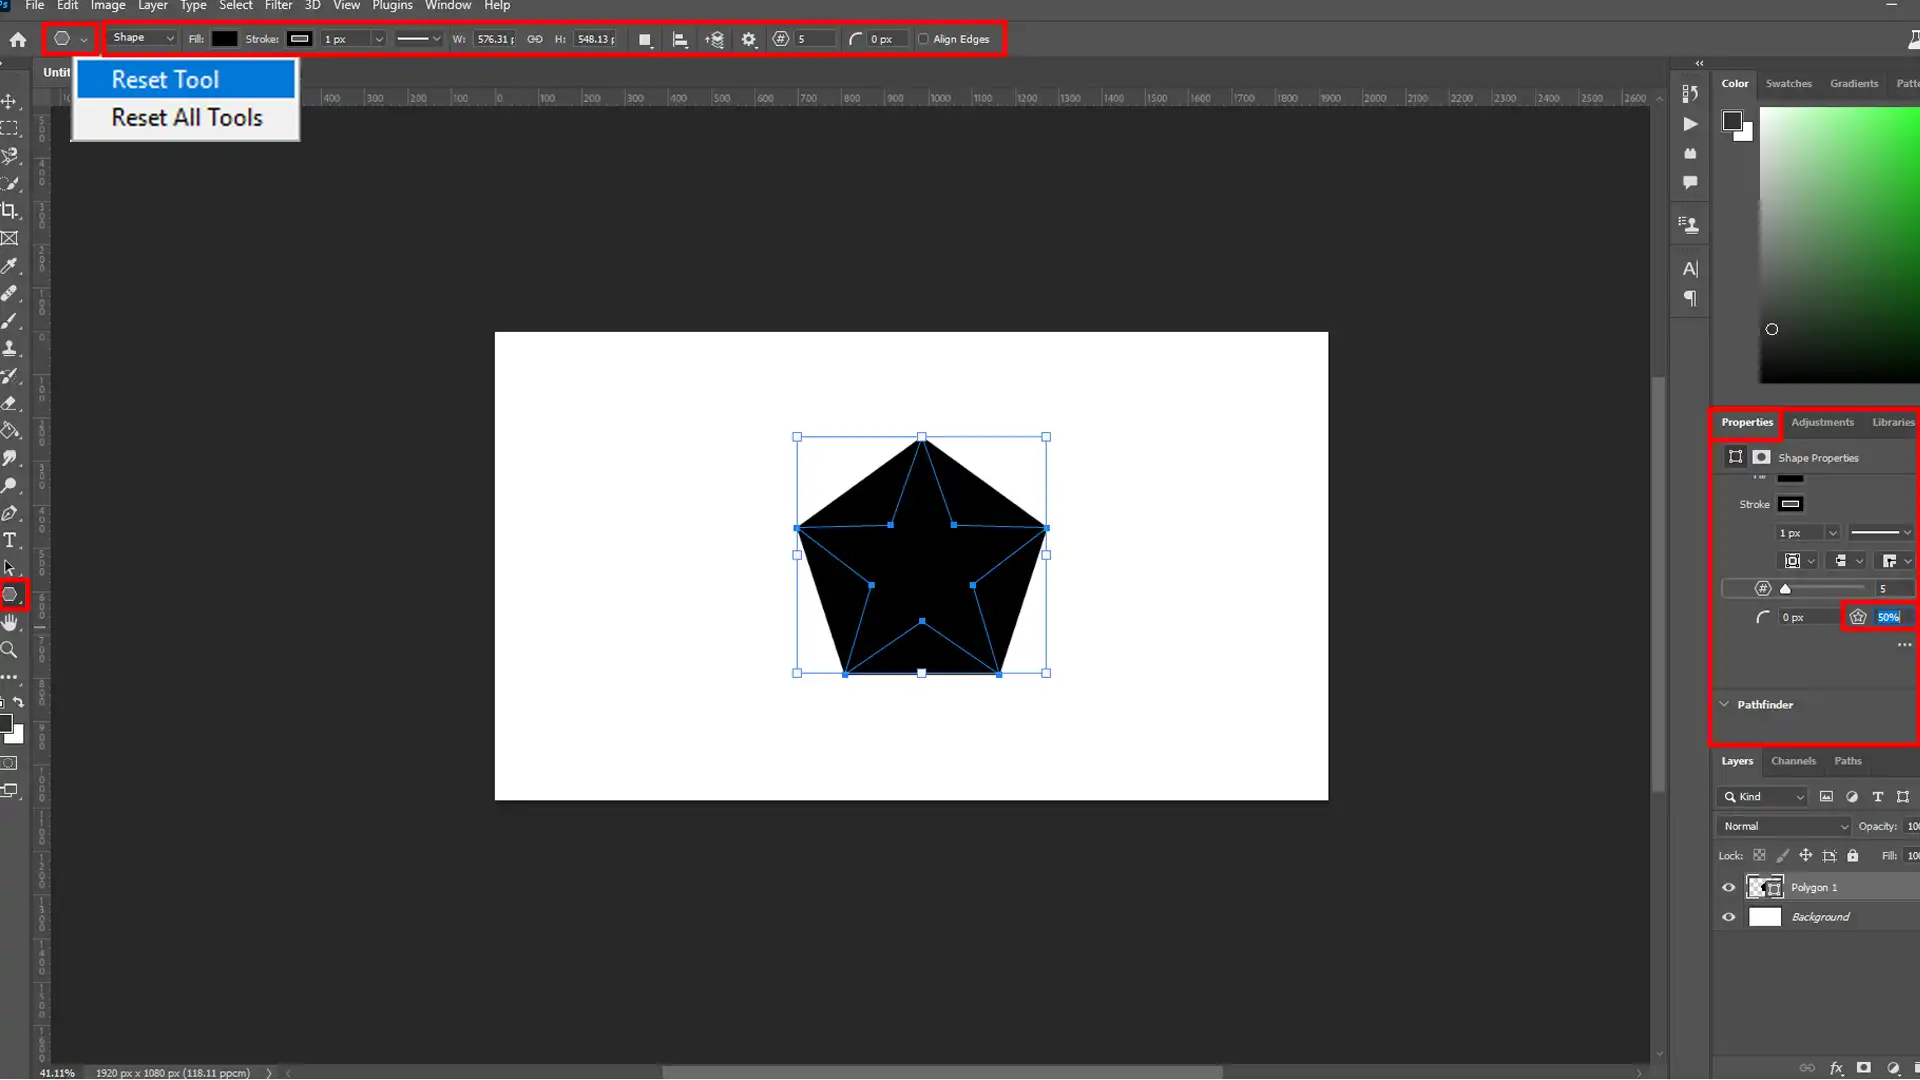
The Polygon tool is essential for creating custom shapes, including stars, in Photoshop.
Found in the toolbar, this tool allows you to define the number of sides, enabling the creation of polygons with varied shapes.
To create a star, select the polygon tool, set the number of sides to 5 or more, and adjust the star ratio in the options bar.
For more advanced customization, you can use a layer mask and to add noise filter to refine the edges of your star and further tweak the star ratio for a unique look.
Incorporating a layer mask allows for seamless blending of your star shape with other elements, enhancing the overall design.
Click and drag on your canvas to draw the star shape.
Creating a Night Sky Scene with Stars
I once replaced a magical night sky scene seasoned with countless tiny stars:
- I started with layering brush strokes across my dark background canvas using varying opacity settings on each stroke application.
- Selecting add noise, I introduced random yet structured scatterings, giving an authentic twinkling impression like real night skies seen under clear weather conditions (use add noise dialog box).
- Optional effects include applying a Gaussian Blur Filter, which provides smoother transitions between bursts and minimizes sharp contrasting patches. This produces more natural visuals, emulating starlit nights!
This practical example underscores how simple techniques combined lead to spectacular results worth sharing.
It aims to help you achieve high-quality workflow standards, bringing you closer to mastering Photoshop tools.
This guide efficiently supports your creative ambitions, eliminating obstacles with its comprehensive experiential learning approach.
Adjusting the Complexity of Stars
Layers and brushes are essential tools in Photoshop for adjusting star complexity.
These methods transform a simple night sky into an expansive celestial display.
Adding Layers to Enhance Star Depth
Creating depth with multiple layers brings your stars alive.
Let’s walk through how to achieve this effect.
- Add a New Layer: First, open your Layers Panel and add a fresh layer.
- Duplicate Layer: Duplicate this layer several times to create more complexity.
- Change Blend Mode: Set different blend modes like Screen or Overlay to see varied effects.
- Adjust Opacity: Fine-tune the opacity on each layer to make the stars appear at different depths.
For example, for my last project, I used ten layers. I set half of them in Screen mode and adjusted their opacity between 30% and 50%, which made my night sky look quite realistic.
Here’s a table summarizing the blend modes:
| Blend Mode | Opacity (%) |
|---|---|
| Screen | 50 |
| Overlay | 40 |
| Soft Light | 35 |
This method showcases significant improvement compared to using just one or two layers.
Using Brushes for Detailed Star Textures
Brushes can add intricate details that enhance your star field’s texture, making it stand out.
- Select the Brush Tools: Choose a fine brush from the tool palette.
- Set Foreground Color: Configure your foreground color as white or light yellow for natural-looking stars.
- Custom Brushes: Utilize custom brushes. You can find or create unique shapes for added detail.
- Scatter Effect: Apply scatter dynamics in the brush settings panel.
For instance, I once used a custom brush that mimicked tiny star bursts alongside traditional circular dots mixed in various sizes and hues, creating stunning depth and realism on my digital canvas.
To emphasis:
- Use varied brushes
- Apply scattering effects
- Mix multiple colors
This process can bring any static image of stars in Photoshop to life by adding richness and variety to each pixel of starlight in your photo composition.
These steps ensure you learn how to make stars in Photoshop and creatively enhance them for an engaging final product fitting any ambitious astrophotography endeavor!
Incorporating Stars into Landscapes
Incorporating stars into landscape photos can transform an ordinary scene into something magical and awe-inspiring.
Let’s explore how to seamlessly blend stars with your background elements and adjust lighting for realistic nighttime effects.
Blending Stars with Background Elements
Blending stars with background elements in Photoshop requires a structured approach to maintain realism.
Step-by-step guide:
- Open your Landscape Image: Import your base landscape photo.
- New Layer for Stars: Create a fresh layer above your landscape image in the layers panel.
- Custom Brushes: Utilize custom brushes. You can find or create unique shapes for added detail.
- Scatter Effect: Apply scatter dynamics in the brush settings panel.
Create a Star Field:
- Use the Polygon Tool set to star shape.
- Adjust the number of sides to get perfect star shapes.
Distribution and Size:
- Adjust the star ratio to vary in size, making some stars appear closer than others.
Here is a handy table of settings:
| Setting | Parameter |
|---|---|
| Polygon Sides | 5 |
| Ratio | Varies (0-100) |
Blend Mode Adjustment: Set the blend mode of the star layer to lighten or screen for natural integration.
Following these steps will create a beautiful, believable night sky that fits seamlessly with your landscape.
Adjusting Lighting for Natural-Looking Night Skies
It’s crucial to adjust the lighting to achieve a natural look so that the sky doesn’t overshadow or misalign with foreground elements.
Steps for realistic adjustment:
Match Light Sources:
- Identify any light sources (moon, artificial lights) in your original image and adjust accordingly.
Use Cloud Filter for Soft Light Effects:
- Apply the clouds filter on a fresh layer to simulate diffused moonlight.
Layer Masking Techniques:
- Add a layer mask to blend night skies more smoothly through gradual transparency adjustments.
Adjust Exposure using White Point Slider & Black Point Slider
- Balance highlights and shadows to unify both elements cohesively.
Additional Filters & Effects:
Here’s an example setting list:
- White Point Slider: 85%
- Black Point Slider: 15%
Consider to add noise filter, a slight gaussian blur, or a noise filter on distant elements to suggest atmospheric depth and haze without overpowering detail in closer objects.
These techniques will ensure you add stars effectively and harmoniously adjust other factors like lighting and exposure.
Making every element fit perfectly within the scene’s overall ambiance.
For stunning results in long exposure photography at night, mastering the art of adjusting lighting is crucial. Learn how to enhance natural-looking night skies by exploring effective techniques
Remember, incorporating realistic star effects takes practice, but following these structured approaches will help create stunning nightscape photography every time!
Tables such as those below can be beneficial:
| Adjustment Tool | Purpose |
|---|---|
| Clouds Filter | Simulate diffused moonlight |
| Layer Mask | Smooth transition between sky and elements |
| White/Black Point Sliders | Balance highlights/shadows |
This structured method ensures natural looking night landscapes by blending stars seamlessly with background elements while maintaining appropriate lighting conditions for an authentic feel!
Creating Star Trails and Comets
Creating beautiful star trails and comets in your images can transform a plain nighttime scene into a visual masterpiece.
Let’s dive into two methods for achieving these effects using Photoshop.
Using Motion Blur for Dynamic Effects
Motion blur can make static stars appear like they’re streaking across the night sky.
This method enhances the dramatic effect of your photos.
Steps to Apply Motion Blur:
- Select the Stars Layer: Ensure you have a separate layer containing your stars using the layers panel.
- Apply Gaussian Blur: Navigate to Filter > Blur > Gaussian Blur. Adjust the radius until your stars are suitably blurred.
- Access Motion Blur: Go to Filter > Blur > Motion Blur.
In the dialog box, set an angle that matches your desired streak direction.
Adjust the distance slider to lengthen or shorten your trails.
I once used this technique during a shoot at a beach, overlaying blurred star paths behind a perfectly crisp Milky Way core.
Layering Star Trails for Enhanced Visual Depth
For a richer visual experience, layering multiple star paths can create depth and dimension in your images.
Steps to Layer Star Paths:
- Create Multiple Layers: Start by duplicating your primary star layer multiple times.
- Adjust Hue Value: Change each duplicate layer's hue slightly for color variance (Image > Adjustments > Hue/Saturation).
- Use Layer Mask: Add layer masks on each duplicate to blend them harmoniously.
- Group Layers: Arrange duplicates into one cohesive unit within a single layer group.
By processing different layers with slight differences in hue value and opacity.
I achieved an almost three dimensional look in my astrophotography project last summer.
Use tables and lists when necessary for better readability:
| Action | Tool |
|---|---|
| Duplicate Main Layer | Ctrl + J |
| Change Hue Value | Image > Adjustments |
| Add Layer Mask | Bottom of layers panel |
This method makes captured stars trail across the image, adding depth with layered hues and masks.
Integrate both approaches to enhance astrophotography and gain insights from unique techniques you can apply seamlessly in Adobe Photoshop!
Designing Star Patterns and Backgrounds

Creating star patterns can enhance your designs in Adobe Photoshop.
This method speeds up the process of adding multiple stars to your composition.
To elevate your designs with stunning visuals, mastering the art of Photoshop patterns is essential. Explore how designing star patterns and backgrounds can enhance your projects.
Steps to Create a Star Pattern
- Create a New Document: Set up a 100 x 100 px canvas.
- Draw the Star Shape: Use the polygon tool and set sides to create a star shape.
- Define the Pattern: Select the created star, go to Edit > Define Pattern.
- Apply the Fill Color: In another document apply the fill color, go to Layer > New Fill Layer > Pattern, then select your newly created star pattern.
| Step | Action |
|---|---|
| Create Document | Set dimensions (e.g., 100×100 px) |
| Draw Star | Use polygon tool for desired star shape |
| Define Pattern | Edit menu -> Define Pattern |
| Apply | Layer -> New Fill Layer -> Pattern |
Here is an example table summarizing the process:
This method is efficient when you need several stars with consistent spacing and arrangement.
Designing Constellation-Themed Artworks
Creating constellation-themed artwork adds a unique touch of astronomy to your designs. This approach requires more delicate detail and creativity.
Steps for Creating Constellations
Backdrop Preparation: Start with a dark background layer representing the night sky.
Position Main Stars:
- Use different sizes of the star shapes.
- Place them randomly according to real constellations or designs.
Connecting Lines Between Stars:
- Pick the Brush Tools from the toolbar.
- Connect stars smoothly for artistic lines between chosen points.
Using layer mask methods can help blend parts of these lines seamlessly into your design, achieving professional looks similar to observing natural constellations.
Example structured table for constellations:
| Step | Action |
|---|---|
| Backdrop Preparation | Dark background layer position |
| Stars | Varied shapes & Placement |
| Connecting Lines | Brush Tool between main stars |
Adding these steps into your workflow ensures refined results that captivate viewers visually while maintaining astrological accuracy or inspired randomness!
By incorporating these creative methods into your projects, you significantly elevate their aesthetic appeal with well-designed star patterns and backgrounds, ideally suited for themes such as cosmic art or dreamy scenes!
Finalizing Your Starry Design in Photoshop
Final touches make your starry design stand out. Let’s dive into the final steps to perfect your project.
Applying Color and Texture to Stars
Adding color and texture brings your stars to life. Here’s how you can do it:
- Select the Desired Star Layer: Choose the star layer you want to modify in the layers panel.
- Apply a Gradient: Open the properties panel with a gradient overlay to add depth.
Texture Application:
- Go to Filter > Noise > Add Noise for a grainy effect.
- Use Gaussian Blur from Filter > Blur for a soft look.
Use these steps iteratively until you get the desired mix of color and texture.
Working with Star Layer in Photoshop
Star layers are critical when adding and customizing stars in your designs.
Creating a new layer for each star or group of stars allows you to adjust their color, texture, and effects without altering other project elements.
In the Layers Panel, create a fresh layer for your stars, apply your desired effects, and use blending modes and opacity adjustments to integrate them into your design seamlessly.
Saving and Exporting Your Final Project
Before showcasing your work, ensure you’re saving correctly.
Here are comprehensive steps:
Best Formats for Saving Star Designs
Choosing the correct format preserves quality:
- JPEG: Ideal for web use with smaller file sizes.
- PNG: Maintains transparency and is useful for logos or icons.
- PSD: Keeps layers intact, allowing future edits without loss of data.
Step-by-Step Guide to Save:
- Click File > Save As from the top menu.
- Select format (JPEG/PNG/PSD).
- Adjust any settings in the prompt window if needed.
Frequently Asked Questions

How to create stars in Photoshop?
To create stars in Photoshop, use the Brush Tool or custom shapes.
Access customizable brush settings to vary star sizes and scatter them across the layers for a realistic night sky effect.
This method allows for creative freedom in star creation.
How to make Shooting Star in Photoshop?
Create a New Document:
- Open Photoshop and create a new document (e.g., 1920x1080 pixels).
Fill the Background:
- Use the Paint Bucket Tool (G) to fill the black or dark blue background.
Add Stars:
- Create a new layer named "Stars."
- Select the Brush Tool (B) with a small, soft, round brush (2-4 pixels).
- Scatter stars across the canvas by clicking randomly.
Draw the Shooting Star:
- Create a new layer named "Shooting Star."
- Use the Brush Tool (B) with a small, stiff, round brush (3-5 pixels) to draw a dot where you want the shooting star to start.
- Draw a straight line from the dot to create the tail. Hold Shift to draw a straight line.
Add Motion Blur:
- Go to Filter > Blur > Motion Blur. Set the angle and distance to match the tail's direction.
Enhance the Glow:
- Duplicate the "Shooting Star" layer (Ctrl + J).
- Apply Gaussian Blur (Filter > Blur > Gaussian Blur) to the duplicated layer.
- Set the blending mode of the duplicated layer to Screen.
Add a Glow:
- Create a new layer named "Glow."
- Use a soft round brush with white or light color to brush around the head of the shooting star.
Add Trail Sparkles:
- Create a new layer named "Trail Sparkles."
- Use a small, soft, round brush with low opacity to add sparkles along the tail.
Adjust Opacity:
- Adjust the opacity of layers to blend the shooting star naturally.
Group Layers:
- Group all layers related to the shooting star (Ctrl + G) and name the layer group "Shooting Star."
How to make Retro Stars in Photoshop?
Create a New Document:
- Open Photoshop and create a new document (e.g., 800x800 pixels).
Draw a Star:
- Select the Polygon Tool from the toolbar.
- In the top menu, set the number of sides to 5.
- Draw the star by clicking and dragging on the canvas.
Retro Effects:
- Duplicate the stars layer (Ctrl + J).
- Select the duplicated layer and go to Filter > Blur > Gaussian Blur. Set the radius to 5-10 pixels.
- Change the blending mode of the blurred layer to Screen or Overlay.
Color:
- Select the original stars layer.
- Use the Paint Bucket Tool (G) to fill the star with a bright, retro color (e.g., yellow or pink).
Retro Pattern:
- Create a new layer above the star.
- Go to Edit > Fill > Pattern. Choose a retro pattern from the Pattern Library.
- Change the blending mode of the pattern layer to Multiply or Overlay.
Duplicate and Arrange:
- Duplicate the star layers (Ctrl + J) and resize or rotate them to create a pattern of retro stars across the canvas.
How to create a Star Brush in Photoshop?
Create a New Document:
- Open Photoshop and create a new document (e.g., 500x500 pixels).
Draw a Star:
- Select the Polygon Tool from the toolbar.
- Set the number of sides to 5 in the top menu.
- Draw the star by clicking and dragging on the canvas.
Define the Brush:
- Use the Rectangular Marquee Tool (M) to select the star.
- Go to Edit > Define Brush Preset.
- Name your new brush and click OK.
Use the Star Brush:
- Select the Brush Tool (B).
- Open the Brush Preset Picker and choose your new star brush.
Customize Brush Settings (Optional):
- Open the Brush Settings panel (Window > Brush Settings).
- Adjust settings like Size, Spacing, and Scatter to achieve the desired effect.

Conclusion
Mastering how to make stars in Photoshop can significantly enhance your design projects, whether you’re looking to achieve a realistic Milky Way or a whimsical star effect.
You can create stars with varying star ratios and intricate details by leveraging tools such as the polygon tool and exploring custom shapes.
Using layer masks and Gaussian blur techniques allows for seamless blending and edge softening, enhancing the final image.
Remember to add stars to your document as needed, experimenting with brush settings and fill color options to perfect your star effect.
With Adobe Photoshop, creating stunning star scenes becomes accessible and enjoyable.
Remember to explore other options within Photoshop to refine and improve your skills continually in creating stars.
For more in-depth tutorials and tips, check out our Photoshop Course and Lightroom Course.
These courses will help you elevate your photo editing abilities further.
Additionally, you can explore Photoshop directly through Adobe Photoshop and enhance your projects with Adobe Lightroom.
Read more about Photoshop:


Course

Light Effect Photoshop


Lightroom Course 2025

Adobe Photoshop Course 2025

Photo Editing Course


