In this article, I’ll walk you through how to roughen edges in Photoshop.
Imagine transforming smooth, polished lines into rugged, textured edges that catch the eye and add character to your design.
You’ll be amazed at how this simple technique can elevate your work from ordinary to extraordinary. By the end, you’ll not only master the art of roughening edges but also discover new creative avenues.
Ready to add some edge to your designs?
Let’s dive in!
Table of Contents
Step-by-Step Guide to Roughen Edges in Photoshop
Here’s how to roughen edges in Photoshop to add texture and character to your photos. Follow these steps to get started.
Open Your Photo
Launch Photoshop and open the photo you want to work on. This is your starting point for all the adjustments.
Click on File, then select Open, and choose your file. Make sure your background layer is unlocked by double-clicking the layer icon.
An unlocked background layer ensures you can make changes freely.
Selecting and Isolating Edges for Roughening in Photoshop
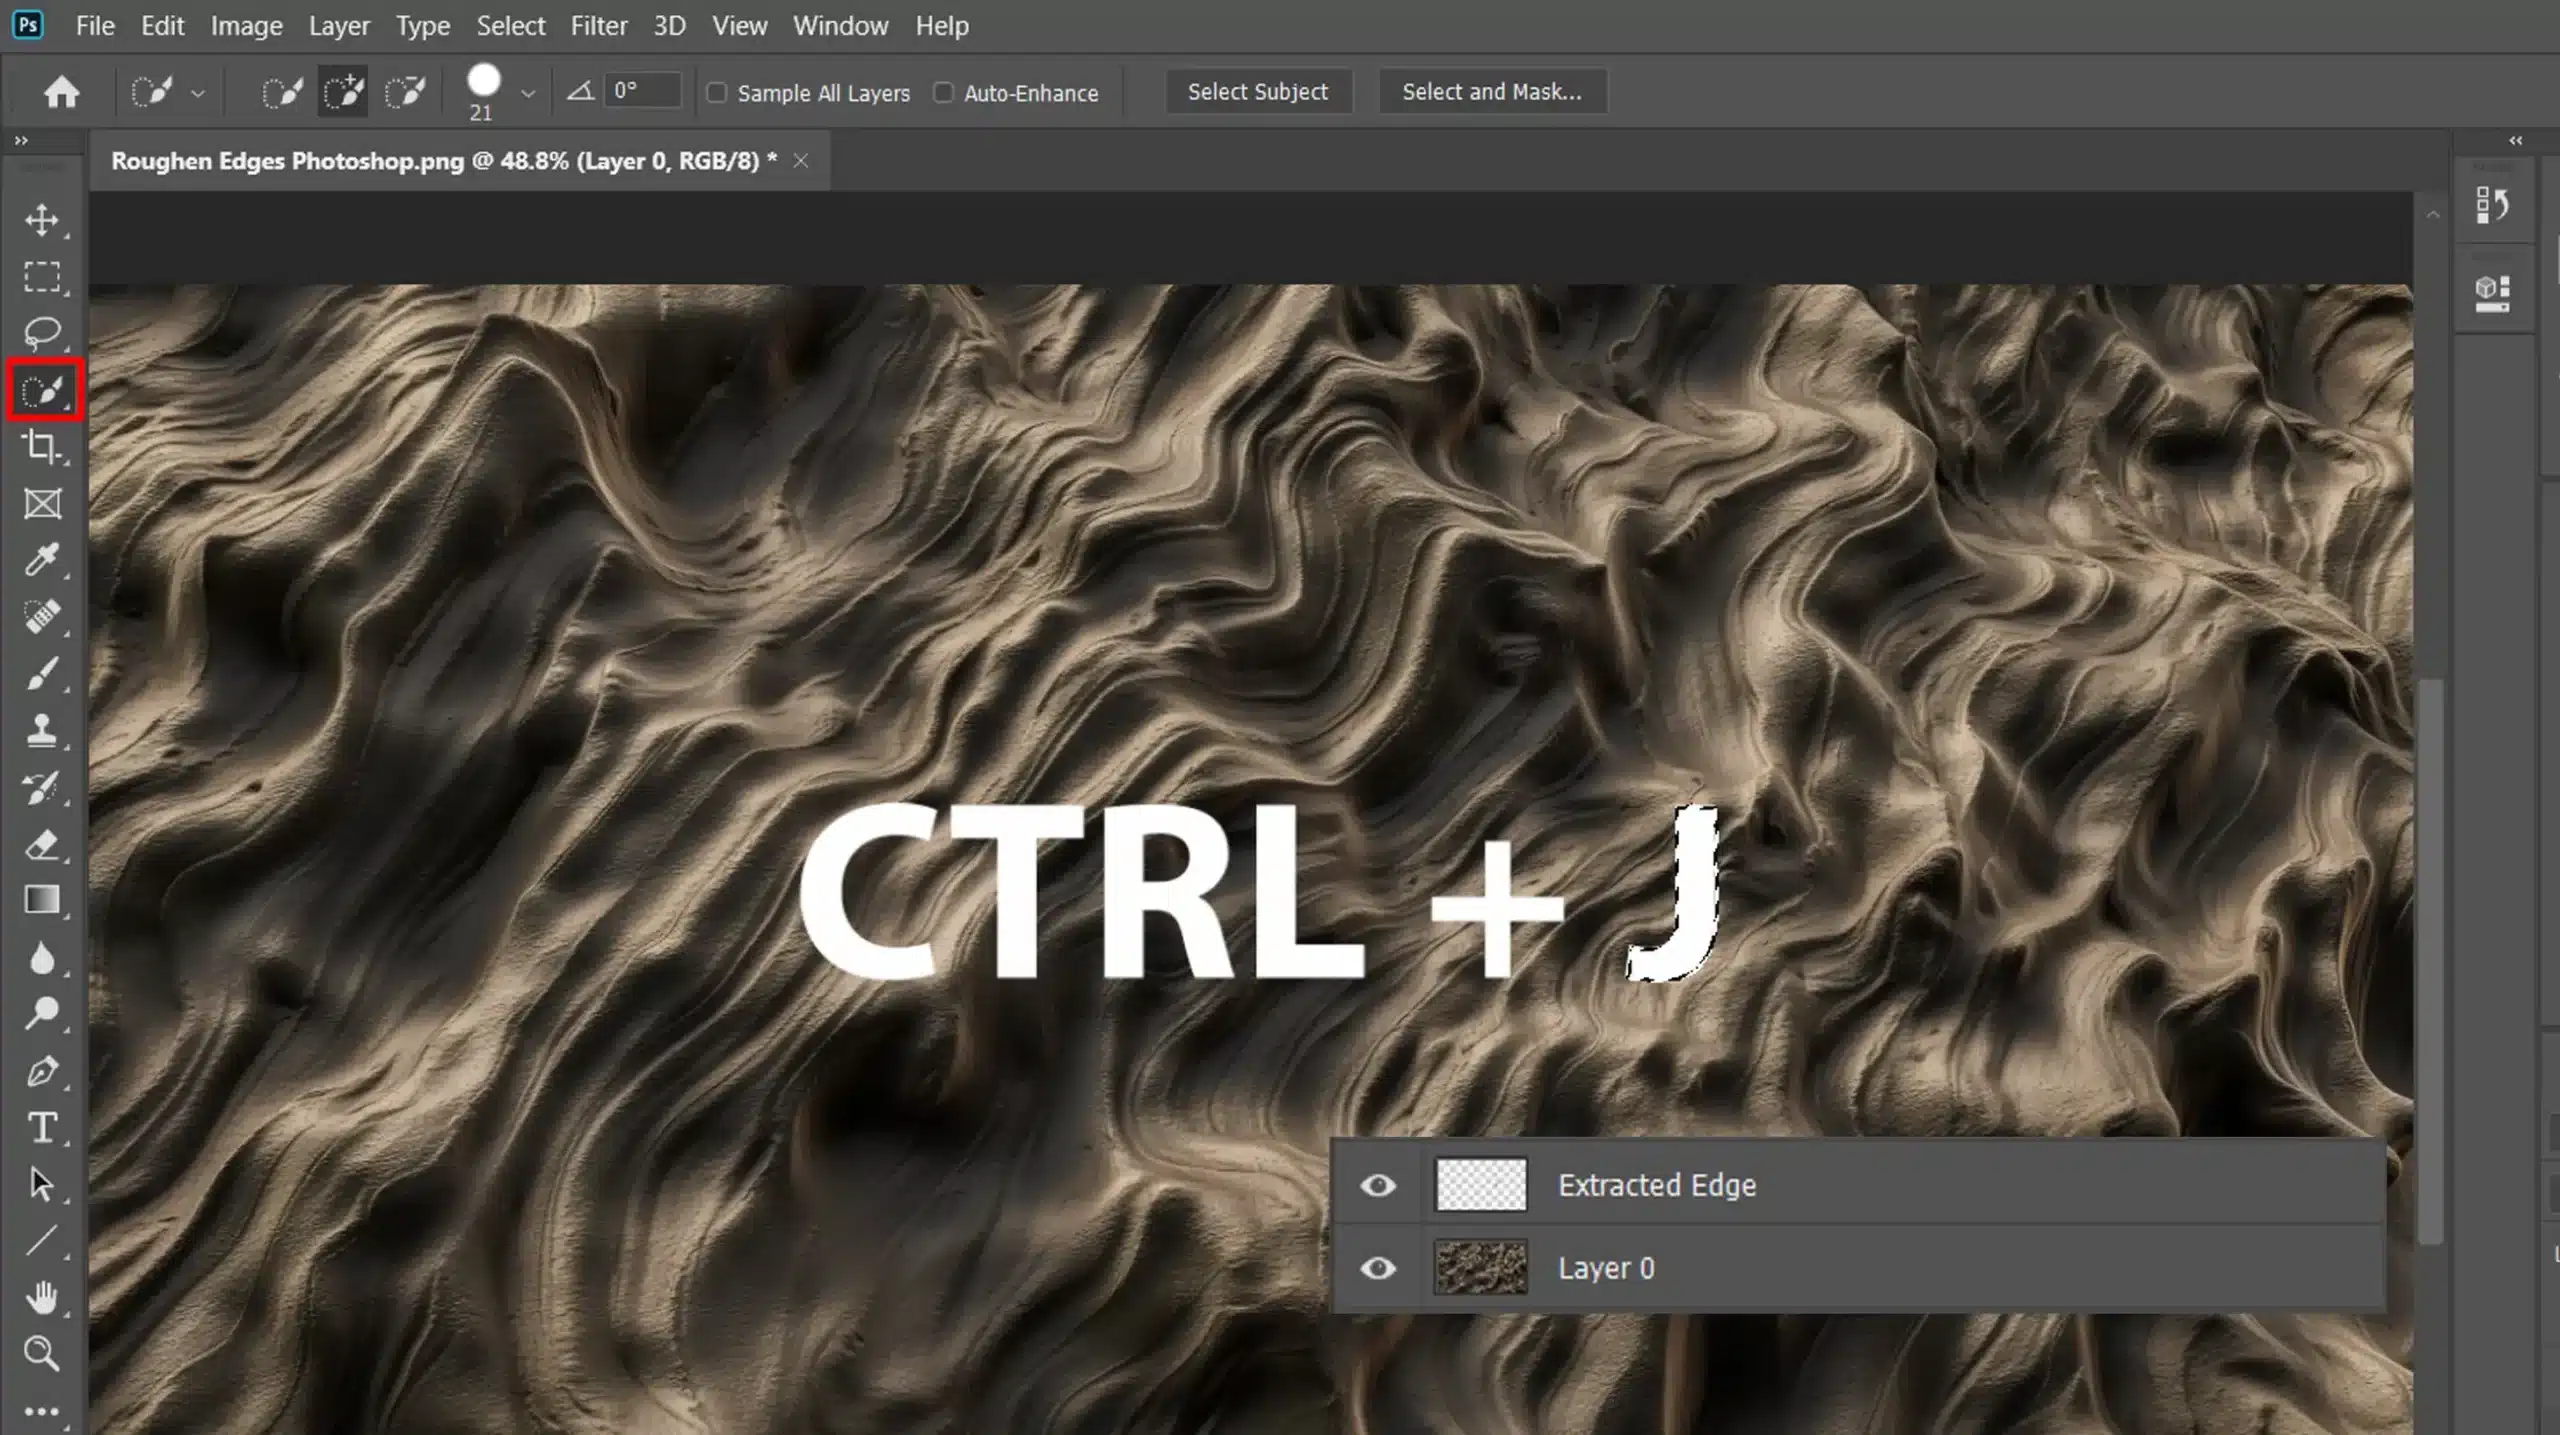
Use the quick selection tool in the toolbar to trace around the edges you wish to roughen.
This step requires precision for the best results. Ensure your selection covers all the edges to be roughened. Take your time with this step, it’s important.
Once selected, hit Ctrl+J to create a new layer from the selection. The extracted edge will now be on a separate layer.
To easily select and isolate edges for roughening in Photoshop, you can use the Photoshop select subject feature to quickly identify the main subject before refining your selection then refine the selection with the object selection tool for more precise control.
Apply the Roughen Effect
To achieve the roughen effect, you can use various tools in Photoshop. Start by exploring the Filter Gallery to apply this textured look.
Using the Filter Gallery
Head over to the menu and click on Filter, then select Filter Gallery. Here, you’ll find various options to modify your photo.
Navigate to the Distort section and choose the Roughen Edges option. You will immediately see the effect applied. This gives your selection a rough, organic look.
Adjusting the Settings
Tweak the settings within the Filter Gallery to achieve your desired style.
Use the sliders to modify the intensity and characteristics of the roughen effect. If it doesn’t look right, you can always undo it and try again.
When satisfied, click OK to apply the effect. This finalizes the roughening on your edges.
Fine-Tuning the Effect
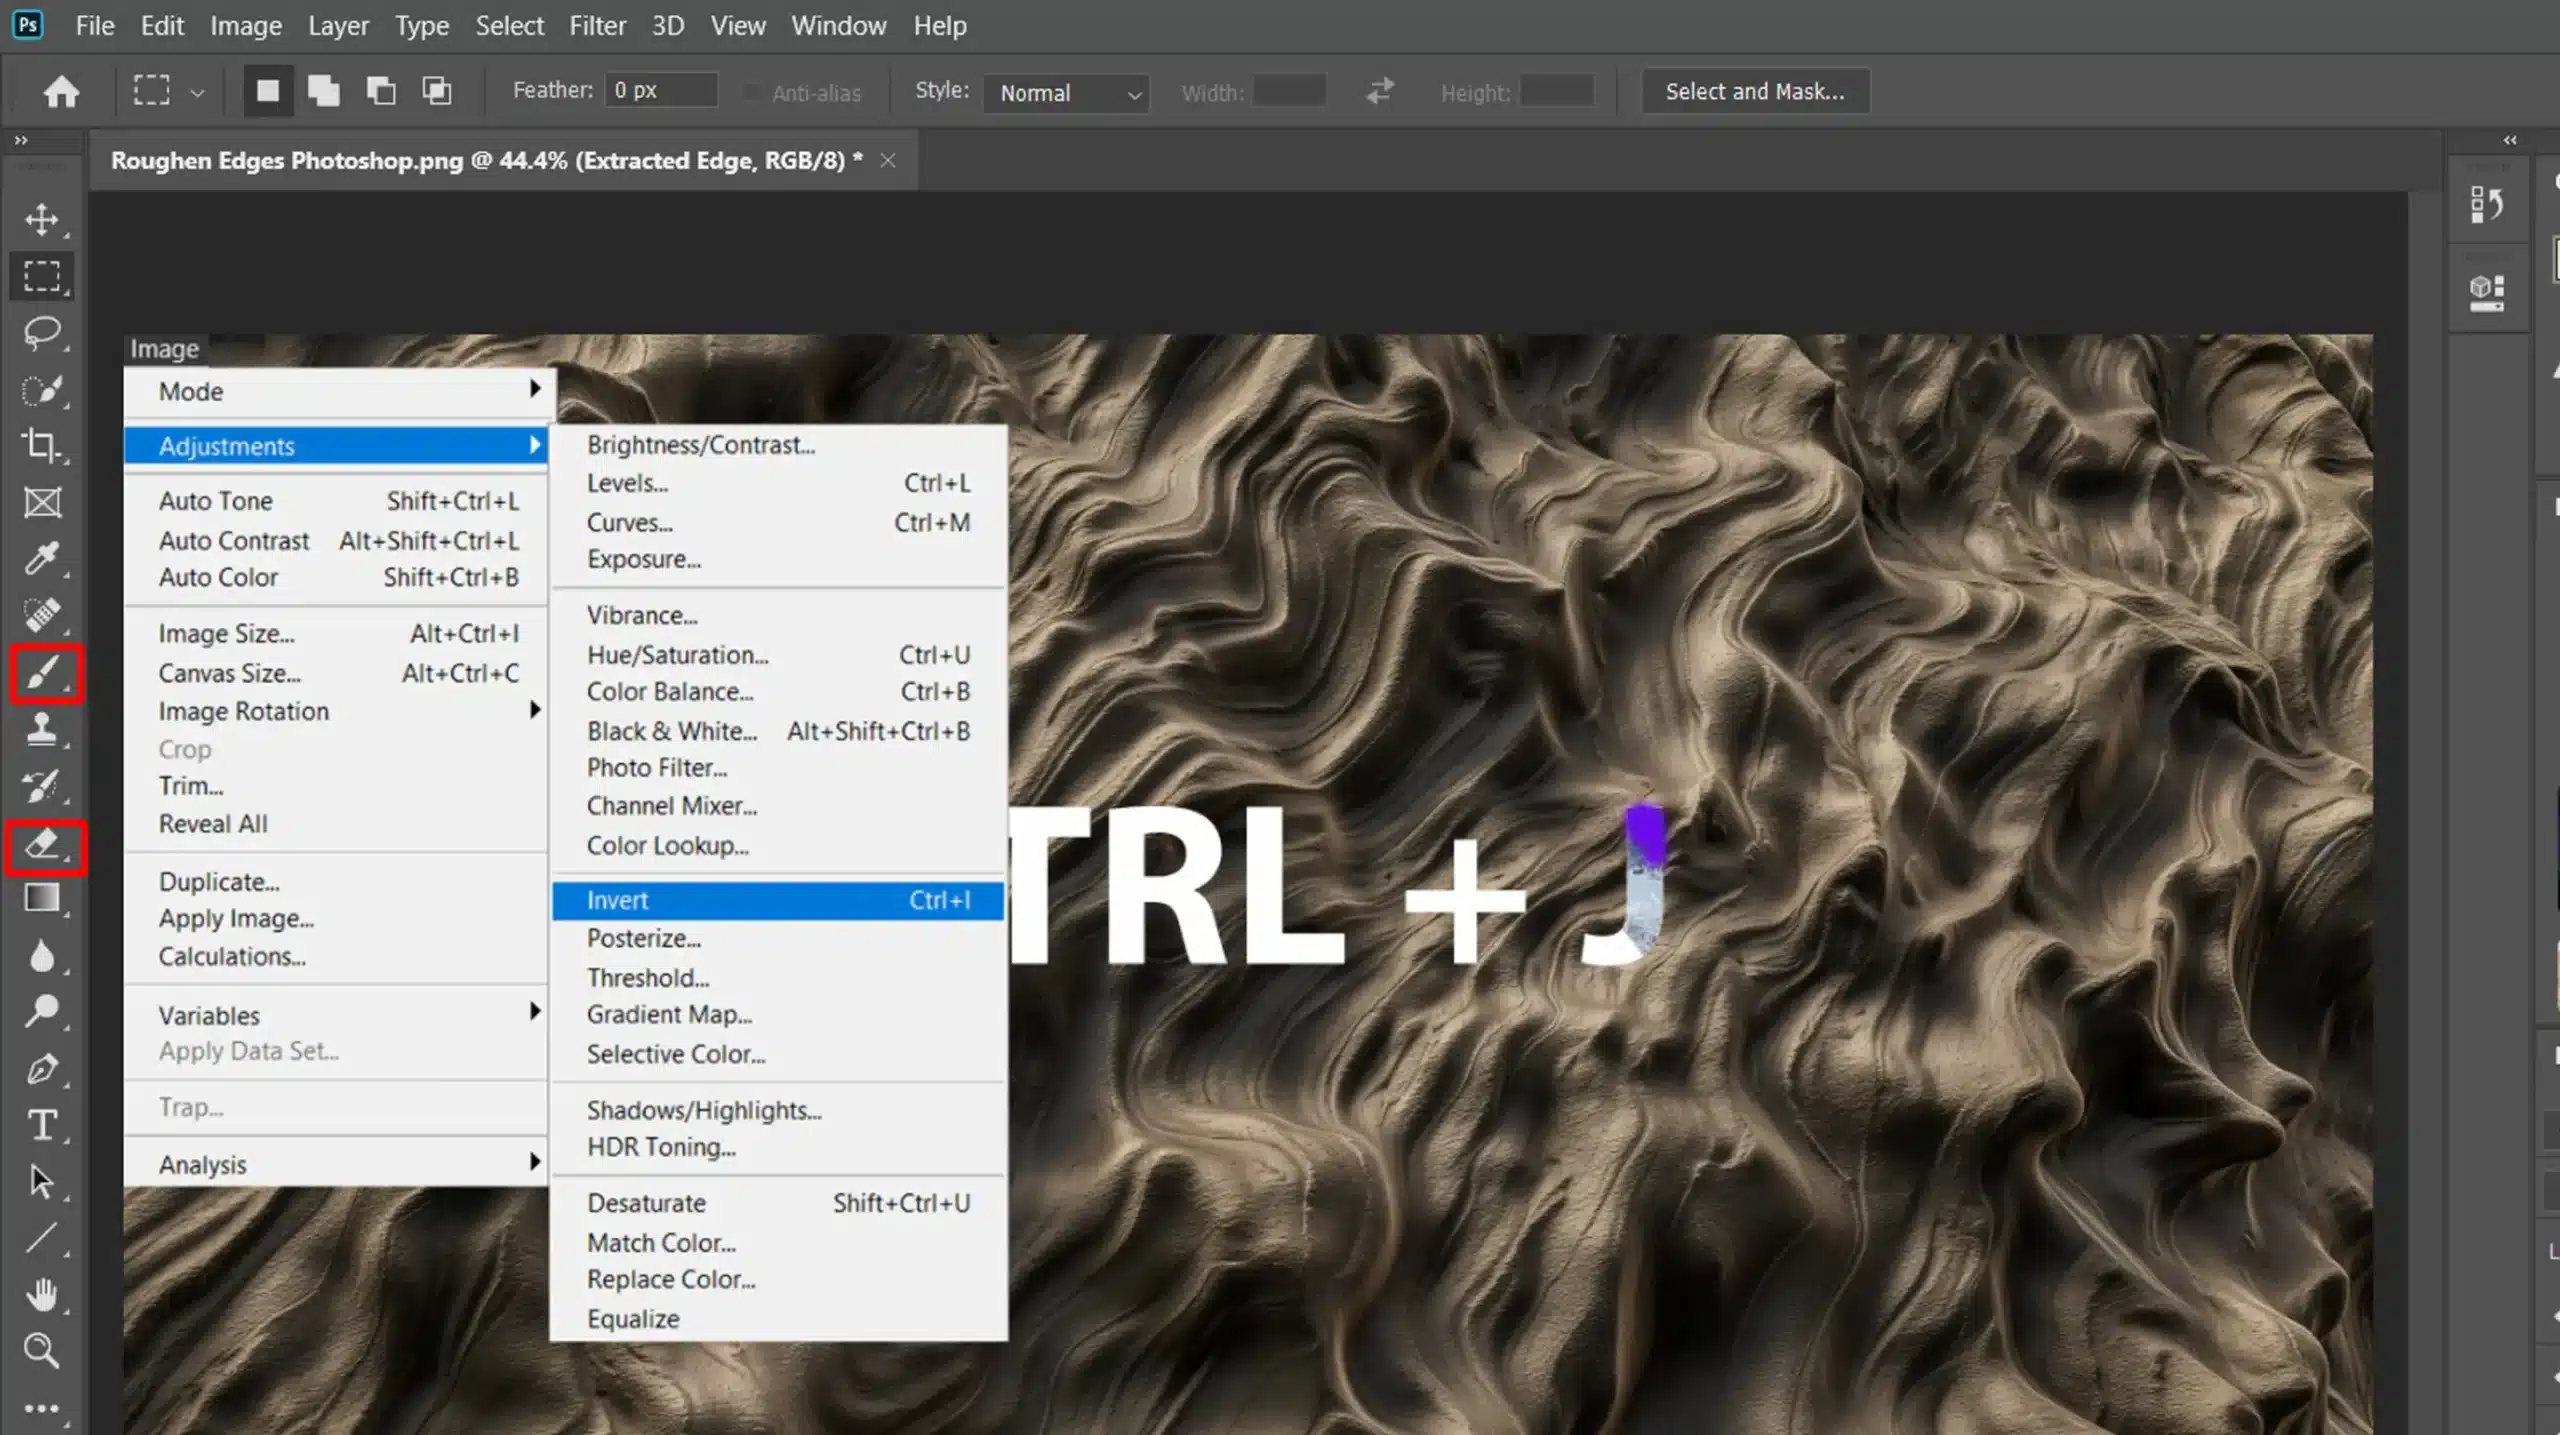
Select the eraser tool from the toolbar to manually erase any areas that don’t look natural.
Switch to the brushes panel to change the brushtype for more control.
Adjust the opacity in the options bar if needed. Zoom in and out to ensure all edges are consistent.
You might need to invert the mask if the effect seems too intense. Save your work often to prevent losing progress.
Pro Tip: Use a combination of the brush and the eraser tool to refine the roughen effect, making it look even more realistic.
This approach ensures every detail appears carefully crafted, adding to the authenticity of your photo edits.
To achieve a more polished look, use the refine edges option to fine-tune the effect, ensuring smooth transitions and natural-looking borders.
Advanced Techniques for Roughen Edges
Explore advanced methods to add unique textures and effects to your edges. Let’s begin with using the Layer Mask Icon for a more refined look.
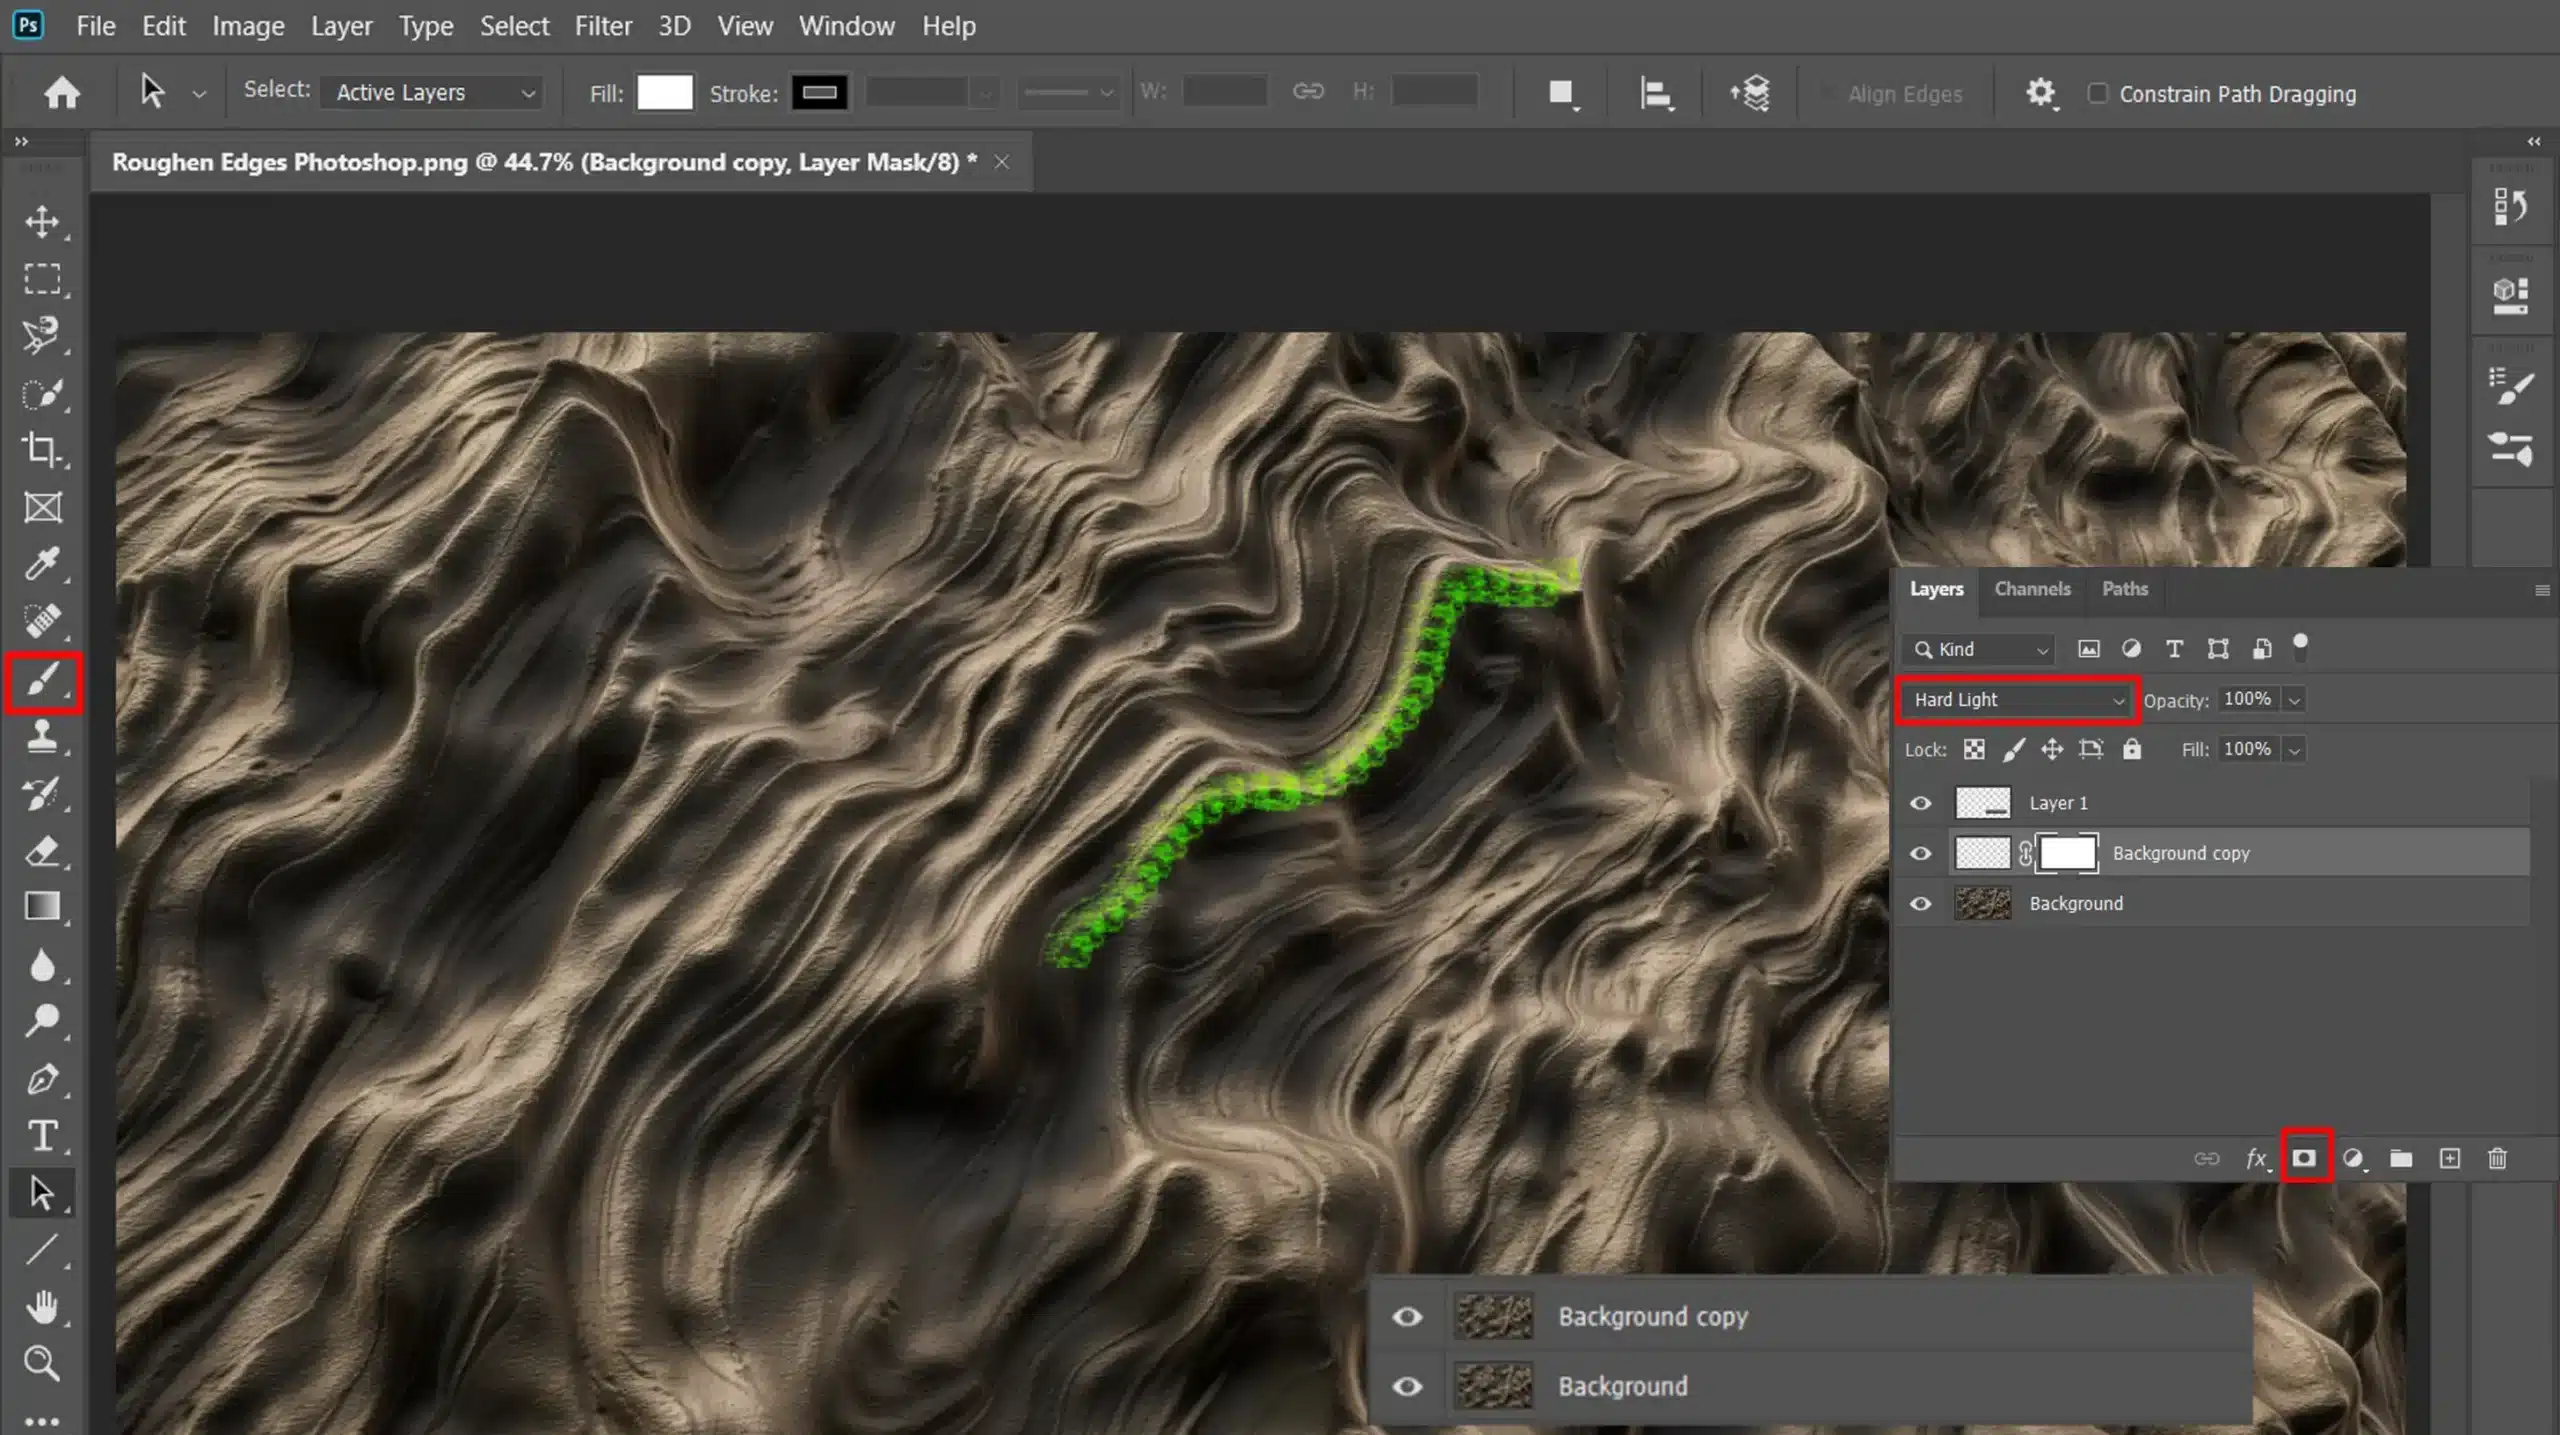
Using the Layer Mask Icon to Roughen Edges
Let’s kick off by talking about layer masks. They create great flexibility in Photoshop.
You add a mask by clicking the icon at the bottom of the layers panel.
This icon, a rectangle with a circle in it, adds a mask that makes you hide parts of a layer or reveals parts of the background.
Unlike erasing, this method is non-destructive.
To create an edge rougher, use a textured brush. Select the brushtool, then click the brushes panel.
Choose a textured brush, then paint over the layer. Darker brush strokes will hide more of your photo while lighter strokes reveal it.
To better understand how to use the mask icon to roughen edges, refer to a comprehensive Photoshop masking guide for detailed instructions and tips.
Custom Brushes
Custom brushes can personalize your work. Open the brushes panel and choose an interesting brush.
You can also create your own brushes by selecting an area on the canvas, then going to Edit > Define BrushPreset. Save your new brush and find it in the brushes.
Using custom brushes provides control over the appearance of the edge. They help in maintaining the natural look you aim for.
Don’t forget to try different textures and play with the opacity settings for variety.
Combining Effects
Combining effects enhances your project:
First, apply adjustments like color overlay or gradients to the background layer.
Click the new layer icon to create a layer dedicated to effects.
Then, use a brush to add texture or strokes around the edge of your photo.
This process involves patience and fine-tuning. Save your work often. To further refine, experiment with opacities and blend modes found in the layers panel.
Pro Tip: Always duplicate your background layer before making any edits. It preserves your original work allowing for easy corrections.
When working with roughen edges in Photoshop, it’s easy to make mistakes.
Before diving into the specifics, it’s important to be aware of common mistakes when roughening edges in Photoshop. The table below highlights important pitfalls and how to avoid them.
Aspect
Overview
Overdoing the Effect
Using too many effects can overwhelm your photos. Keep it subtle and balanced to maintain the integrity of the image.
Ignoring Image Quality
Always use high-resolution photos to ensure detailed editing and avoid pixelation. Check quality consistently during editing.
Not Saving Your Work
Regularly save your work, especially when working on complex projects. Use backups and different versions to safeguard progress.
Overdoing the Effect
It’s easy to get carried away when discovering new features in Photoshop. Too much effect can turn an impressive work into something overdone.
Subtlety is important. Use effects sparingly to enhance your photos without overwhelming them.
One common pitfall includes using heavy filters or over-the-top color adjustments. These can distort a photo beyond recognition.
Experiment with opacity and blend modes to find a balance that adds texture while maintaining the photo’s integrity. Remember, effects should complement, not dominate.
Ignoring Image Quality
Always use high-resolution photos. Poor photo quality translates to poor final results in your edits.
Low-resolution photos offer fewer pixels, which makes detailed editing challenging. Colors and edges might appear jagged.
Ensure your photos have a resolution suitable for your project. High-quality photos ensure clean, sharp edits. Avoid scaling up small photos.
Doing so can result in pixelation and loss of detail. Consistently check your photo quality during the editing process.
Not Saving Your Work
Frequent saves are significant when working with complex, multi-layered files. Computers crash, files can corrupt, don’t let hours of work disappear.
Always save a backup file before making significant changes. This practice ensures a revert point.
Create new layers for each major step. This convenience offers flexibility in editing without affecting the original layer.
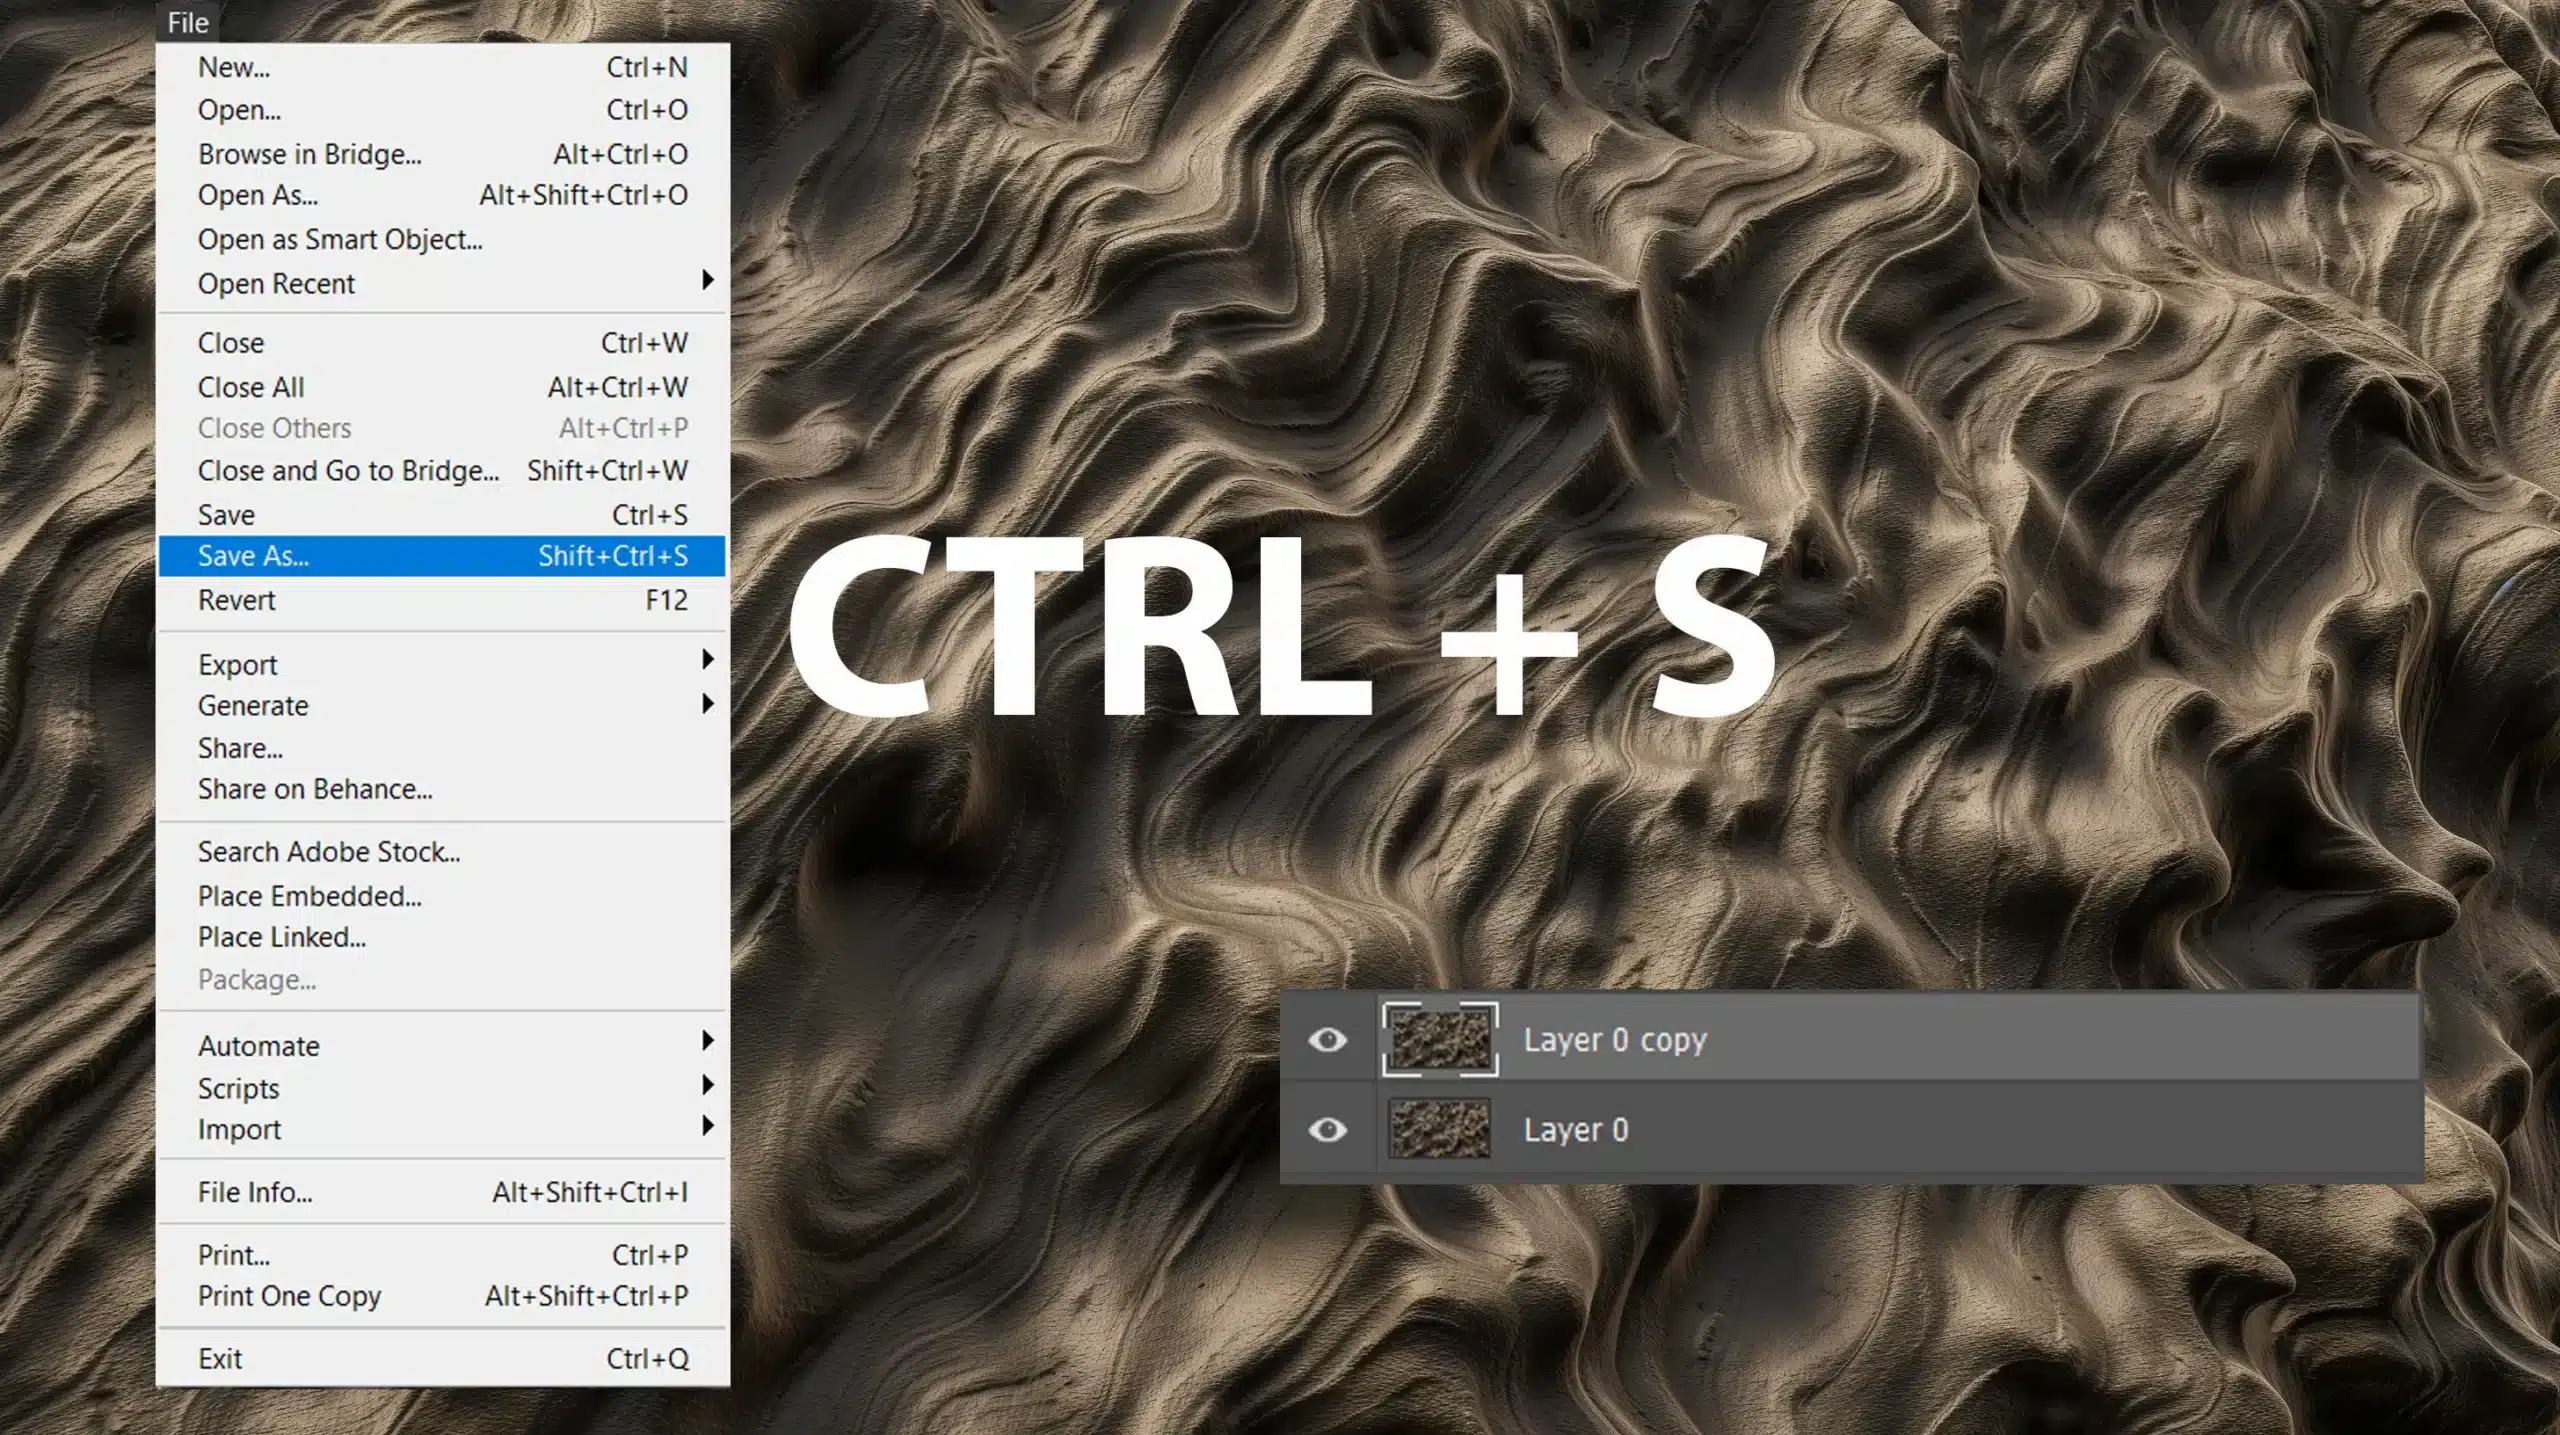
Use the 'Save As' option to keep versions, especially when working on long projects. Different names can help track progress.
Use keyboard shortcuts like Ctrl+S regularly to save time. Understanding the value of frequent saves can never be overstated.
Pro Tip: Always utilize the mask icon for non-destructive editing. Layer masks allow you to erase or hide parts of a layer while preserving the original background layer.
This feature offers unparalleled flexibility and should always be part of your workflow.
Understanding the concept of roughening edges in Photoshop is significant. This technique can add a unique, hand-drawn feel to your designs, giving them a more professional appearance. Let’s delve into how this effect is used in different areas.
Graphic Design
In graphic design, roughen edges are a popular tool for creating unique and engaging visuals. This effect can make text and images look more dynamic and less rigid.
Steps to Apply Rough Edges:
Create a new layer using the new layer icon in the layers panel.
Select the layer mask icon to conceal the area you want to modify.
Use the brush tool with various stroke settings to roughen the edges manually.
To ensure flexibility, apply effects on separate layers. This approach allows you to go back and create changes without affecting the entire design.
Digital Art
Digital artists often use the roughen edges effect to give their work a more sketch-like or rustic appearance.
How to Use Roughen Edges in Digital Art with the Layers Panel
Follow these steps to roughen edges in Photoshop and add texture to your digital art:
Open your artwork in Photoshop and duplicate the background layer.
Create a new layer and use the brush tool to outline the areas you want to roughen.
Click the Add Layer Mask button at the bottom of the Layers panel, with the duplicated layer selected.
Adjust the settings in the layers panel to blend the rough outlines smoothly into your artwork.
This technique adds depth and dimension to digital art, making it stand out.
Marketing Materials
When creating marketing materials like flyers, posters, and social media graphics, roughen edges can add a touch of creativity.
Applying Rough Edges to Marketing Materials:
Select the background layer of your document.
Apply a layer mask and use the brush tool to roughen the edges.
Add a color overlay if needed to match your branding, and adjust the overlay to blend seamlessly with your design.
This makes your marketing materials more appealing and attention-grabbing.
Pro Tip: Always save a copy of your original file before making significant changes. This way, if you don’t like the final result, you can always revert to the original version.
For more advanced techniques, consider exploring the Content-Aware Fill in Photoshop to seamlessly blend roughened edges with other elements.
Additionally, understanding the Difference Between Photoshop and Lightroom can help you decide which software is best suited for your specific needs.
Frequently Asked Questions
How do I create a ragged edge in Photoshop?
Open your image in Photoshop.
Select the layer with the image you want to edit.
Go to the 'Filter' menu, choose 'Brush Strokes' and select 'Spatter'.
Adjust the spray radius and smoothness to achieve the desired ragged edge effect.
Apply the filter and save your work.
What is the rough edges action in Photoshop?
The rough edges action in Photoshop is a preset that applies a specific kind of border to your image.
You can find this action in the 'Actions' panel.
If not pre-installed, you can download it from Adobe's website or other resources.
Once loaded, simply select the action and apply it to your image layer.
How do you fix jagged edges in Photoshop?
Open your image and select the layer that needs adjustment.
Zoom in on the jagged edges you want to fix.
Use the 'Lasso' tool to select the area around the jagged edge.
Go to the 'Select' menu, click on 'Modify,' and choose 'Smooth.'
Set the sample radius to smooth out the edges.
Deselect by pressing Ctrl+D (Cmd+D on Mac), and check the improvements.
How do I soften all edges in Photoshop?
Open your image in Photoshop and select the layer you wish to adjust.
Go to the 'Filter' menu, select 'Blur', and choose 'Gaussian Blur'.
Adjust the blur radius until the edges appear soft enough for your liking.
Click 'OK' to apply the blur and then save your project.
Using this tool has significantly enhanced my design projects, adding a unique and authentic touch to my work.
It’s a simple yet powerful technique that can make your photos stand out. If you’re looking to deepen your skills, I highly recommend checking out this comprehensive Photoshop course and Lightroom course.
These courses have been essential in helping me create impressive visuals. For the latest tools, consider visiting Adobe’s Photoshop and Lightroom pages.
Take these steps to boost your creativity and technical skills.
Happy editing!
If this article has helped you, then Like and Share it with your friends
$2,061.00Original price was: $2,061.00.$1,061.00Current price is: $1,061.00. 27584
Download Your Free Guide Now!
Discover the secrets of photography with our printable guide! Master essential techniques like aperture, shutter speed, and ISO to create stunning images. Get your free printable PDF now and start turning your snapshots into masterpieces!