Raindrops Effect Photoshop: Creating Realistic Water Droplets
Raindrops Effect Photoshop: Creating Realistic Water Droplets
Have you ever wanted to create a stunning raindrops effect in Photoshop?
If so, you’re in the right place. Imagine transforming your ordinary photos into captivating masterpieces with just a few clicks. I promise it’s easier than you think.
In this tutorial I will guide you through the simple steps to achieve that mesmerizing raindrop look.
Let’s get right into it!
Table of Contents
Creating the Raindrops Effect Photoshop
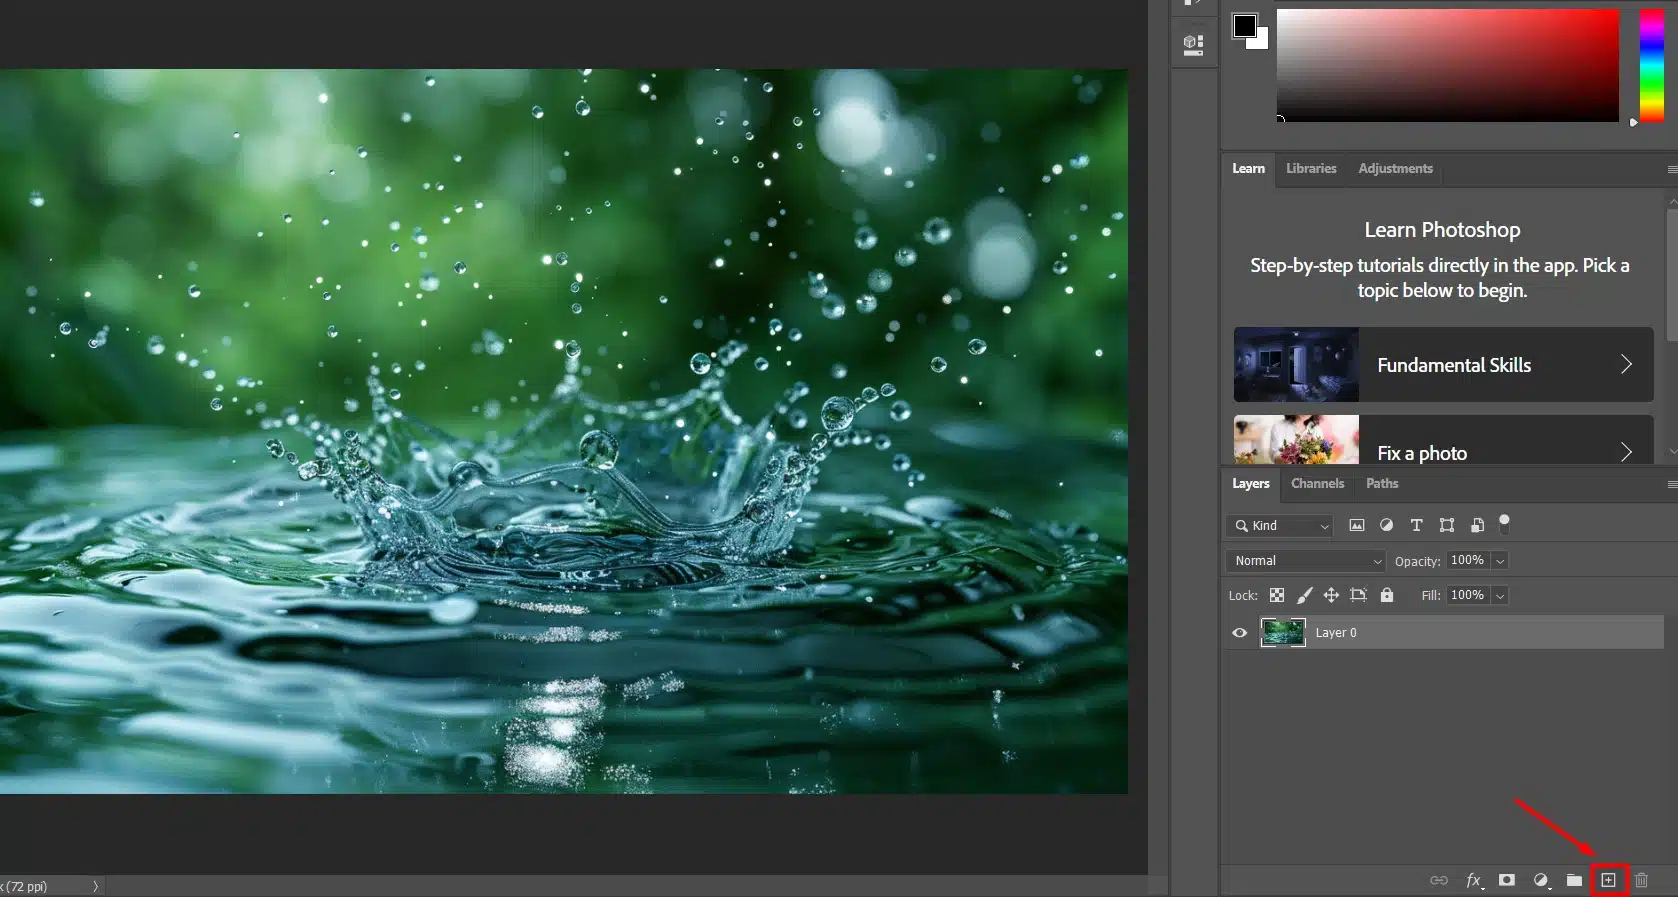
First, ensure the Layers panel is visible by enabling it from the Window menu.
We need to create a new layer for the rain effect. Do this by clicking on the “add new layer” icon in the Layers panel.
Adjusting Noise Settings
On your newly created blank layer, fill the one layer with black color using Edit > Fill. Next, adding all the noise to this layer via Filter > Noise > Add Noise:
Set the amount to 400%.
Ensure Gaussian and Monochromatic options are selected.
Click OK to apply the noise.
Applying the Motion Blur Filter
The next step is to give the noise some motion to resemble falling rain. We’ll achieve this through the motion blur filter. Go to Filter > Blur > Motion Blur.
Setting the Angle and Distance
In the Motion Blur settings, set the angle to -65 degrees and the distance to 20 pixels:
This makes all the noise look like Raindrops Effect Photoshop.
Click OK to apply the motion blur effect.
Blending the Rain Effect
Now that we have our basic raindrops, blending them into our original photo is significant for a realistic look.
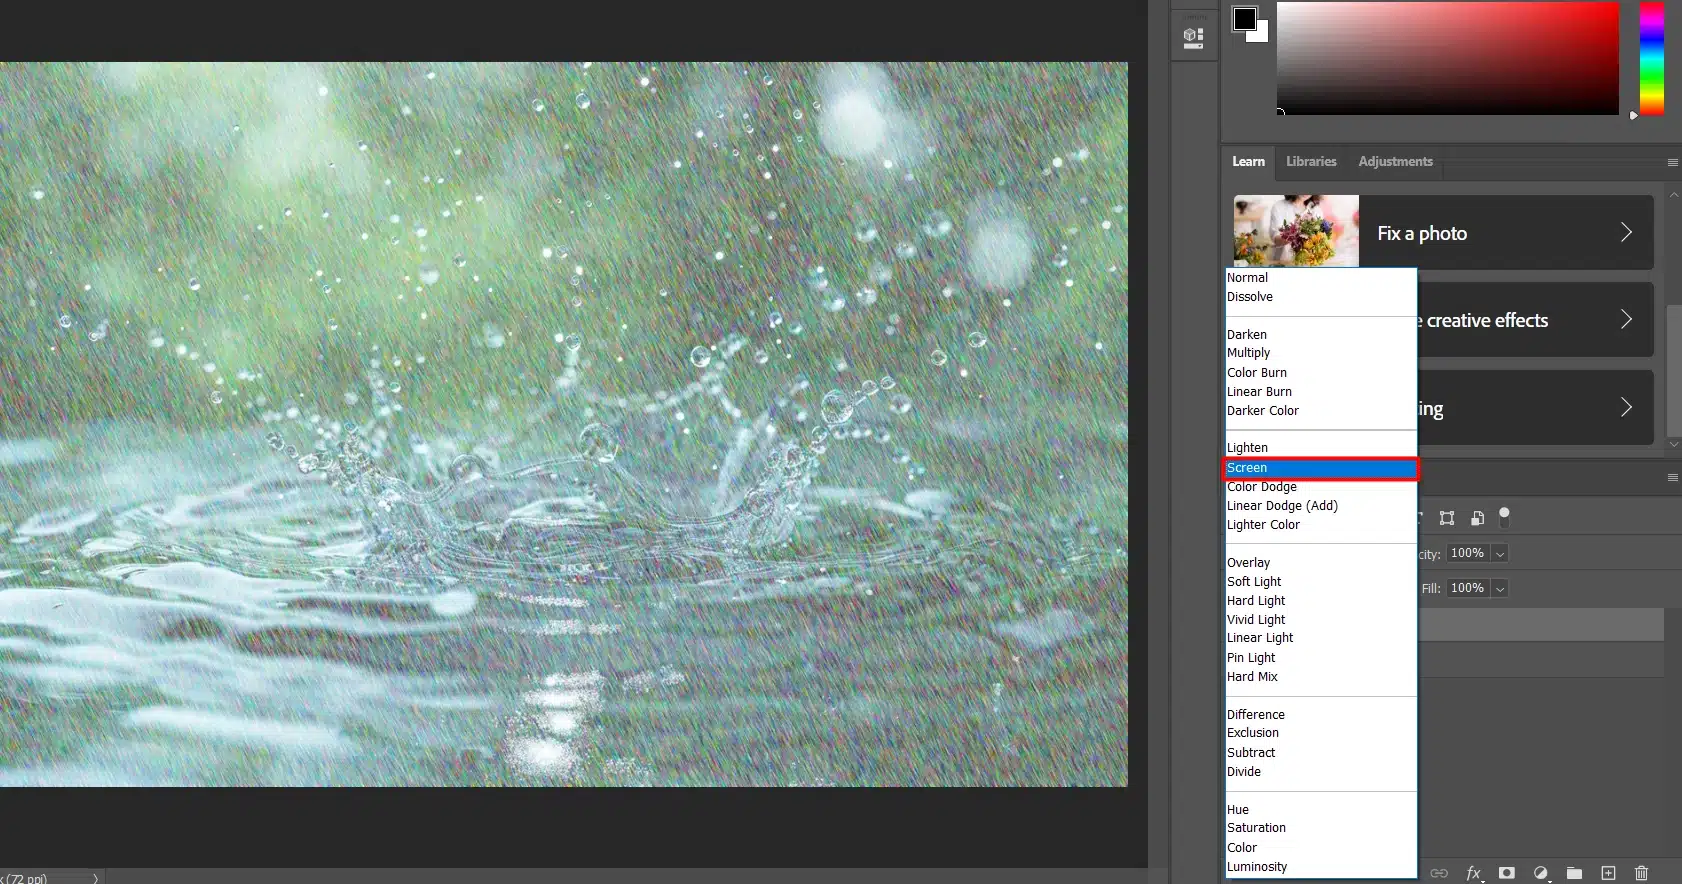
Using Blending Modes
Change the blending mode of the noise layer to Screen. This will remove the black background and leave only the raindrops visible:
Adjust the opacity of the noise layer to refine the effect.
Duplicate the noise layer for added depth using Ctrl + J (or Command + J).
Finally, to make the rain appear more natural, you can adjust brightness and contrast using Image > Adjustments > Brightness/Contrast.
Pro Tip: Learning how to use manual mode on your camera or in software can help fine-tune the details, ensuring the rain looks as realistic as possible!
Techniques to Improve and Perfect the Rain Effect in Your Designs
Creating rain effects in Adobe Photoshop can be a game-changer for any project.
Adding a realistic touch to your designs is now simpler with our step-by-step guide.
To better understand the differenttechniques for creating rain effects in Photoshop, here’s a comparison of various approaches.
This table highlights the significant aspects of each style, helping you choose the most suitable method for your project
Aspect
Vintage Rain Effect
Modern Rain Effect
Grunge Rain Effect
Noise Settings
Low (150%)
Moderate (250%)
High (400%)
Motion Blur Angle
-45 degrees
-65 degrees
-75 degrees
Blending Mode
Overlay
Screen
Multiply
Opacity
50%
75%
60%
Additional Effects
Vignette for an old photo look
Brightness/Contrast adjustment
Grain filter for a rugged texture
Mastering Natural Rain Effects: Raindrop Shapes and Background Layer Styles
To make rain appear natural, you need to master creating raindrop shapes and applying subtle background layer styles.
Creating Raindrop Shapes
We start by creating raindrop shapes:
Open a new document window in Aoobe Photoshop.
Use the brush tool to draw oval shapes that mimic raindrops. Vary their sizes to keep things looking realistic.
Fill them with your foreground color.
Duplicate these shapes and scatter them around to create the illusion of falling Raindrops Effect Photoshop.
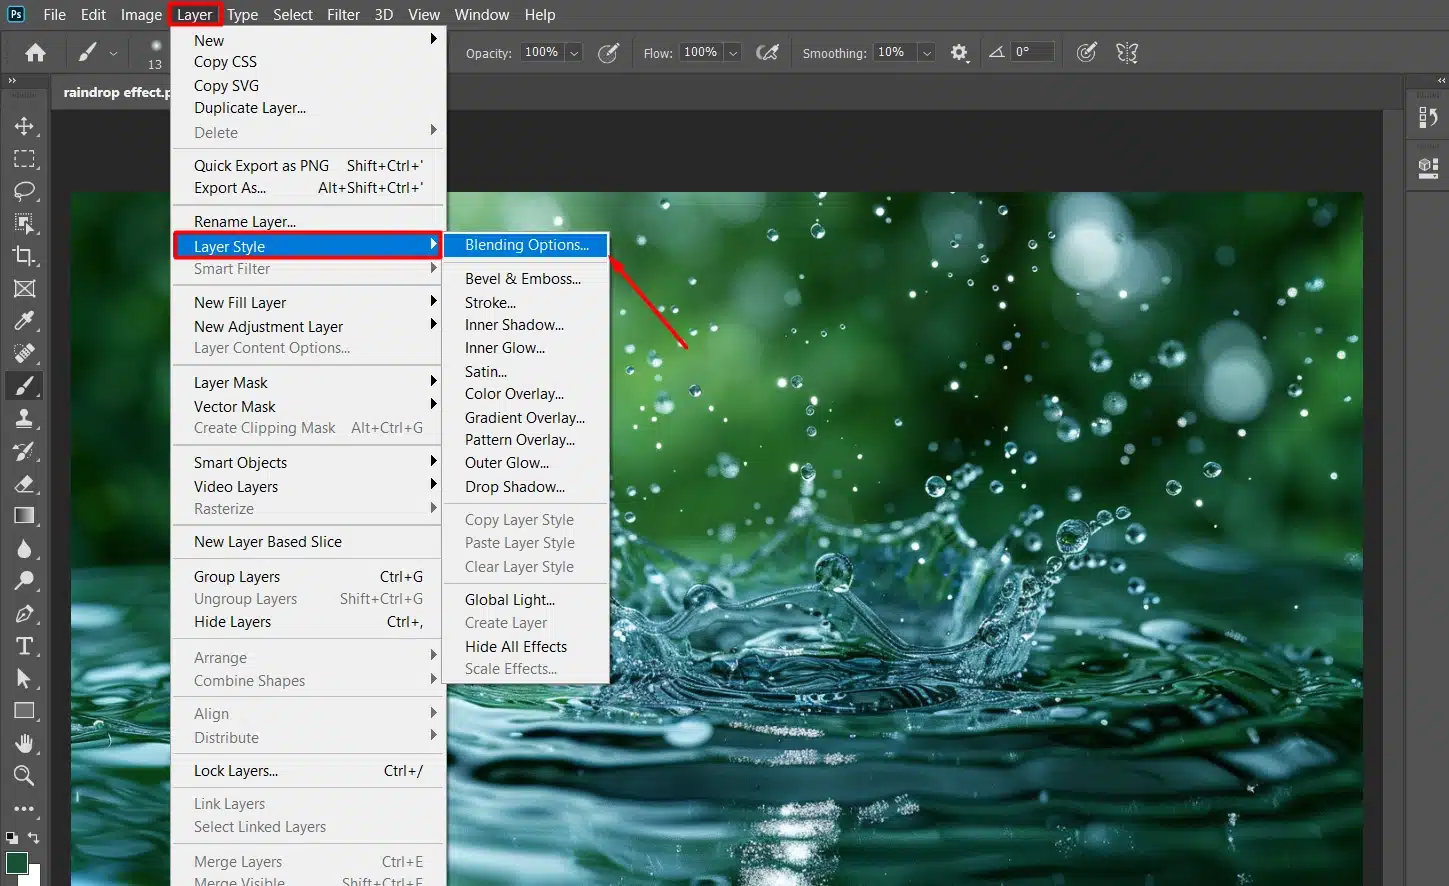
Applying Layer Styles
Once you have your raindrops, apply top layer styles for that extra touch:
Go to Layer Style and choose Blending Options.
Select Bevel and Emboss to add depth.
Adjust the settings so the raindrops appear slightly raised. This gives your rain effect in Photoshop more realism.
Using Motion Blur for Realism
Motion blur can dramatically increase the believability of your raindrops effect photoshop .
Adjusting Motion Blur Settings
To use it effectively:
Convert your raindrop layer into a smart object. This allows you to make non-destructive edits.
Apply a motion blur by going to Filter > Blur > Motion Blur.
Set the angle to -75 degrees (or whichever angle reflects your scene's rain direction).
Adjust the distance to simulate wind speed. Too much blur makes it less realistic, so fine-tune it for the best results.
Pro Tip: Combine different techniques for the best effect. Create two layers of rain: one closer to the camera and one farther back.
Apply the same amount of blur to the distant rain layer and slightly less blur to the closer one.
Converting this layer into smart object allows for non-destructive editing and flexibility. This adds depth and realism to the rain effect in Adobe Photoshop.
As you wrap up your project, focus on adding the final touches and preparing it for export.
This stage involves reviewing your work to ensure every detail is perfect before saving and sharing your creation.
Reviewing Your Work
Before finalizing, take a moment to review your work. Check for consistency, ensuring the rain effect aligns harmoniously across the canvas space.
Inspect every detail to make sure no raindrop looks out of place. Remember, small tweaks can make big improvements.
Step back: View your image from a distance to catch any glaring issues.
Zoom in: Inspect finer details like edges and blend modes.
Adjust midtones: Use the midtones slider if the rain appears too bright or dark.
Consistency is important here. Each brush stroke and filter should contribute to a cohesive final product.
This ensures that your rain effect doesn’t distract but rather enhances your overall background composition, much like the refined results you achieve from mastering Lightroom.
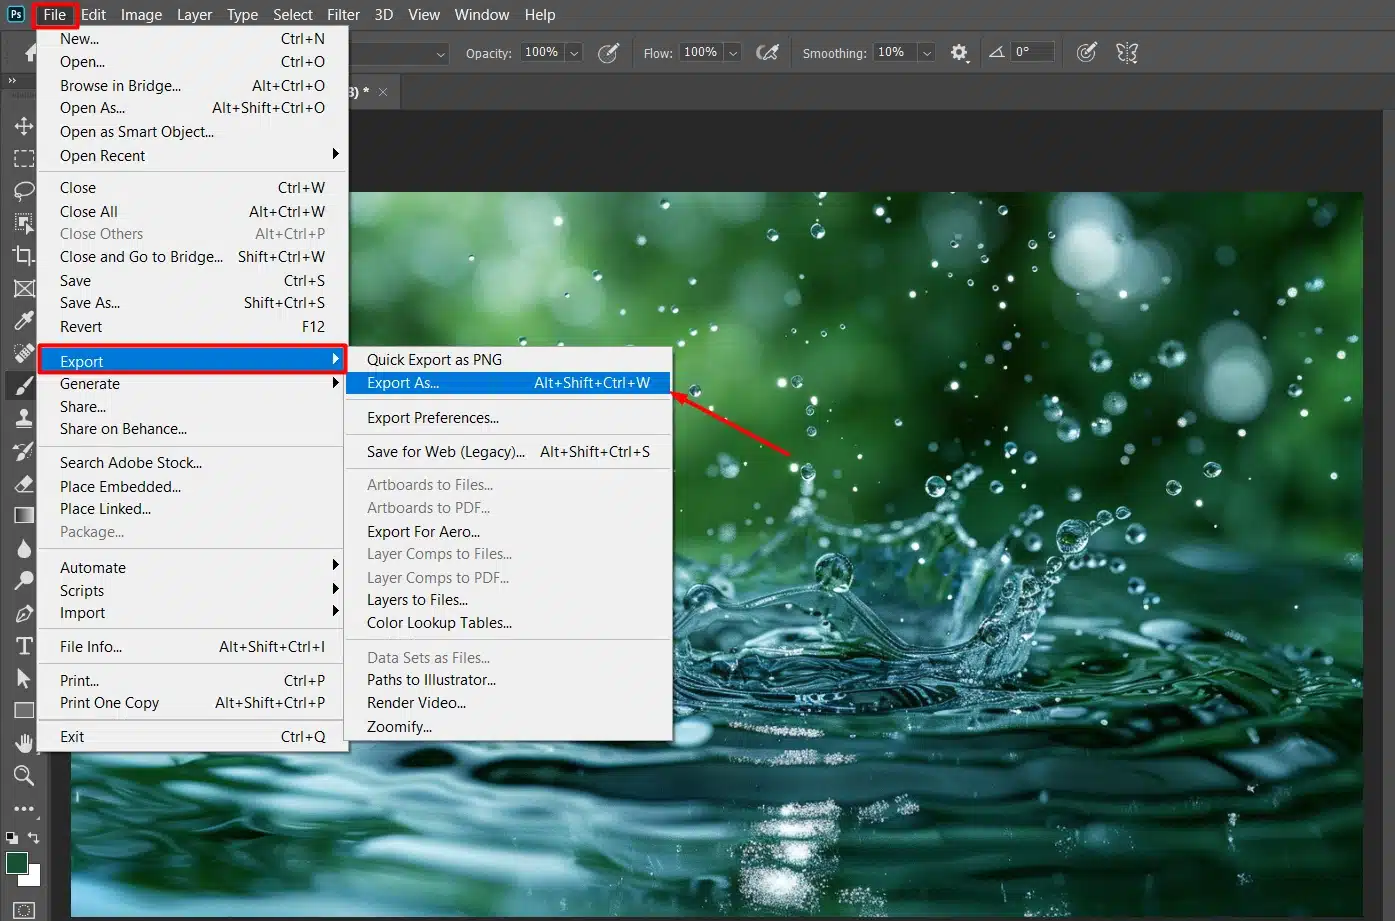
Exporting the Image
Once satisfied with your artwork, it’s time to export it for use. Here’s how you can do it efficiently:
Flatten layers: If you’re sure there are no more edits, flatten your layers panel by going to Layer > Flatten Image.
Choose format: File > Export > Export As, select your desired file format (e.g., PNG or JPEG).
Adjust settings: Optimize the settings to balance file size and quality. Click OK to finalize.
Exporting correctly preserves the integrity of your design while making it suitable for web and print use.
Always double-check the resolution and file type to ensure compatibility with your intended platform.
Pro Tip: When adding rain, converting your top rain layer into a smart object allows flexible changes without quality loss.
Additionally, converting a layer into a smart object and using Photoshop shortcuts and Lightroom shortcuts can speed up your workflow significantly, making the editing process more efficient.
Common Mistakes When Creating Rain Effects in Photoshop
Creating realistic rain effects in Photoshop can be tricky, with inadequate layer management being a common mistake that affects the final image quality.
Inadequate Layer Management
A frequent mistake is insufficient attention to blank layer organization.
Without proper management, it becomes challenging to adjust elements or apply edits non-destructively, leading to potential workflow inefficiencies and difficulty in fine-tuning the rain effect.
Overusing the motion blur filter is another common error.
Applying too much gaussian blur can result in an unnatural appearance of raindrops, detracting from the overall realism of the effect.
To master the art of blur, carefully adjust the motion blur settings to achieve a balanced and authentic rain effect that enhances rather than overwhelms the image composition
Ignoring Lighting and Perspective
Neglecting to consider lighting and perspective when applying the rain effect can diminish its realism.
Raindrops should interact realistically with light sources and appear consistent with the scene’s depth and perspective.
Failing to account for these factors can result in a disjointed or flat-looking rain. To avoid this, check out these tips on photography lighting.
Frequently Asked Questions
How to give a rain effect in Photoshop?
Open your image in Photoshop.
Select Layer > New > Layer to create a new layer.
Go to Filter > Noise > Add Noise. Adjust the amount to around 25%, and check 'Uniform' and 'Monochromatic'.
Select Filter > Blur > Motion Blur. Set Angle to around -65 degrees and Distance to 50 pixels.
Change the blending mode of the layer to Screen to see the effect on your image.
How do you make a water drop effect in Photoshop?
Open your image in Photoshop.
Choose the Ellipse Tool and draw a small circle on the area you want the water drop.
Right-click on the layer and choose Blending Options.
Apply 'Bevel & Emboss' and 'Drop Shadow' to give a 3D look.
Adjust the opacity of the layer to make the water drop look more realistic.
What steps should I take to add a rain filter to a photo?
Open your photo in Photoshop.
Create a new layer from Layer > New > Layer.
Fill the layer with black using the Paint Bucket Tool.
Go to Filter > Noise > Add Noise. Set the Amount to about 100%, and choose Gaussian and Monochromatic.
Apply Filter > Blur > Motion Blur with an angle that mimics rain direction.
Set the layer's blending mode to Screen to see the rain effect.
What is the process to make it rain on photos?
Open your photo in Photoshop.
Add a new layer by selecting on the "add new layer" icon in the Layers panel.
Go to Filter > Render > Clouds, then Filter > Noise > Add Noise with an amount of 100%, selecting 'Uniform'.
Select Filter > Blur > Motion Blur and adjust settings to simulate rain (try setting Distance to 60 pixels and Angle to -65 degrees).
Adjust the blank layer opacity and blending mode to blend the rain naturally with your photo.
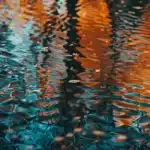
In conclusion, mastering the raindrops effect in Photoshop has truly transformed my approach to digital artistry.
This technique adds a captivating layer of realism to my photos, making them stand out in a competitive field.
By incorporating the raindrops realistic effect, I’ve been able to evoke emotions and tell more compelling stories through my work.
If you’re eager to elevate your skills, I highly recommend exploring my comprehensive Photoshop course and enhance your editing prowess with my Lightroom course.
Happy editing!
If this article has helped you, then Like and Share it with your friends
$2,061.00Original price was: $2,061.00.$1,061.00Current price is: $1,061.00. 27585
Download Your Free Guide Now!
Discover the secrets of photography with our printable guide! Master essential techniques like aperture, shutter speed, and ISO to create stunning images. Get your free printable PDF now and start turning your snapshots into masterpieces!