Have you ever wondered how to outline text in Photoshop to make your designs pop?
You’re in the right place! In this guide, I’ll walk you through a simple, step-by-step process to create stunning text outlines that can transform your images and graphics.
Whether you’re a beginner or just looking to polish your skills, this article will provide you with everything you need to know.
From capturing attention with bold outlines to adding a touch of creativity to your projects, I’ve got you covered.
Let’s dive in and make your text stand out like never before!
Table of Contents
Step-by-Step Guide: How to Outline Text in Photoshop
To outline text, first make a white box as a background, then choose pattern for your text layer and select “Convert to Shape” for further customization.
Creating a Text Layer
The first step in outlining text in Photoshop is to create a text layer. This serves as the foundation for any text-related work you do in Photoshop.
- Open a new file in Photoshop.
- From the left toolbar, select the "Type Tool" (T).
- Click on your canvas to create a text box and type your desired text.
- Adjust the font and size from the top toolbar.
- After typing, move to the Layer Panel. Ensure your text has its dedicated layer. If it doesn’t, create a new layer and repeat the steps.
Applying Layer Style for Outlining
Once you have your text layer ready, the next step is to add an outline using the layer style options.
- Secondary-click on your text layer in the Layers Panel and select "Blending Options".
- A window appears with various styles and effects. Look for the "Stroke" option in the left column and click on it.
Adjusting Outline Thickness and Color
When the outline option is selected, you can customize the thickness and color of your outline text.
- Adjust the outline's size by moving the stroke weight slider.
- To change the stroke color, click on the color box and choose a solid color from the Color Picker.
- Experiment with different settings until you find a look that suits your preference. Small changes can make a big impact on the final result.
When adjusting outline thickness and color, it’s important to consider the color profile in Photoshop.
A proper color profile ensures your outlines look vibrant and consistent across different devices.
Customizing Stroke Options
For further customization, you can delve into more advanced outline options.
- In the Stroke menu, you will find additional settings like Position, Fill Type, and Blending Mode.
- Position helps you place the outline inside, outside, or centered on the edge of your text.
- Fill Type gives options such as solid color, gradient, or pattern.
- Blending Mode allows advanced mixing with the underlying text and background layers.
- Experiment with these options to fine-tune your outlined text and achieve a professional look.
Pro Tip:Â Hold Shift as you resize text to keep proportions intact. This trick helps maintain the quality of your text layer when adjusting size.
By following these steps, you now understand how to outline text in Photoshop effectively.
Whether you’re working on a simple project or something more complex, knowing how to create a text outline can elevate your work.
For more advanced techniques, consider exploring how to use the content-aware fill in Photoshop or how to add texture in Photoshop to enhance your designs further.
Enhance your projects with Photoshop text effects by customizing stroke options. Craft unique text styles, enhancing your designs with personalized outlines and dynamic effects smoothly.
Advanced Techniques for Text Outlining in Adobe Photoshop
To enhance the appearance of your text outlining in Adobe Photoshop, you can edit the font and convert it to a shape, allowing you to apply a gradient for a more dynamic effect.
Incorporating gradient techniques in Photoshop can elevate your design when exploring advanced techniques for text outlining.Â
These gradients add depth and dimension, enhancing the overall visual appeal.Â
Using Multiple Layers for Complex Effects
Creating complex outlines in Adobe Photoshop involves using multiple layers. This method offers flexibility when making adjustments.
- Start by adding your text to a new project: Use the "Type Tool" to enter your text, making sure it sits on its dedicated layer.
- Duplicate your text layer: Drag it to the "New Layer" icon or press Ctrl+J. Rename this duplicate layer for easy identification.
- Apply a stroke effect to each layer: Secondary-click the layer and select "Blending Settings." Choose "Stroke" and set different sizes and colors for each outline. For example, your first layer could have a smaller, darker stroke, while the duplicate can have a larger, lighter outline. This stacking will give your outlined text a unique, multidimensional look.
- Adjust the layer opacity: Access the "Opacity Slider" found in the top menu of the Layers Panel. Adjust it to make the underlying layers slightly visible through the top layers, giving a more textured appearance.
Using multiple layers can do wonders when it comes to outlining text. Not only does it offer flexibility, but it also enhances creativity.
Enhance your projects with the Photoshop text box feature by using multiple layers for complex effects. This method allows intricate designs and greater flexibility, elevating your text creations seamlessly.
Combining Layer Styles for Unique Designs
For those looking to elevate their outlined text further, combining layer styles is the way to go.
- Create a new text box: Use the "Text Tool".
- Navigate to the "Blending Settings" menu: Right-click your text layer and experiment with multiple layer styles.
- Combine "Stroke" with "Drop Shadow" and "Outer Glow": Each effect has its unique settings. In the "Drop Shadow" section, adjust the angle, distance, and opacity to form a shadow effect under your text. The "Outer Glow" option lets you choose a glow color and adjust its spread and size to match your design needs.
Here’s a cool trick, use the “Convert to Shape” feature to manipulate the text outlines as a vector shape.
This lets you use the “Pen Tool” for even more detailed and custom modifications. How about using patterns?
Enhance your designs with Photoshop patterns. These versatile patterns add texture and depth, making your outlined text and graphics visually stunning and unique.
Choose a design overlay in the “Blending Options” to add texture to your text. This can construct a striking background, ensuring the outlined text stands out.
Once done, always review your combinations to ensure they harmonize well. Combining layer styles is an excellent way to perfect your text in Photoshop.
You get a unique, professional-quality text that’s bound to impress everyone.
Pro Tip: Remember, you can always group your layers into folders for better organization.
Simply select your layers, secondary-click, and choose “Group from Layers.”
This keeps your workspace tidy and manageable, enabling you to focus more on creativity and less on clutter.
Enhance your designs by learning how to warp text in Photoshop. Combining Layer Styles for unique designs, this technique adds dynamic effects that make your text pop and stand out beautifully.
Common Mistakes and How to Avoid Them
One common mistake when outlining text is not ensuring that the text layer is selected, which can lead to unexpected results.
Mistake | Description | Solution |
---|---|---|
Not Selecting the Text Layer | Applying effects to the wrong layer | Double-check that the correct layer is active |
Misaligned Layers | Text appears off-center or misplaced | Use alignment tools in the options bar |
Invisible Text | Text hidden beneath another layer | Drag the text layer above others in the panel |
Inconsistent Outlines | Varying stroke sizes and colors across text | Use the same settings for all layers |
To avoid this, always double-check that the correct layer is active before applying any layer styles effects.
Troubleshooting Text Layer Issues
When working with text in Photoshop, mistakes can happen. One common issue is misaligned layers.
To fix this:
- Select the layer.
- Use the alignment tools in the options bar.
Another problem people face is not being able to see their text. This often happens because the text layer is below another layer.
To resolve this:
- Drag the text layer above other layers.
Ensuring Consistent Outlines
Designing outline text sounds easy, but there are some tricks.
Follow these steps:
- Use the 'Text Tool' to type your text.
- Right-click on the text layer and choose "Blending Settings".
- Under these options, find and select the 'Stroke' setting.
- Choose a stroke color that contrasts well with your text. This helps in making the outline stand out.
- Adjust the size of the stroke if needed.
Consistency is fundamental when applying an outline to multiple text layers. Make sure to use the same stroke size and color for all layers. This way, your design looks uniform.
Pro Tip: Save your preferred outline settings, so you don’t have to redo them each time. Just ‘choose stroke’, set your preferences, and save them for future use.
Additional Tips for Text Layers
If you’re looking to enhance your text layers further, consider using the magic wand tool in Photoshop for precise selections.
Additionally, learning Photoshop shortcuts can significantly speed up your workflow, making it easier to manage text layers and other elements in your projects.
Creative Ideas for Using Outlined Text
One creative idea for using outlined text is to select a bold font and convert it to a shape, following specific instructions to create an engaging design.
For example, you can apply two colors to the outline and fill, making the text stand out and adding depth to your project.
Enhance your creativity with the path selection tool in Photoshop while exploring creative ideas for using outlined text.
This powerful tool allows precise control over text outlines, enabling you to design unique and eye-catching effects effortlessly.
Incorporating Outlined Text in Designs
Outlined text can make your designs look sharper and more professional. Start by using the ‘Text Tool’ to type your message, then select a font that suits your style.
If you need inspiration, explore different fonts in the ‘Type Menu’. Outlines provide a clean and sleek look that makes your text pop out.
To add an outline:
- Secondary-click on the text layer and pick "Blending Options".
- Choose the 'Stroke' option and adjust the size and color to your preference. This gives a neat outline. Now your text layers are consistent and easy to read.
Discover the text portrait effect in Photoshop by incorporating outlined text in designs. This technique blends creativity with structure, enhancing your portraits’ visual impact effectively.
Enhancing Visual Impact with Outlines
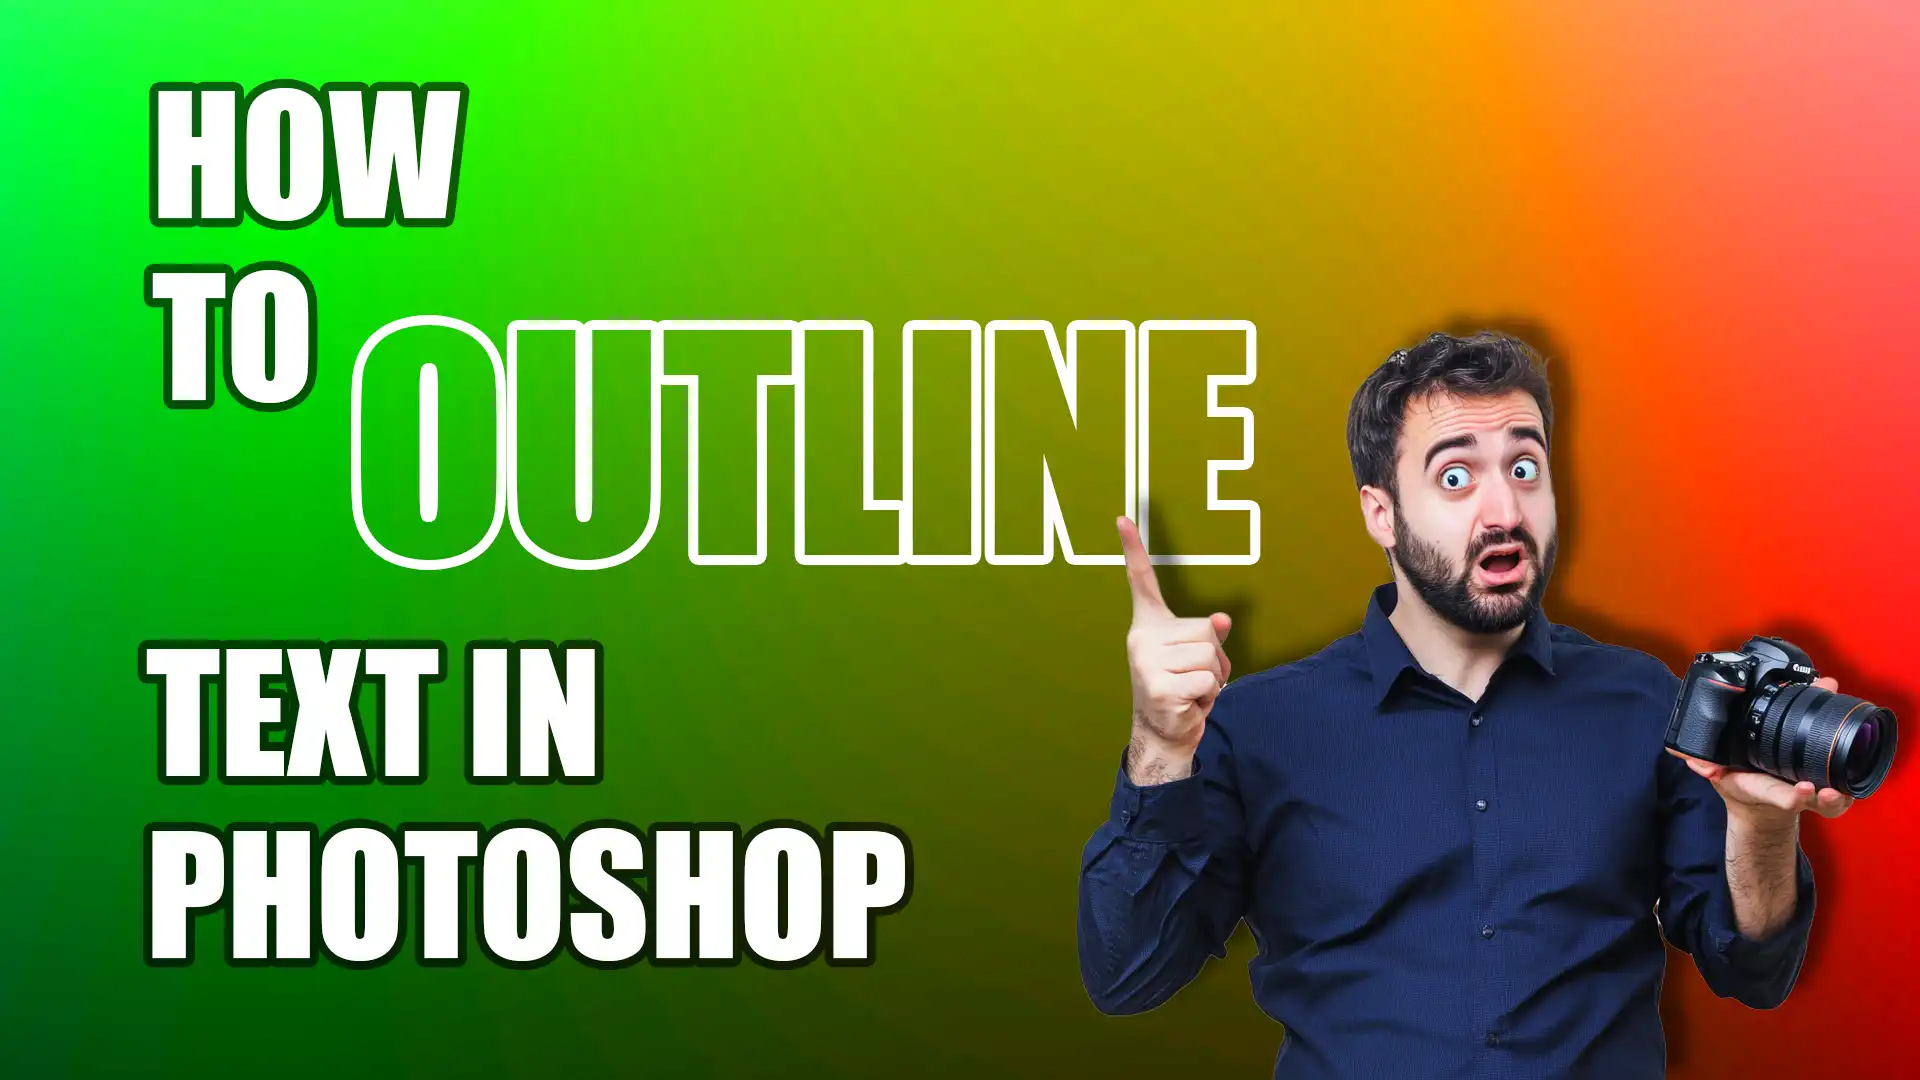
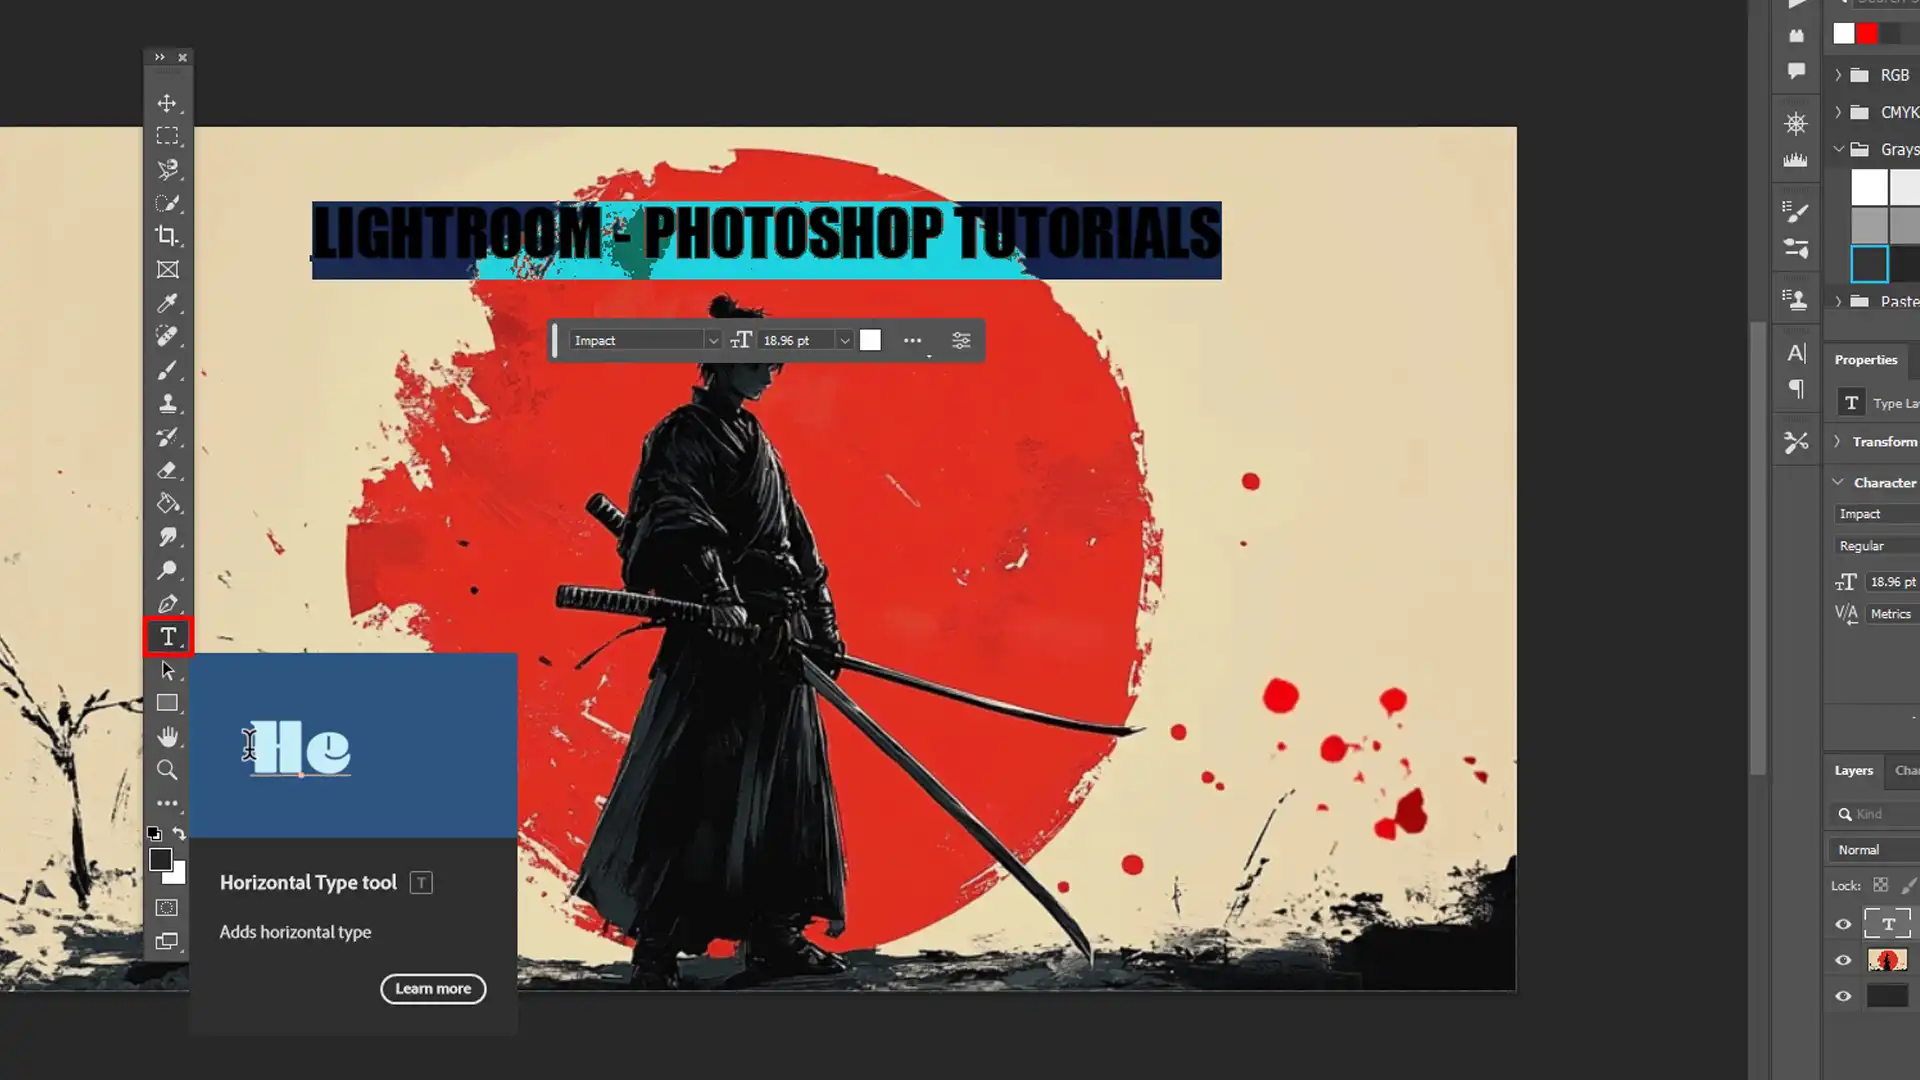
Outlines enhance the visual impact of your text, making it pop on any background. Whether you’re working on posters, social media graphics, or any other design, outlined text grabs attention.
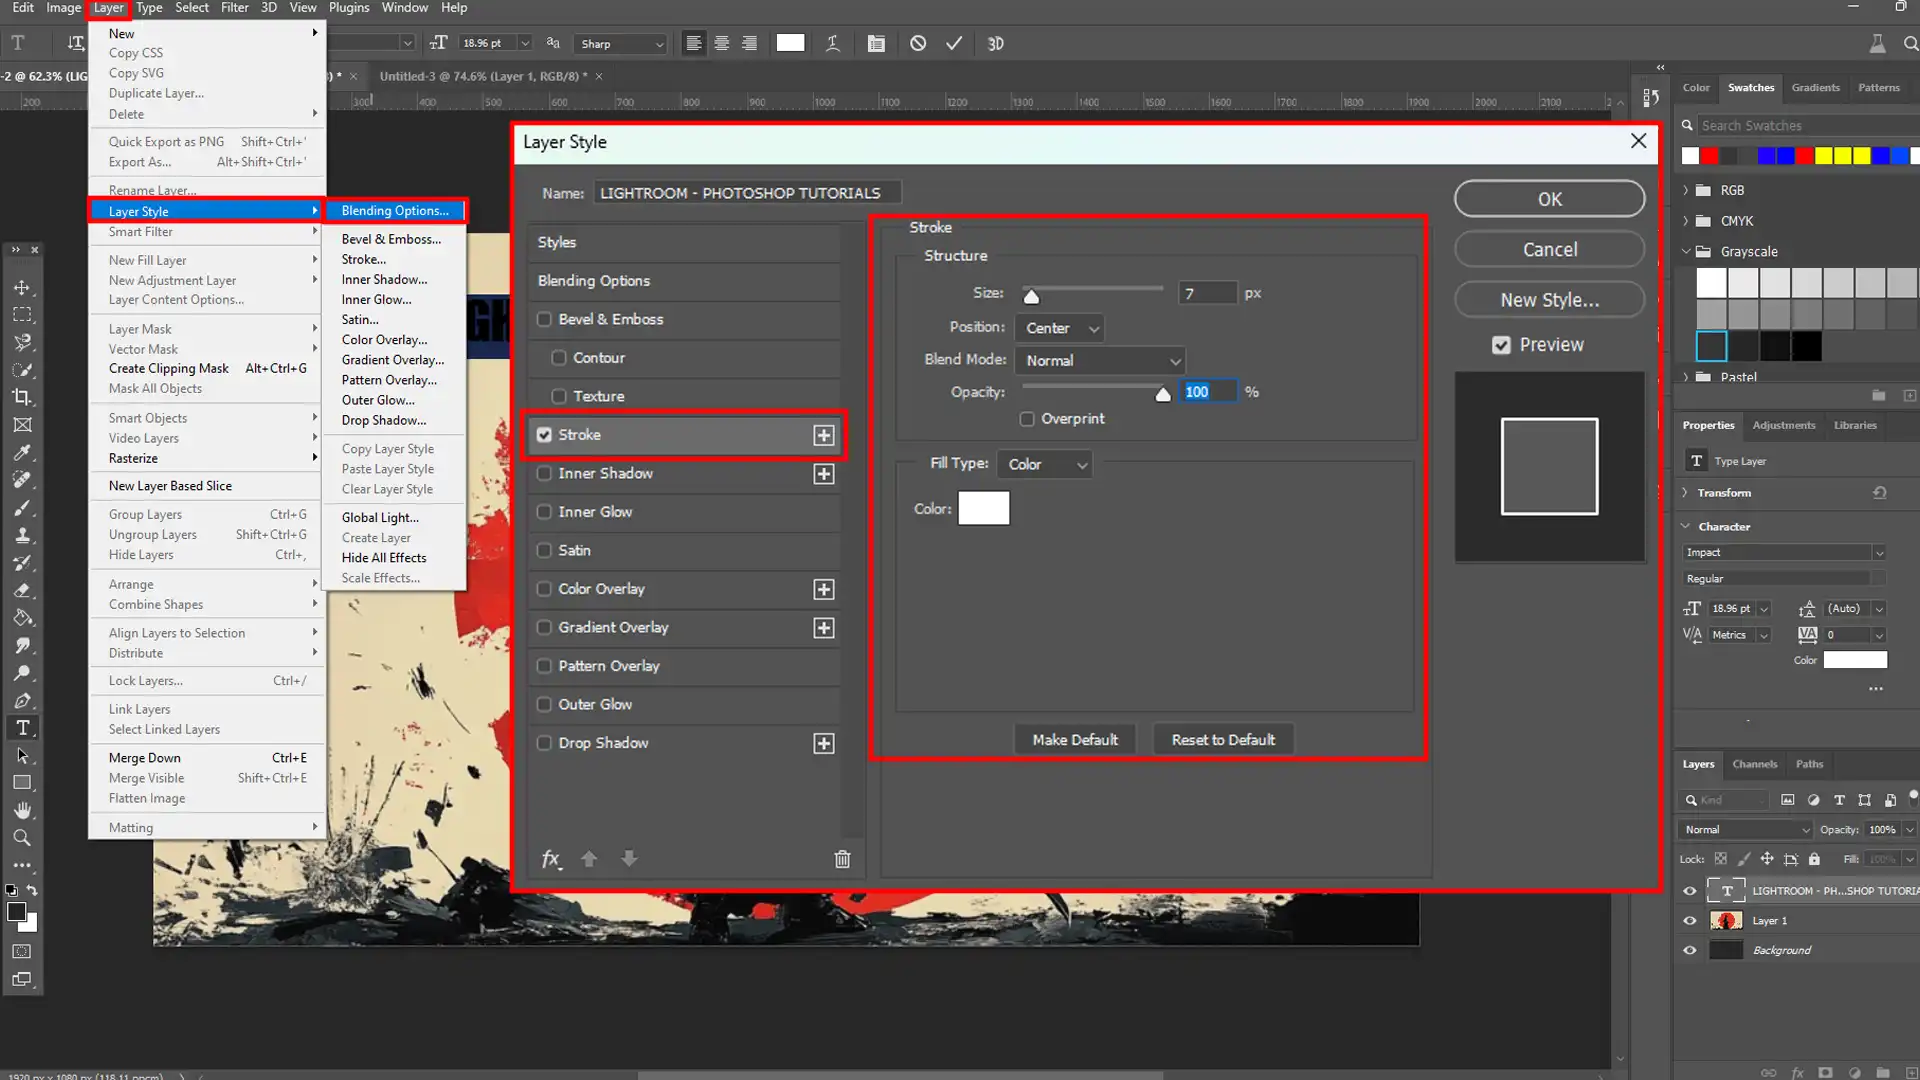
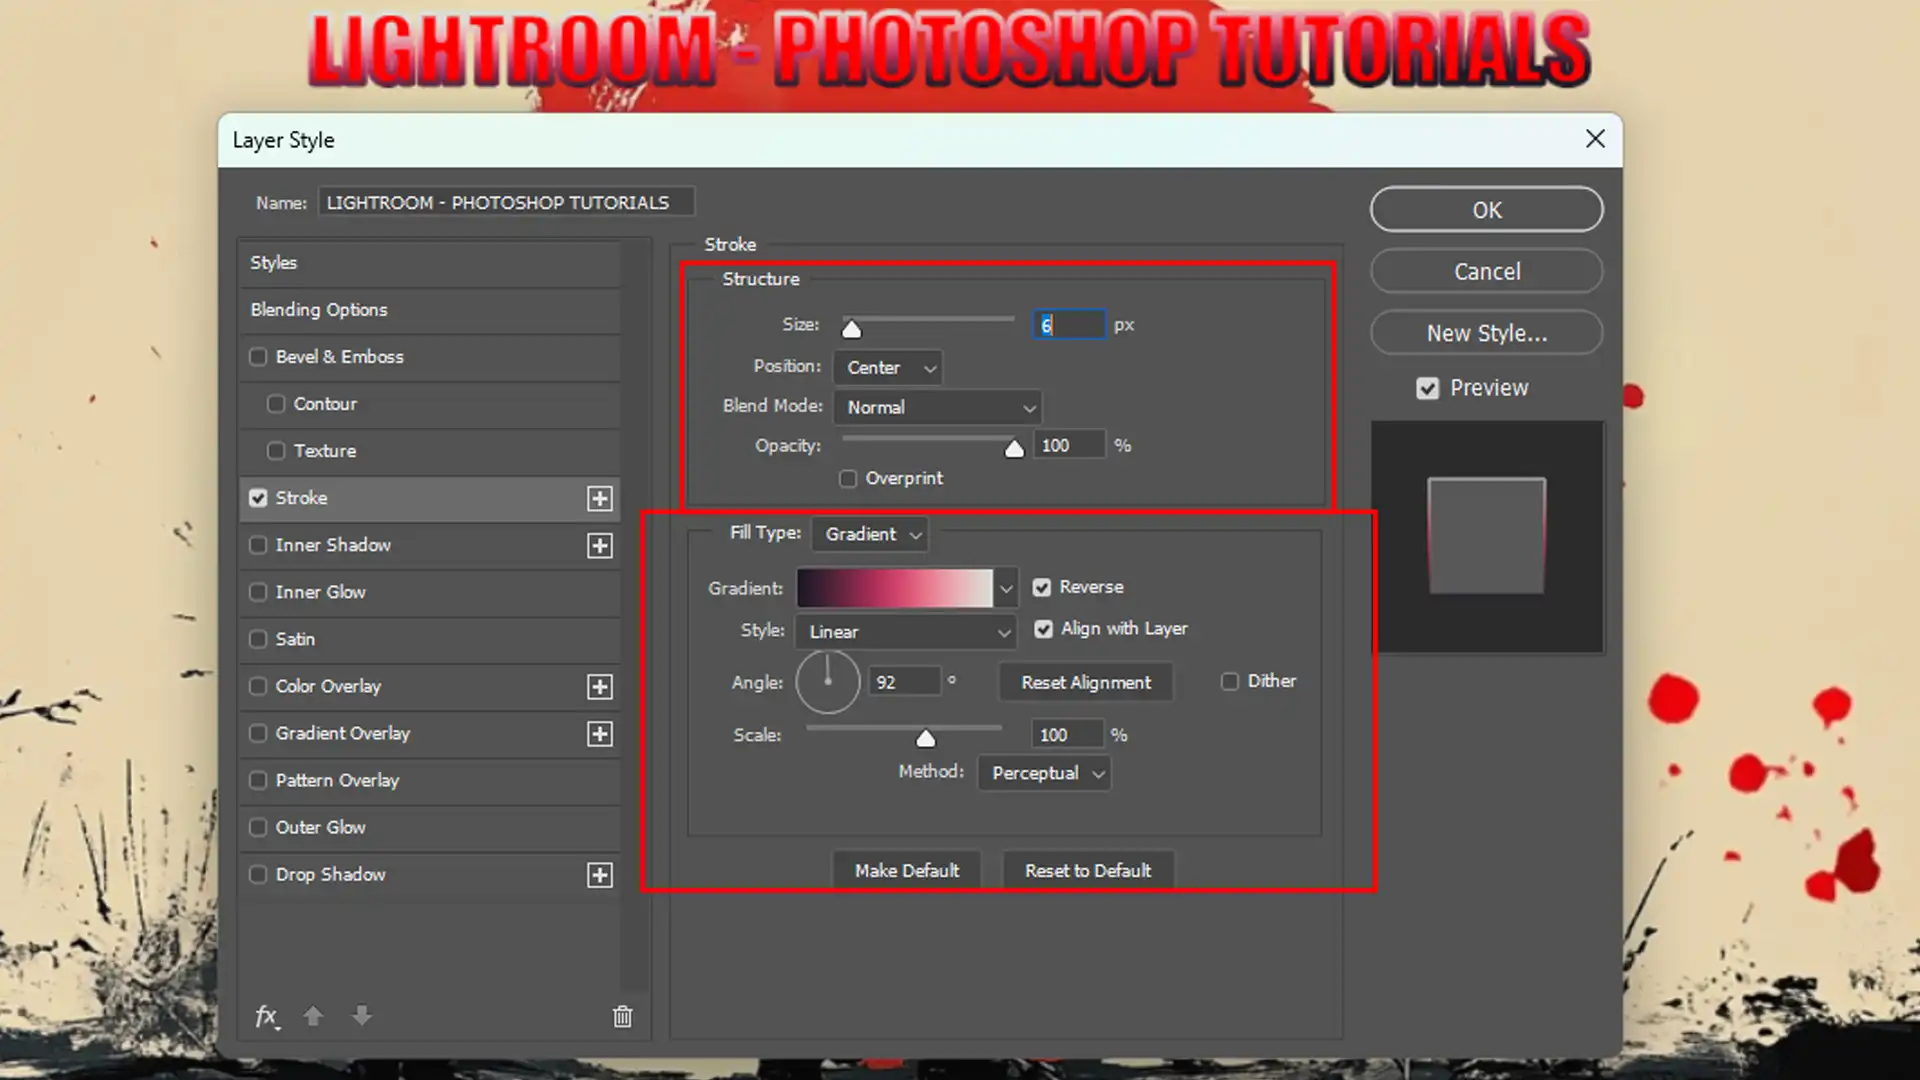
The trick is to balance it right, so experiment with different outline sizes and colors. Using the layer style options, such as “Blending Options”, you can easily customize your text.
Combining outlined text with a filled interior adds depth. Outlines work especially well with bold fonts.
They keep text readable while adding flair. Remember, when you convert text outlines, you expand creative possibilities.
You can then manipulate each letter individually for unique designs. Try using the rectangle tool to create boxed outlines for a compact look.
To enhance your visuals effectively, understanding the type of filters in Photoshop is important.
By combining filters with outlines, you can create stunning designs that elevate the overall impact of your artwork.
Pro Tip: Use contrasting colors to make your outlined text pop!Â
Experiment with different fonts and enjoy the process!
For more advanced techniques, consider exploring how to use the Photoshop shape tool and blending modes in Photoshop to further enhance your designs.
These tools offer additional customization options that can make your outlined text even more unique and visually appealing..
Frequently Asked Questions (FAQs)
How do I add an outline to text?
East steps to outline text:
- Open your text layer in Photoshop.
- Go to the 'Layer' menu, choose 'Layer Style,' then choose 'Stroke.'
- In the Stroke settings, adjust the size, position, and color to create your desired outline.
How do you outline in Photoshop?
Follow these steps to outline:
- Select the layer or object you want to outline.
- Access the 'Layer Style' menu and choose 'Stroke.'
- Modify the settings like size, color, and position to apply the outline.
How to trace letters in Photoshop?
Step-by-step guide to trace letters:
- Open the image with the letters you want to trace.
- Use the 'Pen Tool' to carefully draw paths over each letter.
- Right-click the path and select 'Stroke Path' with a brush or other tool to apply.
How do I sharp text outline in Photoshop?
- Double-click the text layer to open 'Layer Styles.'
- Select 'Stroke' and choose a size that complements your text.
- For sharper outlines, increase the 'Opacity' and choose a 'Position' that suits the style (Outside, Inside, or Center).
Conclusion
Learning how to outline text in Photoshop has truly changed the way I make my designs. I remember the first time
I added an outline to my text, it made everything look so much clearer and more professional. If you follow the steps in this guide, you’ll find it easy to make your own text pop out.
To keep improving, check out my Phostoshop Course and Lightroom course. These courses offer detailed instructions that can help you master Photoshop and Lightroom.
Additionally, having the right tools can make a big difference. Consider getting Adobe Photoshop and Adobe Lightroom.
These programs are significant for making great designs and make tasks like outlining much easier. I hope this guide helps you assemble amazing projects.
Keep practicing, and you’ll see your skills grow.
Read more about Photoshop:Â