Editing Wildlife Photos in Lightroom for Stunning Results

Editing wildlife photos in Lightroom is where your passion meets precision, transforming raw moments of nature into breathtaking works of art. Imagine capturing a leopard’s fierce gaze or a majestic eagle in flight, and then bringing those images to life with unparalleled clarity and impact. In this blog, we’ll explore the art and science of fine-tuning wildlife photos. Discover how to enhance exposure, sharpen intricate details, and perfect color temperature in photographs to highlight the true essence of your subjects.

Whether you’re an experienced wildlife photographer or just embarking on this exciting journey, these editing techniques will help you create stunning visuals that truly capture the wild’s majesty. Get ready to elevate your wildlife photography and let your images roar with life!

Table of Contents

Layered Adjustments: Editing Wildlife Photos in Lightroom

A zebra in a field of golden grass, displayed in Adobe Lightroom, showcasing detailed color grading and layered adjustments in the editing process.

When it comes to edit wildlife photos, capturing stunning images in the field is just the beginning. The real magic often happens during post-processing, where Adobe Lightroom plays a critical role. Layered adjustments in Lightroom allow you to enhance your wildlife photos selectively, ensuring each part of the image is given the attention it deserves. Below, we’ll explore some of the most effective techniques to edit wildlife photos using Lightroom’s advanced tools.

Enhancing Details with Selective Sharpening

Zebra selected in Lightroom with a red mask overlay, showcasing selective sharpening for detailed fur and texture enhancement.

Selective sharpening is vital in wildlife photography to highlight the fine details, such as feathers, fur, or scales, without introducing unwanted noise.

Correcting Exposure and Enhancing Shadows

Zebra in Lightroom with shadow and highlight adjustments applied, enhancing details in the darker areas of the subject.

Wildlife photography often involves shooting in challenging lighting conditions, making gloom recovery and exposure adjustments crucial.

White Balance and Color Management

Zebra in Lightroom with adjustments to whites, vibrance, and saturation, enhancing the color balance and managing highlights for a natural effect.

Getting the colors right is essential to edit wildlife photos.

Local Adjustments and Masking

A zebra in a golden field being selectively edited using local adjustments and masking tools in Adobe Lightroom.

One of Lightroom’s most powerful features for wildlife photos is the ability to apply local adjustments using masks.

Tilt-shift in Lightroom is another valuable technique that can add a unique, miniature effect to your wildlife photos. Applying the tilt-shift effect can help draw attention to your subject by blurring certain parts of the image while keeping the subject in sharp focus, mimicking the shallow depth of field often seen in macro photography.

Simplifying the Background

Zebra in Lightroom with adjustments to hue, saturation, and luminance to simplify the background and enhance the subject.

A busy background can detract from the main subject. Use the following techniques to keep the viewer’s attention where it belongs.

By utilizing these layered adjustments in Lightroom, you can significantly enhance your wildlife photos, transforming good shots into great ones. Whether you’re working on the sharpness of a bird’s feathers or remove the background to make an animal pop, these techniques provide the control needed to bring your vision to life.

These practices not only enhance the visual appeal of your pictures but also ensure that each part of the photograph contributes to the overall story, making your shots truly stand out when using the right wildlife photography equipment.

Post-Processing Tips for Your Portfolio in Editing Wildlife Photos

Creating a stunning wildlife photography portfolio requires more than just capturing great shots in the field. The post-processing phase is where you can elevate your wildlife images, ensuring they are not only technically perfect but also visually impactful. Below are key tips for wildlife photography to make your portfolio-ready.

Start with the Basics: Culling and Initial Adjustments

Before diving into detailed edits, begin with a thorough culling process. This involves selecting the best shots based on sharpness, exposure, and composition. Use a star rating system to gradually narrow down your selection until only the most compelling wildlife images remain.

Fine-Tuning Exposure and White Balance

Exposure Adjustments

White Balance

Local Adjustments: Enhancing the Subject

Wildlife photos often benefit from local adjustments that help the subject stand out.

Advanced Techniques: Using Layers and Masks

For more complex edits, consider using layers and masks in Photoshop after your initial Lightroom adjustments.

Preparing for Different Outputs: Print vs. Digital

Editing for different platforms requires different approaches.

Final Touches: Noise Reduction and Sharpening

The final steps often involve reducing noise and sharpen the image to ensure it looks polished and professional.

By following these post-processing tips, you can ensure that your wildlife portfolio showcases your best work, with each image reflecting the true beauty and essence of the natural world.

Color Grading in Editing Wildlife Photos

Elk in a meadow with vibrant autumn colors, enhanced through color grading adjustments in Lightroom to balance shadows, midtones, and highlights.

Color grading is a crucial step in wildlife photography post-processing, allowing you to increase the mood, atmosphere, and overall impact of your images. Proper color grading can transform a good photo into a stunning piece of art that stands out in your portfolio. Here’s how you can effectively color grade your wildlife photos using tools like Adobe Lightroom.

Tool/Technique Purpose Best Application
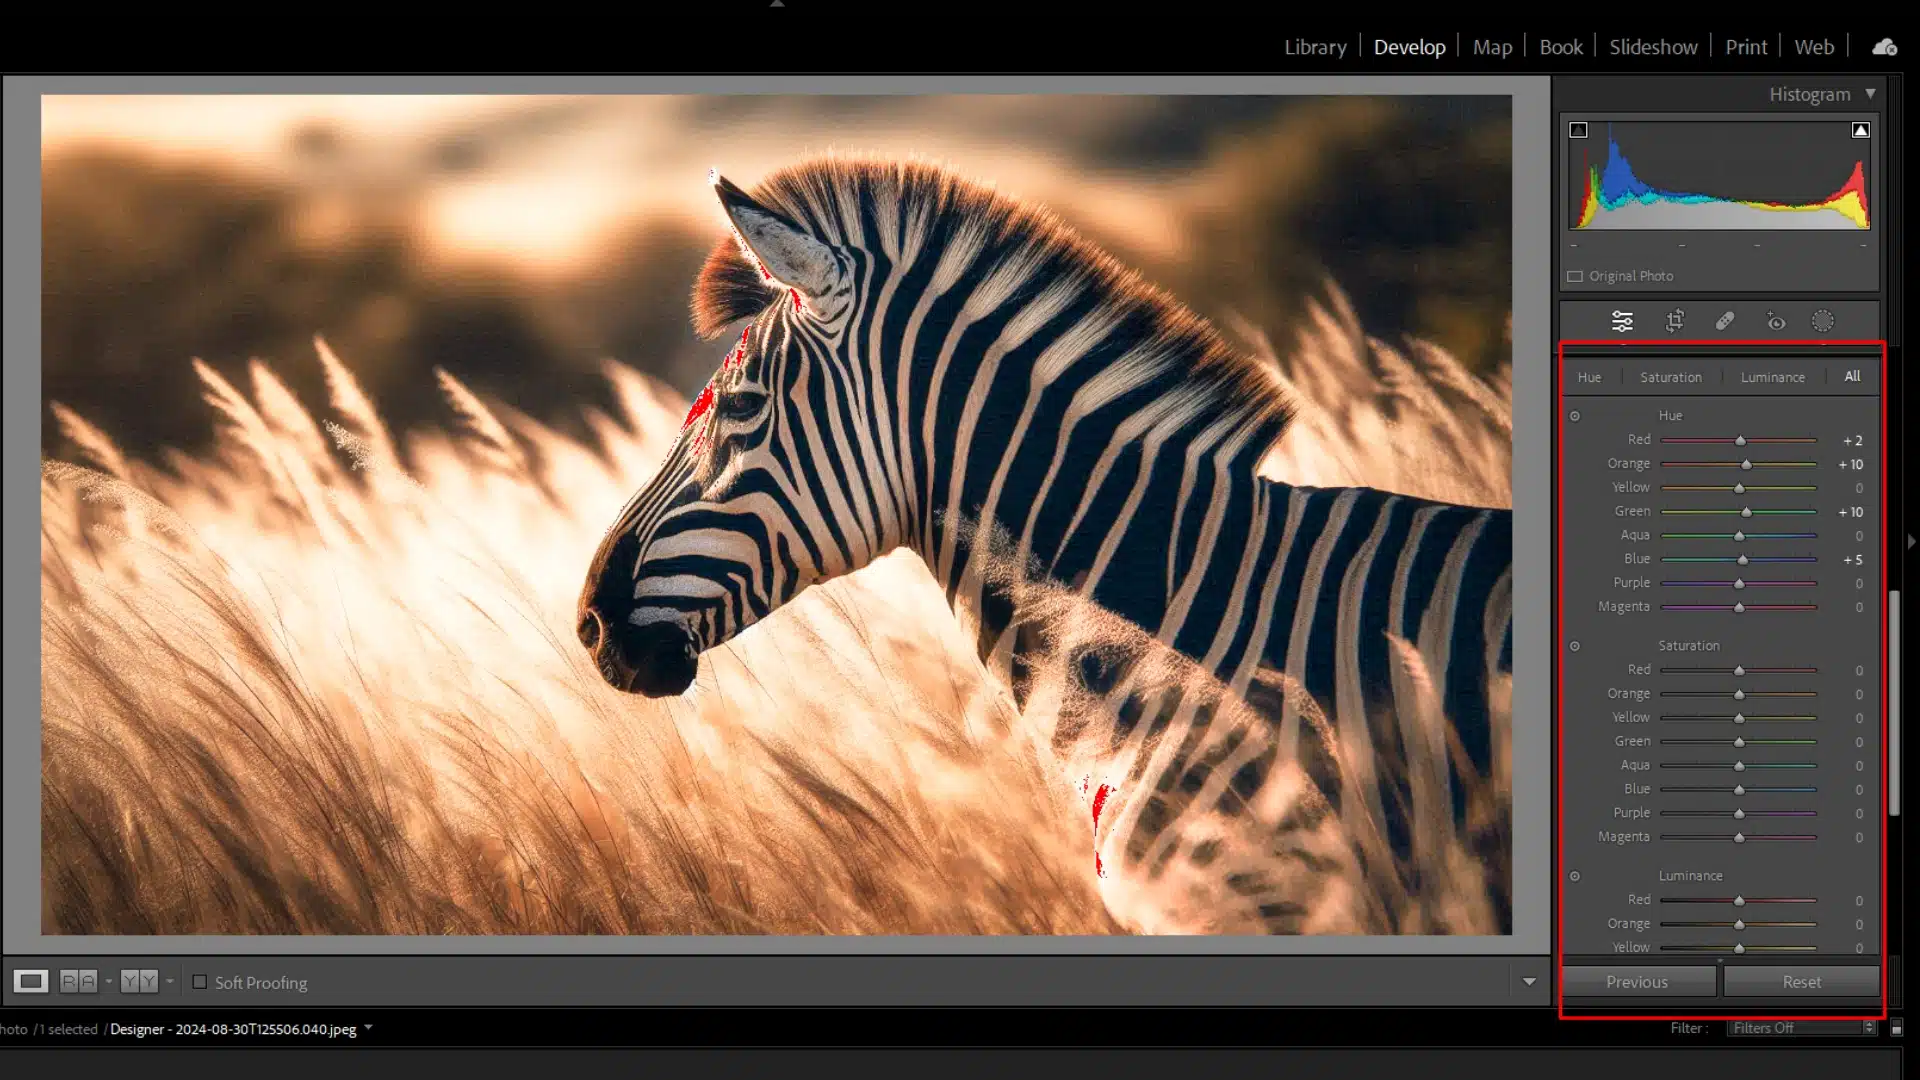
Hue, Saturation, Luminance (HSL) Adjust color tones, intensity, and brightness. Control individual colors, making greens more vibrant or skies more vivid.
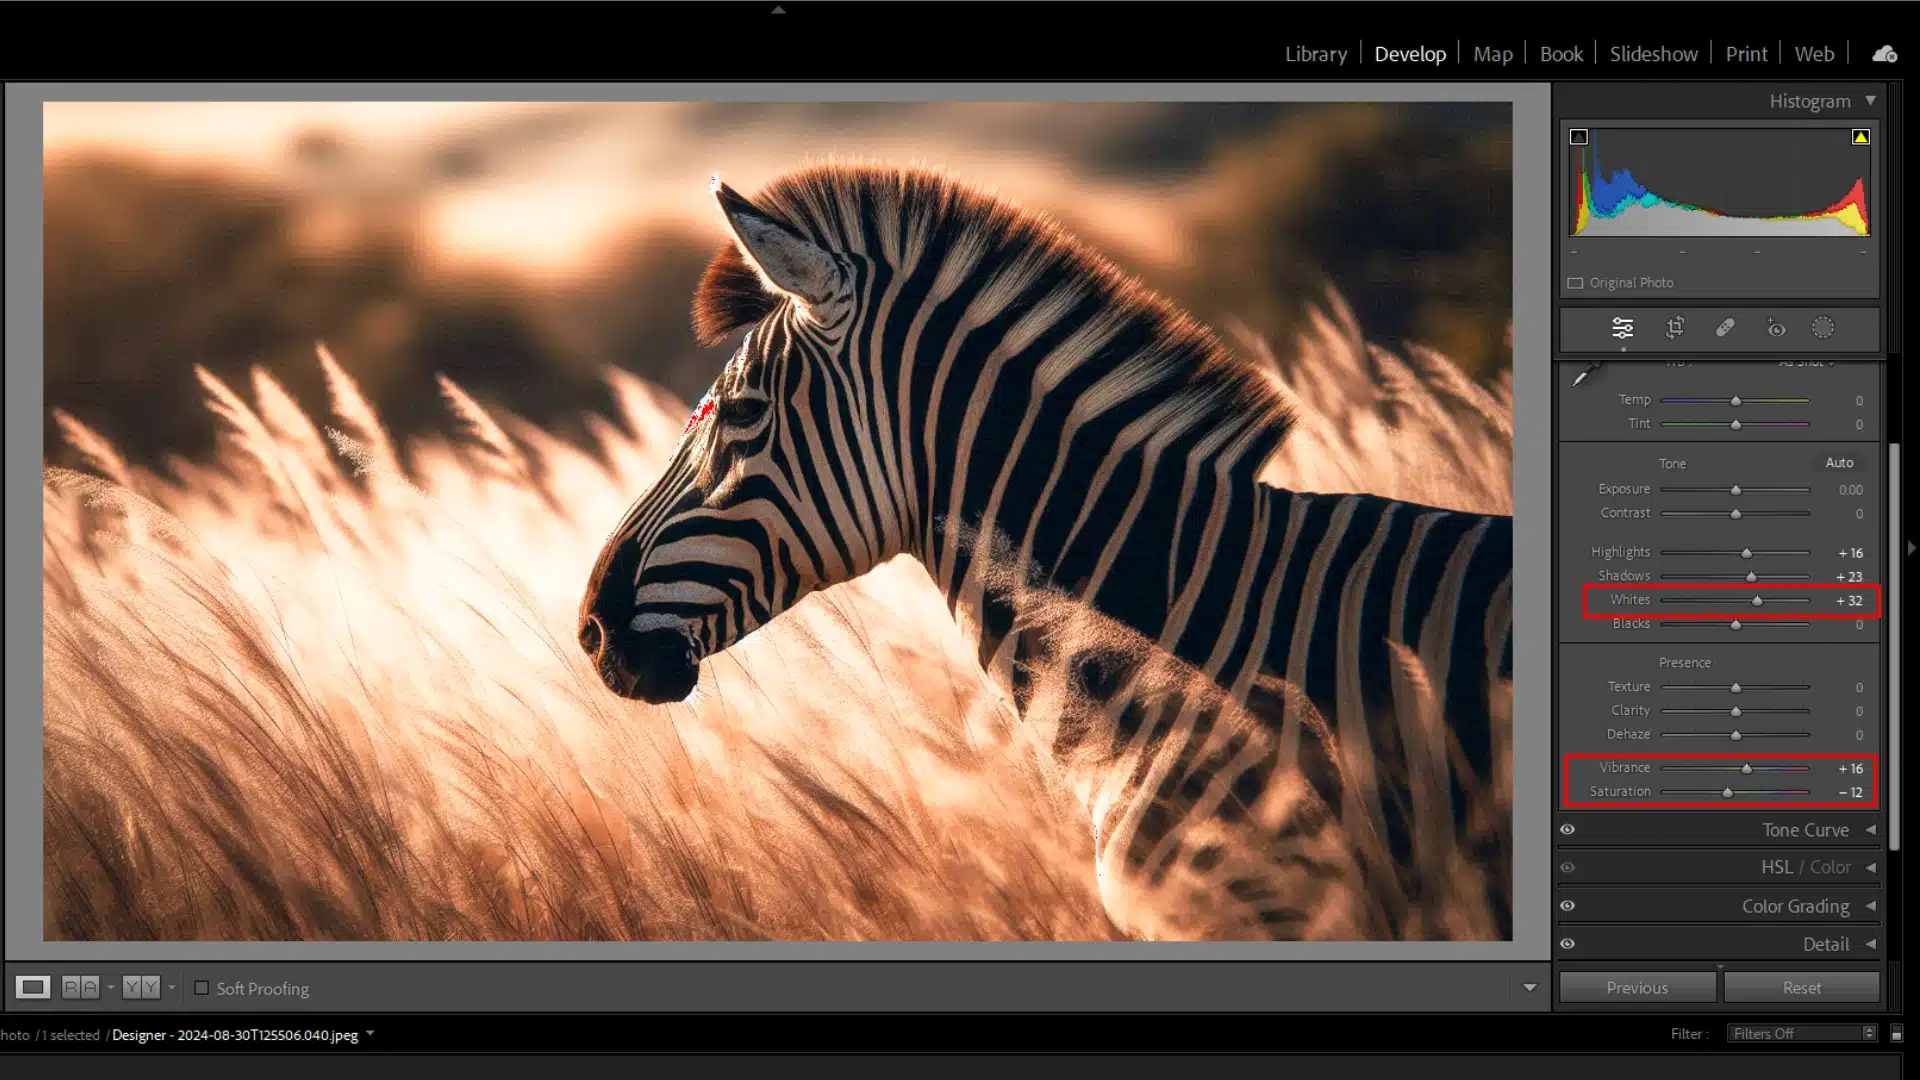
Vibrance vs. Saturation Enhance muted colors without overdoing saturation. Preserve natural tones while intensifying subtle hues in wildlife images.
Curves Modify tonal range and specific color channels (RGB). 
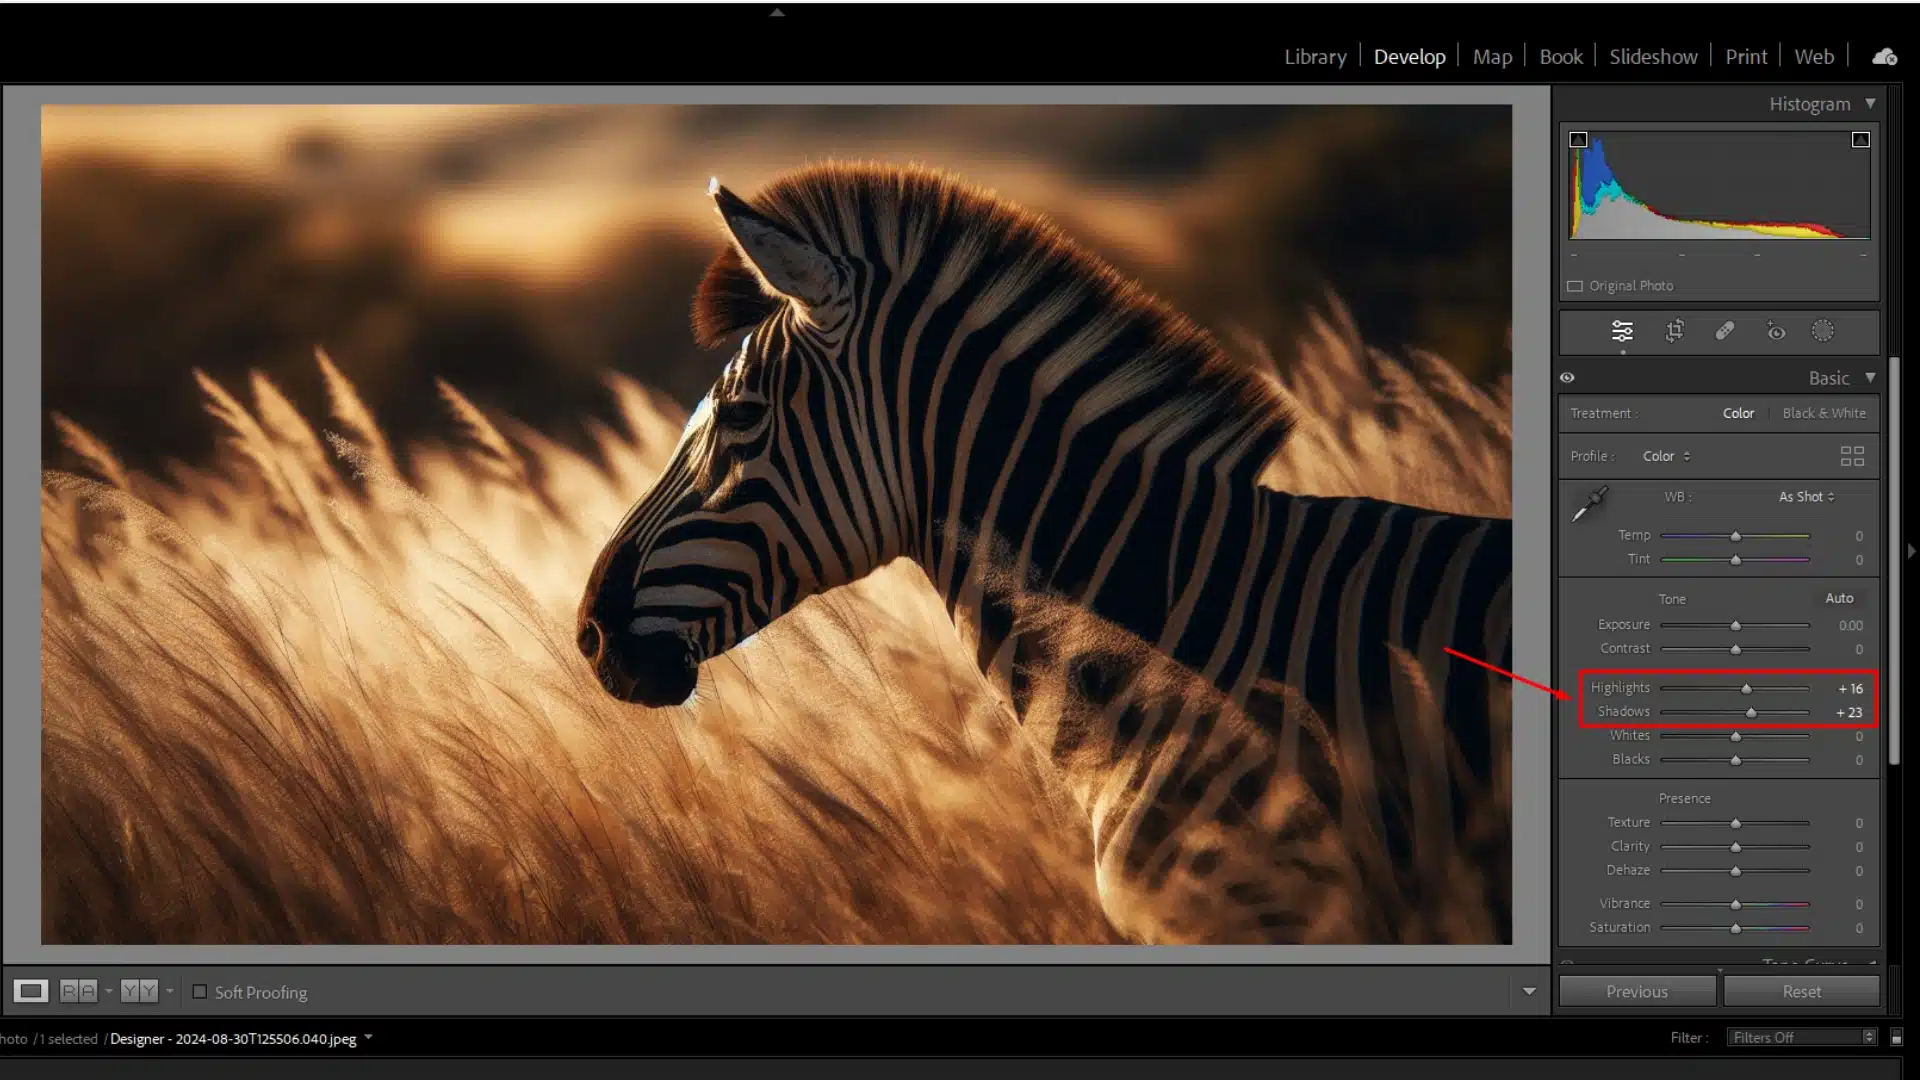
Fine-tune color casts for desired mood, especially in shadows and highlights.
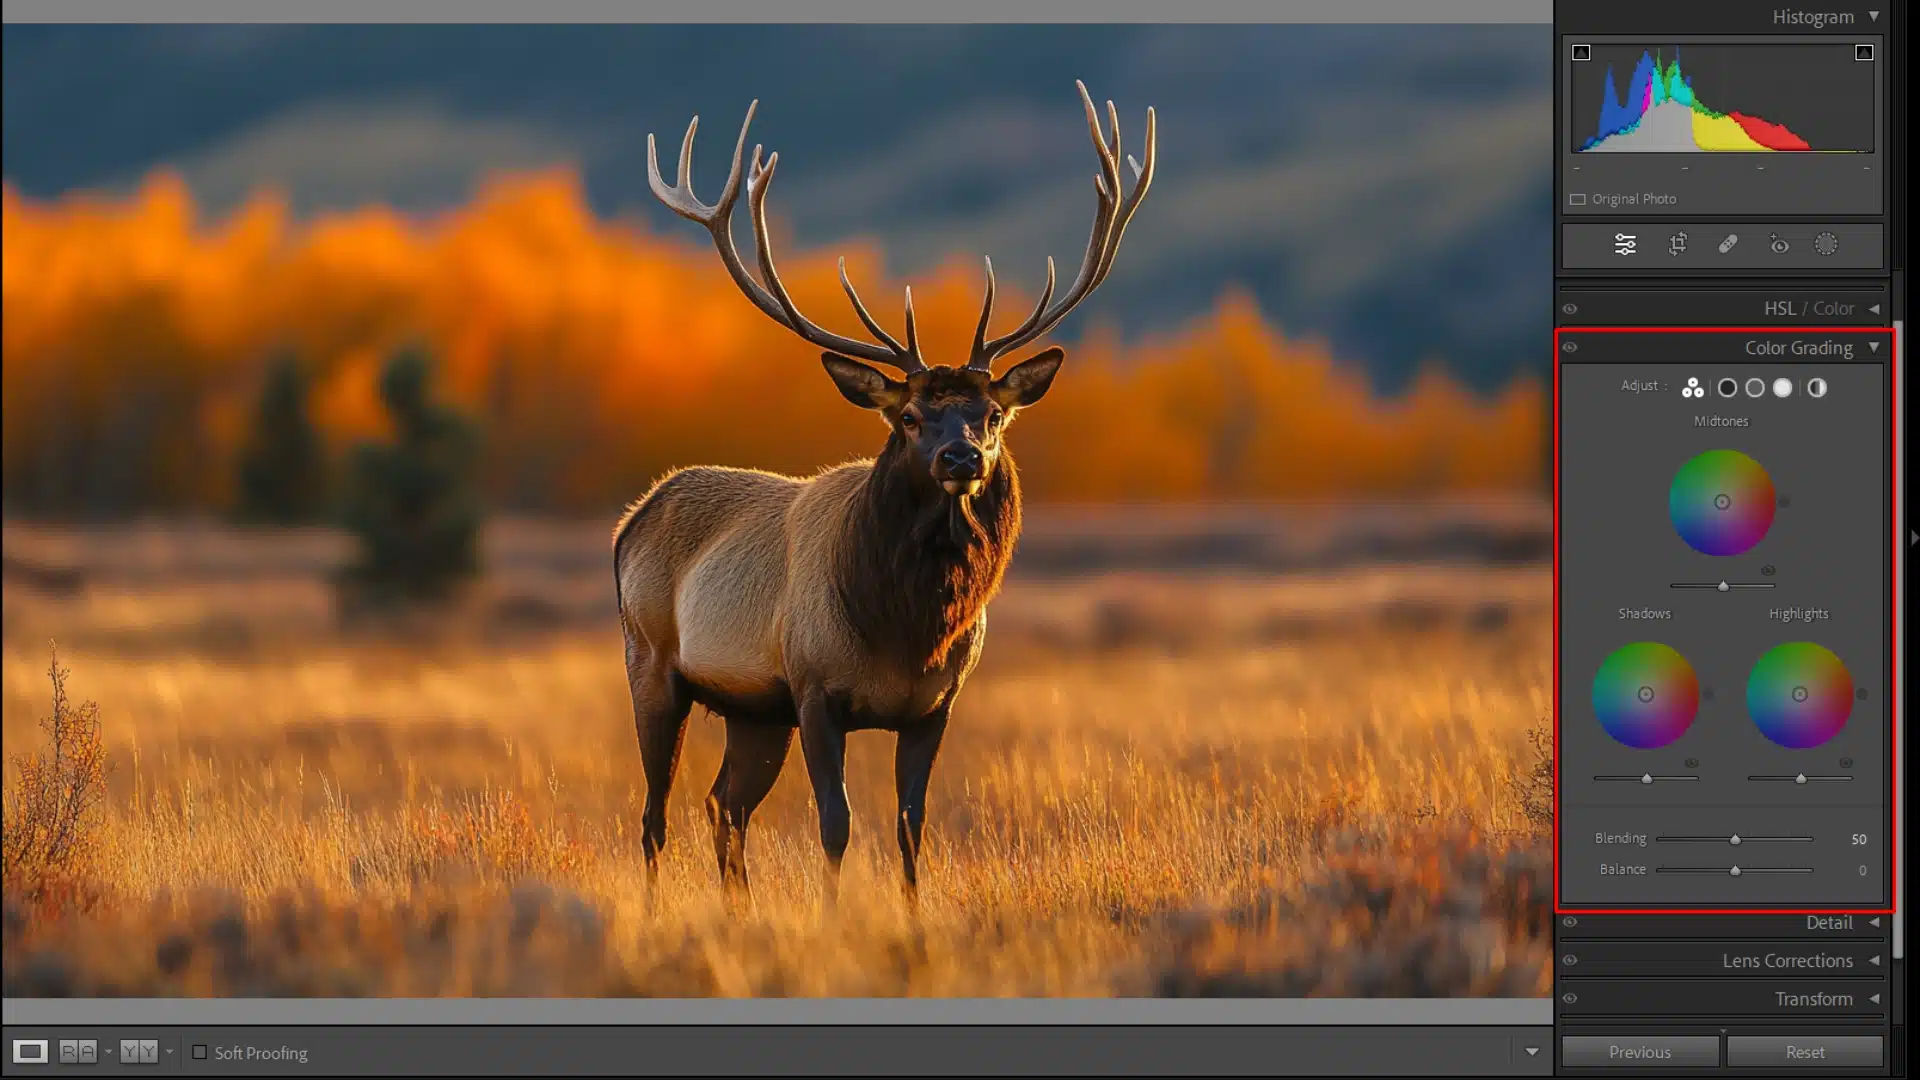
Color Grading Panel Adjust shadows, midtones, and highlights independently. Add warmth to highlights and cool tones to shadows for depth and atmosphere.
LUTs (Look-Up Tables) Apply consistent color grading across images. Create a cohesive look in your wildlife photography series.
Custom Profiles Save custom color grading settings for future use. Ensure consistency and signature style across your portfolio.

Understanding the Basics of Color Grading

Before diving into specific tools, it’s important to understand the fundamentals of color grading:

Using Lightroom’s Color Grading Panel

The Color Grading Panel in Lightroom is where you can make detailed adjustments to the shadows, midtones, and highlights independently, which is essential for creating a balanced and dynamic look.

Advanced Techniques: LUTs and Custom Profiles

For more advanced color grading, consider using LUTs (Look-Up Tables) or creating custom profiles in Photoshop that can be imported into Lightroom:

Avoiding Common Pitfalls

While color grading can significantly increase your images, it’s easy to overdo it. Here are some tips to avoid common mistakes:

By mastering these color grading techniques, you can create wildlife images that not only capture the beauty of the natural world but also resonate emotionally with your audience. These refined, carefully graded images will be the highlight of any wildlife photography portfolio.

Common Questions about Editing Wildlife Photos in Lightroom

Photoshop-Masterclass-Advanced-Editing-Layer-Manipulation

How to edit wildlife in Lightroom?

Editing wildlife photos in Lightroom involves several key steps. Start by adjusting the White Balance to ensure accurate color representation, which is critical for natural-looking wildlife shots. Next, fine-tune Exposure settings to balance the highlights and shadows, particularly if your subject is backlit or in challenging lighting conditions. Use the HSL (Hue, Saturation, and Luminance) panel to control specific colors, ensuring that the colors of the animals and their environment are vibrant but realistic. Finally, employ local adjustments to selectively increase details such as the animal’s eyes or fur, helping the subject stand out against the background.

What is the best way to edit wildlife photos?

The best way to edit wildlife photos is to adopt a workflow that enhances the natural beauty of your images while maintaining realism. Begin with basic adjustments like White Balance, Exposure, and Contrast to correct the overall look of the image. Then, move on to color grading using tools like the HSL panel and Color Grading panel to refine colors, making them pop without looking artificial. For finer control, use local adjustments to emphasize the subject, such as enhancing the eyes or sharpening the fur. Finally, apply noise reduction if necessary, and finish with subtle sharpening to bring out the details​.

What is the best wildlife photo editing software?

The best wildlife photo editing software depends on your specific needs, but Adobe photoshop and lightroom are industry standards for professional wildlife photographers. Lightroom excels in organizing and making global adjustments, such as exposure and color corrections, while also offering powerful tools for selective editing. Photoshop complements Lightroom with advanced features like layer-based editing process, detailed retouching, and the creation of complex composites. Other notable software includes Capture One Pro for superior color grading and Topaz DeNoise AI for sound reduction in high-ISO images.

Should you edit wildlife photos?

Yes, you should edit wildlife photos to enhance their visual impact and correct any imperfections that might have occurred during shooting. Editing allows you to adjust, color, and sharpness, ensuring that your wildlife photos accurately reflect the scene you intended to capture. However, it’s important to edit wildlife photos with a light touch to maintain the natural appearance of the wildlife and their environment. Over-editing can lead to unnatural results, so aim for edits that enhance without distorting reality.

Conclusion: Editing Wildlife Photos in Lightroom

Before and after comparison of a zebra photo in Lightroom, demonstrating adjustments to hue, saturation, and luminance for a polished final result.
Editing wildlife photos in Lightroom can transform an ordinary shot into something extraordinary. I recall working on a zebra image where the flat light and muted colors didn’t capture its true essence. By adjusting the exposure, color grading the midtones to enhance the stripes’ contrast, and sharpening the eyes, I brought the zebra to life, reflecting the moment’s majesty.

This process reveals the hidden beauty in wildlife photography by editing wildlife photos in Lightroom. To enhance your skills, explore our Photoshop course or Lightroom course today. 

If Editing Wildlife Photos in Lightroom article has helped you, then Like and Share it with your friends

Facebook
Twitter
LinkedIn
Pinterest

Have a nice photoshoot!

Read more about: Photo Editing with Lightroom and Photoshop

Download Your Free Guide Now!

Discover the secrets of photography with our printable guide! Master essential techniques like aperture, shutter speed, and ISO to create stunning images. Get your free printable PDF now and start turning your snapshots into masterpieces!