Blending pictures can transform your images into captivating visual stories that draw viewers in. In this article, I will guide you through the straightforward yet powerful techniques to blend images effortlessly.
Whether you’re looking to enhance your creative projects or simply impress your friends on social media, mastering these skills will unlock new artistic possibilities.
Let’s get started!
Table of Contents
How to Blend Pictures Using Software
Blending pictures in Photoshop involves combining multiple images to create a seamless composition or artistic effect.
With the right techniques and tools, you can achieve stunning results by merging textures, colors, and elements from different photos.
You can also learn these Lightroom editing tips to make this process even easier.
Step-by-Step Guide
This steps provides a detailed, methodical approach to completing a task or achieving a goal.
1. Choose Your Photos

Choose two photos you want to blend. These should be accessible and clear.
2. Open a Photo Blender App
Find and open a photo blender app online or use software like Photoshop. It’s simple and quick.
When choosing the best mobile photo editing apps, consider a photo blender app for seamless blending. `
These tools offer great options to enhance and merge images effortlessly. Explore top choices here: best mobile photo editing apps.
3. Upload the Images
Upload the images you’ve chosen in photo editor.
Many apps support drag and drop which is great for ease of use.
4. Adjust Settings
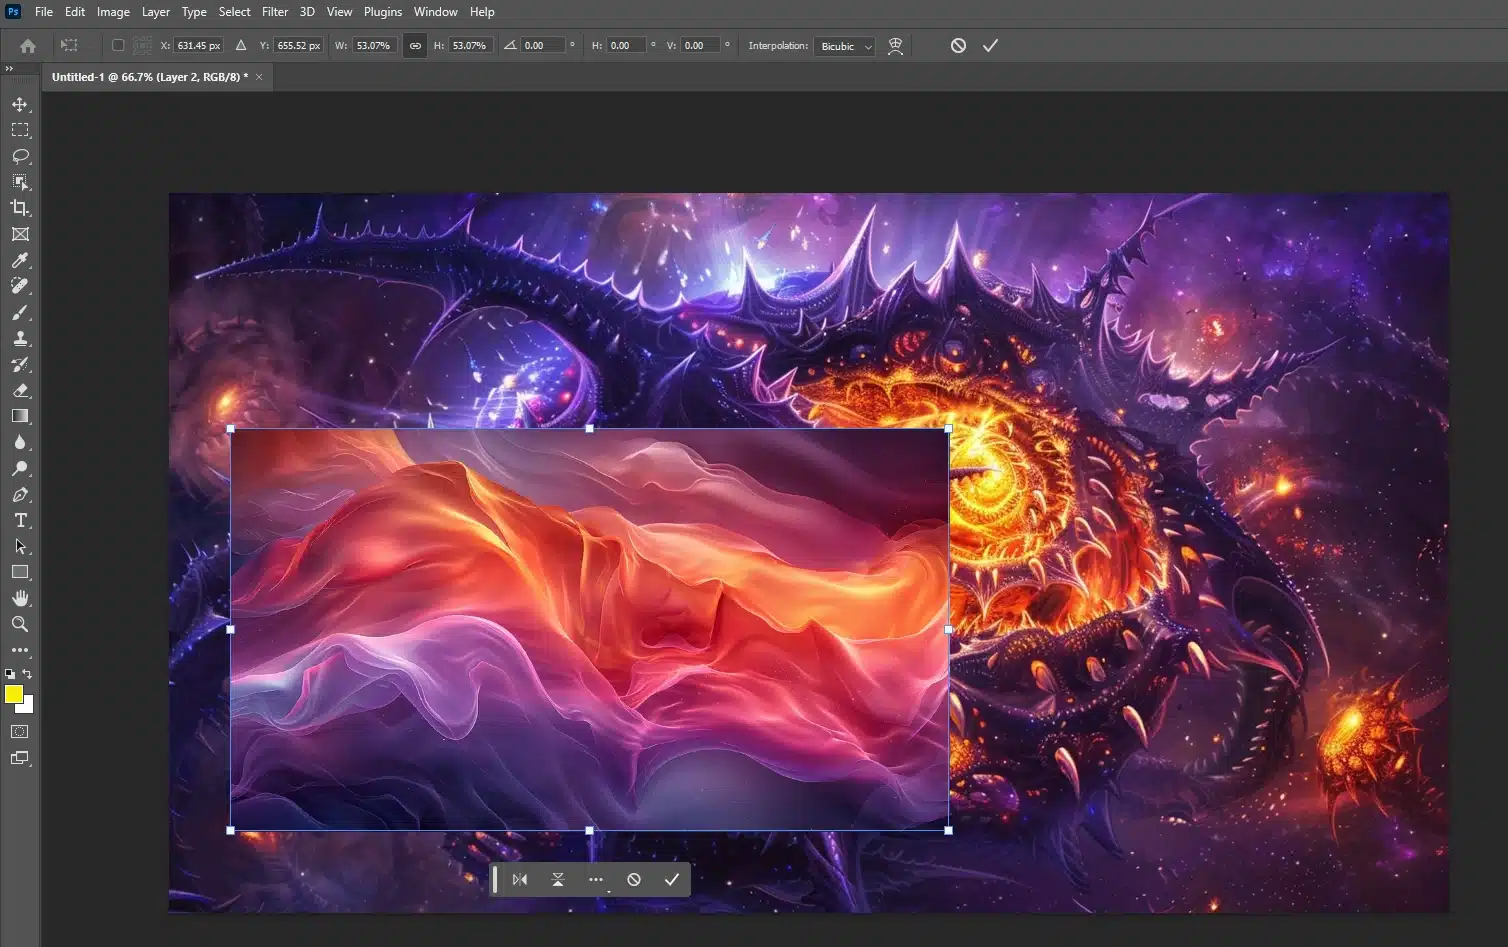
Adjust settings like alignment, crop, resize, and rotate to fit your vision.
In Photoshop, you can use the Transform tool for precise adjustments for combining two photos.
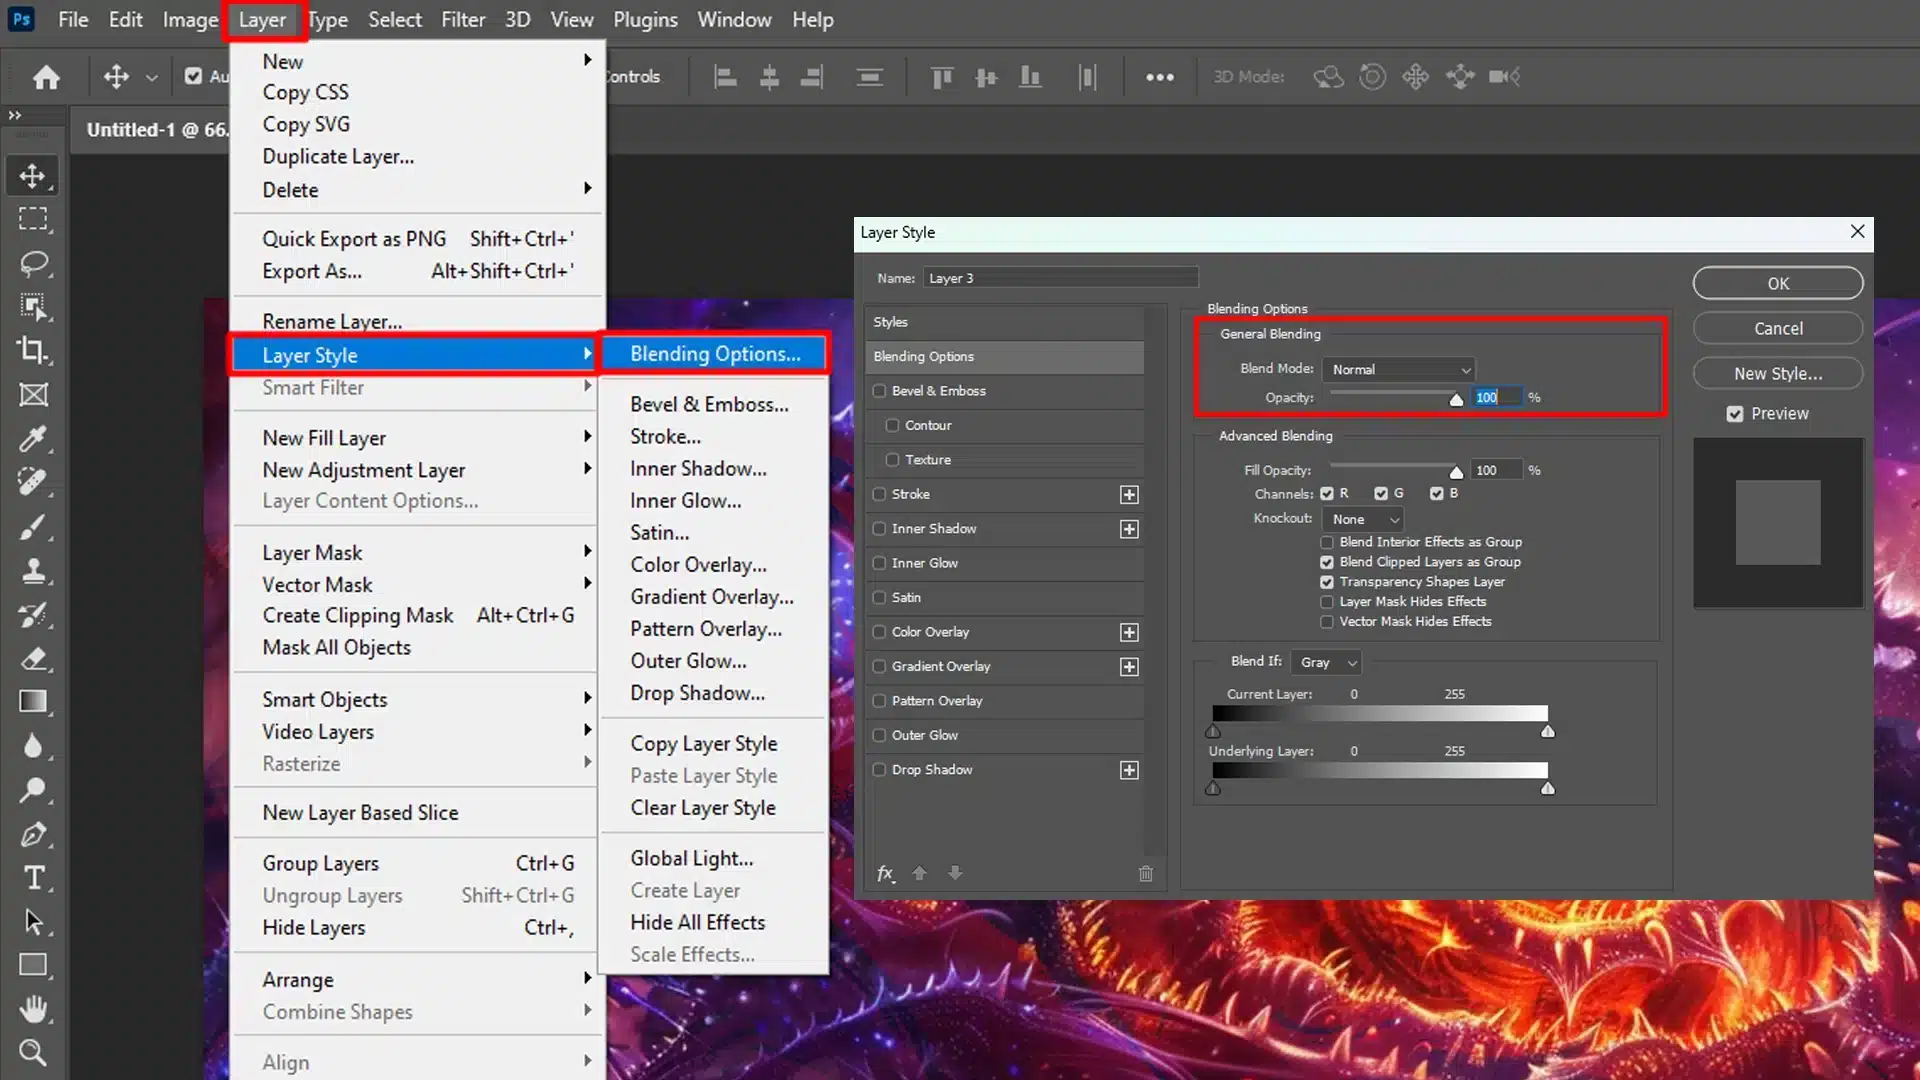
5. Use the Blend Tool for Two Photos

Click on the blend tool and adjust transparency to achieve the desired look for the picture. It’s like mixing paint!
In Photoshop, you can experiment with different modes to find the perfect filter.
To create stunning photo compositions, using the blend tool for two photos can be invaluable.
For instance, if you need to replace a sky, mastering this technique will effortlessly merge the new sky with your existing photo, achieving a flawless and captivating result.
6. Add Text or Special Effects
If you want, add text or special effects to make your photo blender stand out more.
Photoshop templates offers a variety of tools like the text tool and various filters to enhance your image.
If you are interested in exploring motion effects, adding motion blur to your photos to bring a dynamic element to your compositions.
Enhance your photos with a lens flare effect using Photoshop.
This special effect adds a captivating touch to your images.
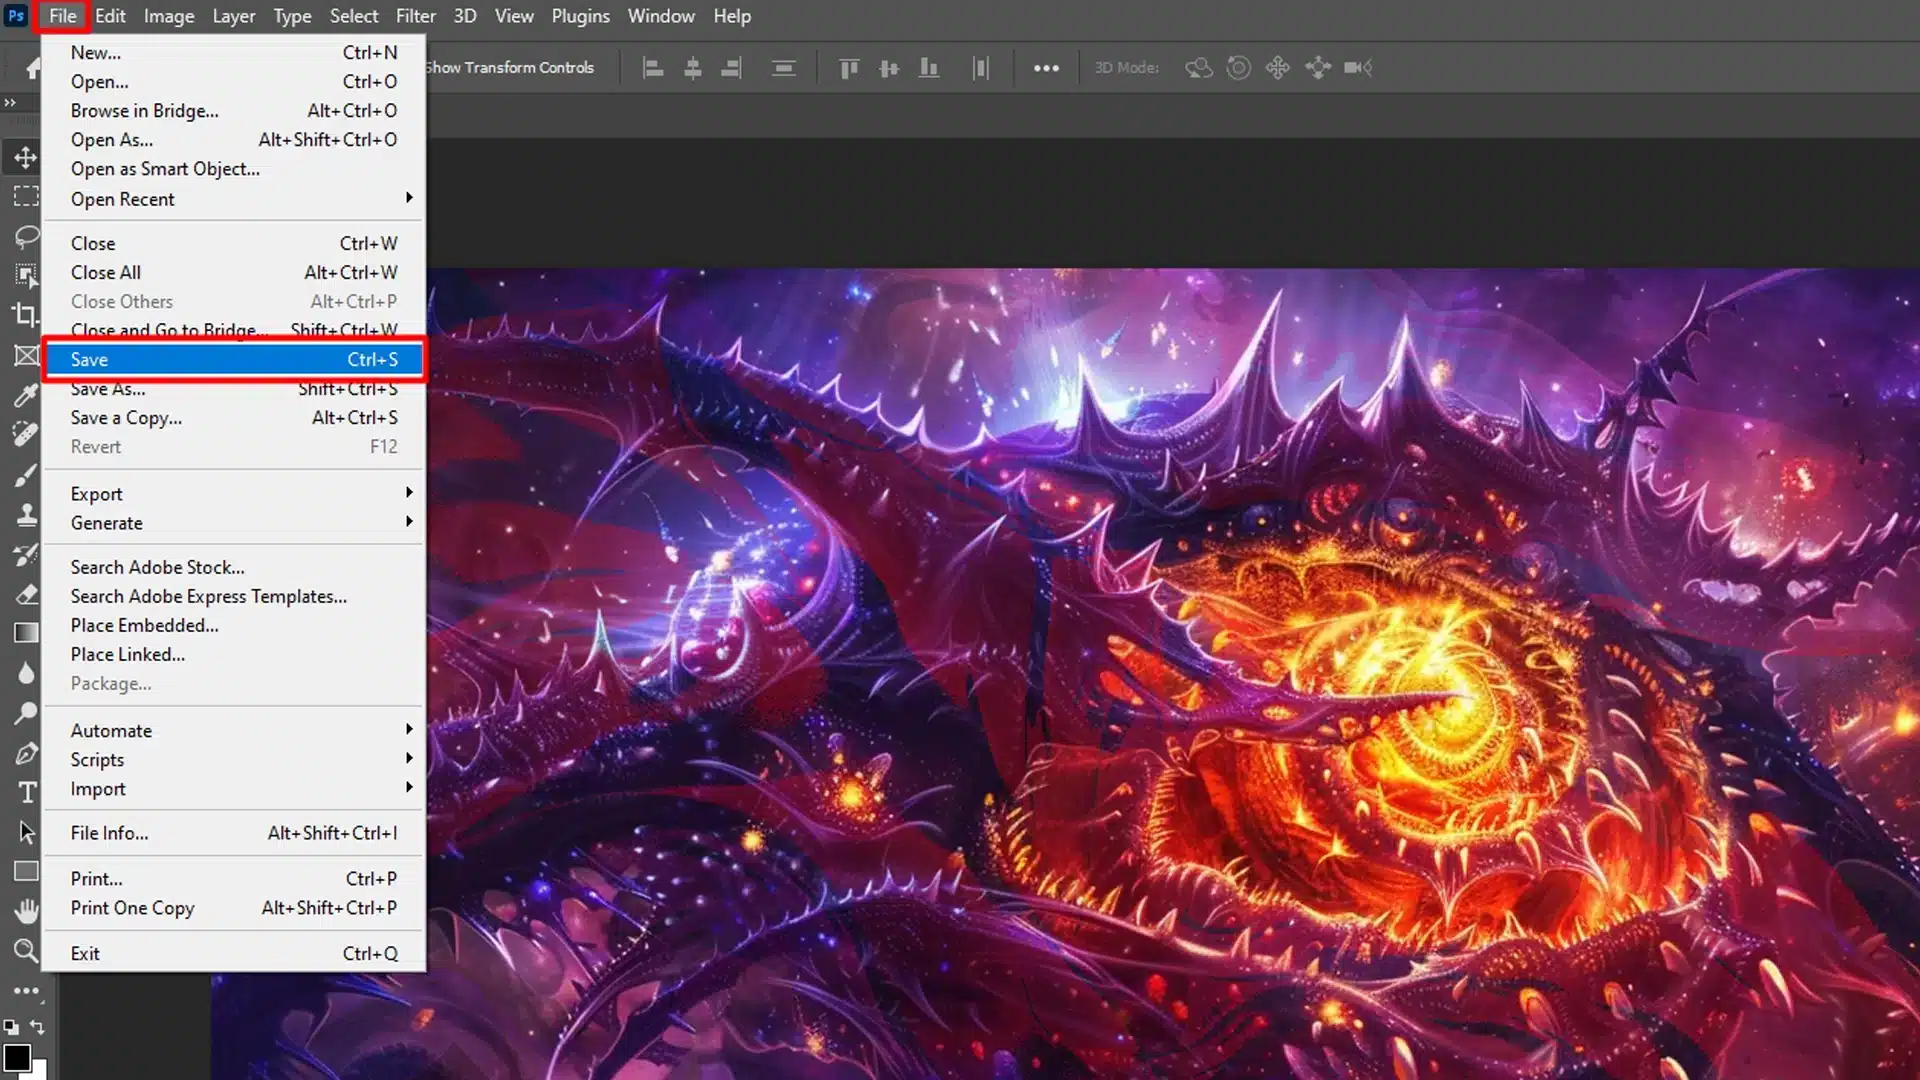
7. Save the Blended Image

Lastly, save the blended image in a common file format like JPG or RAW for easy sharing.
For higher Resolution, consider saving in a camera RAW filters or TIFF format.
Advanced Techniques
Let’s delve into more sophisticated methods and tools for achieving superior results in blending pictures.
| Technique | Description | Pros | Cons |
|---|---|---|---|
| Layer Masking | Use masks to blend layers seamlessly. | Precise control over blending areas. | Requires careful handling of masks. |
| Gradient Blending | Apply gradients to create smooth transitions. | Creates smooth and natural effects. | Can be challenging to perfect. |
| Blend Modes | Utilize different blend modes for varied effects. | Offers diverse creative options. | Results can be unpredictable. |
| Opacity Adjustment | Adjust opacity to merge images subtly. | Simple and effective for many effects. | Limited to basic blending. |
These techniques go beyond basic approaches, offering deeper insights and complex strategies to enhance your images.
High Quality Images
Start with high-quality images for professional results.
The tools can only work best with good raw gallery.
Consistent Lighting
Ensure the lighting is consistent to make the image look more natural with more details.
Simplify Background
Use images with simple background to avoid distractions.
Experiment with Blending Modes
Different modes give different looks. Experimenting helps you find the style that clicks and boost your creativity.
Photoshop offers multiple blending modes such as Multiply, Screen, and Overlay.
To enhance your photos, try Lightroom HDR merge. By experimenting with blending modes, you can create unique effects and improve your images.
Pro Tip : Use the “Erase” tool to remove background for a more unified image.
In Photoshop, you can use the quick selection tool or the magic wand tool for precise background removal.
By following these methods and tips, you can not only create beautiful images but also unleash your creativity.
Frequently Asked Questions

How do you make a blended picture?
- Choose: Select two or more photos you want to blend.
- Open: Use your photo blender editing app and import the photos.
- Blend: Utilize blending tools like opacity sliders, blend modes, or masks to merge the photos.
- Adjust: Change colors and effects to unify the look.
What is blending photos?
- Combining: Blending photos involves combining two images into a single image.
- Seamless overlay: This technique is used to create a seamless overlay or merge different aspects of each photo.
- Enhance send artistic compositions: Enhances the storytelling aspect of photographs or create artistic compositions.
What is the app that blends pictures together?
- Adobe Photoshop: Known for its comprehensive set of tools and features.
- Canva: Offers simple combine tools for beginners and templates to get started.
- PicsArt: Features creative combine options and effects for mobile users.
- GIMP: A free, open-source alternative with powerful combine capabilities.
How to blend two pictures together for free?
- Photopea: Use online tools like Photopea, which is similar to Photoshop and free to use.
- GIMP: Download GIMP, which is a robust editing tool that supports various blending techniques.
- Mobile Apps: Explore mobile apps like Snapseed or Adobe Photoshop Mix, available for both Android and iOS devices.
Conclusion
Blending pictures can be a fun and creative way to enhance your photos. From choosing the right images to using tools like the blend tool for two photos, each step helps you create a stunning result.
Personally, I’ve found that mastering these techniques opens up so many new possibilities for my projects in both Photoshop and Lightroom.
If you’re eager to improve your skills, consider diving into my Photoshop course or a Lightroom course. Both courses provide hands-on experience to help you blend pictures more effectively.
Happy editing!
Read more about Photoshop:


