As an expert photographer, I’ve seen how portrait filter in photoshop can transform ordinary images into captivating works of art. Whether you’re just starting out or you’re a seasoned pro, understanding and using these filters in Adobe Photoshop can significantly elevate your portrait ideas in photography.
In this guide, I’ll share practical tips and insights to help you achieve stunning results. Let’s dive into the world of portrait filters and unlock their potential together.
Table of Contents
Understanding the Smart Portrait Filter in Photoshop
The Smart Portrait Filter in Photoshop is a revolutionary tool powered by Adobe Sensei, designed to increase and modify portrait images with ease. Released in October 2020, this filter uses artificial intelligence to apply various effects and adjustments to portrait photos, allowing users to make realistic and impactful edits.
How to Use the Smart Portrait Filter
Open the Image
To begin using the Smart Portrait Filter, open a Photoshop document and select an image with a recognizable face. This filter specifically requires a face to function properly.
Accessing Neural Filters
Navigate to Filter > Neural Filters. This will open the Neural Filters panel on the right side of Photoshop.
Select Smart Portrait
In the Neural Filters panel, locate and select the Smart Portrait filter in photoshop from the list of available filters. If it is still in the Beta section, you might need to update your Photoshop to the latest version.
Adjust Settings
Once the Smart Portrait filter is selected, you can adjust various settings to achieve your desired effect. These settings are categorized into different groups:
- Expressions: Adjust facial expressions such as happiness, surprise, and anger using sliders that range from -50 to 50. For instance, increasing the happiness slider adds a smile to the subject's face, while the anger slider can add furrowed brows and a more intense expression.
- Facial Age: Modify the perceived age of the subject. Dragging the slider to the left makes the subject appear younger, while dragging it to the right makes them look older. This adjustment also affects hair color and thickness.
- Hair Thickness: Control the thickness of the subject's hair. Increase the slider to make the hair appear fuller, or decrease it to make the hair look thinner.
- Eye Direction: Change the direction of the subject's gaze. Adjust the slider to make the eyes look left or right.
- Head Direction: Alter the angle of the subject's head. This slider helps in making subtle changes to the head's orientation.
- Light Direction: Adjust the primary light source in the image to change how shadows and highlights fall on the subject's face.
Select Output Method
After making your adjustments, choose how you want to output the edited image. You can apply the filter to the current layer, make a new layer, or output as a new document. Once selected, click OK to apply the changes.
Key Features of the Smart Portrait Filter
- AI-Powered Adjustments: The filter in photoshop uses AI to make realistic changes to facial features, enhancing the overall look of portraits.
- AI-Powered Adjustments: The filter uses AI to make realistic changes to facial features, enhancing the overall look of portraits.
- Versatility: From changing expressions to adjusting light direction, the Smart Portrait filter offers a wide range of modifying options.
- User-Friendly: The sliders and controls are intuitive, making it easy for users of all skill levels to apply professional-looking edits.
By mastering the Smart Portrait Neural Filter, photographers and photo editors can significantly increase and edit their portrait images and text portrait projects, creating visually appealing and professional results with minimal effort.
Key Features of the Portrait Filter in Photoshop
The Portrait Filter in Photoshop offers a range of functionalities that significantly enhance portrait photographs. Below is a table that outlines the key features of the Portrait Filter, highlighting the differences and unique aspects of each feature.
Feature | Description | Purpose | Benefits |
---|---|---|---|
Facial Age | Adjusts the subject’s age appearance by altering skin texture, hair color, and features. | Makes the subject look younger or older. | Versatile aging effects, realistic transformations. |
Hair Thickness | Modifies the density of the subject’s hair. | Increases or decreases hair volume. | Adds volume or reduces thickness for different visual effects. |
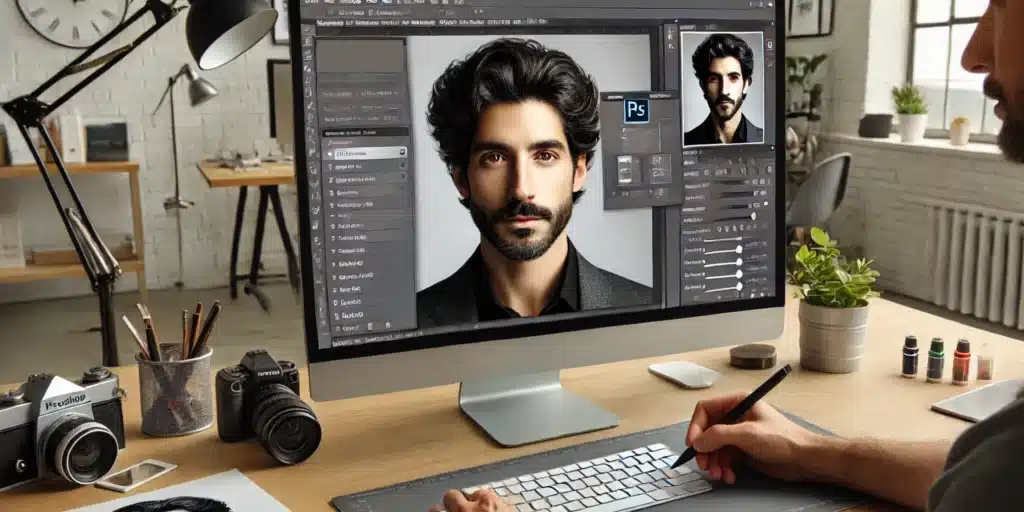
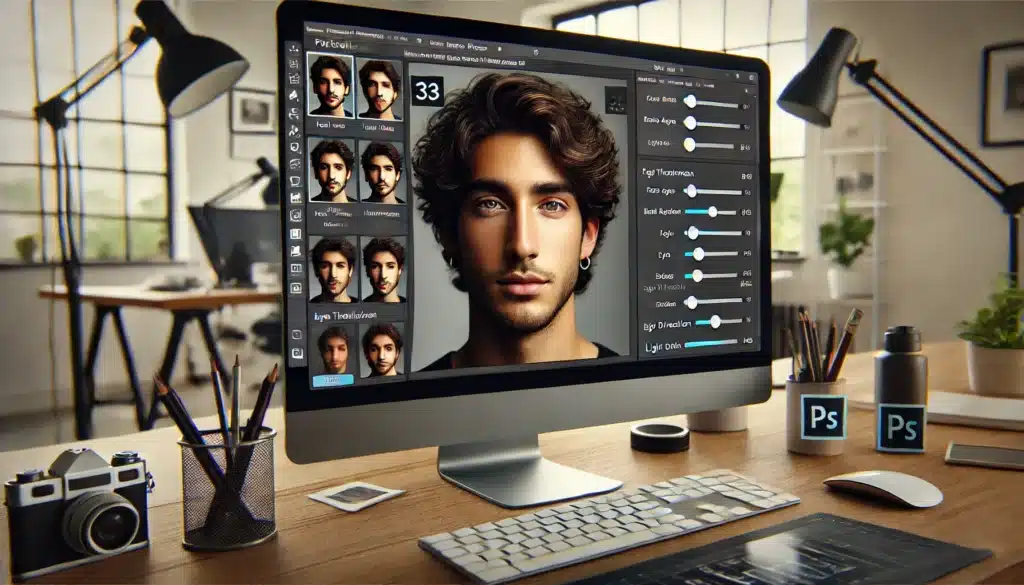
Eye Direction | Changes the direction in which the subject is looking. | Aligns the gaze with other elements in the composition. | Enhances the subject’s engagement with the scene. |
Head Direction | Adjusts the orientation of the subject’s head. | Changes the angle of the head. | Improves composition and alignment. |
Light Direction | Alters the primary light source to change shadow and highlight placements. | Matches lighting to the environment or artistic needs. | Creates dynamic lighting, matches scene lighting. |
Happiness | Adds or reduces a smile on the subject’s face. | Changes the expression to look happier. | Makes portraits more engaging and friendly. |
Surprise | Adjusts features to make the subject appear surprised. | Enhances the look of surprise by widening eyes and raising eyebrows. | Adds dramatic expression changes. |
Anger | Modifies facial features to reflect anger. | Adds intensity by furrowing brows and altering mouth shape. | Creates powerful emotional expressions. |
Auto Balance | Balances multiple adjustments to maintain a natural look. | Ensures combined adjustments don’t overpower the image. | Keeps the overall result realistic. |
Output Options | Provides various ways to save the edited photo, including new layer and Smart Filter options. | Allows flexible output methods for non-destructive work. | Protects original photo, offers editing flexibility. |
Let’s delve deep into this:
Facial Adjustments
The Portrait Filter in Photoshop offers several facial adjustment features that allow you to modify the appearance of the subject’s face. These adjustments include:
- Facial Age: This feature allows you to make the subject appear younger or older by adjusting skin texture, smoothness, and hair color. For instance, dragging the slider to the left makes the skin smoother and hair darker, while dragging it to the right adds wrinkles and gray hair.
- Happiness: Adjusting this slider changes the subject's facial expression to appear more joyful. Increasing the value adds a smile, while decreasing it can give a neutral or serious expression.
- Surprise and Anger: These sliders modify the facial expressions to reflect surprise or anger by adjusting features such as eyebrows, eyes, and mouth positioning.
Hair Adjustments
- Hair Thickness: This slider allows you to increase or decrease the thickness of the subject's hair. Thicker hair can make the subject look more youthful, while thinner hair can be used to create a more mature appearance.
Gaze and Head Direction
- Eye Direction: Change where the subject is looking by adjusting this slider. This can be useful for aligning the subject's gaze with other elements in the photo or creating a specific mood.
- Head Direction: This slider adjusts the angle of the subject's head, allowing you to change the orientation to better fit the composition of the photo.
Lighting Adjustments
- Light Direction: Modify the primary light source's direction to change how shadows and highlights fall on the subject's face. This feature helps in creating dynamic lighting effects without needing to retake the photo under different lighting conditions.
Auto Balance Combinations
- Auto Balance Combinations: When multiple sliders are adjusted simultaneously, this feature helps maintain a natural and balanced look by limiting the impact of each individual adjustment. This ensures that the overall effect remains realistic.
Depth and Background Effects
- Lens Blur and Depth Map: This feature allows you to create a realistic depth-of-field effect by adjusting the focal range and blur strength. The depth map visualizes the depth of the image, helping you to achieve a precise and professional look.
- Generative Fill and Expand: Utilize AI to fill in or expand parts of the image seamlessly. This feature is particularly useful for adjusting the composition and removing unwanted elements from the background.
Masking and Fine-Tuning
- Precise Masking: The advanced masking tool allows for more accurate color masking, which is essential for isolating the subject and applying effects only where needed. This helps in achieving a clean and professional finish.
Output Options
- Flexible Output Options: Choose from multiple output methods such as applying changes to the current layer, creating a new layer, or outputting as a new document. This flexibility ensures that your original image remains unaltered and you have maximum control over the revising process.
By leveraging these features, you can significantly boost your portrait photos, creating visually stunning results that stand out
Frequently Asked Questions about Portrait Filter
What filter to use for portraits?
When choosing a filter for portraits, consider using softening filters like the Soft Focus or Diffusion Filter. These smart filters help to reduce harsh details and blemishes, providing a smoother and more flattering look to the subject’s skin. Additionally, Neutral Density (ND) filters can be used to control light exposure, which is particularly useful in bright outdoor settings to achieve a balanced and professional appearance.
Which ND filters for portraits?
For portrait photography, ND filters ranging from ND2 to ND8 are commonly used. These filters reduce light exposure by 1 to 3 stops, allowing for wider apertures or slower shutter speeds even in bright conditions. These results in a shallow depth of field, which helps in creating a pleasing blur background, making the subject stand out more prominently.
How to filter photos for free?
You can use free tools like GIMP, Canva, Snapseed, and VSCO to apply filters to your photos. GIMP offers powerful, Photoshop-like filters, while Canva provides a user-friendly platform. Snapseed and VSCO are mobile apps with robust filtering capabilities available on iOS and Android.
What is a smart portrait?
A Smart Portrait in Adobe Photoshop uses AI to adjust facial expressions, age, hair thickness, and head and eye direction. Leveraging Adobe Sensei, it enhances portraits naturally and realistically.
Conclusion: Portrait Filter in Photoshop
Using the Portrait Filter in Photoshop revolutionized my portrait photography. For example, I retouched outdoor portraits taken in harsh sunlight, using Smart Portrait features to soften facial lines, adjust hair thickness, and simulate golden-hour light. These quick changes saved time and impressed my clients.
Elevate your photo revising skills with our comprehensive courses. Our Photoshop course covers essential tools, while our Lightroom course enhances workflow. Perfect for beginners and those refining their skills, these courses offer valuable knowledge and practical experience. Join us today!
Have a nice photoshoot!Â
Course
Light Effect Photoshop
Lightroom Course 2024
Adobe Photoshop Course
Photo Editing Course
Get the latest version of Photoshop & Lightroom