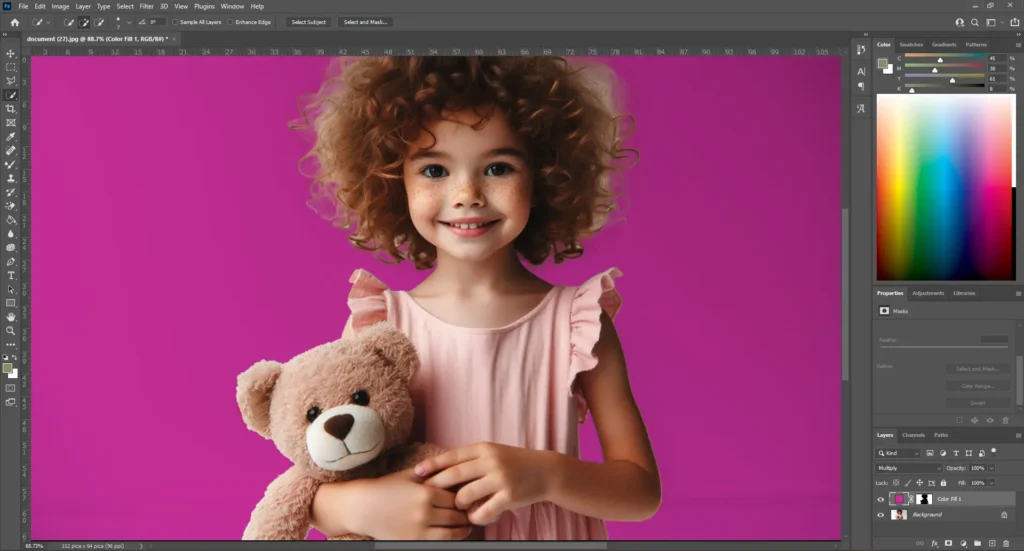
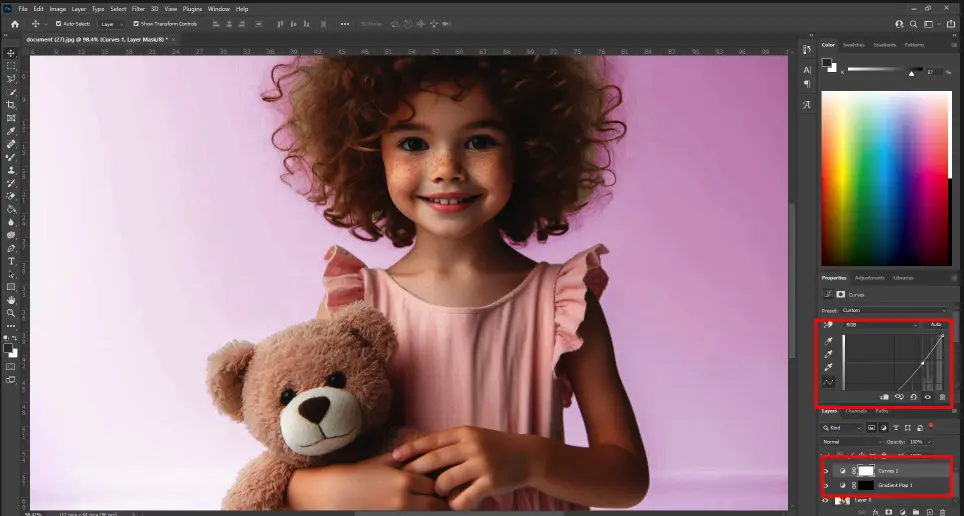
Portrait Backgrounds in Photoshop: Enhancing Your Photography

Creating captivating portrait backgrounds in Photoshop can transform simple images into a work of art. Whether you’re aiming for a sleek, professional look or a creative and unique backdrop, Photoshop offers a range of tools and techniques to bring your vision to life.

As an expert photographer, I’ve found that mastering background in Photoshop is key to making portraits stand out. In this guide, I’ll share essential tools, step-by-step processes, and expert tips to help you enhance your portrait photography. Whether you’re a beginner or an experienced user, you’ll find valuable insights and practical advice to elevate your skills and generate stunning contexts with ease.

Table of Contents

Essential Tools and Techniques for Creating Portrait Backgrounds in Photoshop

Here is a table that highlights the key differences between some of the essential tools and techniques used for creating portrait background in Photoshop:

Tool/Technique Description Key Features Best Used For
Layers and Masks They are individual elements of a picture, while masks control their visibility. Non-destructive editing, Precise control, Element blending Organizing elements, creating complex compositions
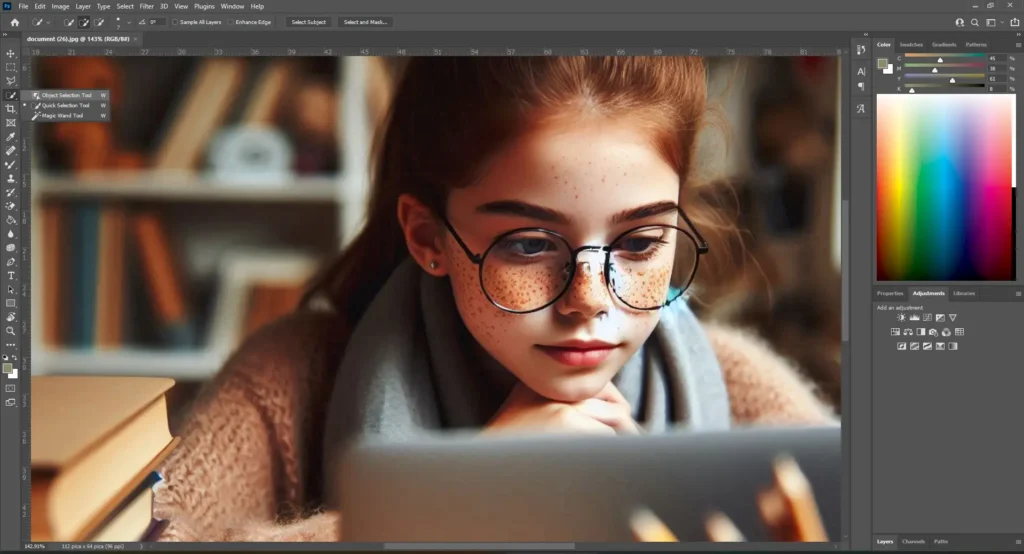
Selection Tools Tools to isolate specific areas of a photo for editing. Quick Selection Tool for fast selections, Magic Wand device for color-based selections Isolating elements, creating masks
Blend Modes Modes that determine how layers interact with each other. Multiply for darkening, Screen for lightening, Overlay for increasing contrast Blending layers, adjusting exposure and contrast
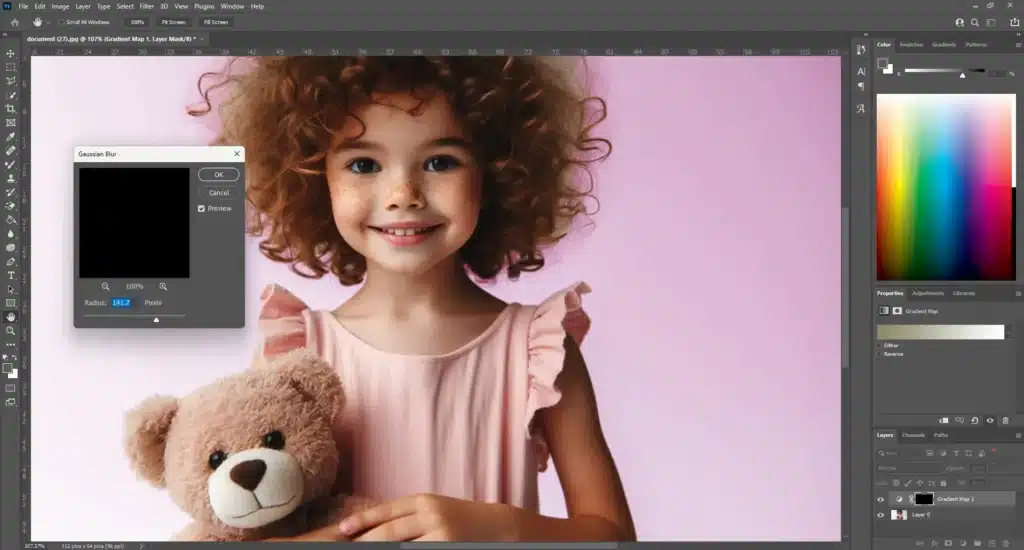
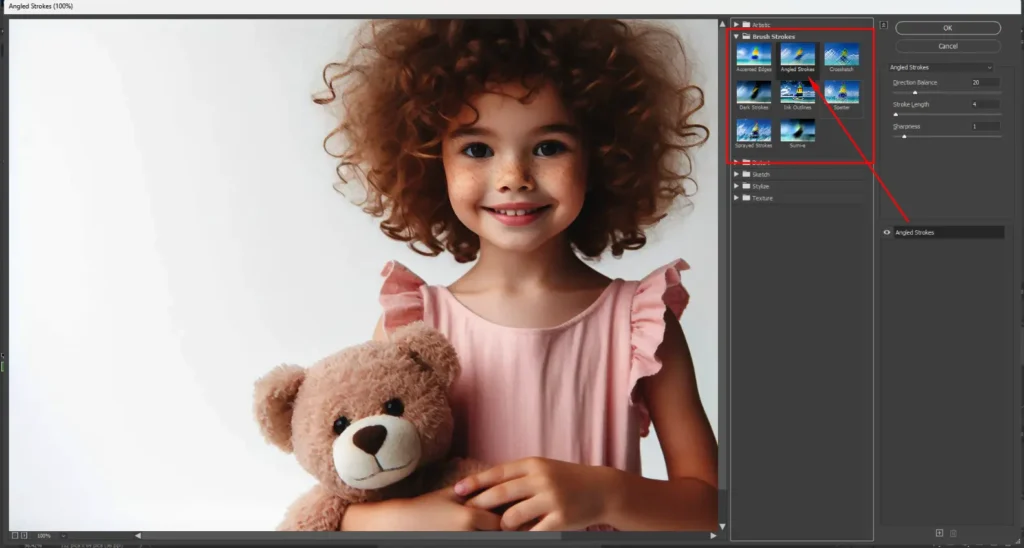
Filters and Effects Tools to apply special effects to layers. 
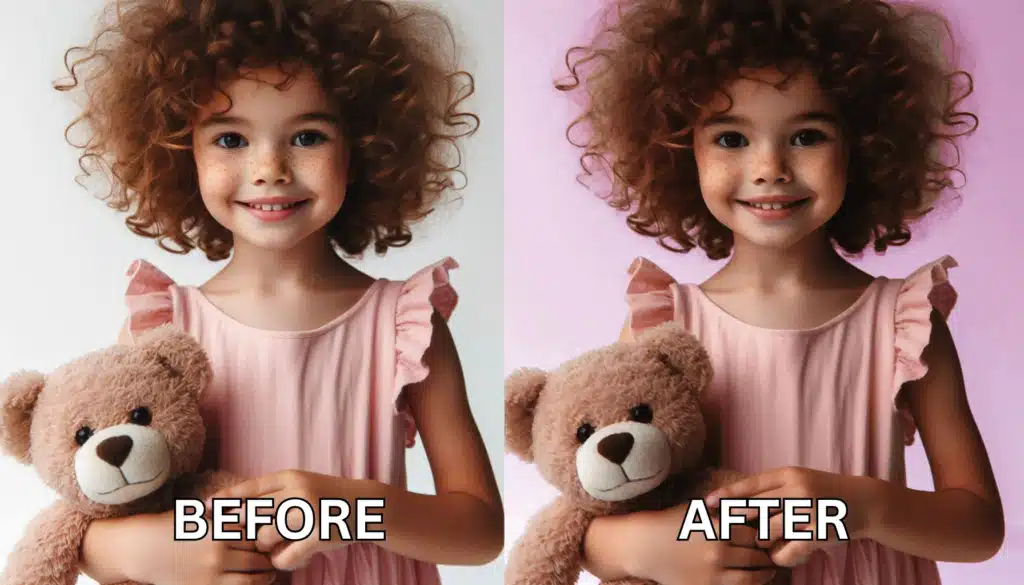
Gaussian Blur for softening edges, Noise for texture, Gradient Map for tint grading Adding texture, creating depth, special effects

Understanding Layers and Masks

Using Selection Tools in Portrait Background

Close-up of Photoshop interface displaying selection tools and layers, focusing on creating portrait backgrounds.

They are crucial for isolating the main element from the background or selecting specific areas to apply effects.

Adding and Modifying Portrait Background

Young girl holding a teddy bear with a pink background in Photoshop, demonstrating the use of layer masks and color fill.

Here are steps to add and modify scenes:

Enhancing Backgrounds with Textures and Effects

Young girl with a teddy bear and a light pink background in Photoshop, with the Gaussian Blur tool applied to create a soft texture effect.

Textures and effects can add depth and interest to your scenes.

By mastering these devices, you can build captivating and professional portrait sceneries in Photoshop, tailored to your creative vision and project needs.

Tips for Blending Subjects with Portrait Backgrounds in Photoshop

Young girl with a teddy bear and a light pink background in Photoshop, with Curves Adjustment Layer applied for blending.

Blending a subject with a Photoshop background  can be challenging, but with the right techniques, you can achieve realistic results. Here are essential tips to master this art.

Adjusting Lighting and Color

It is crucial for creating a cohesive composite graphic.

Use Curves Adjustment Layer:

Adding Shadows and Highlights

Adding realistic shadows and highlights can enhance the depth and realism of your composite photo.

Make a Drop Shadow:

Use Dodge and Burn devices:

Using Blend Modes

Blend modes can significantly impact how layers interact with each other, helping to integrate the subject with the background.

Blend Modes:

Creating a Depth of Field Effect in Portrait Background

Matching the depth of field between the subject and the background can add realism to your composite snap.

Blur Background:

By following these techniques, you can make a seamless blend between your key feature and background, resulting in a realistic and visually appealing composite picture.

Enhancing Scenes with Textures and Effects in Portrait Background

Textures and effects can add depth, interest, and a unique touch to your portrait scenes in Photoshop. By integrating these elements, you can transform a simple backdrop into a captivating scene that complements your main element.

Adding Texture Overlays

It can bring a new dimension to your portraits, making the backdrop more dynamic and engaging.

Using Filters and Effects in Portrait Background

Young girl with a teddy bear and a white background in Photoshop, with Angled Strokes filter applied from the Artistic filters menu.

Filters can add creative touches to your backdrops, making them stand out.

By incorporating these techniques, you can elevate your digital collection and add a professional touch to your pictures.

Common Mistakes to Avoid for Portrait Backgrounds in Photoshop

Blending main elements with settings in Photoshop is crucial for achieving professional and realistic composite images. However, several common mistakes can undermine your efforts. Here are some key pitfalls to avoid, along with practical tips to ensure your images look seamless and polished.

Not Properly Selecting Your Elements

Accurate selection is the foundation of a good blend. If your selection is rough or inaccurate, the final composite will look unnatural.

Ignoring Illumination Conditions

Consistent illumination is crucial for a realistic blend. Mismatched lighting between the main element and setting can make the composite look artificial.

Overusing Blending Modes

While blending modes are powerful, over-relying on them or using the wrong mode can result in unnatural colors and loss of detail.

Over-Editing Before Blending

Applying too many edits to your images before blending can complicate the process and result in a less cohesive final image.

Creating Halos Around Edges

Halos can appear when the edges of a digital collection aren’t properly blended, resulting in a visible outline that disrupts the natural look of the composite.

Rushing the Process

Blending requires patience and attention to detail. Rushing through the process can lead to sloppy results.

By being mindful of these common mistakes and implementing these solutions, you can enhance your skills in blending subjects with backgrounds in Adobe Photoshop, resulting in more realistic and professional-looking images. Keep practicing and refining your techniques to achieve the best results.

Frequently Asked Questions about Portrait Backgrounds in Photoshop

Photoshop-Masterclass-Advanced-Editing-Layer-Manipulation

What background is best for portraits?

The best backdrop for portraits depends on the mood and style you want to convey. Generally, neutral colors like gray, white, or black are versatile and can help highlight the person being photographed without distractions. Soft, textured landscape photography can add depth without overpowering the graphic. For more creative portraits, using vibrant colors or interesting patterns can add personality and interest. Always consider the subject’s clothing and complexion to ensure the backdrop complements rather than clashes.

How to make a portrait background?

Creating a portrait backdrop in Photoshop involves a few steps:

What is the best background for an official portrait?

For official portraits, a clean, uncluttered backdrop is ideal. Solid colors like navy blue, gray, or beige are often preferred as they convey professionalism and keep the focus on the person. Ensure the backdrop is evenly lit to avoid harsh shadows or highlights, creating a polished and formal appearance.

How do I change the background color of a portrait in Photoshop?

To change the backdrop color of a portrait in Photoshop, follow these steps:

Conclusion: Portrait Backgrounds in Photoshop

Side-by-side comparison of a young girl with a teddy bear, showing the original white background and the modified pink background created in Photoshop.

Mastering portrait backgrounds in Photoshop can greatly enhance your photos. Initially daunting, I found success by experimenting with tools and techniques. One highlight was transforming a plain backdrop into a vibrant one. For more, check our Photoshop courses and Lightroom courses to advance your skills!

If this article has helped you, then Like and Share it with your friends

Facebook
Twitter
LinkedIn
Pinterest

Have a nice photoshoot!

Read more about: Photo Editing with Lightroom and Photoshop

Download Your Free Guide Now!

Discover the secrets of photography with our printable guide! Master essential techniques like aperture, shutter speed, and ISO to create stunning images. Get your free printable PDF now and start turning your snapshots into masterpieces!