Professional Guide to the Photoshop Painting Effect
Professional Guide to the Photoshop Painting Effect
Ready to unlock your creativity with the amazingPhotoshop “painting effect”?
This powerful tool transforms regular photos into masterpieces. Whether you’re a pro or a newbie, this effect can bring your visions to life.
Discover how simple it is to create captivating images. Dive into this guide and see how you can level up your work and impress your audience.
Table of Contents
How to Resize an Image in Photoshop for Painting Effects
When aiming to create stunning paintings using digital tools like Photoshop, you need to know how to correctlyresize your images.
Whether you’re using the oil paint filter or trying to achieve a detailed oil painting effect, maintaining the integrity of your original photo during resizing can significantly influence the overall aesthetic of your artwork.
Feature
Description
Impact
Image Resolution
72 dpi for web, 300 dpi for print
Low resolution for web, high resolution for print to maintain detail
‘Image Size’ Feature
Adjusts pixel dimensions and document size
Essential for fitting the image into the desired dimensions
Aspect Ratio
Link icon between width and height
Prevents distortion, maintains a natural look
Selecting the Correct Image Resolution for Painting
Choosing the right resolution is vital for any digital painting.
If you plan on printing your artwork, aim for a minimum resolution of 300 dpi, which allows for clear and detailed prints.However, a resolution of 72 dpi may suffice for web displays.
Effectively using the layers panel and learning different layering techniques can help manage resolution settings without losing clarity and learning how to add texture can significantly enhance the depth and realism of your digital painting.
Understanding essential tools in Photoshop, such as the Dodge and Burn tool, can further refine your artwork, giving it a professional touch.
Using the 'Image Size' Feature for Optimal Resizing
To access the ‘Image Size‘ feature in Photoshop, navigate through Menu > Image > Image Size.
This feature allows detailed adjustments to both pixel dimensions and document size.
Here’s a quick guide:
Ensure 'Resample' is selected. This allows Photoshop to add or subtract pixels from the image during resizing.
Use a smart object layer if possible; this preserves the original quality while enabling transformative changes without degradation.
Adjust Width and Height with reference to resolution settings discussed earlier.
Additionally, knowing how to use the Content-Aware Scale in Photoshop can help you resize images without distorting key elements.
In the 'Image Size' dialog box, ensure that the link icon between width and height input boxes (denoting aspect ratio) is active.
Adjust width or height, Photoshop will automatically adjust the other dimensions proportionately.
Hit 'OK' once you are satisfied with the previews.
Applying Initial Painting Effects in Photoshop
When you start painting digitally, the key is to replicate the dynamic nature of real brush strokes.
To begin, select a brush from the brush panel that resembles a traditional painting brush.
Adjusting the brush size and modifying the brush sliders for scattering and texture in your brush settings allows each stroke to impart unique characteristics typical of physical media.
Experiment with different brushes to enhance your digital painting skills.
Key Steps:
Open Layers Panel.
Choose a textured brush.
Modify opacity and flow on the top toolbar.
Apply strokes in varied motions.
This approach not only increases texture but also gradually builds up the paint’s body, creating a rich, tactile surface similar to that seen in traditional paintings.
Adjusting Layer Styles for a More Authentic Paint Look
After laying down your initial strokes, it’s time to work more deeply on making them look seamlessly integrated like actual paint layers.
This is where adjusting the layer styles becomes crucial. First, utilize blending modes; “Multiply” or “Overlay” can offer that visual depth synonymous with layered paints.
Add an oil paint effect, which is great for softening hard edges and uniting disparate strokes under one textural theme.
Navigate to Filter > Stylize, then select ‘filter stylize oil paint‘.
Adjust settings like shine and cleanliness for best results keeping it subtle and working well with most artistic intentions.
Key Techniques:
Apply Blending Mode: Multiply or Overlay from the drop-down menu.
Use Oil Paint Filter: Set smoothness at 3-7 depending on desired textureintensity.
Familiarizing yourself with Photoshop shortcuts can make implementing these techniques even easier.
Creating a Custom Brush for Unique Painting Effects
Creating a custom brush in Photoshop provides artists with a powerful tool to unleash their creativity and achieve unique textural or stylistic effects.
With this advanced capability, you can tailor brush dynamics specifically suited to your art style.
Designing Your Brush Tool
Brush design begins with selecting an appropriate shape or pattern that acts as the base of your brush strokes.
To start, open the Brushes Panel via Window > Brushes.
Here, you can either modify an existing brush or create one from scratch by selecting the ‘New Brush‘ option in the drop-down menu.
When crafting your own brush, focus on how each stroke complements your overall artistic vision.
Additionally, knowing how to use the Patch Tool can aid in refining your brush strokes for a more polished look.
Saving and Managing Custom Brushes
Once satisfied with the settings and look of your new brush, save it by clicking on the right side of the panel menu icon (‘Save Brushes‘).
This ensures all adjustments are retained for future use without reconstructing settings every session, integrating efficiency into creativity.
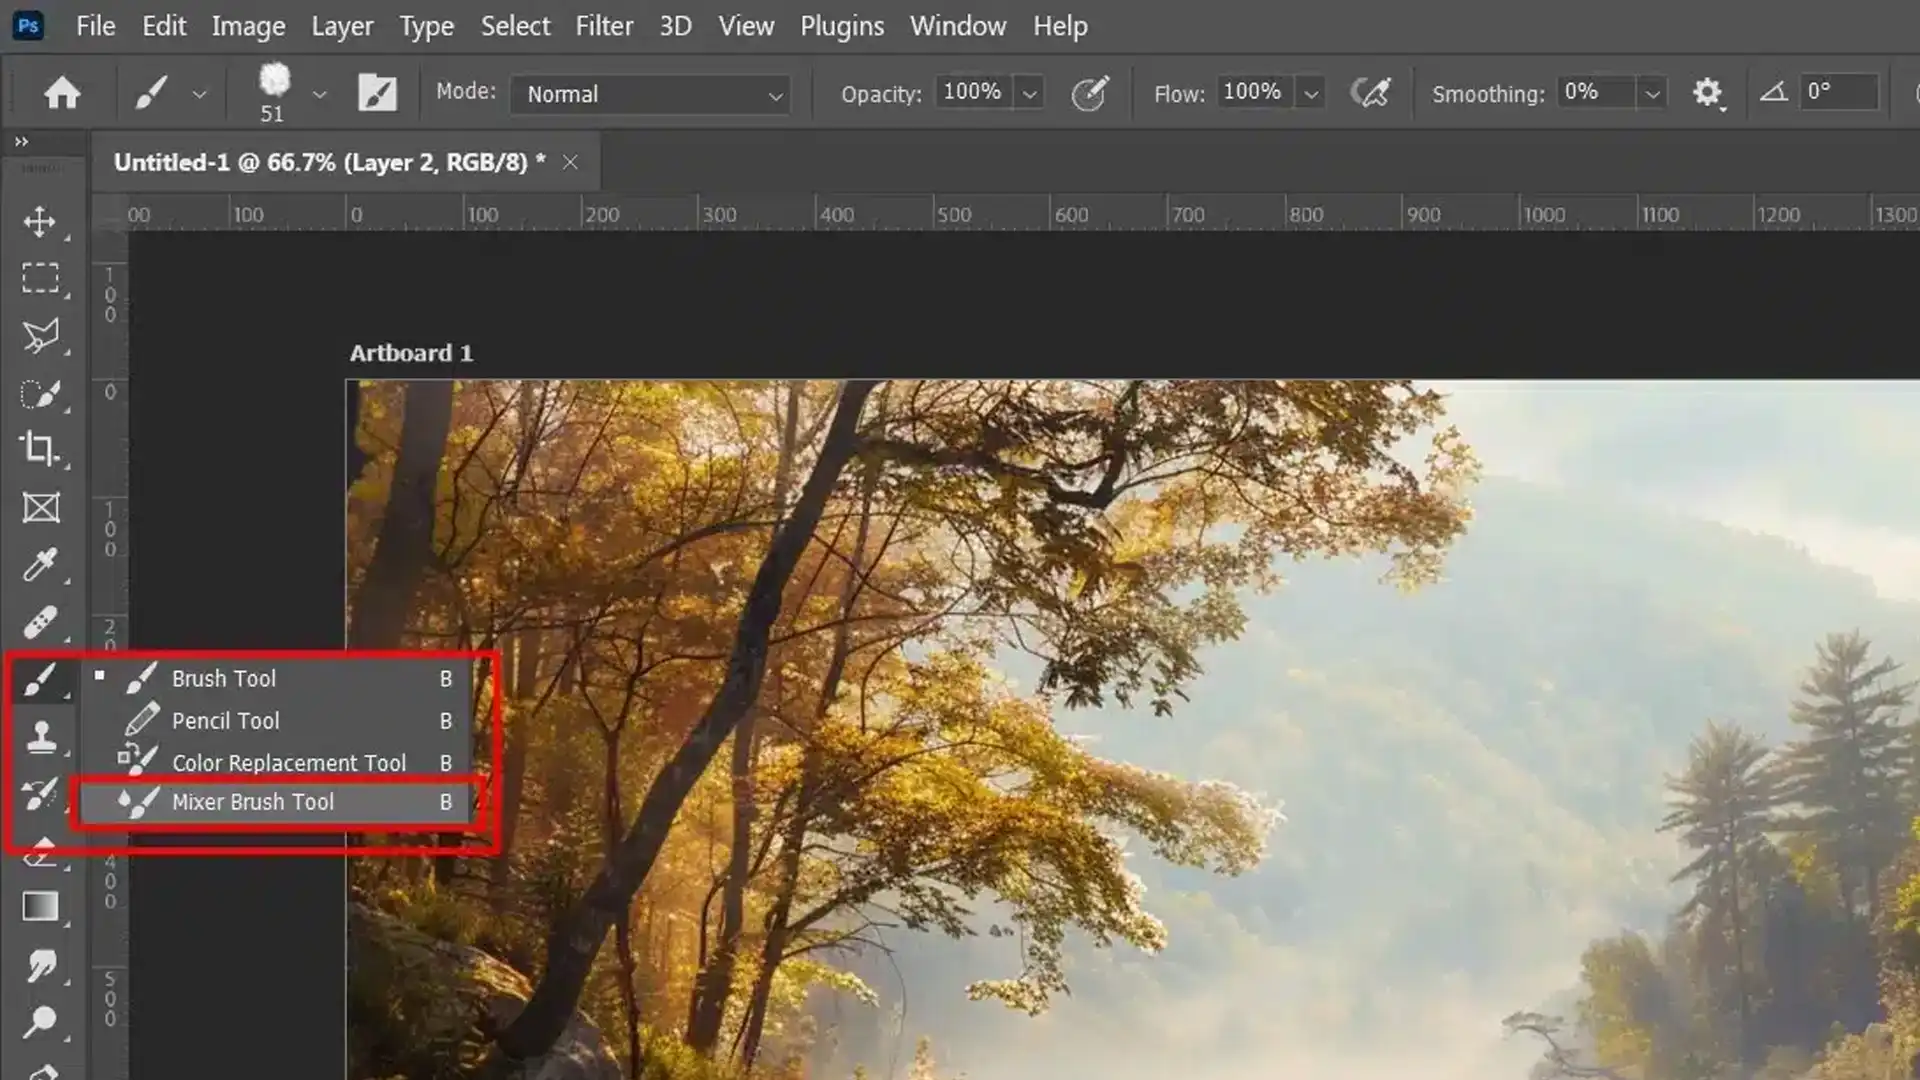
Utilizing the Mixer Brush Tool in Photoshop
The Mixer Brush Tool in Photoshop is a powerful feature for artists looking to blend colours and create stunning, realistic paint effects digitally.
By simulating real-world brush strokes, this tool opens up a world of creativity.
Basics of Mixer Brush Settings
Before exploring the artistry the Mixer Brush can achieve, it’s important to understand its fundamental settings.
To access these settings, select the Mixer Brush from the toolbar or press ‘B‘ on your keyboard.
Then right-click to open the drop-down menu, where you’ll find various brush sliders that control the wetness, mix rate, and flow of your paint.
Wetness: This slider affects how much paint the brush picks up from the canvas.
Load: Determines how much paint is loaded onto the brush after each stroke.
Mix: Controls the rate at which new colours blend with existing ones.
Flow: Adjusts the speed at which paint is applied as you drag your brush.
Techniques for Blending Colors Like Real Paint
Achieving a seamless blend of colours with digital tools can be challenging, but mastering these techniques can bring an oil painting feel to your work:
Loading Colors: Unlike traditional painting, where you physically dip your brush into paint, in Photoshop, hold Alt (Option on Mac) and click on the area of colour you want to load into your brush.
Blending Modes: Utilize different blending modes from the layers panel; some effective modes for painting include Multiply for shadows and Screen for highlights which help achieve depth and luminosity similar to oil paintings.
Brush Pressure: Using a tablet and stylus allows for pressure-sensitive control over brush strokes. Applying varying degrees of pressure lets you mimic natural brushwork found in physical paintings.
When trying to emulate real-life painting techniques such as dry-brushing or glazing within Photoshop:
Use a lower flowsetting for more subtle effects or when attempting to build up thin layers.
Increase load amounts when aiming for thick coverages akin to impasto techniques found in oil paints.
Advanced Techniques for Realistic Painting Effects
In the pursuit of creating stunningly realistic artwork in Photoshop, understanding and mastering advanced techniques can transform your digital canvases.
These methods not only elevate the aesthetic but also enhance the depth and emotional impact of your work.
Utilizing texture overlays is a commendable strategy for infusing your paintings with remarkable depth and realism.
To apply the texture, open your layers panel, and drag the texture file onto it. Convert this layer into a “smart object” so you can scale it without quality loss.
Gently blend it with the “remove background” using blending modes like Overlay or Soft Light. This integrates the “texture” seamlessly, emphasizing surface details and adding a tactile quality to your “oilpaint effect“.
Adjust opacity to get the right intensity.
Right-click the layer → Convert to Smart Object
Go to Layer menu → Blending Modes → Choose Overlay
Adjust Slider for Opacity in Layers Panel
Using Filters and Adjustments to Enhance Paint Visuals
Photoshop’s different types of filters provides an expansive toolkit for transforming ordinary images into works reminiscent of traditional “oil painting.”
Key among these is employing the Photoshop CC oil paint filter, which softens lines and blends colours in ways that mimic classic brushwork.
Enhance this effect further through:
Sharpness adjustments via CameraRaw filters, refining details where needed.
Employing adjustment layers for brightness/contrast ensures lightsource enhances rather than flattens your painted effects.
Use sliders in Color Balance or Selective Color adjustments to enrich shadows, mid-tones, and highlights.
Pro Tip: These adjustments are useful when dealing with multiple light sources such as editing photos of fireworks.
Layer Management for Complex Painting Projects
Efficient layer management can significantly improve complex digital painting projects.
This approach streamlines workflow and maintains the quality and adjustability of artwork.
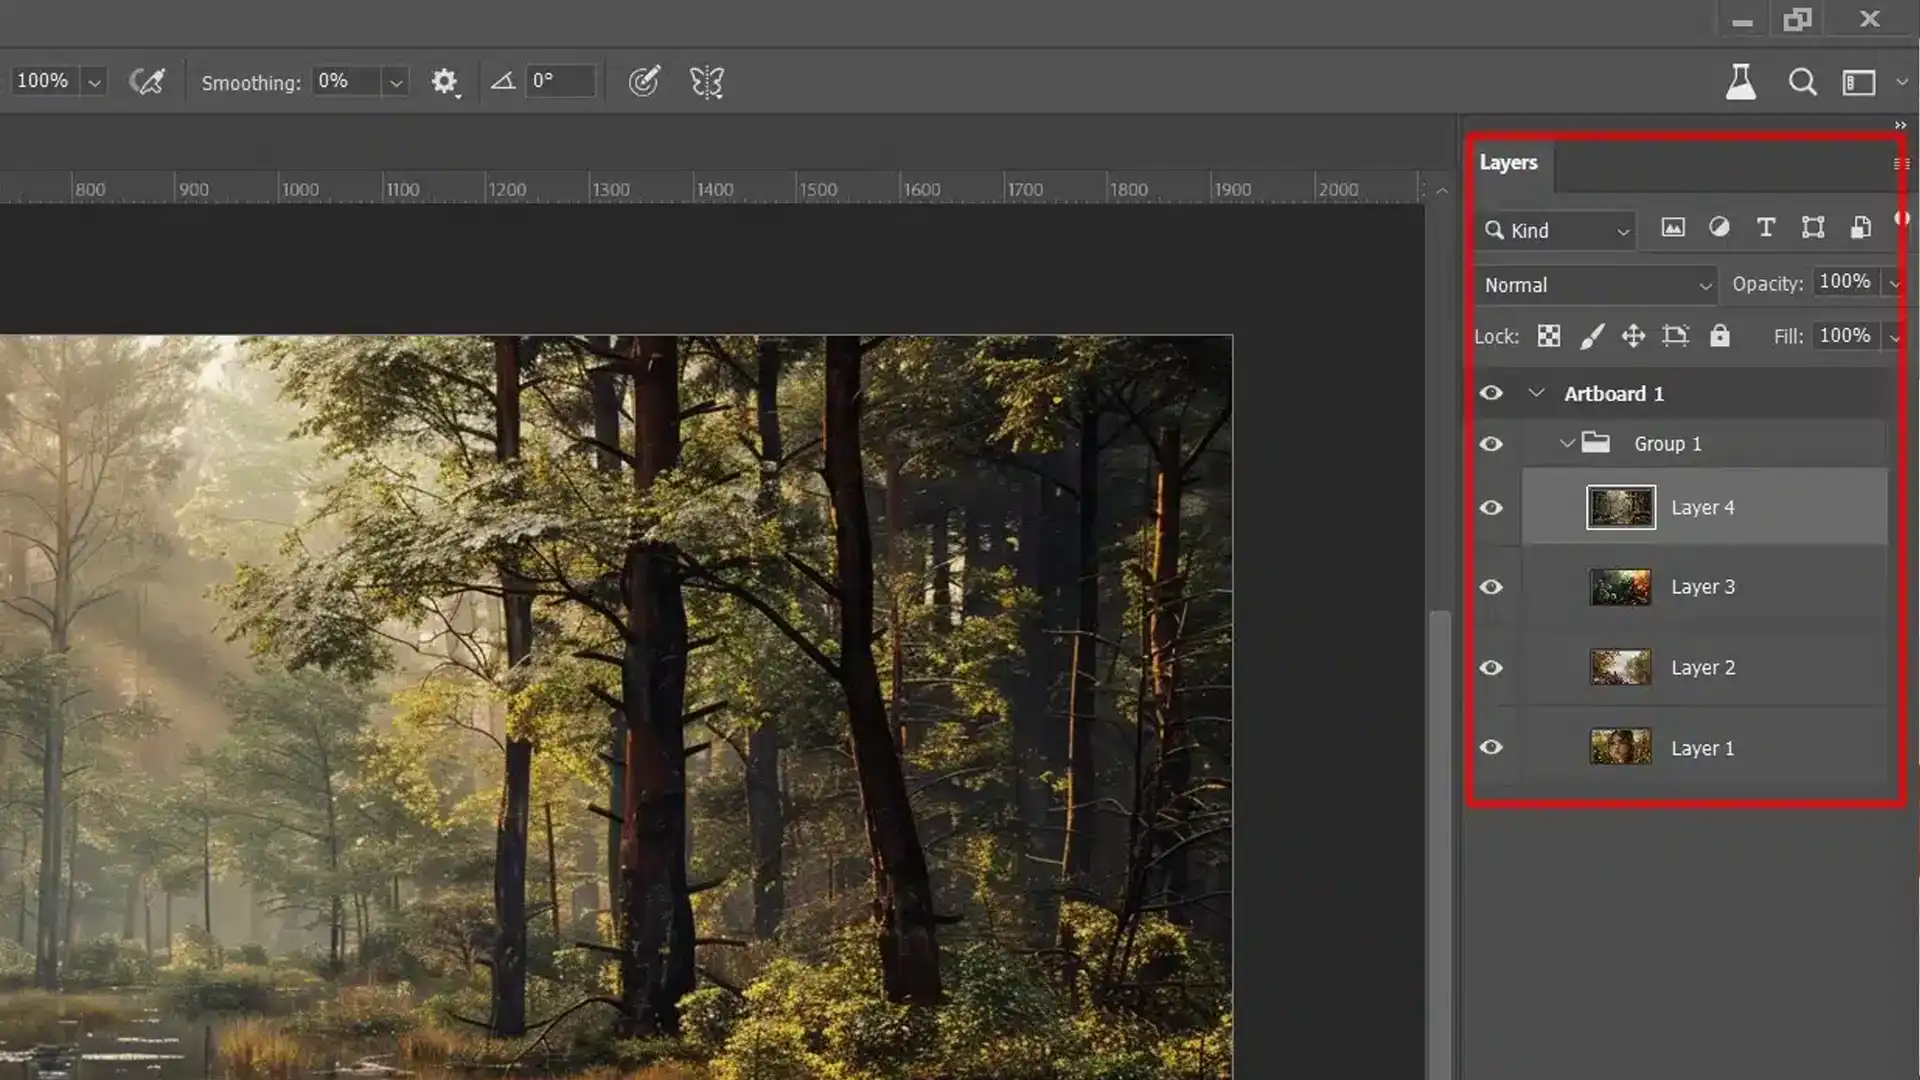
Organizing Layers for Efficiency
When working with multiple layers, it’s essential to keep everything organized to navigate your project easily.
A well-organized layer panel allows for quicker adjustments and enhances efficiency, especially when working with intricate designs involving textures and multiple effects.
Labelling: Always label your layers with descriptive names; this simple step can save you time spent scrolling through unidentified layers.
Grouping: Categorize related layers into groups. For instance, all background elements should be in one group while the main subject features in another.
Colour Coding: Assign colours to similar groups of layers to visually streamline your workflow.
For instance, knowing how to use features like the Content-Aware Fill in Photoshop can streamline your editing process, allowing you to make precise adjustments without disrupting the overall composition.
Merging and Adjusting Layers without Losing Quality
Consider using smart objects for non-destructive edits to preserve the quality of an original photo while optimizing file size and manageability.
Convertingto Smart Objects: By converting layers into a smart object, you maintain the original characteristics of the layer while enabling extensive non-destructive editing. This technique is particularly useful when applying the oil paint effect or other substantial modifications where preservation of the underlying details is crucial.
AdjustmentLayers: To maintain flexibility, use adjustment layers rather than direct modifications. These allow you to test with colour balances, contrast levels, and more, all reversible adjustments that don't alter the actual data of your original layers.
Layer Comps: Save different states or versions of your artwork using layer comps within Photoshop. This feature provides access to previous states quickly without having to merge down or irreversibly apply effects.
Frequently Asked Questions (FAQs)
How to make a paint effect in Photoshop?
To create a paint effect, open your photo in Photoshop and duplicate the background layer.
Navigate to the filter menu, and choose the oil paint effect. Adjust the brush slider settings to your liking.
This will transform your photo, giving it a painted look with beautiful texture and detail.
How to make a Photoshop image look like a painting?
To make your entire image look like an oiled painting in Photoshop, use the oil paint effect found under the Filter Stylize menu.
Experiment with the settings, like stroke intensity and texture, to achieve your desired oil painting effect. The higher the settings, the more pronounced the painting looks.
How do you add artistic effects in Photoshop?
Access filters from the Filter menu to add artistic effects. For example, applying the oil paint effect or using brush strokes from the stylized options can impart artistic flair.
Tools and layers in Photoshop let you combine effects for unique artistic expressions in your images.
How do you add a painting effect to a photo?
To add a painting effect, open your photo in Photoshop and access the oil paint effect via the Filter gallery.
Customize your brush and texture sliders to mimic brush strokes and paint texture on your photo, instantly transforming it from a standard photo to an exquisite piece of art.
In conclusion, I’ve found that mastering the “painting effect” in Adobe has truly transformed my creative projects. It’s an easy and effective way to turn ordinary photos into extraordinary works of art.
I encourage you to experiment with this effect and see how it can enhance your own designs. You’ll be amazed at the results and the impact it can have on your work.
$2,061.00Original price was: $2,061.00.$1,061.00Current price is: $1,061.00. 27584
Download Your Free Guide Now!
Discover the secrets of photography with our printable guide! Master essential techniques like aperture, shutter speed, and ISO to create stunning images. Get your free printable PDF now and start turning your snapshots into masterpieces!