Photoshop Layering Tutorials: Master the Art of Layer Management
Photoshop Layering Tutorials: Master the Art of Layer Management
Are you ready to elevate your photo editing skills? Photoshop layering tutorials can unlock a whole new world of creative possibilities for you.
In this article, I’ll guide you through the layer basics, helping you understand how to stack, blend, and manipulate images like a pro.
So, let’s get started and transform your editing game!
Table of Contents
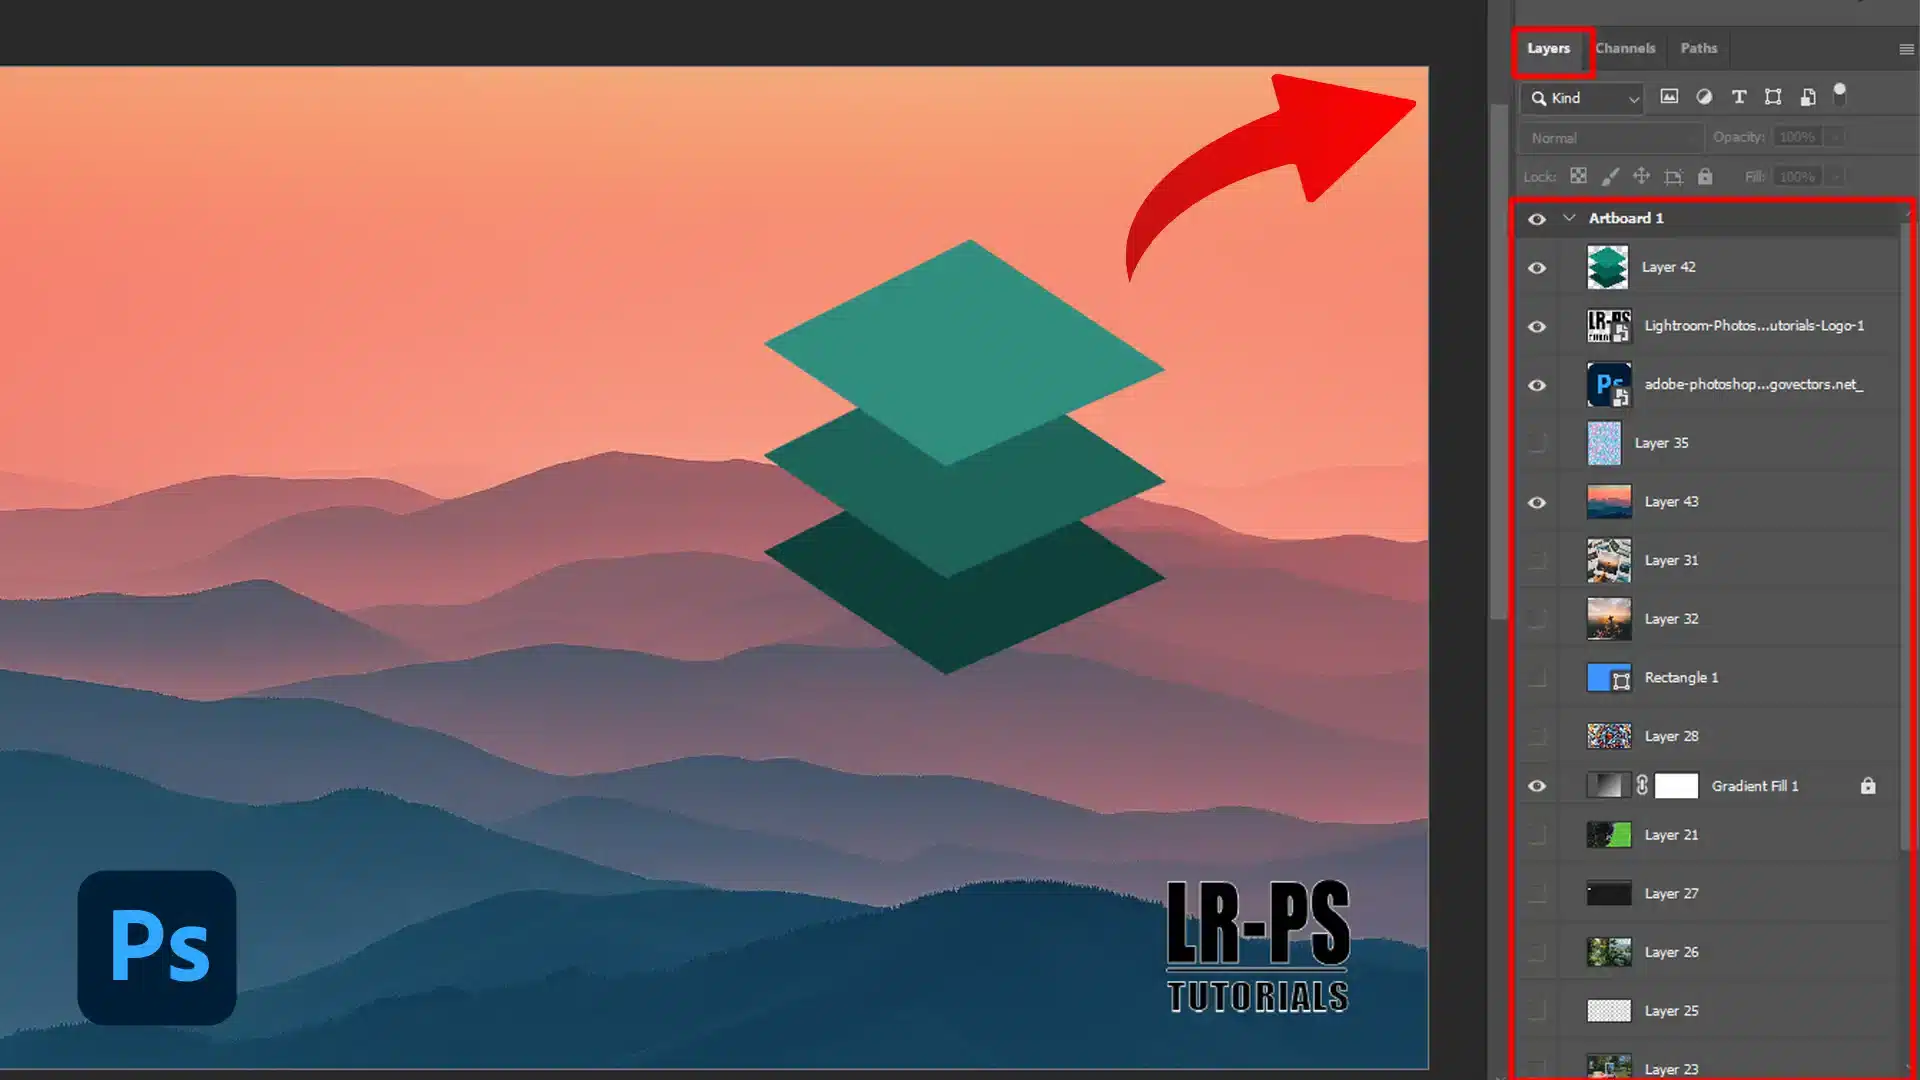
Understanding the Basics of Layers in Photoshop
Layers are the backbone of photo editing in Photoshop. They allow you to own separate layer elements of your work while keeping everything editable and organized.
At the bottom, click on the "Create a new layer" button. You can also press Shift+Ctrl+N (Shift+Command+N on Mac).
This creates a blank layer above the active layer. Name it for easy identification.
Pro Tip: Learn the new layer shortcut to make your workflow even easier when lookin through Photoshop layering tutorials.
How to Work with and Manipulate Layers
You interact with Photoshop layers by selecting them in the layers panel. Use the move tool to reposition them, or the eraser tool to make parts transparent.
Apply different layer styles to add effects like shadows or glows. For more advanced edits, consider using Smart Objects in Photoshop to maintain the quality of your layers.
Additionally, you can use the Photoshop select subject feature to quickly isolate and work on specific elements within a layer group.
Consider complementing your skills with Lightroom for efficient photo editing and management!
Adding Background layer
To add a background layer in Photoshop, open your project and go to the Layers panel. Click the “Create a New Layer” icon at the bottom of the panel.
Drag this new layer to the bottom of the layer stack. Select the Paint Bucket Tool, choose your desired color, and click on the new layer to fill it. Your background layer is now added and ready for further editing.
To add an adjustment layer in Photoshop, click the “Create new fill or adjustment layer” icon at the bottom of the Layers panel and choose the desired adjustment from the menu.
Moving Elements
To move layers in Photoshop, follow these steps:
Click and drag the layer you want to move in the layers panel. This changes its position in the stacking order.
You can move multiple layers simultaneously by holding the Ctrl key while selecting them.
To Transform a desired layer in Photoshop, follow these steps:
With the desired layer selected, press Ctrl+T (Command+T on Mac) to transform.
Resize, rotate or flip the correct layer as needed.
Hit Enter to apply the transformation.
Adjusting the Order of Layers
Change the position of Photoshop layers within the panel by dragging them up or down. Higher layers appear above lower ones in the document window.
Rearrange to control the visibility of overlapping parts in pictures such as ones that contain motion blur.
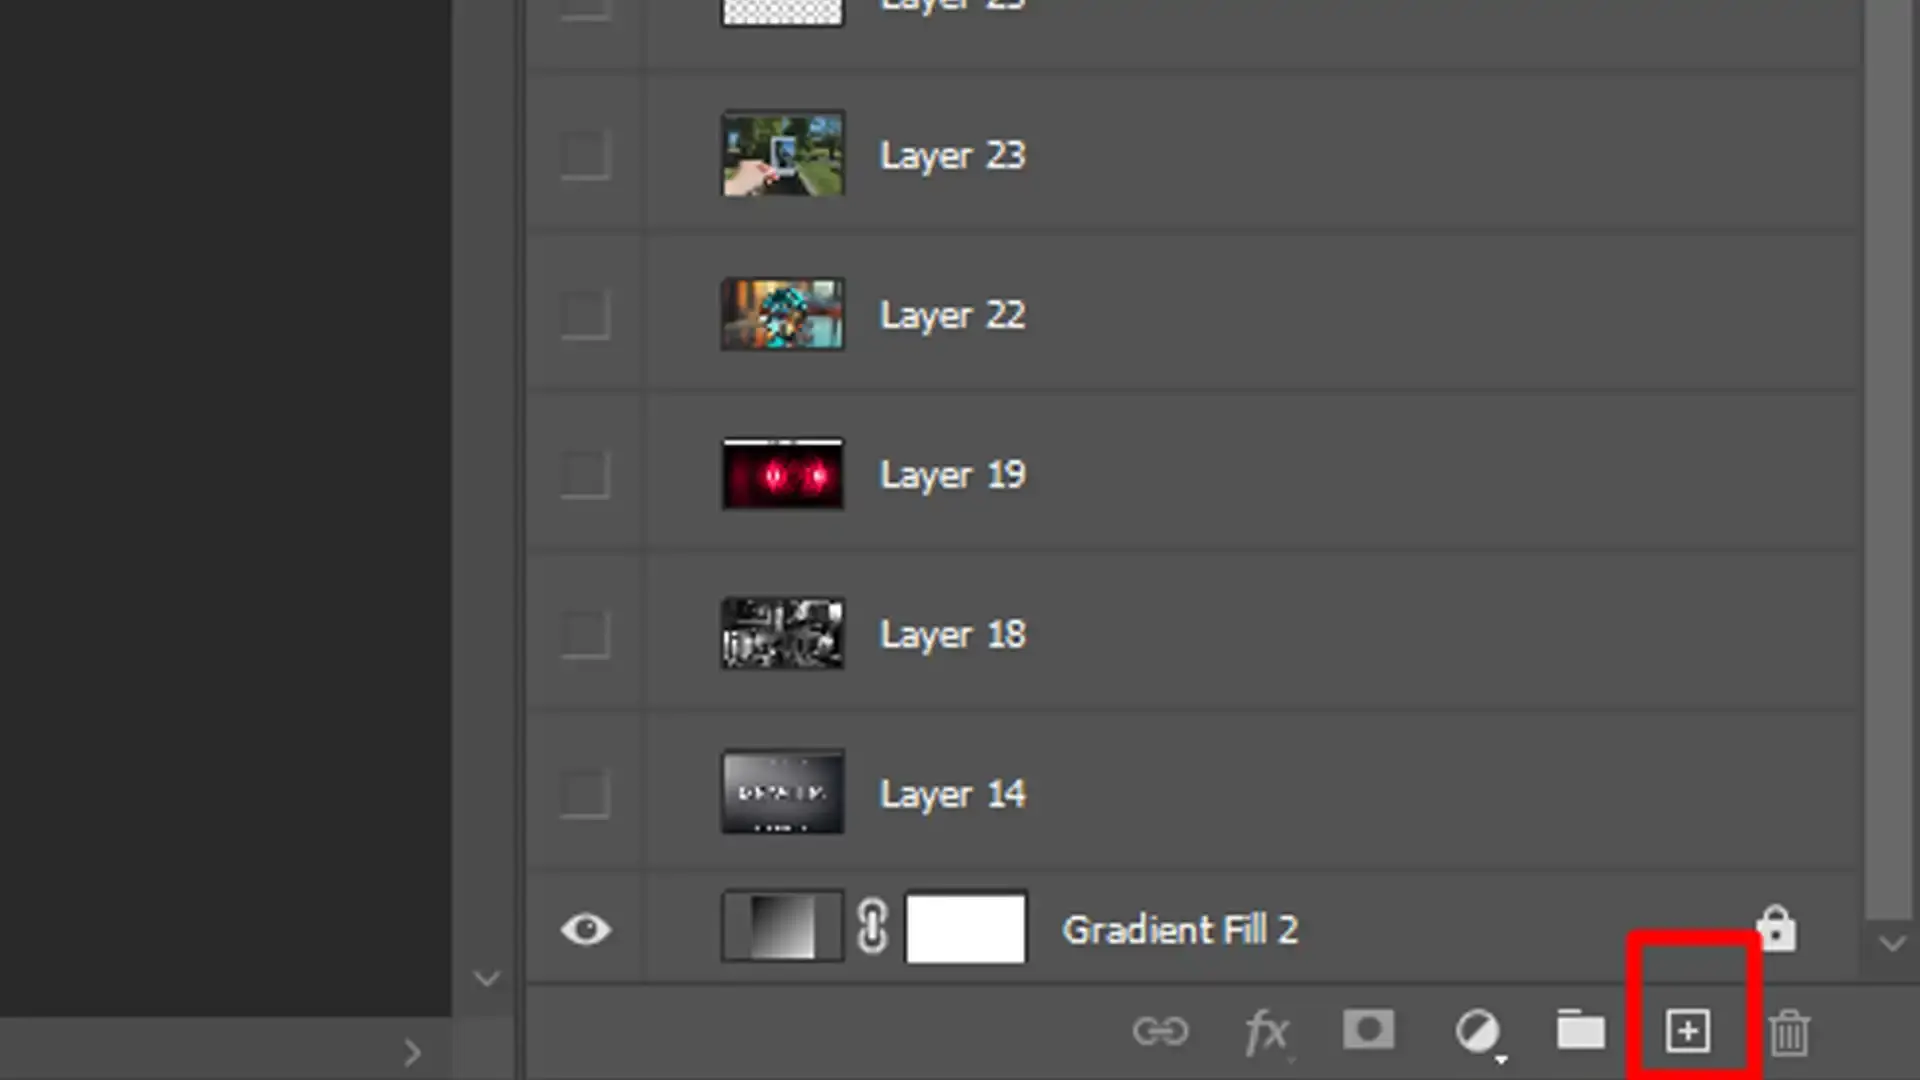
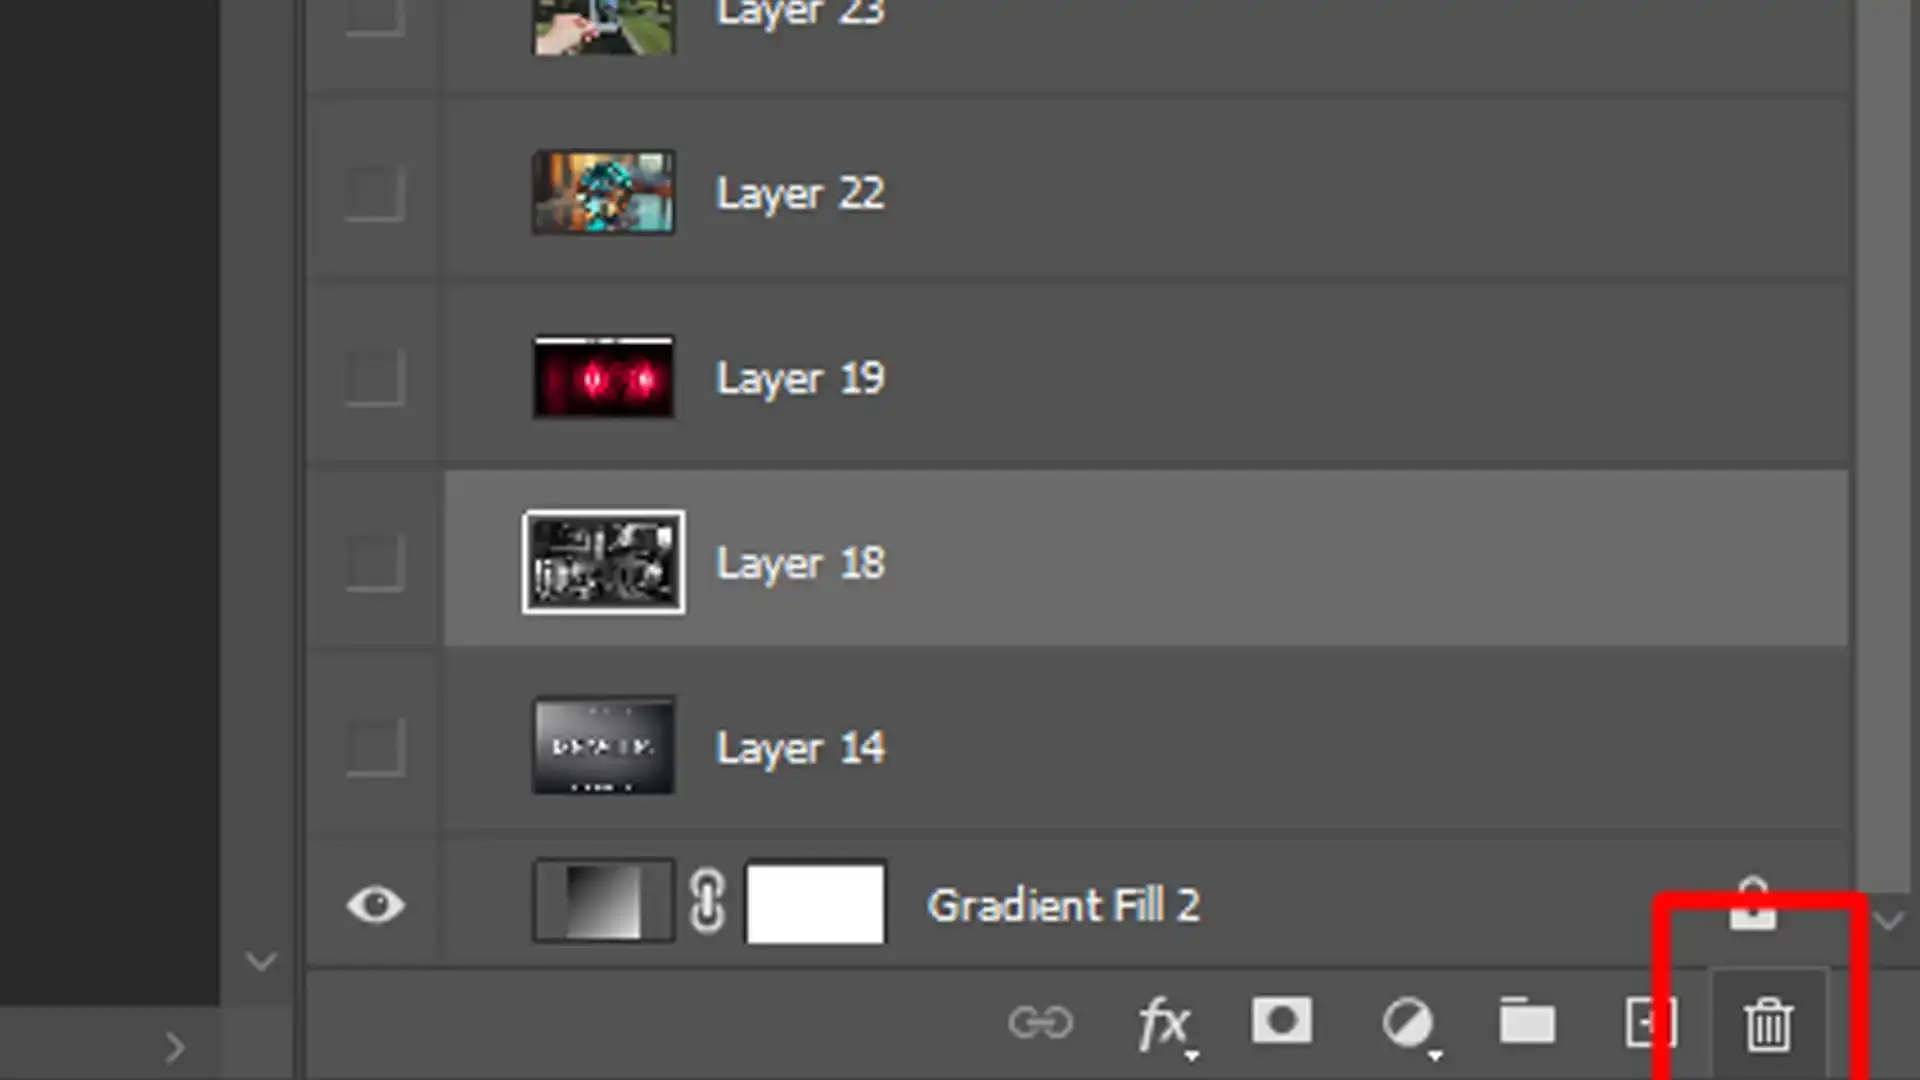
Deleting Photoshop Layers
To delete layers in Photoshop, follow these simple steps:
Select the layer you wish to delete.
Click the trash can icon at the bottom of the layers panel or hit the Delete key on your keyboard.
Confirm if prompted.
Pro Tip: Use adjustment layers for nondestructive editing. This way, you can tweak settings without altering the original photo.
Additionally, learn how to use the content-aware fill in Photoshop for seamless edits and to remove unwanted objects from your photos.
To create an identical copy of your current layer style, select it and use the “Duplicate Layer” option from the Layer menu or right-click and choose “Duplicate Layer.
Photoshop Layering Tutorials
Now, let’s look at how to actually use these layering techniques.
Basic Photoshop Layering Tutorials
Let’s start with the basics. Understanding layers and the edit layers panel is important. Think of them as transparentsheets stacked on top of each other.
Simple techniques for editing can help you manipulate these layers to create complex and visually appealing images.
To create a new layer, click the 'New Layer' button at the bottom of the panel.
Name your new layer for easy identification.
This new blank layer can be moved above or below other layers, allowing different elements to interact smoothly.
Remember, each new layer is independent. You can edit, move, or delete it without affecting others.
Advanced Photoshop Layering Tutorials
Once you’re comfortable with the basics, delve into advanced techniques. These methods offer greater control and creativity.
Using Adjustment Layers in Photoshop Layering Techniques
Adjustment layers are invaluable for making color and tonal corrections without altering the image.
Go to the adjustments panel and select an adjustment, like Levels or Curves.
The adjustment appears as a new layer above your selected layer.
Tweak settings to achieve your desired effect.
Masking Layers for Precise Editing
Masking layers allow precise editing by concealing parts of the layer. Great for blending images.
Select a layer and click the layer mask icon at the bottom of the layers panel.
Use the brush tool to paint black on areas you want to hide.
Smart Objects for Non-Destructive Editing
Smart objectsmaintain quality when resizing or transforming layers.
Creative Layering Ideas
Time to explore your creative side!
Layers aren’t justfor basic edits, they can transform your artwork.
Experiment with Blend Modes
Each mode affects the layer group uniquely, creating various visual effects.
Add Textures
Place textures in the layers panel and adjust opacity or blend modes to integrate them into your design.
Compositing Multiple Images
Create a surreal look by compositing images using masking layers and adjustment layers.
Organize with Layer Groups
Organize complex projects with layer groups. They keep your layers palette tidy and help manage multiple layers.
Incorporate Vector Graphics
Adding vector graphic shapes to your project is a great way to introduce sharp, scalable graphics without losing quality.
Pro Tip: Use layer styles like shadows, glows, and emboss to add depth and dimension to your layers. Double-click the layer in the layers panel to access regular layer styles.
Additionally, you can remove an object seamlessly by using layer masks and the content-aware fill tool.
These layering techniques help you master Photoshop, unleashing your creative potential.
Photoshop Layering Tutorials With Layers Panel
Navigating the layers panel is significant for anyone diving into Photoshop.
Think of layers as transparent sheets stacked on top of each other.
They let you work on different parts of an image without altering other segments. You can create, move, and delete layers to manage your project effectively.
Navigating the Layers Panel
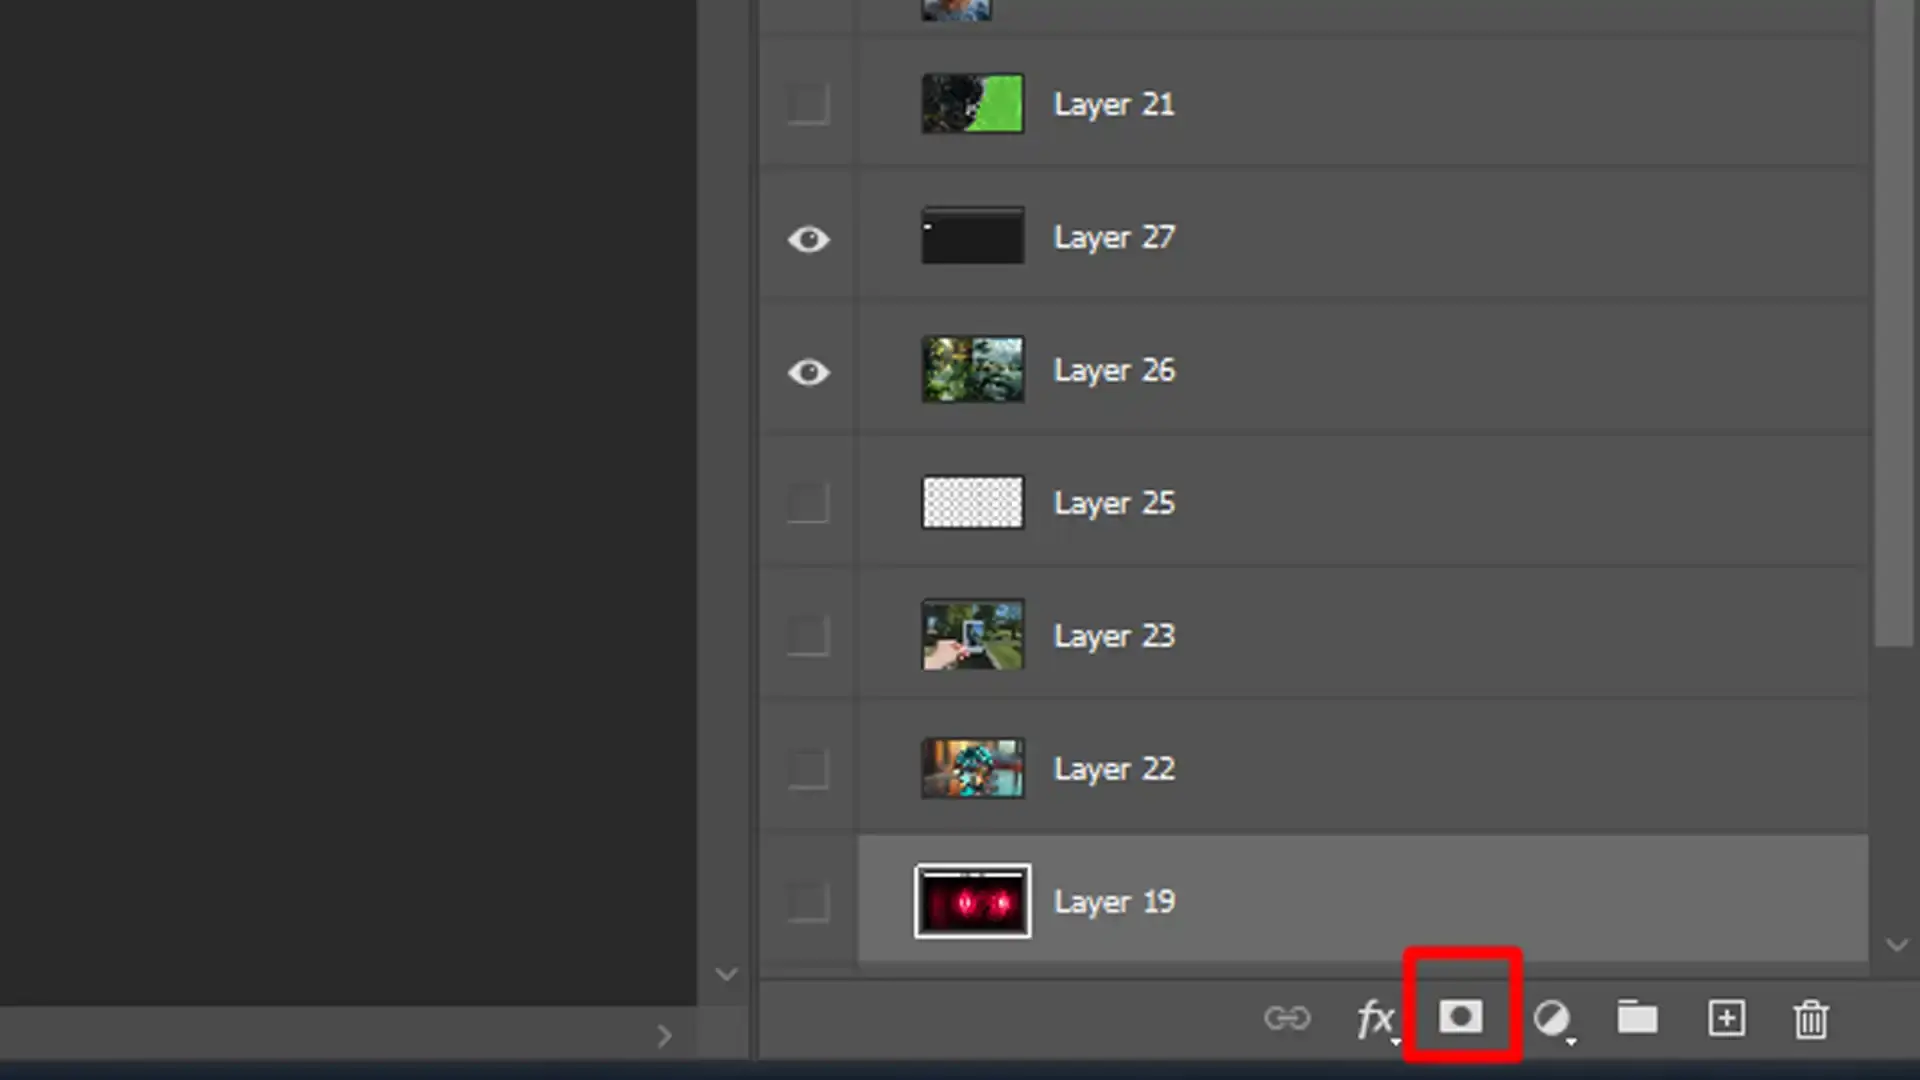
Open the layers panel via the “Window” menu if it’s not visible. The layers panel shows the layers in your document. Each existing layer has a thumbnail, icon, and layer name.
To interact with a layer independently, simply click on it. Holding the Shift key lets you select multiple layers in Photoshop at once, which is handy when you need to move or delete them together.
Photoshop Layering Options
The options at the bottom of the layers panel are critical:
The "Create a new layer" button adds an empty layer above the selected one.
Dragging layers up or down changes the layer order.
Clicking the trash icon deletes the selected layer(s).
Adjustments like blending modes and opacity allow you to tweak how layer effects look.
Customizing the Layers Panel
To keep things tidy:
Rename layers by double-clicking the layer name.
Group layers by selecting them, right-clicking, and choosing "New Group from Layers". This approach helps organize complex projects.
Add adjustment layers like curves or levels for non-destructive edits. These layers affect all the layers beneath them in the stack without altering the original photo.
Pro Tip: Use layer masking to hide or reveal parts of a layer.
Paint with the brush tool on the mask black conceals, white reveals.
This technique is excellent for blending multiple images seamlessly.
Unlock the Power of Adjustment Layers
Welcome, fellow shutterbugs and photo tinkerers! Ever felt like you had a magic wand to instantly enhance your images?
Well, let me introduce you to adjustment layers in this Photoshop layering tutorials. They’re not quite magic, but they’re pretty darn close.
Adjustment layers allow you to make non-destructive edits to your photos, letting you tweak colors, contrast, and brightness without harming the original photo.
You can even perform a layer color swap to change specific colors within a layer seamlessly. Shall we dive in?
What is an Adjustment Layer?
Adjustment layers in Photoshop let you make non-destructive edits to color, tone, and contrast without altering the original image
Definition
An adjustment layer sits atop your original photo or any layer underneath and allows for modifications.
Imagine placing a transparent sheet over your photo, drawing your changes on it, and then being able to erase or alter those changes whenever you want.
Functionality
Unlike a regular layer, an adjustment layer affects all the reordering layers in Photoshop below it.
So, if you lighten or darken an image, every layer beneath this adjustment will be affected uniformly.
This keeps your image intact while allowing for dramatic transformations. Think of it as a redo button for the creative process.
Our Photoshop Layering Tutorials can be useful for understanding how to manage layer opacity, apply advanced blending modes, and use masking techniques to enhance image composition and achieve precise visual effects.
Types of Adjustment Layers
Here’s a quick comparison of the different adjustment layers you can use in our Photoshop Layering Tutorials :
Aspect
Overview
Brightness/Contrast
Adjust overall lightness or darkness
Levels
Fine-tune shadows, midtones, and highlights
Curves
Make precise tonal adjustments
Hue/Saturation
Change colors and their intensity
Color Balance
Adjust the color balance of the image
Black & White
Convert a color image to grayscale
Here are the different types of adjustment layers you can use in Photoshop:
Brightness/Contrast: Adjust the overall lightness or darkness.
Levels: Fine-tune shadows, midtones, and highlights.
Curves: Make more precise tonal adjustments.
Hue/Saturation: Change colors and their intensity.
Color Balance: Adjust the color balance of the image.
Black & White: Convert a color image to grayscale.
These tools open up a world of possibilities. Whether it’s correcting a photo taken in poor lighting or adding a unique color twist, there’s a tool for every need.
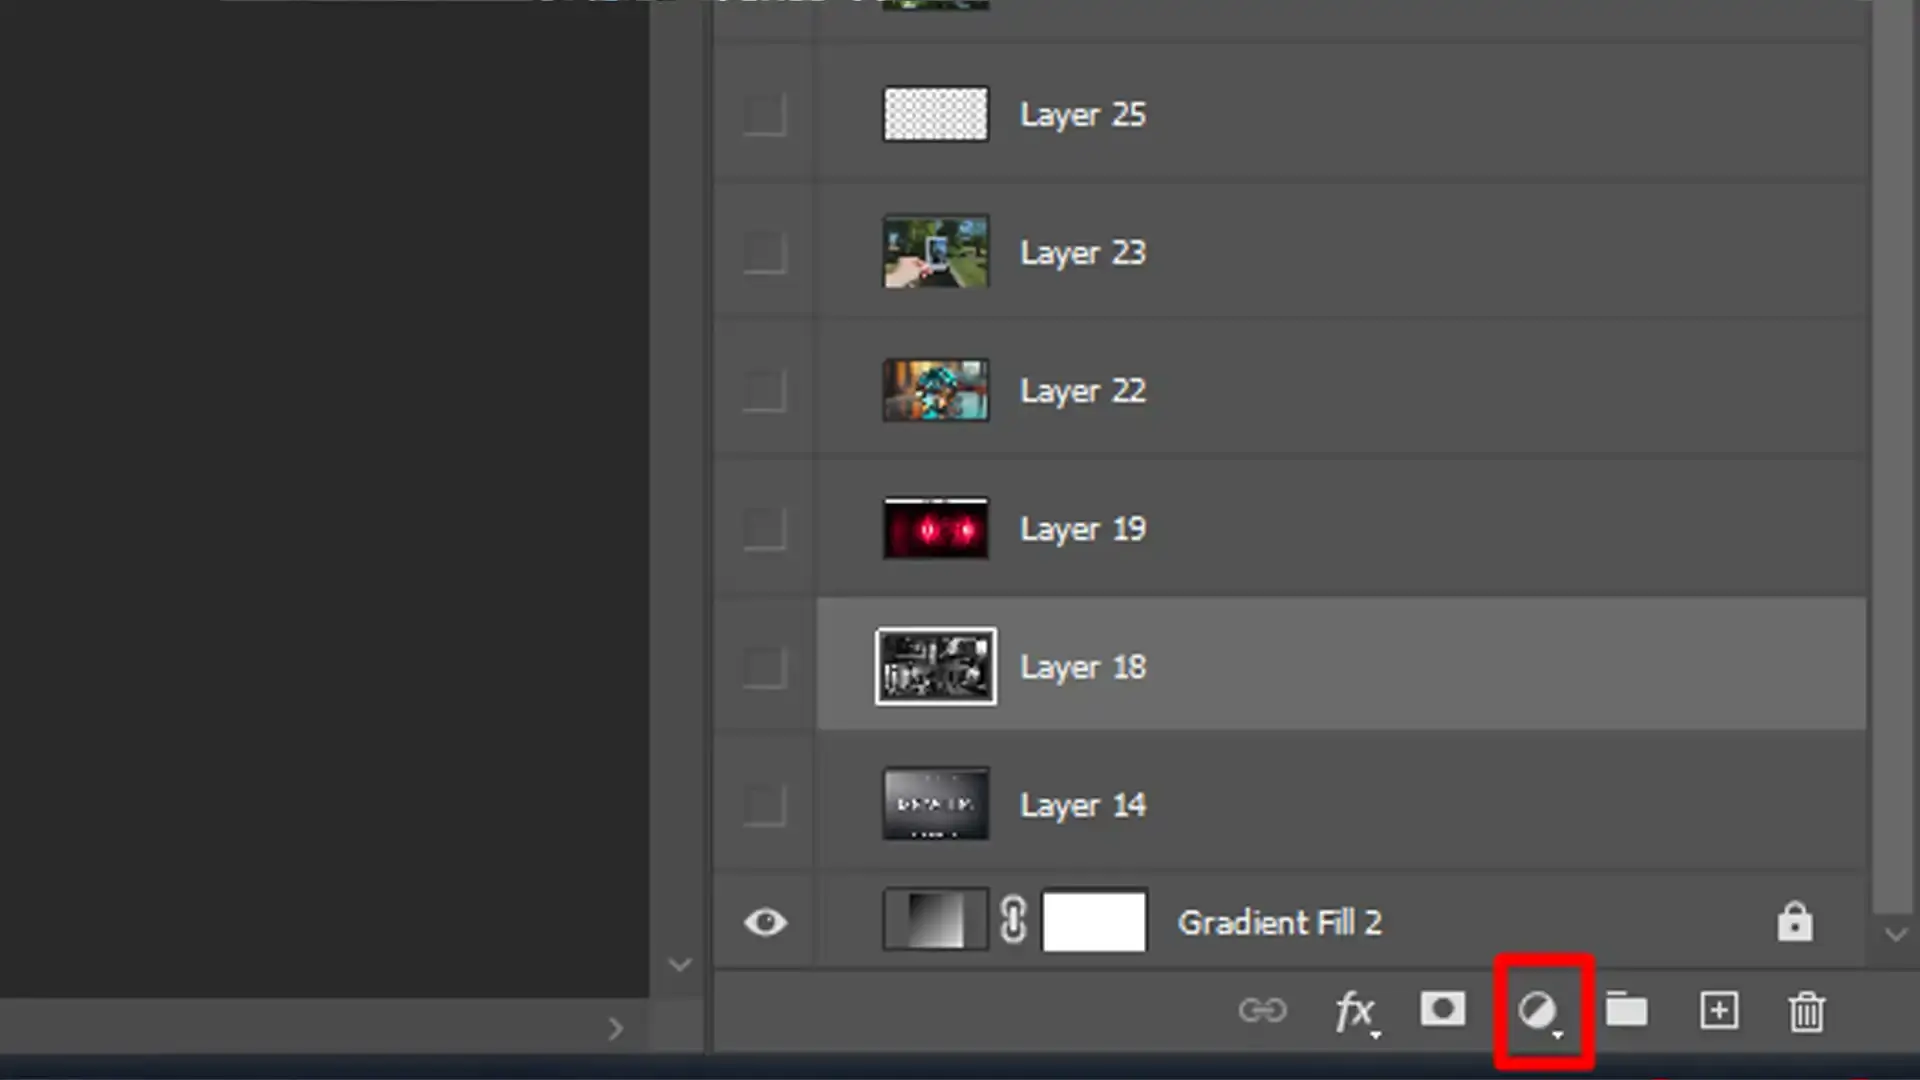
Applying Adjustment Layers
To apply adjustment layers in Photoshop, follow these steps for :
Open your image in Photoshop.
Go to the layers palette, usually on the right side of the screen.
Click the 'Create New Fill or Adjustment Layer' button at the bottom of the palette (it looks like a black-and-white circle).
Select your desired adjustment from the list.
A new adjustment layer appears in the layers panel, along with a properties panel where you can tweak settings.
Pro Tip: Use a layer mask with your adjustment layers! This lets you apply changes only to specific parts of your image.
Select the brush tool and paint black on the mask to conceal, white to reveal. Simple and effective, just like that!
You’ll have more control, flexibility, and creativity in your projects.
Perfecting Layer Masks
Layer masking allows you to hide or reveal parts of a layer without permanently altering your image. Here’s how to create and use them:
Steps to Create a Layer Mask
Open an image in Photoshop.
Ensure the layers panel is visible. If not, find it under 'Window.'
Click the 'Add layer mask' button at the bottom of the panel. This will create a white adjustment layer on your selected layer, indicating that everything on this layer is visible.
Hiding Sections of a Layer
Select the brush tool from the tools panel.
Make sure your foreground color is set to black.
Paint over the areas you want to conceal. Poof, they're hidden!
To reveal any areas you previously masked, switch the brush color to white and paint over the concealed areas.
Advanced Layer Mask Techniques
Let’s explore how to combine multiple masks for more precise and creative effects.
Combining Multiple Masks
Once you’re comfortable with basic masking, try combining multiple masks:
Add adjustment layers like Levels or Curves above your current image layer
Mask parts of these adjustments to apply changes selectively.
Experiment with blending modes for unique effects.
Using Gradient Masks
Another pro technique involves using gradient masks:
Create a new layer and apply a gradient to the mask for smooth transitions between hidden and revealed areas.
This is excellent for landscape photography where you might blend multiple exposures or sky enhancements.
Additional Tips for Mastering Photoshop Layering
To further enhance your skills, consider learning about the Content-Aware Fill in Photoshop for seamless edits and the patch tool in Photoshop for precise corrections.
These tools can complement your use of masking layers and broaden your editing capabilities.
Pro Tip: To keep organized, use layer groups. Group related layers together by selecting them and pressing Ctrl+G (Cmd+G on Mac).
This makes navigating your layers palette easier and helps manage complex projects.
Frequently Asked Questions
What are the steps for layering in Photoshop?
Open your project: Make sure the Layers panel is visible. If not, go to Window > Layers to display it.
Add a new layer: Click the "New Layer" icon at the bottom of the Layers panel. It looks like a sheet of paper.
Reorder layers: Drag and drop layers to reorder them, or use the layers panel to select different layers you want to work on.
How do I make everything into one layer in Photoshop?
Ensure visibility: Ensure all layers you want to merge are visible.
Select layers: Click on the top layer, then press and hold Shift, and click on the bottom layer to select them all.
Merge layers: Right-click on the selected layers and choose "Merge Layers" from the context menu. This will combine them into a single layer.
How do I arrange layers in Photoshop?
Select layer: Select the layer you want to move in the Layers panel.
Use Move Tool: Use the "Move Tool" from the toolbar or press "V" on your keyboard.
Reposition: Drag the layer to the desired position. If you need to move it up or down in the layer stack, you can drag it within the Layers panel or use the Layer > Arrange menu.
What techniques can I use to blend layers better in Photoshop?
Select layer: Select the layer you want to blend.
Adjust Opacity: Open the Layers panel and find the "Opacity" slider at the top. Adjust it to change how transparent the layer is, allowing layers below to show through.
Use Blending Modes: Experiment with different blending modes, which you can find next to the Opacity slider. These modes affect how the colors and light interact between layers.
Diving into Photoshop Layering tutorials has been a game-changer for my creative projects. The skills I’ve gained from these tutorials have dramatically enhanced my ability to produce complex and visually stunning images.
When I first started, the concept of layers seemed complicated, but these tutorials made it easy to understand and apply. Learning how to add shadows, use layer masks, and even perform a layer color swap has opened up endless creative possibilities.
If you’re looking to elevate your editing proficiency, I highlyrecommend checking out this comprehensive Photoshop course and the detailed Lightroom course.
Happy editing!
If this article has helped you, then Like and Share it with your friends
$2,061.00Original price was: $2,061.00.$1,061.00Current price is: $1,061.00. 27585
Download Your Free Guide Now!
Discover the secrets of photography with our printable guide! Master essential techniques like aperture, shutter speed, and ISO to create stunning images. Get your free printable PDF now and start turning your snapshots into masterpieces!