Transform your photos with the Photoscape 3D effect! Elevate your images with depth and dimension in Adobe Photoshop using just a few clicks.
Start by duplicating your original image on the background layer. Then, navigate to the layers panel and create a new layer using the new layer icon.
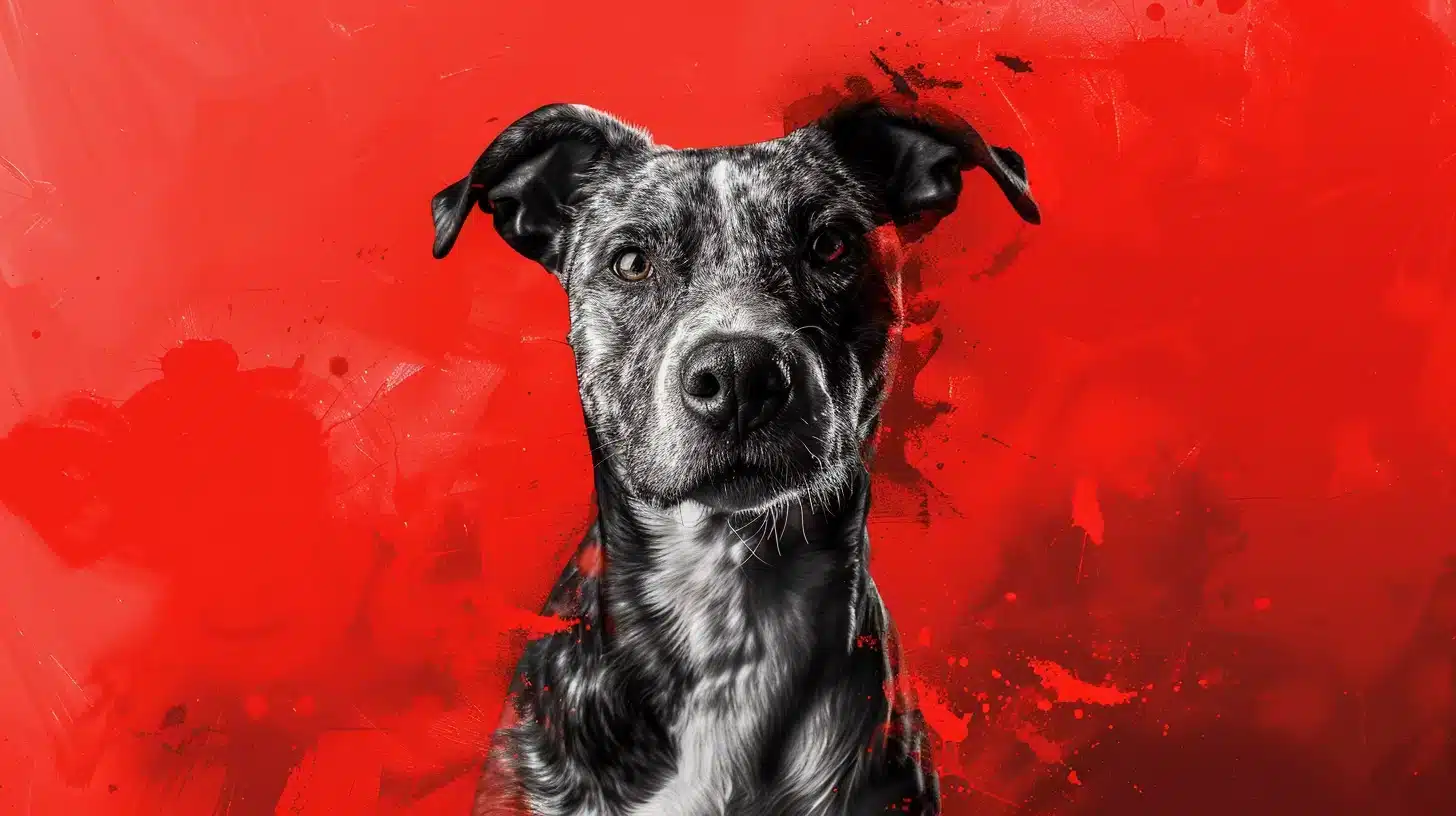
Next, explore the layer style dialog box to add depth and dimension. Use the green and blue channels so that the cyan outline appears.
Easily manage your edits with the visibility icon and layer icons. With this tutorial, you’ll master creating a captivating Photoscape 3D effect in Photoshop.
Table of Contents
Getting Started with PhotoScape 3D Effect 3D Effect
Downloading and Installing PhotoScape
- Go to the official PhotoScape website.
- Click on the download button to start.
- Once downloaded, find the installer file in your downloads folder.
- Double-click on the file and follow the on-screen instructions to install PhotoScape.
- After installation, open PhotoScape from your desktop or start menu.
Basic Interface Overview
The PhotoScape interface is designed to be user-friendly and easy to navigate. Here’s a quick overview:
- Menu Options: Located at the top of the screen, these include functions like open, save, and print.
- Main Workspace: Situated in the center, this is where you edit your photos.
- Tools Panel: Found on the left, this panel includes tools such as the crop tool, move tool, and more.
- Layers Panel: Located on the right, you manage your layers.
Pro Tip: Try experimenting with the 3D Effect in PhotoScape. It can add depth to your images by manipulating the green and blue channels. For more advanced editing, consider using Photoshop for tasks like removing shadows or adding texture to your photos.
Creating a PhotoScape 3D Effect
Step 1: Open Your Image
First, open PhotoScape and load your image. This can be done by clicking the ‘Open‘ option in the menu at the top of the screen. Ensure your image is clear and suitable for a 3D effect.
Step 2: Duplicate the Background Layer
Next, duplicate the background layer. Right-click on your image in the layers panel and select ‘Duplicate Layer.’
Step 3: Apply the PhotoScape 3D Effect
Utilize the layers panel to apply the PhotoScape 3D Effect. Switch to the duplicate layer and follow these sub-steps:
Adjusting Depth and Perspective
- Go to the 'FX' icon in the layers panel.
- Click on the icon to open the layer style dialog box.
- Select 'Blending Options,' then navigate to the 'Advanced Blending Section.'
- Uncheck the 'Red Channel' option under 'Channel.' This action isolates the depth.
Fine-Tuning the Effect
- With the 'Move Tool,' press the left arrow key to move the layer slightly.
- A cyan outline appears around the image, enhancing the 3D Effect.
- Maintain precision by holding the shift key as you adjust with the left arrow key.
Step 4: Save and Export
Finally, save your work. Go to ‘File‘ in the menu and select ‘Save As‘. Choose your preferred format, name your file, and click ‘Save.’ Your 3D effect masterpiece is ready!
Pro Tip: To create even more dynamic 3D effects, experiment with the blend mode options in the ‘Layer Style‘ dialog box.
Additional Tips for Enhancing Your PhotoScape 3D Effect
If you want to refine your 3D Effect further, consider using Photoshop for advanced editing. Tools like the Content-Aware Fill and Blending Modes in Photoshop can add more depth and realism to your images. Additionally, understanding the Difference Between Photoshop and Lightroom can help you choose the right software for your specific needs.
Tips and Tricks for Better PhotoScape 3D Effects
| Aspect | Overview |
|---|---|
| Ease of Use | PhotoScape offers a user-friendly interface, while Adobe Photoshop has extensive features with a steep learning curve. |
| Editing Capabilities | PhotoScape provides basic photo editing and collages, whereas Adobe Photoshop offers advanced editing, 3D effects, and professional tools. |
| 3D Effects | PhotoScape has limited 3D capabilities, while Adobe Photoshop provides extensive tools and detailed control. |
| Layer Management | PhotoScape offers simplified, basic layer functions, whereas Adobe Photoshop features advanced layer management with extensive options. |
| Compatibility | Both PhotoScape and Adobe Photoshop are compatible with Windows and macOS. |
Using Layers Effectively for Accomplishing Green and Blue Channels
To achieve stunning 3D effects, layering is key. Start by duplicating the background layer. The background layer gives you a safe backup.
Once duplicated, go to the layers panel. Adjust the new layer by selecting the ‘layer style dialog box‘ from the FX icon. This step paves the way for depth in your images.
In the layer style dialog box, click the ‘Blending Options‘. Fine-tune the green and blue channels, unchecking the red channel.
Enhancing with Shadows and Highlights from the Layer Style dialog box
Shadows and highlights add realism to a 3D effect. Select the ‘FX icon‘ again and explore options like ‘inner shadow.’
To create dynamic lighting, add highlights using the ‘Blending Options‘ in the layer style dialog box. Adjust the opacity and angle for natural effects.
Look at the visibility icon to compare changes. Toggle it to see the differences.
Experimenting with Different Angles
The angle of depth can dramatically alter the perception of the 3D Effect. Use the move tool to experiment with various angles.
Drag the duplicated layer slightly left or right. Observe how this creates depth without distorting the color image.
Different colors (like cyan and green) help visualize these changes better. Adjust until you feel the Effect is right.
A practical tip: For beginners focus on subtle shifts. Too much movement distorts the original image.
Pro Tip: Save every version while experimenting. This way, you can trace back any step without losing work.
Additional Tips for Using Photoshop
For those looking to refine their skills further, understanding essential tools in Photoshop is crucial. Tools like the Quick Selection Tool in Photoshop can help isolate areas quickly, making your workflow more efficient.
Moreover, learning how to use the Content-Aware Fill in Photoshop can save you time when removing unwanted elements from your original image, ensuring a cleaner final product.
You can find a comprehensive guide to mastering light and depth in photography by visiting the Aperture in Photography: A Comprehensive Guide to Mastering Light and Depth.
Common Mistakes to Avoid
Overdoing the PhotoScape 3D Effect
One common mistake many beginners make is overdoing the Effect.
When working with effects in Adobe Photoshop, it’s tempting to go all out. Remember, subtlety often works better. For instance, sometimes less is more when using the layer style dialog box to create 3D effects.
Double-clicking on the layers panel and adjusting the blue channels can help achieve a balanced look. Overly bold effects can distract from the original image.
Ignoring Image Quality
Another pitfall is ignoring image quality. Always start with a high-resolution image.
A low-quality photo can turn your work into a pixelated mess. Maintain image integrity by appropriately adjusting the size and resolution before applying any effects.
This ensures the final output remains crisp. It also means you get the best results using the ‘Quick Selection Tool.’
Neglecting Background Layer Elements
Neglecting background elements is a frequent oversight. Before adding two images, ensure the background layer complements the main subject.
Simple adjustments in the advanced blending section can make a huge difference. Ensure the brightness and contrast levels don’t overshadow your primary focus.
Also If you want to learn more tricks and tools about background in Lightroom please check out our How to Blur Background in Lightroom: A Step-by-Step Guide.
Additional Tips
For those interested in enhancing their skills, consider learning how to use the Content-Aware Fill in Photoshop for seamless edits or exploring Lightroom Shortcuts to speed up your workflow. These tools can significantly improve your editing efficiency and the quality of your final images.
Also, if you’re interested in this topic, you can read more about Photoshop vs Illustrator: Which One is the Best for You?
Frequently Asked Questions (FAQs)

How to get a 3D effect on photos?
- Choose a photo editing software that supports 3D effects.
- Select the photo you want to edit and upload it to the software.
- Look for a feature or tool labelled '3D effect' or similar.
- Apply the Effect and adjust the settings to achieve your desired look.
- Preview the changes and save your new 3D image.
Does PhotoScape still exist?
- Yes, PhotoScape is still available and actively maintained.
- You can download it from its official website or other software distribution platforms.
- PhotoScape offers various features, including photo editing, creating collages, and more.
How to make a 3D image?
- Select a photo editing tool that includes 3D capabilities.
- Upload the image you want to convert into 3D.
- Use the 3D feature to transform your image by adjusting depth and angle to simulate the Effect.
- Experiment with different settings to enhance the 3D feel.
- Save your newly created 3D image.
How do you create a 3D effect in Photoshop?
- Open Photoshop and load the image you want to edit.
- Navigate to the '3D' menu and select 'New 3D Layer from File' for your image.
- Adjust the 3D settings, depth, texture, and light to get the desired Effect.
- Use tools like 3D rotation and pan to fine-tune the image placement.
- Render the image to apply the Effect fully and save your work.

Conclusion
Mastering the Photoscape 3D effect has boosted my photo editing skills by adding depth and dimension to my images. This tool makes photos stand out, whether you’re a beginner or experienced. Using the new layer icon helps keep edits organized.
For more advanced techniques, check out my Photoshop Course and Lightroom Course. They’ve transformed how I edit photos.
Explore Adobe Photoshop and Adobe Lightroom for more powerful tools. Try the Effect and watch your images come to life!
Read more about Photoshop:


Creating a stunning visual can be challenging, but with the Photoscape 3D effect, it becomes a lot easier. Imagine transforming your flat images into captivating three-dimensional masterpieces. Intrigued? Let me guide you through this exciting process, step by step, ensuring your photos stand out. Ready to dive in and learn how to elevate your imagery? Let’s get started!
How to Create PhotoScape 3D Effect
Step 1: Open Your Image
Start PhotoScape and open your image. Find your photos on your computer or connected device.Step 2: Duplicate the Background Layer
Press “Ctrl + J” on Windows or “Cmd + J” on Mac to make a duplicate. Now, you have two layers – the original and a duplicate.Step 3: Open the Layer Style Dialog Box
Double-click on the duplicate layer to open the Layer Style dialog box. Look for “Blending Options” in the list.Step 4: Adjust the Green and Blue Channels
In blending options, uncheck the green and blue channels for the duplicated layer.Step 5: Offset the Layer
Use the move tool to drag the duplicated layer to the side. A ten-pixel move is good. Press the left arrow key or right until a cyan outline appears.Step 6: Merge Layers
When you’re happy with the look, merge the two layers. Right-click the duplicated layer and select “Merge Down” (or press “Ctrl + E”/”Cmd + E”).Final Touches
Use the crop tool to trim any unwanted edges from the image. This will give your image a clean finish. Pro Tip: Want more depth? Double-click the layer style settings again and try the “Bevel & Emboss” effect. This adds extra shading to your image, making it stand out! Remember, practice makes perfect. Keep adjusting until you get the 3D look you want in PhotoScape. Both old and new users find this method easy and effective. By following these steps, you can create a PhotoScape 3D effect quickly. Happy editing! For more advanced photo editing techniques, you might also want to explore using the Patch Tool in Photoshop or learn about Photoshop and Lightroom Shortcuts to speed up your workflow. Added these keywords: Patch Tool in Photoshop, Lightroom Shortcuts.Introduction to PhotoScape 3D Effects
<table style=”border-collapse: collapse; width: 100%;”> <thead> <tr style=”background-color: #028DF4; color: white; font-weight: bold;”> <th style=”border: 1px solid #DDDDDD; text-align: left; padding: 8px;”>Aspect</th> <th style=”border: 1px solid #DDDDDD; text-align: left; padding: 8px;”>Overview</th> </tr> </thead> <tbody> <tr> <td style=”border: 1px solid #DDDDDD; text-align: left; padding: 8px;”><strong>Ease of Use</strong></td> <td style=”border: 1px solid #DDDDDD; text-align: left; padding: 8px;”>PhotoScape 3D Effect is beginner-friendly with straightforward steps. Photoshop 3D Effect requires familiarity with layers and blending.</td> </tr> <tr> <td style=”border: 1px solid #DDDDDD; text-align: left; padding: 8px;”><strong>Depth and Detail</strong></td> <td style=”border: 1px solid #DDDDDD; text-align: left; padding: 8px;”>PhotoScape provides basic 3D effects with channel adjustments. Photoshop offers more control with advanced blending options.</td> </tr> <tr> <td style=”border: 1px solid #DDDDDD; text-align: left; padding: 8px;”><strong>Additional Effects</strong></td> <td style=”border: 1px solid #DDDDDD; text-align: left; padding: 8px;”>PhotoScape is limited to basic adjustments like channel shifts. Photoshop allows for extensive PhotoScape 3D effects like bevel & emboss.</td> </tr> <tr> <td style=”border: 1px solid #DDDDDD; text-align: left; padding: 8px;”><strong>Learning Curve</strong></td> <td style=” border: 1px solid #DDDDDD; text-align: left; padding: 8px;”>PhotoScape has a quick learning curve, suitable for new users. Photoshop has a steeper learning curve due to feature complexity.</td> </tr> <tr> <td style=”border: 1px solid #DDDDDD; text-align: left; padding: 8px;”><strong>Software Requirements</strong></td> <td style=”border: 1px solid #DDDDDD; text-align: left; padding: 8px;”>PhotoScape is standalone software with basic editing features. Photoshop is part of Adobe Creative Suite with extensive tools.</td> </tr> <tr> <td style=”border: 1px solid #DDDDDD; text-align: left; padding: 8px;”><strong>Final Output Quality</strong></td> <td style=”border: 1px solid #DDDDDD; text-align: left; padding: 8px;”>PhotoScape is good for simple PhotoScape 3D effects on basic images. Photoshop is suitable for professional-grade 3D enhancements.</td> </tr> </tbody> </table> Hey there! Today, we’re diving into PhotoScape 3D effects using Photoshop. It’s simpler than you think and can be done with just a few clicks. Let’s make your images pop.Why 3D? A Quick Overview
PhotoScape 3D effects bring depth to your photos. Imagine your image jumping off the screen. It’s fun and engaging.Step-by-Step Guide to Creating PhotoScape 3D Effects
Step 1: Setting Up Your Image
Open your image in Photoshop. Duplicate the background layer by right-clicking on it and selecting “Duplicate Layer.” Now, you have two layers—one original and one duplicate.Step 2: Access the Layer Style Dialog Box
Double-click the duplicated layer to open the layer style dialog box. This tool is essential for adding effects. Locate the blending options within this tool.Step 3: Adjusting Blending Options
In the advanced blending section, uncheck the channels for the duplicated layer. This isolates the red channel and gives that 3D look.Step 4: Creating the Cyan Outline
Use the move tool. Select the duplicated layer and drag it to the left using the arrow key (Left). An outline (Cyan) will appear around your image, giving it that Effect.Step 5: Merging and Cropping
Merge the two layers by right-clicking on the duplicated layer and choosing “Merge Down.” Use the crop tool to trim extra edges and tidy up your image. Pro Tip: To add depth, experiment with the angle & emboss Effect. This small adjustment can enhance the Effect significantly. There you go! You’ve learned how to create a PhotoScape 3D effect with the channels easily. Keep practicing, and soon, you’ll master more complex photo edits. For more advanced techniques, consider exploring the Content-Aware Fill in Photoshop or learning to Remove Shadows in Photoshop. Added these keywords: “Content-Aware Fill in Photoshop, Remove Shadows in Photoshop.”Getting Started with PhotoScape
So, you’re ready to jump into Photoshop and Lightroom. Great choice! Let’s start with a simple tutorial to create a cool PhotoScape 3D effect.Step 1: Open Your Image
Launch PhotoScape and open your original image. Find the layers panel on the right side of the screen.Step 2: Duplicate the Image Layer
Select the image layer you want to duplicate. Right-click and choose “Duplicate Layer.” A new layer appears above the original layer.Step 3: Access the Layer Style Dialog Box
With your duplicated layer selected, go to the layer style dialog box by double-clicking on the layer thumbnail.Step 4: Modify Blending Options
In the blending options, uncheck the green and blue channels, checking only the red channel. This creates the PhotoScape 3D Effect.Step 5: Offset the Red Channel
To make your cyan outline appear, use the move tool and offset the red channel by holding Shift and pressing the arrow key (Left) a few times.Step 6: Merge Layers
Select both layers in the layers panel, right-click, and choose “Merge Layers.” This combines them into one, locking in the 3D Effect.Step 7: Crop the Image
Finally, crop the image to remove any unwanted edges. This step makes sure your final image looks clean. Pro Tip: Want to go further? Try adding a bevel & emboss Effect under the fx visibility icon in the layer style dialog box to enhance the depth of your PhotoScape 3D Effect. For more advanced editing, consider exploring the Content-Aware Fill in Photoshop or learning to Remove Shadows in Photoshop. Happy editing! Added these keywords: “Content-Aware Fill in Photoshop, Remove Shadows in Photoshop.”Step-by-Step Guide to Creating 3D PhotoScape Effect
Opening Your Image
First, open PhotoScape and load your original image. Use the “File” menu to find and open it. This is your starting point.Duplicating Layers
Next, duplicate the image layer:- In the layers panel, right-click on the background layer and select “Duplicate Layer.”
- You will see a new layer icon.
- Keep a copy of the original image if you need to undo changes.
Adjusting Colors
Now, adjust the colors:- Double-click on the duplicated layer thumbnail to open the layer style dialog box.
- In the advanced blending section, uncheck the channels, leaving only the red channel checked.
- This makes the colors look like they are shifted apart.
Applying the PhotoScape 3D Effect
To apply the PhotoScape 3D Effect:- Offset the channels using the move tool.
- Hold the shift key and press the arrow key (Left) to offset the red channel.
- The classic 3D look with a cyan outline appears in the design.
Final Touches
Lastly, merge both layers by selecting them, right-clicking, and choosing “Merge Layers.” Crop the image to remove any unwanted edges. Your 3D Effect is now visible and more polished. Pro Tip: Add a bevel & emboss Effect using the fx icon to give your image an extra 3D pop. Now, you’re ready. Try these steps and make your images jump out! Added these keywords: “How to Remove an Object in Adobe Photoshop, How to Crop in Adobe Photoshop.”Tips and Tricks for Better PhotoScape 3D Effects
Creating a fantastic effect in your images might seem harsh, but it’s pretty simple once you know how. Follow these steps to get started.Step-by-Step Guide
Step 1: Duplicate Your Background Layer
Open Photoshop and load your image. Right-click on the background layer and select “Duplicate Layer.” This keeps the original image safe.Step 2: Adjusting Colors
Double click on the duplicated layer thumbnail. Uncheck the channels, leaving only the red channel checked. This sets up the colors for the Effect.Step 3: Offsetting Channels
Use the move tool, press the shift key, and tap the left arrow key. This offsets the channels and starts creating the 3D look.Step 4: Merge Layers
Select both layers, right-click, and choose “Merge Layers.” This locks in your Effect permanently.Step 5: Fine-Tuning and Cropping
Crop any unwanted edges from the image. Add a “Bevel & Emboss” effect by clicking the fx icon for an extra touch.Step 6: Troubleshooting and Tips
- Don’t overdo the PhotoScape 3D Effect. Subtlety often works better.
- The more you practice, the better your results will be.
Common Mistakes to Avoid from Creating PhotoScape 3D Effects
Creating a 3D Effect in Photoshop can be fun but tricky. Mistakes happen often. Knowing these common mistakes saves time and improves your final image.Key Mistakes:
1. Not Duplicating the Background Layer
Forgetting to duplicate the background layer is like losing an undo button. Always start by making a duplicate. Click on the layer icon and duplicate it to keep your original image safe.2. Messing Up the Color Channels
When adjusting the Effect in Photoshop, missing a step in color channel adjustment can ruin the color image. Focus on unchecking the green and blue channels and leaving only the red. Don’t’ toggle randomly; stick to the sequence.3. Incorrect Channel Offsets
Offset only the blue and green channels while keeping the red in place. Moving all the colors won’t’ give you the effect you want.4. Ignoring the Layers Panel
Ignoring the layers panel is a one-way ticket to chaos! Keep track of what layer you’re on. Click the eye visibility icon to view changes layer by layer.5. Overdoing the PhotoScape 3D Effect
Big effects are excellent, but subtlety often works better. Avoid pushing your channel offsets too far. A gentle offset provides the illusion of depth without ruining your color image. Pro Tip: Use the new layer icon to add a separate layer to apply the Effect. This helps if you need to tweak something later without altering the main image. For more insights, check out Photoshop vs Illustrator: Which One is the Best for You? Following these steps—duplicating background layers, properly managing color channels, using the layers panel, and maintaining subtlety will enrich your Effect in Photoshop. Happy editing! For more advanced tips, consider exploring the Difference Between Photoshop and Lightroom to understand how each tool can complement your workflow. Added these keywords: “Difference Between Photoshop and Lightroom, background layers.” In conclusion, using the photoscape 3D Effect has changed how I approach digital art, adding depth and dimension to my projects. If you want to improve your skills, check out my Photoshop Course and Lightroom Course. These courses have helped me, and I’m sure they’ll help you, too. For more information on the tools I use, please visit Adobe Photoshop and Adobe Lightroom. These links will take you to the official Adobe pages.Course

Light Effect Photoshop


Lightroom Course 2025

Adobe Photoshop Course 2025

Photo Editing Course


