Merge Layers Photoshop: A Simple Guide for Beginners
Merge Layers Photoshop: A Simple Guide for Beginners
If you’ve ever wondered how to merge layers in Photoshop effectively, you’re in the right place. Imagine creating stunning visuals with seamless layer integration, saving time, and boosting your workflow efficiency.
In this article, I’ll guide you through the essential steps to combine layers like a pro. By the end, you’ll have a solid grasp of merging techniques that can elevate your Photoshop projects.
Ready to transform your editing skills?
Let’s dive in!
Table of Contents
Why Merge Layers Photoshop?
One of the main advantages is reduced file size. Combining all the layers helps in decreasing the file size of your Photoshop document.
A smaller file is easier to store and share. So, it is a win-win situation.
Streamlines Your Workflow
Merging layers helps streamline your workflow. Managing fewer layers makes the process smoother and faster. Especially when you are done editing certain parts, merging them lets you focus on other edits without distraction.
Integrating techniques to blend pictures in Photoshop effectively streamlines your workflow by simplifying the process of combining images seamlessly, saving time and enhancing productivity.
Avoids Mistakes
Another major benefit is that it prevents mistakes. You will not accidentally move part of an image that you have finished adjusting.
This keeps your edits secure and intact.
When to Use
You want to merge layers once you are sure you won’t need to adjust them individually anymore.
A good practice is to save a backup of your original layers, just in case.
The auto save feature in Photoshop is crucial for protecting your work. It automatically saves your progress, ensuring you have a backup in case of unexpected crashes or errors.
This feature provides peace of mind, allowing you to focus on creativity without worrying about losing your hard work.
Step-by-Step: How to Merge Observable Layers
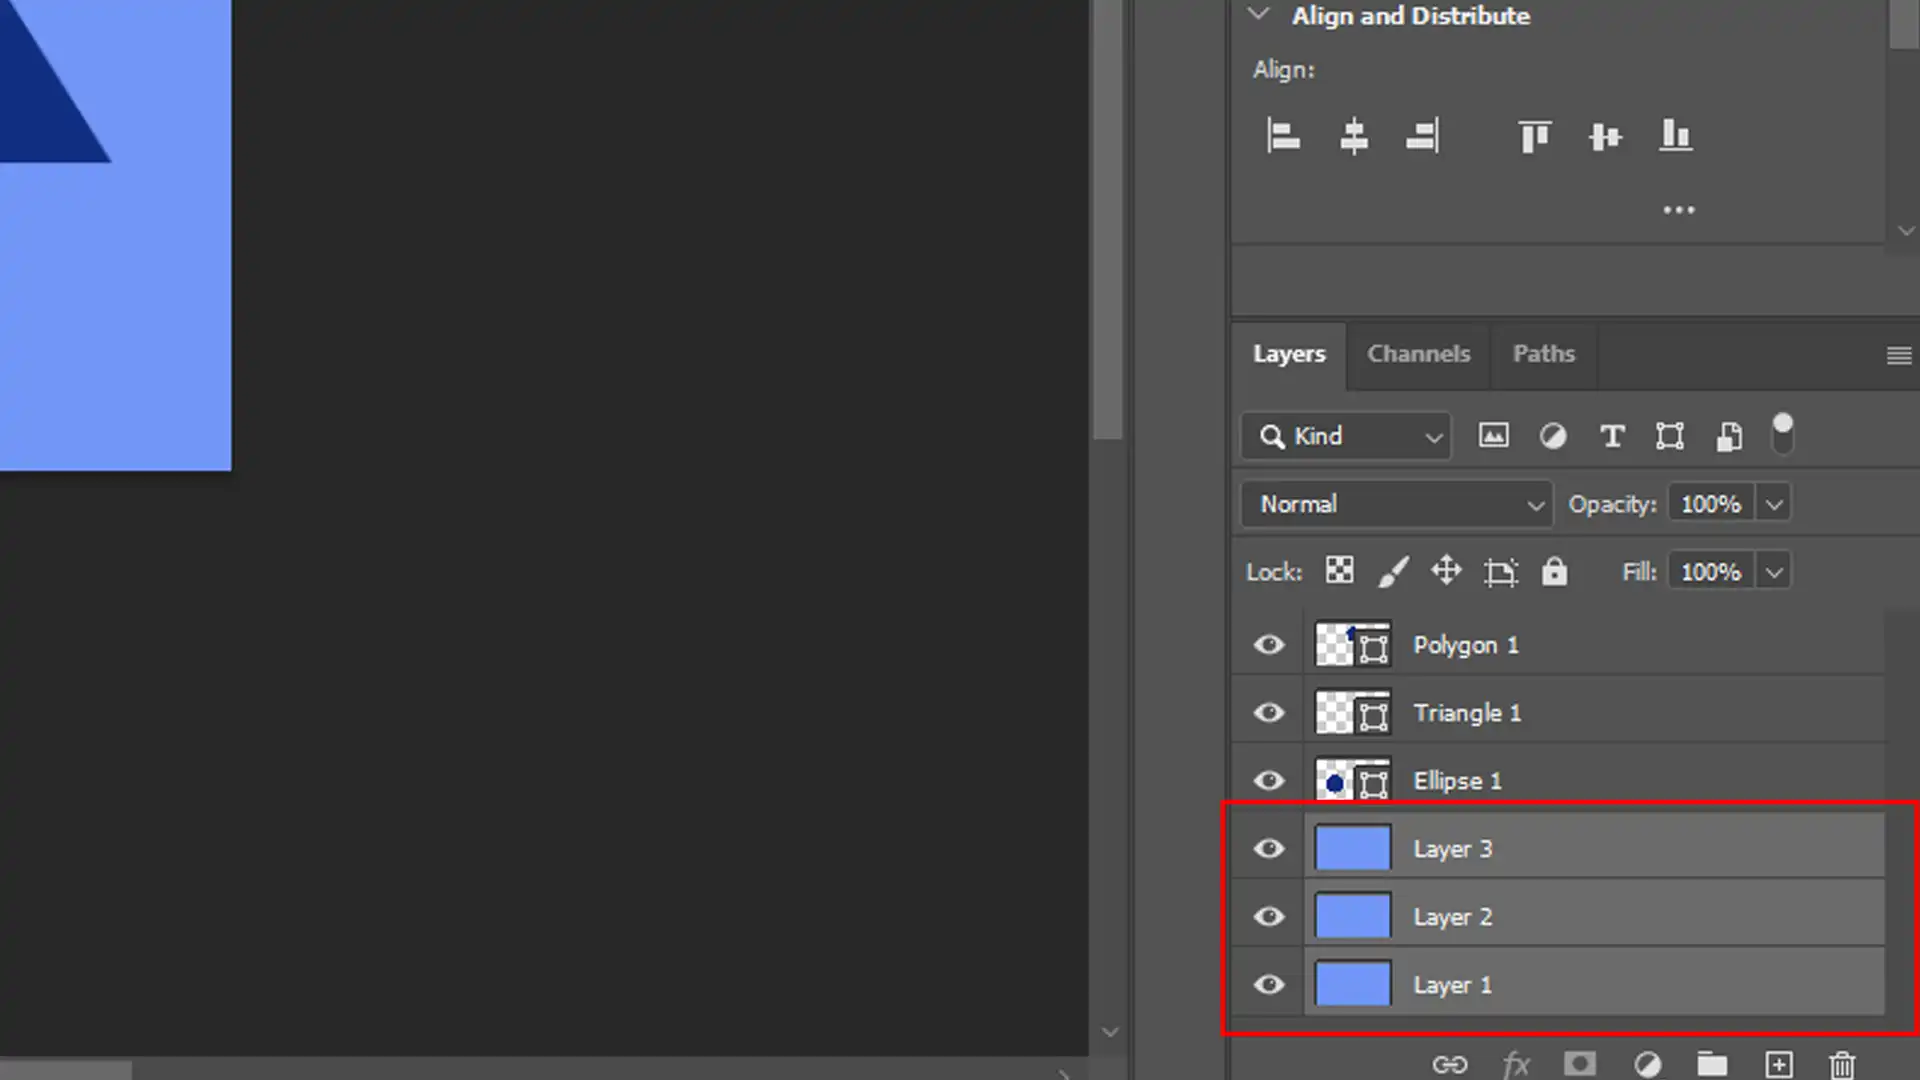
First, select the several layers you want to merge in the layers panel.
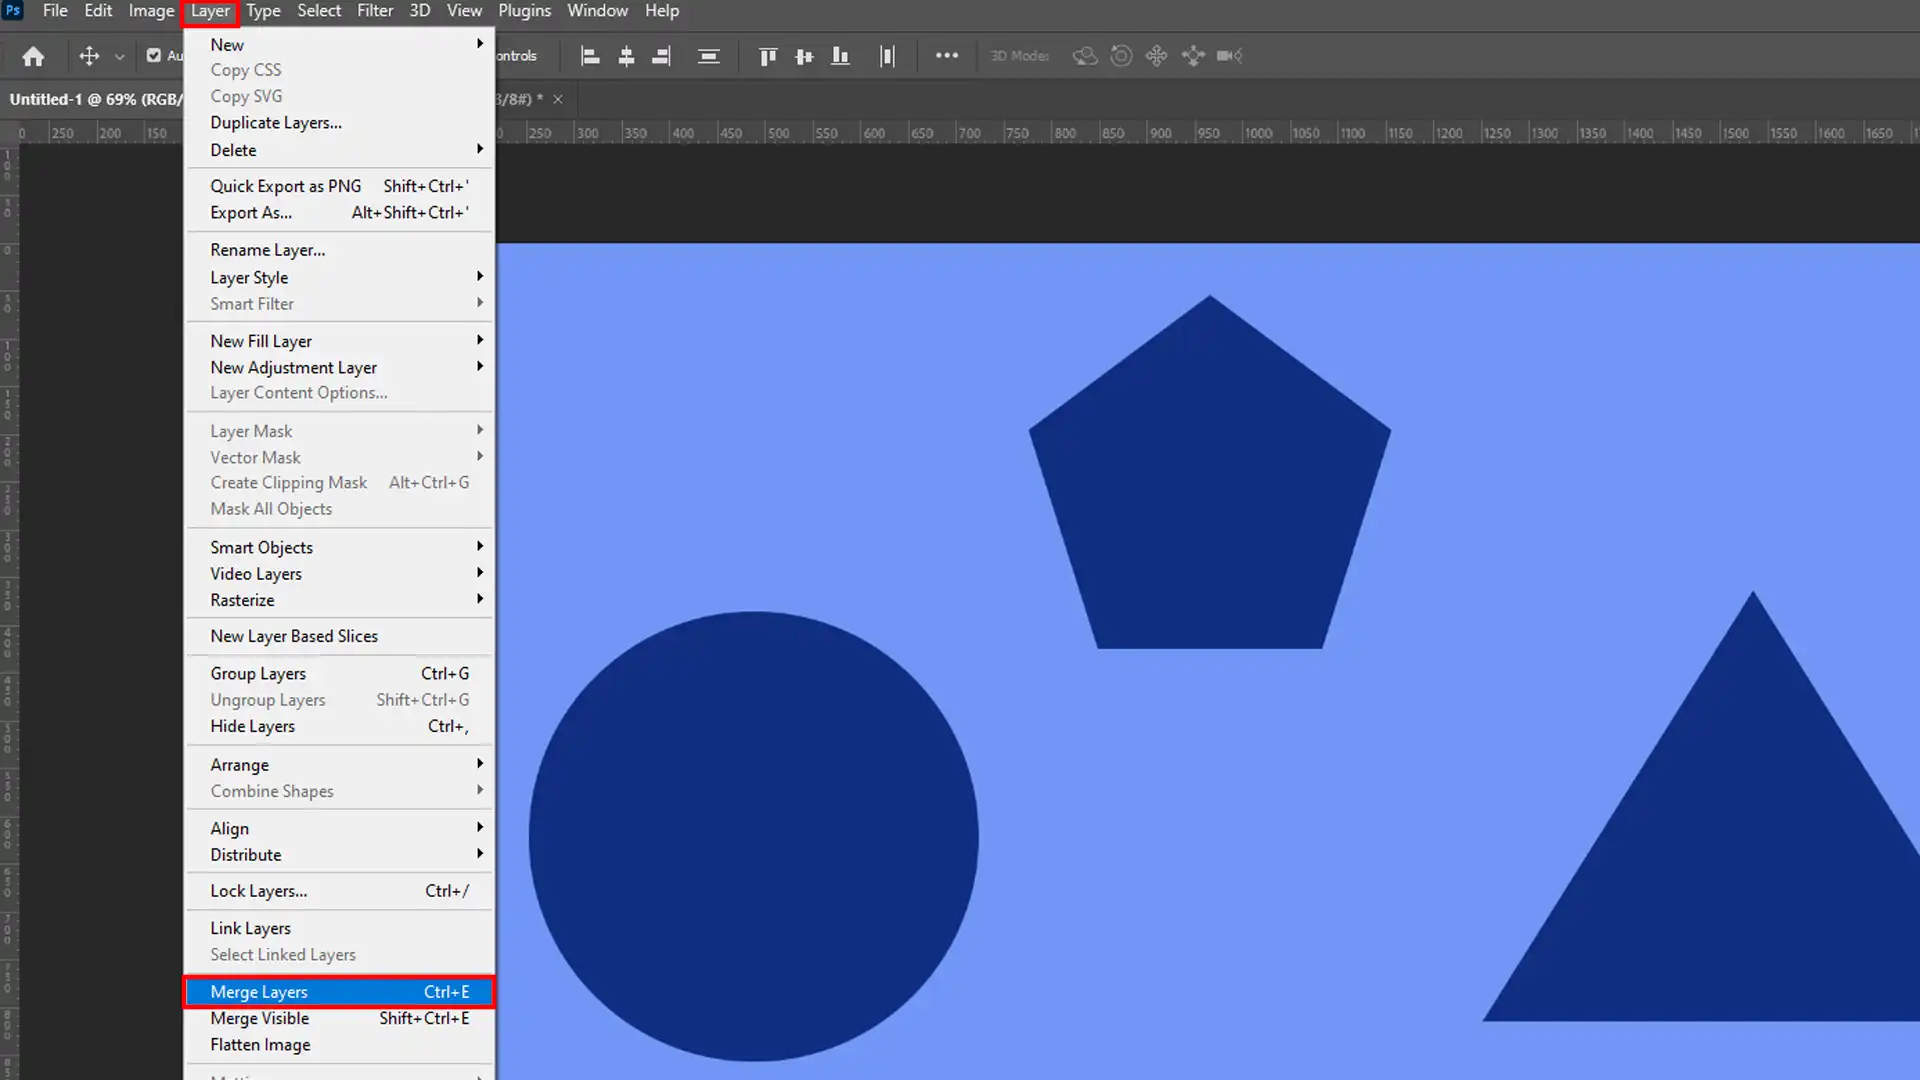
Right-click or go to the layer menu at the top.
Pick "Merge Layers" to combine them into a single layer.
If you want to merge visible layers only, use the "Merge Visible" option.
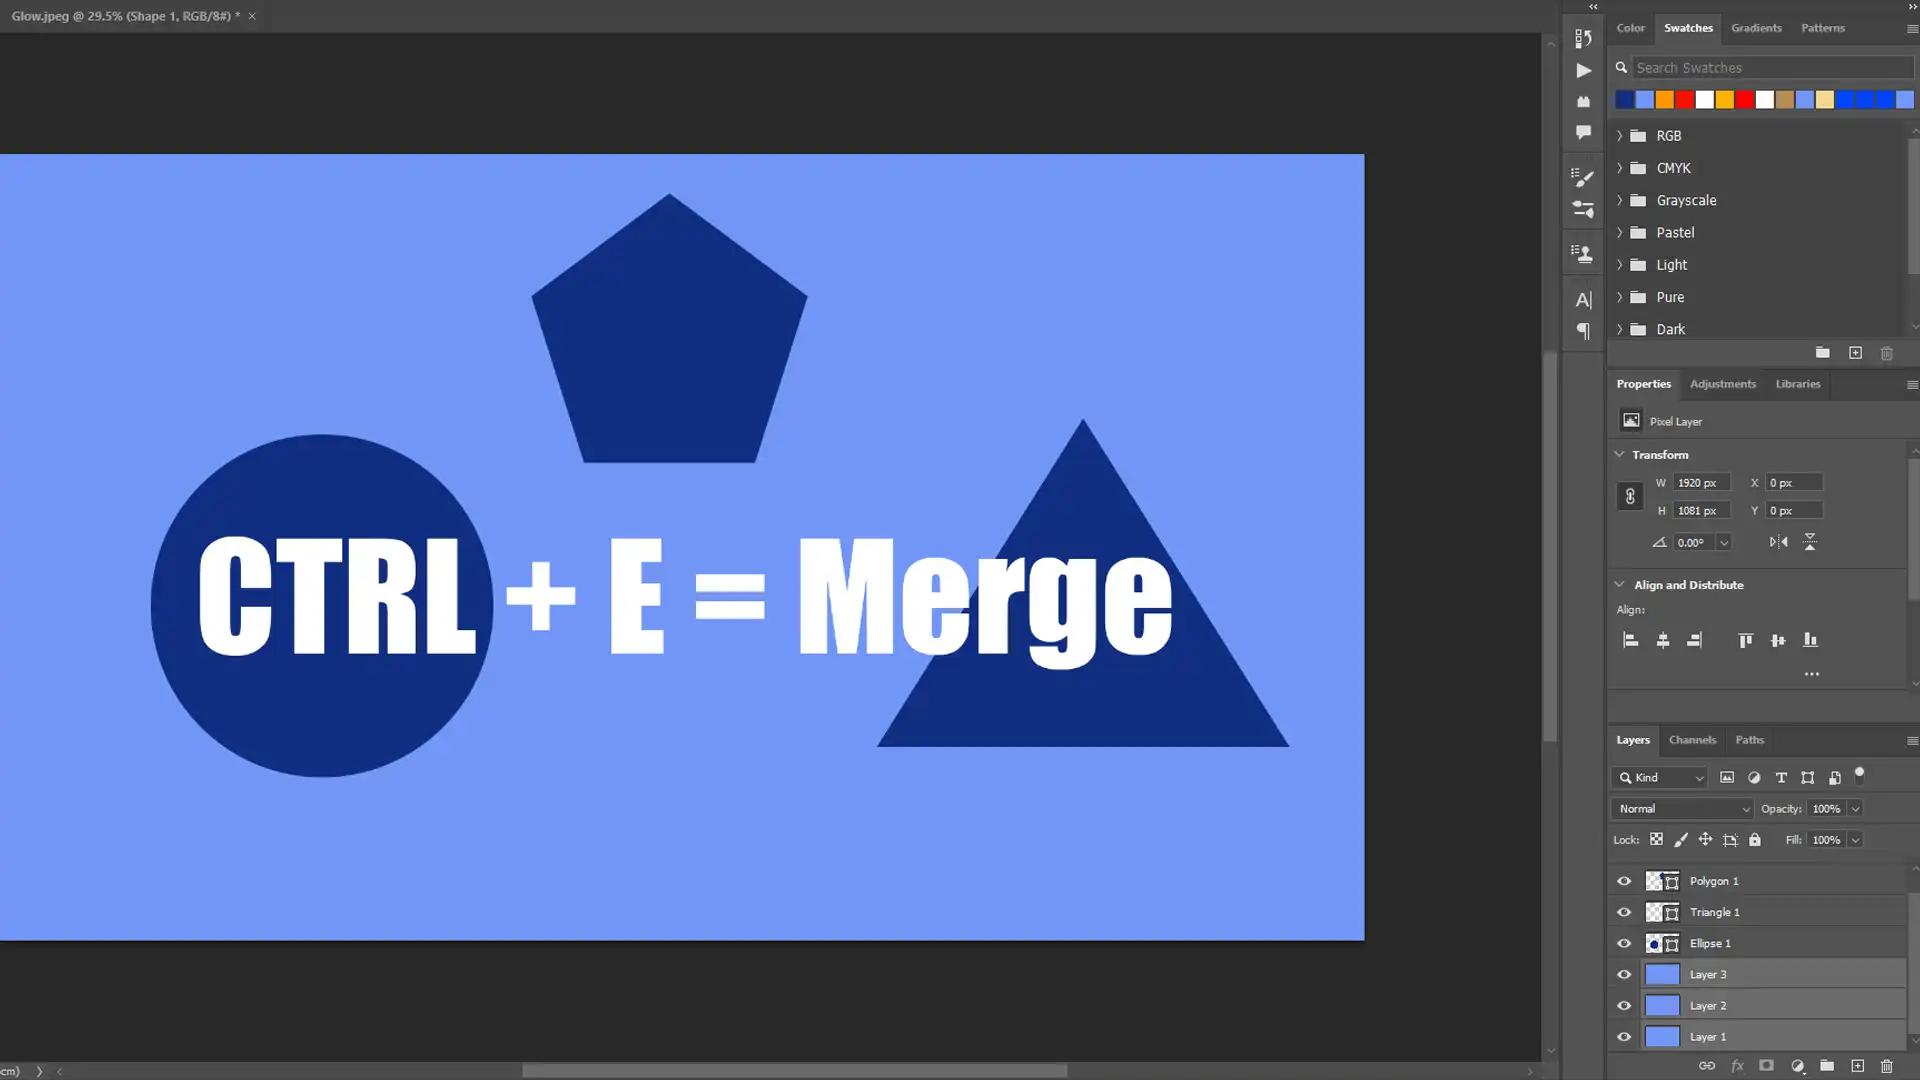
For a quicker method, use the keyboard shortcut "Ctrl E".
Pro Tip: Before you flatten the image, consider creating a new layer or saving a copy. This ensures you keep the flexibility of the originallayers for any future adjustments.
Additionally, familiarize yourself with essential tools in Photoshop to enhance your editing efficiency.
Essential Tools in Photoshop for Layer Management
When working with several layers in Photoshop, utilizing essential tools can significantly enhance your editing process.
To start, make sure to select “Merge Visible” if you want to combine all visible layers while keeping hidden layers untouched.
If you’re looking to consolidate specific layers, you might use the “Select Merge Layers” option to combine one or more layers into a single layer.
To manage layers more effectively, consider using linked layers to keep the relationship between layers intact while you perform merges.
When merging, it’s crucial to manage existing layers carefully; combining the top layer with other layers can help streamline your workflow.
If the top layer is crucial, you may want to merge it with other layers selectively to ensure that its details are preserved.
Remember that merging the top layer first can simplify your process, but always review how it interacts with other layers before finalizing your edits.
By understanding these tools and their functions, you can better manage your layers and achieve more precise and efficient results in your Photoshop projects
Step-by-Step Guide to How to Merge Layers in Photoshop
Let’s dive into the essentials of merging layers in Adobe Photoshop. This easy guide will walk you through the process, making your workflow smoother and faster.
If you’re looking to dive deeper, a Photoshop layering tutorial can make learning how to merge layers in Photoshop much easier.
These tutorials provide clear, step-by-step instructions to help you combine your layers efficiently and enhance your overall workflow.
Selecting the Visible Layers
First, go to the Layers panel. Here, you can see all the layers in your project. To start, hold down the Shift key and click on the layers you want to merge.
This will highlight them. Remember, you can’t merge hidden layers, so make sure all the layers you want are visible.
Using the Menu
After selecting the layers, right-click on one of the highlighted layers. A menu will appear. Select “Merge Layers” or “Merge Visible”.
If you want a quicker method, press Ctrl E. This will instantly merge the selected layers into a single layer.
Checking the Final Layer
It’s always a good idea to double-check your work. Look at the Layers panel again to see the results. The merged layer should appear above the bottom layer in the stack.
Ensure that everything looks right and clicking on each layer confirms the merge.
Pro Tip: Before merging, save a backup of your original work. This way, if you make a mistake, you can easily revert back. To do this, create a new layer and copy all the layers into it.
And there you have it! Follow these steps and you’ll seamlessly merge layers in Photoshop every time.
Using Keyboard Shortcuts for Merging
Merginglayers in Adobe Photoshop can save time and help keep your workspace organized. Pressing “Ctrl E” is one way to merge.
This shortcut merges the selected layers into one layer. When you have multiple layers, this method is efficient.
Integrate empower your editing with new layer shortcuts to enhance using keyboard shortcuts for merging.
These shortcuts streamline your workflow and make merging layers faster and easier.
Integrating keyboard shortcuts in Photoshop has made my editing much faster. Using Keyboard Shortcuts for Merging helps me work more efficiently, saving time and keeping my workflow smooth and organized.
Steps to Merge Layers
Open the Layers Panel: First, go to the Layers panel. Make sure the layers you want to merge are visible. If they are not, clicking them will make them visible.
Select Multiple Layers: Hold down the Shift key and click the layers. This will select multiple layers at once.
Merge Layers: Next, right-click one of the selected layers. A menu appears. Select "Merge Layers" or "Merge Visible." These options combine the selected layers or all visible layers. Another way is to use the "Layer" menu. In this menu, find "Merge Visible." This merges all visible layers in your project.
Use Keyboard Shortcut: If you need more control, you can merge specific layers only. Press "Ctrl E" to merge selected layers. This keyboard shortcut is quick. You see the merged layer in the Layers panel. Check to see if everything looks right.
Why Merging Helps
Reduces clutter, making it easier to find layers
Simplifies your project structure by combining multiple layers
Lowers file size, which helps with performance
Safeguarding Your Work
Ensure you save a backup of your original image before merging. Create a brand new layer and copy all layers into it. This keeps your work safe.
Pro Tip: To keep the merged layer’s transparent areas intact, use “Layer Mask”. Do not flatten the image fully if you still need separate layer adjustments.
To keep the merged layer’s transparent areas intact, refer to the ultimate guide for layer masking in Photoshop. This guide helps you effectively apply layermasks, ensuring you can maintain separate layeradjustments without fully flattening the image.
This technique hides parts of the linked layers without deleting them. For more advanced editing, consider using Lightroom for additional adjustments.
Alternative Methods for Merging Layers in Photoshop
We often stick to the tried-and-true methods in Photoshop, but there are always more efficient ways to do things. Merging layers might sound simple.
Sure, you can hit “Ctrl E.” However, let’s explore some alternative methods to get the job done better and faster.
Method
Description
Pros
Cons
Using the Layer Menu
Go to “Layer” > “Merge Layers” or “Merge Visible”.
Simple and straightforward
Limited control over specific layers
Combining Linked Layers
Link layers and select “Merge Linked”.
Maintains relative positioning
Requires layers to be linked first
Using Clipping Masks
Merge layers without affecting the mask.
Keeps specific areas intact
May be complex for beginners
Flattening the Image
Use “Flatten Image” to combine all layers.
Reduces file size significantly
Cannot edit individual layers later
Integrating how to merge photos in Lightroom serves as a great alternative to Photoshop by simplifying the photo merging process.
This approach streamlines your workflow and allows you to create stunning composite images efficiently.
Using the Layer Menu
The layer options is your best friend.
Go to the menu bar at the top of the screen. Look for “Layer.” Click it, then click “Merge Layers” or “Merge Visible.”
This approach is straightforward. But let’s dig a bit deeper.
Combining Linked Layer Panel
When working with linked layers, merging them can become a little tricky.
Simply merge linked layers by first ensuring they are linked. Click the chain icon next to each layer. Then go back to the layer options and select “Merge Linked.”
Using Clipping Masks
Clipping masks in Photoshop are useful when you want to keep specific areas intact. These can be merged without affecting the mask.
Select the layers you need. Right-click, then pick “Merge Layers.” This keeps your clipping mask while your layers combine.
Flattening the Image
Sometimes you need to flatten the image for various reasons, such as exporting it for web use. Select “Flatten Image” from the layer menu.
This action combines all layers into a single layer, reducing the file size significantly.
Keep in mind that once you flatten image, you cannot edit individual layers, so be sure to save a copy of your project with layers intact if you need to make adjustments later.
Composite Images and Workflow
If you’re creating a composite image, merging layers makes the workflow easier. Select several layers that form part of the composite.
Use “Ctrl E” or go through the menu bar. Either way, the combined layers keep your workspace efficient.
Pro Tip: Want to keep some layers intact while working on others? Use the Clipping Mask Hide technique.
Click “Create Clipping Mask” for selected layers. It keeps some of your layers safe from unintended edits.
Try out these methods to see which one makes your editing process smoother. It’s all about efficiency and keeping things organized.
Integrating a Lightroom HDR merge can significantly enhance your composite images and streamline your workflow.
This technique combines multiple exposures to create balanced and detailed images effortlessly, making your editing process more efficient and your final results more impressive.
Frequently Asked Questions
How to blend two layers together in Photoshop?
Follow these steps to blend two layers together:
Open your project and select the two layers you want to blend from the Layers panel.
Click on the layer mode dropdown at the top of the Layers panel (default is 'Normal').
Choose a blending mode that suits your needs (e.g., Multiply, Screen, Overlay).
Adjust the opacity slider to get the desired effect.
How to merge 3 layers?
Ensure all three layers are visible and unlocked in the Layers panel.
Select the top layer, then Shift-click on the bottom layer of the three to select them all.
Right-click on the selected layers and choose 'Merge Layers' from the context menu. This will combine them into a single layer.
How do I merge two photos in Photoshop?
Easy steps to merge two photos in Photoshop:
Open both images in Photoshop.
Drag one image onto the other using the Move Tool. This will place them in separate layers.
If needed, adjust the size and position of the images to align them as desired.
Once aligned, select both layers in the Layers panel.
Right-click and choose 'Merge Layers' to combine them into one.
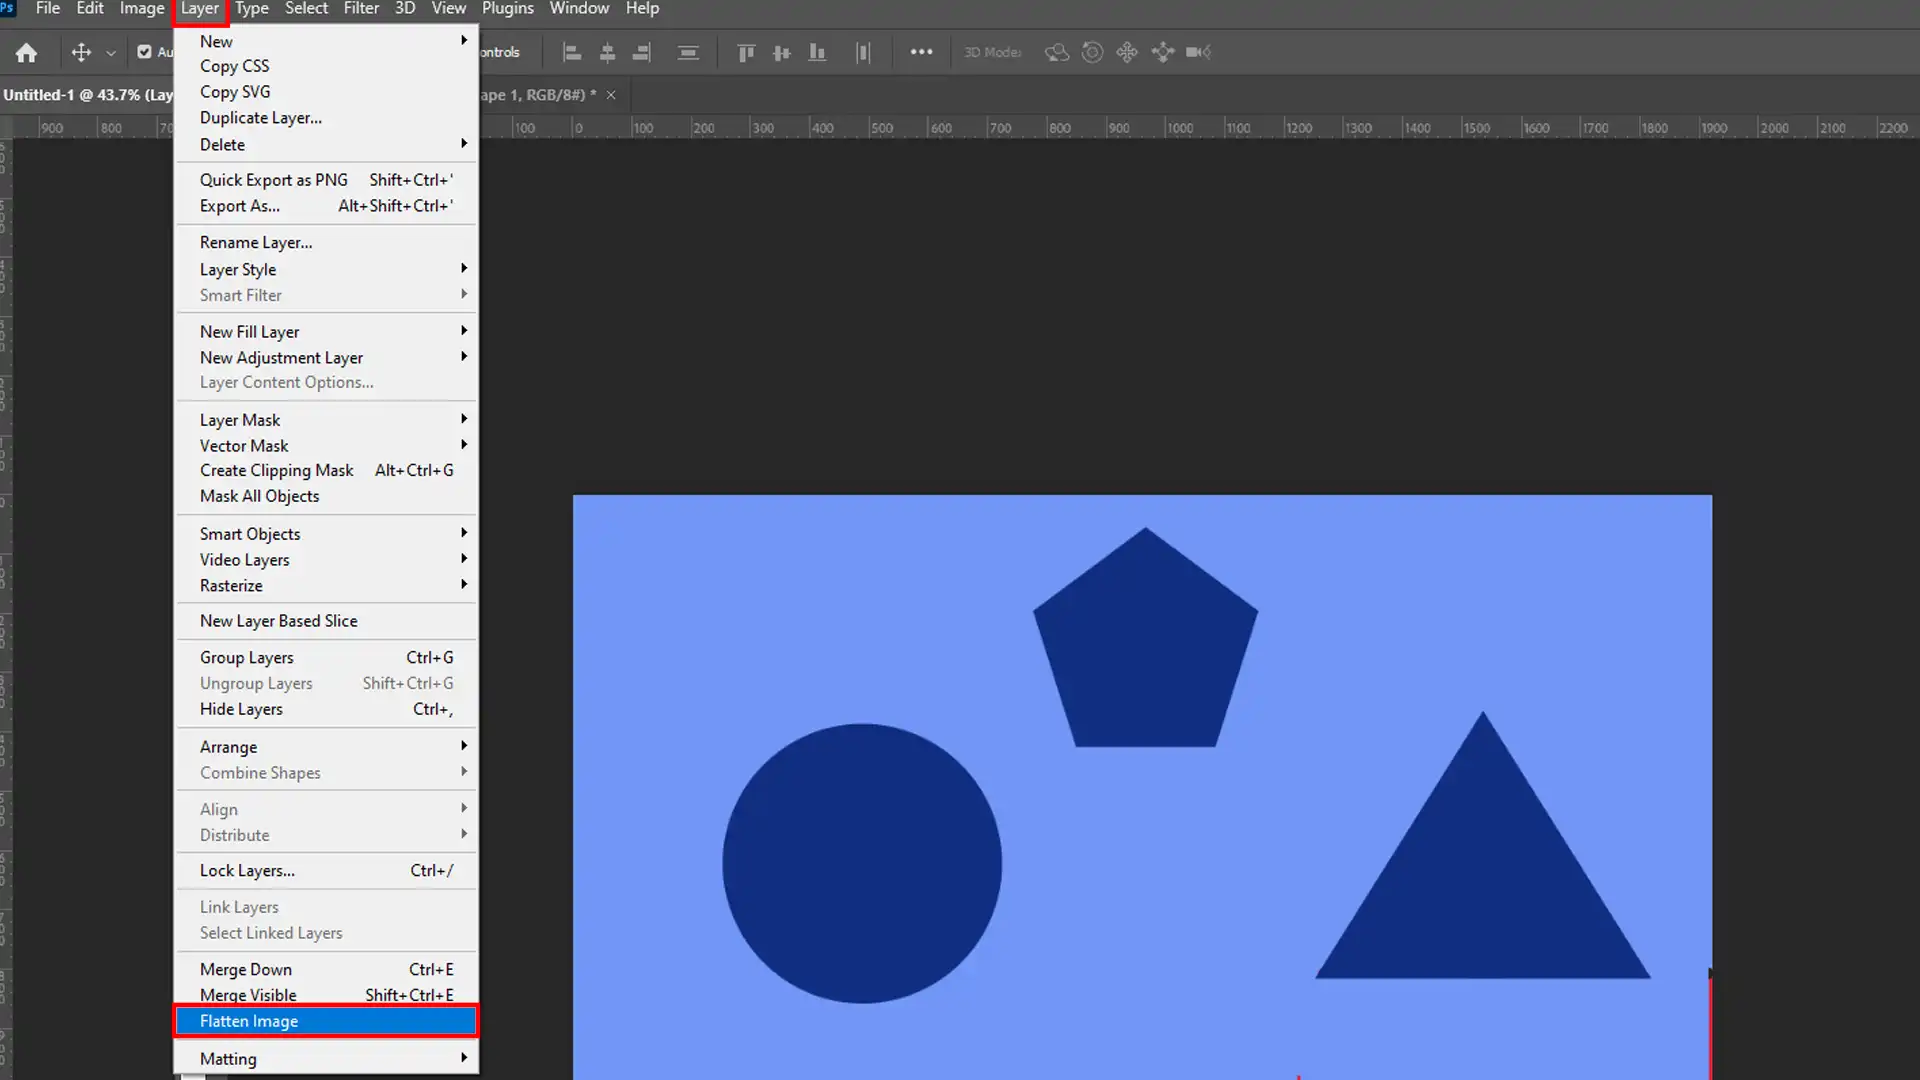
How do you flatten layers in Photoshop?
Open your project with multiple layers.
Go to the top menu, select 'Layer', then 'Flatten Image' at the bottom of the dropdown menu.
Confirm the action if prompted; this will merge all visible layers into a single background layer.
Mastering how to mergelayersinPhotoshop has really improved my editing workflow. I used to have so many layers that my projects felt cluttered and hard to manage.
Once I learned the best ways to combine layers, everything became much smoother and easier to handle.
If you’re just starting out, I highly recommend checking out the Phostoshop Course to get a solid foundation.
For those looking to enhance their photos even more, the Lightroom Course is a great option.
$2,061.00Original price was: $2,061.00.$1,061.00Current price is: $1,061.00. 27584
Download Your Free Guide Now!
Discover the secrets of photography with our printable guide! Master essential techniques like aperture, shutter speed, and ISO to create stunning images. Get your free printable PDF now and start turning your snapshots into masterpieces!