This tool allows you to copypixels from one part of an image to another, making it ideal for retouching and removingimperfections.
Here’s how to use it:
Select the Clone Stamp Tool
Open Photoshop and load your image.
Select the Clone StampTool from the toolbar on the left or press the shortcut key S.
Choose a Source Area:
Hold down the Altkey (Option on Mac) and click on the area of the image you want to copy. This sets the source point.
Start Cloning:
Release the Alt key and move to the area where you want to apply the clone.
Click and drag to paint the cloned pixels onto the new area.
Adjust Settings:
You can use the options bar at the top to adjust brush size, hardness, and opacity for more precise cloning.
Blend Seamlessly:
For a natural look, frequently reset the source point.
Adjust the flow and opacity settings to blend the cloned area seamlessly with the surrounding pixels.
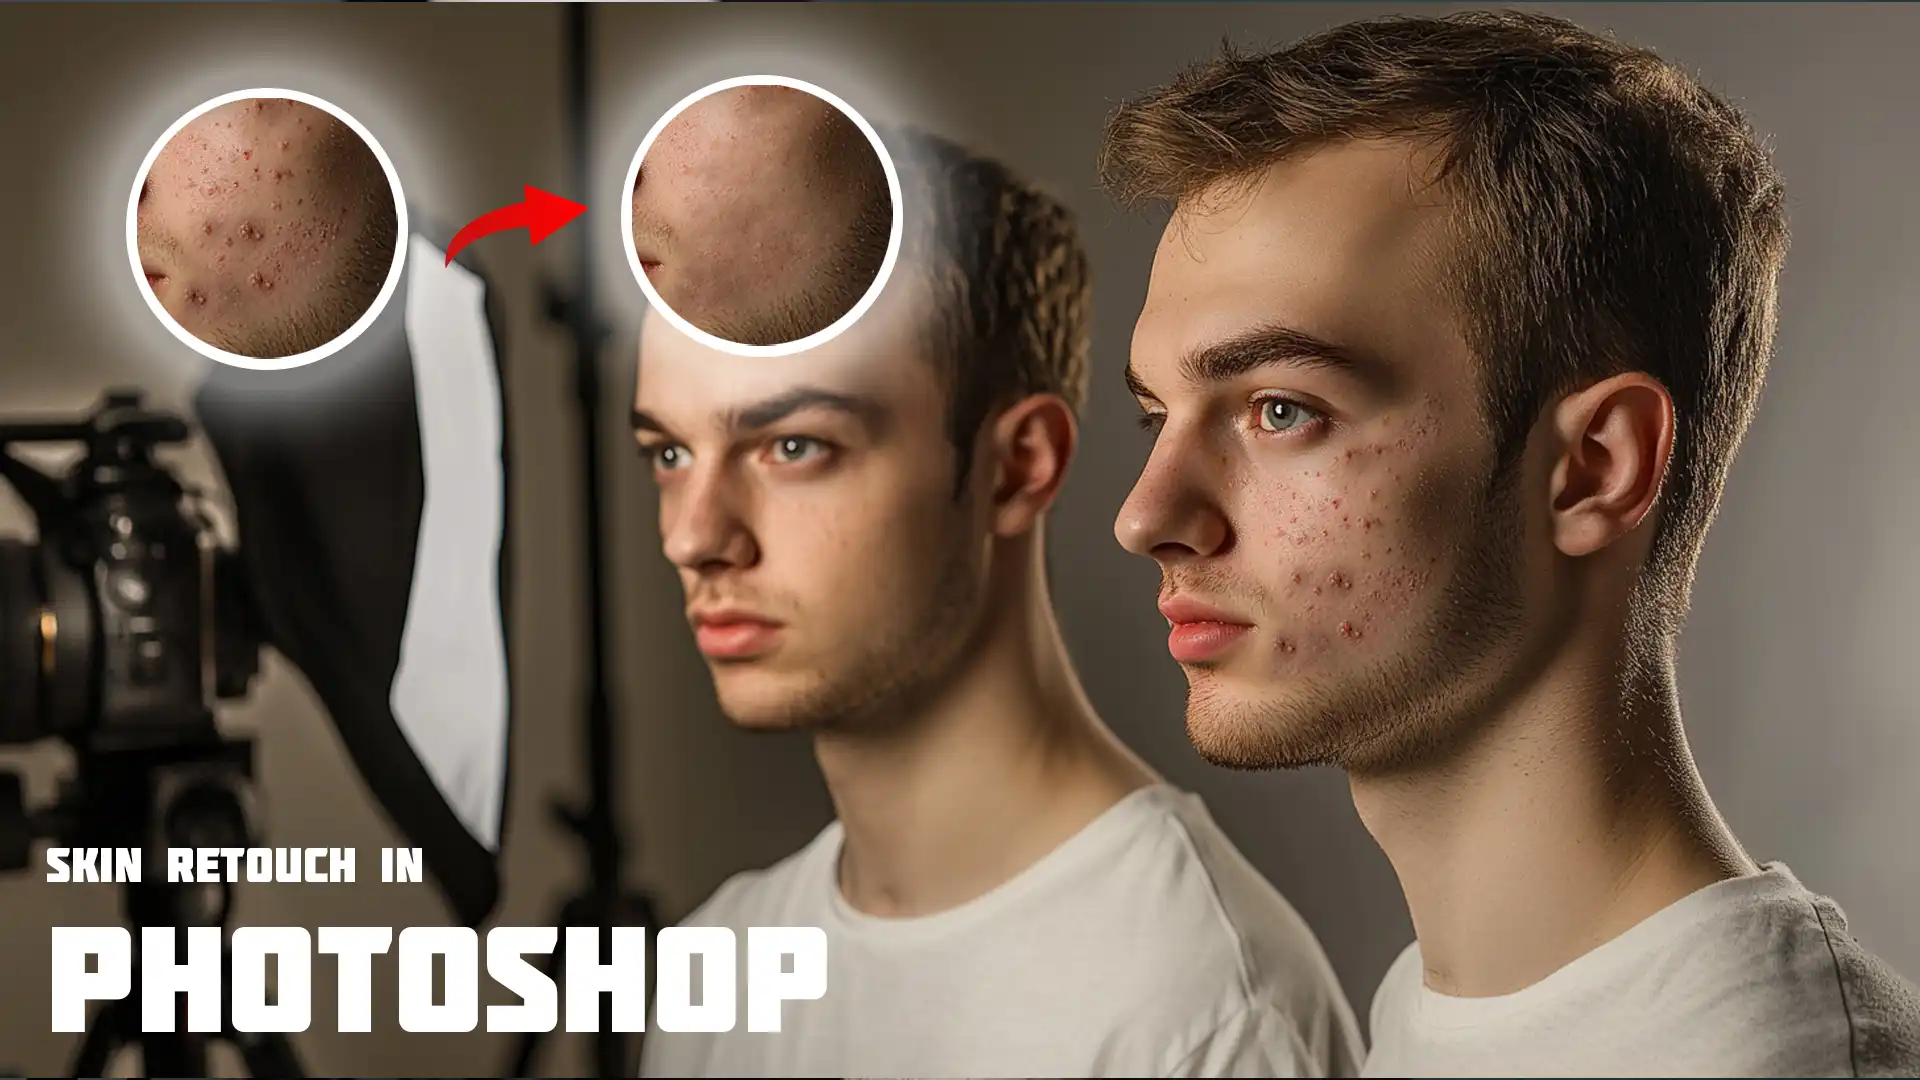
Step-by-Step Skin Retouching Process
Follow these steps to achieve a naturallook in your portraits:
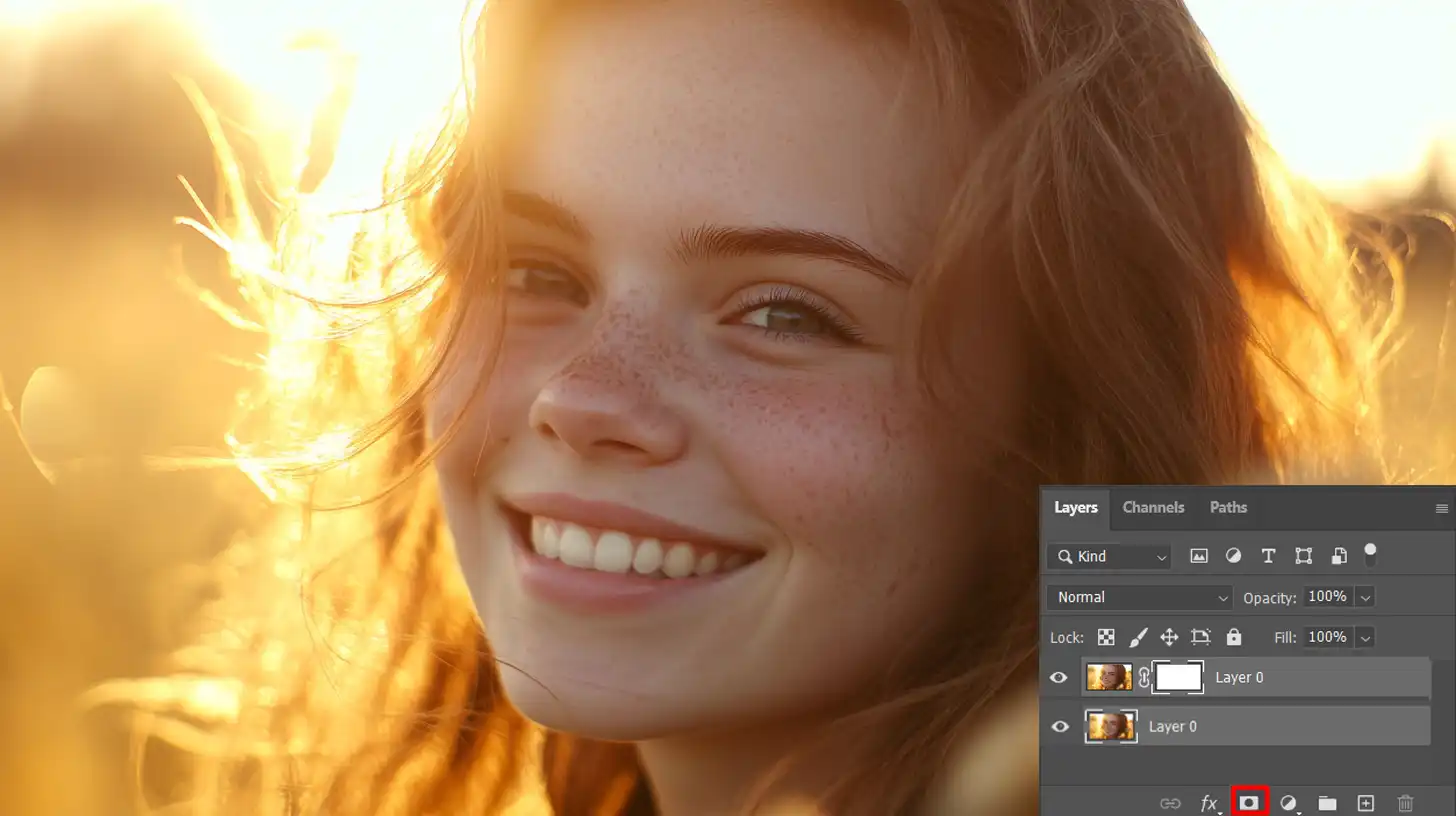
Open your image in Photoshop.
Duplicate the background layer to preserve the original image.
Select the spot healing brush and adjust the brush size to match the blemishes.
Use the healing brush tools to blend the repaired areas.
Apply adjustment layers to fine-tune skin tones and shadows.
Using Adjustment Layers for Final Touches
Adjustmentlayers are important for achieving the perfect skin tones.
They allow you to adjust the color and brightness without altering the original image.
Here’s how:
Create a new adjustment layer for color balance.
Fine-tune the skin tone to match the desired look.
Use a layer mask to apply adjustments selectively.
Maintaining Natural Beauty
While photoretouching is significant, it’s important to maintain the subject’s natural beauty.
Avoid over-editing and focus on enhancing the natural look of the skin.
Pro Tip: Mastering professional skin retouching requires practice and patience.
Using the righttools and techniques, you can automate creating stunning portraits with Photoshop action for portraits highlighting the subject’s natural beauty.
Step-by-Step Skin Retouching Process
To achieve professional-looking skin retouching, follow these simple steps to enhance your images while preserving natural beauty.
Starting with the basics, you’ll learn how to open your photo and create a duplicate layer for non-destructive editing.
Step 1: Open and Duplicate Image
Start by opening your image in Photoshop.
Always duplicate the image layer to preserve the original before retouching.
This step is important for nondestructive editing.
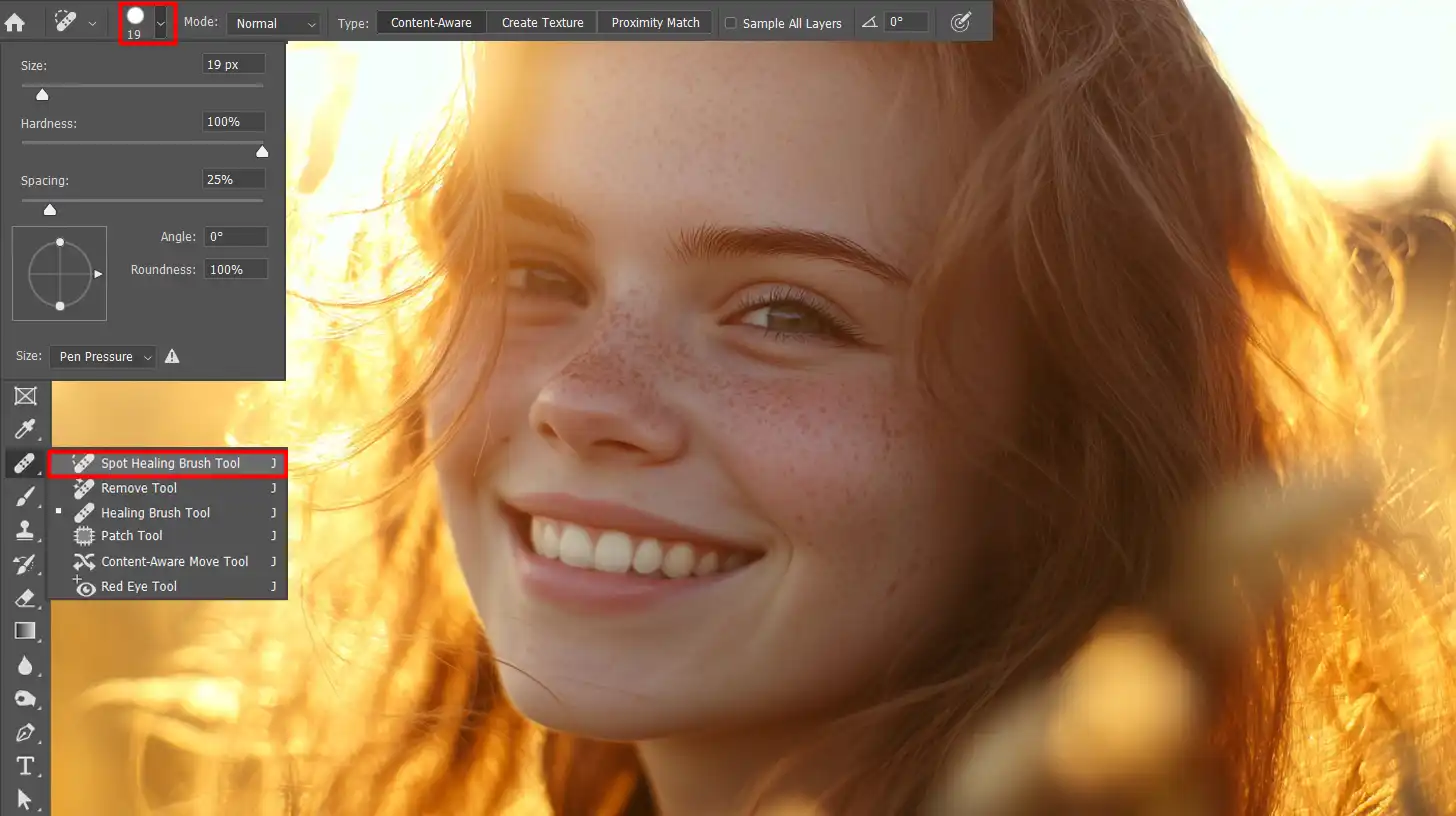
Step 2: Select Spot Healing Brush Tool for Minor Retouching
Choose the SpotHealingBrush from the toolbar.
This tool is excellent for removing minorblemishes quickly.
Open your image in camera raw, and adjust the temperature and tintsliders.
This method works well for different skin types.
Enhance Eyes and Teeth
Create a new layer, and use the brushtool to paint over the eyes and teeth.
Adjust the opacity for a natural look.
Use Multiple Images for Composites
Creating compositeswithmultipleimages can add depth to your work.
Use layers to blend the images seamlessly. This technique is great for creative projects.
Refine Hair with Masking
Masking is significant for refining hair in portraits.
Use the quick selection tool to select the hair, then refine the edges using the refine edge brush.
This method keeps the hair looking natural.
Control Shadows and Highlights
Adjusting shadows and highlights can add depth to your images.
Use the adjustment layer to fine-tune these elements. This technique enhances the overall look of your photos.
Enhance your skills by learning to master Photoshop shadows, which is indispensable for controlling shadows and highlights. Discover techniques to balance lighting and elevate your image editing.
Save Your Work in Different Formats
Save your work in various formats, such as JPEG files and PSDs.
This ensures you have a high-quality version for printing and a web-friendly version for online sharing.
Use Adjustment Layers for Non-Destructive Photo Editing
Always use adjustmentlayers for non-destructive photo editing.
This allows you to make changes without altering the original image.
It’s a great way to experiment with different looks.
Unlock powerful editing by using adjustment layers in Photoshop, which is important for non-destructive photo editing. Master these layers to enhance images seamlessly without altering the original.
Frequently Asked Questions (FAQs)
How to retouch in Photoshop?
To Photoshop retouch , first open the image.
Use the spot healing tool for minor blemishes.
Utilize adjustment layers to perfect skin tones. Add new layers to ensure non destructive edits.
The clone stamp tool and other retouch tools can achieve smooth skin.
How do you retouch a product in Photoshop?
Start by opening the product image in Photoshop.
Use the healing brush tool or clone stamp tool to remove imperfections. Adjust color and tone with an adjustment layer.
Enhance details using sharpening tools to create a polished, professional look.
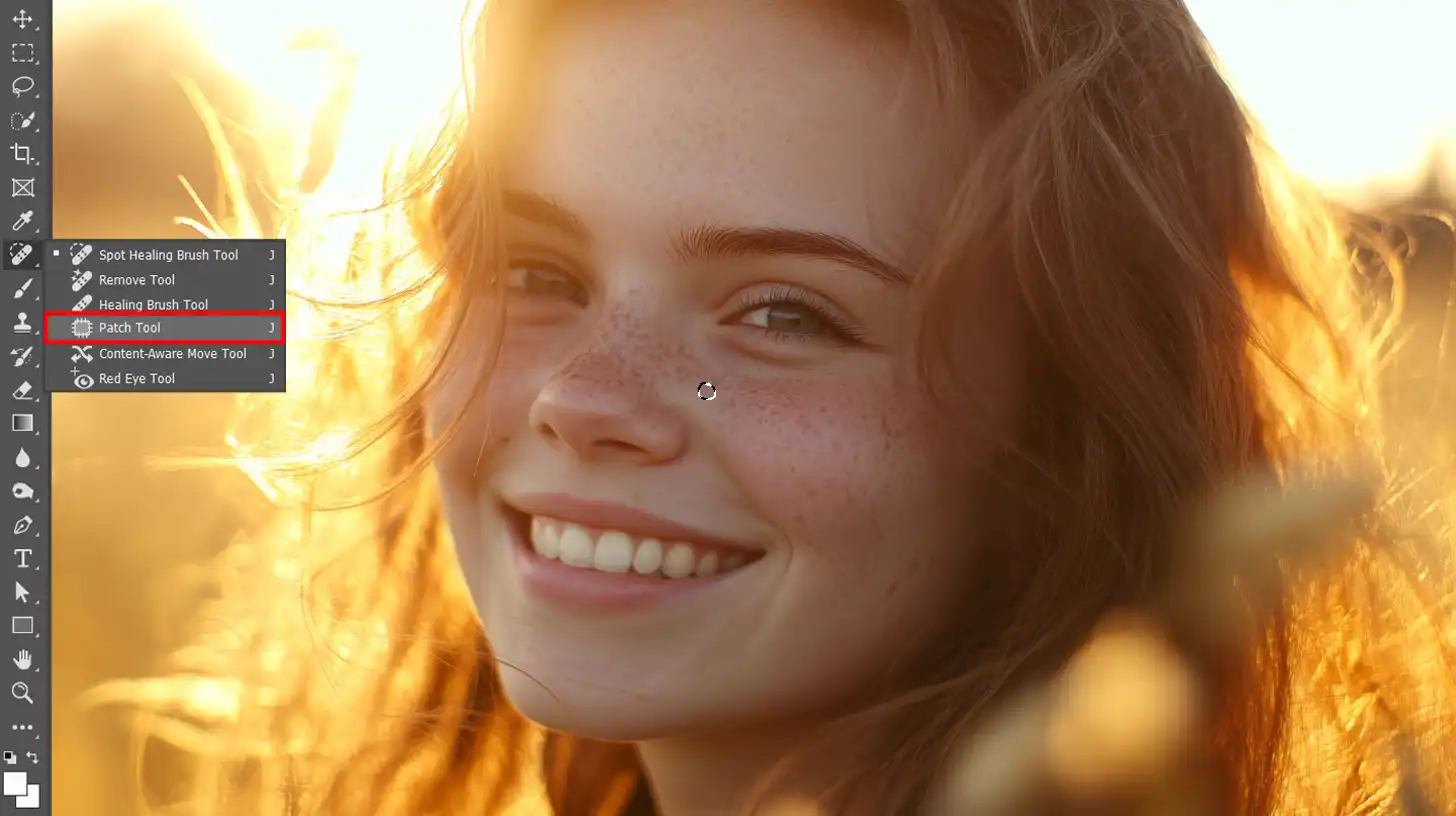
What are the retouching tools in Photoshop?
Photoshop offers numerous retouching tools, including the spot healing tool brush, cloning stamp tool, and patch tool.
The brush tool also aids in retouching.
Each helps fine-tune images, remove blemishes, and enhance skin texture and details.
How to use Retouch
Retouching in Photoshop involves a few importnant steps to enhance and perfect your images:
Mastering the art of Photoshop retouch opens up endless possibilities for enhancing your images.
Whether you aim to achieve smooth skin, remove unwanted objects, or adjust background elements, understanding the basics of tools like Photoshop is important.
The tutorial shows how to effectively use adjustment layers to make nondestructive edits that preserve the original image’s features.
To apply the right techniques, it’s important to consider the skin type and specific requirements of each portrait.
For instance, using the clone stamp for imperfections or adjustment layers for color correction can significantly improve the final output.
Retouching is not just about making faces look flawless but also about enhancing the overall image while maintaining natural textures and details.
$2,061.00Original price was: $2,061.00.$1,061.00Current price is: $1,061.00. 27584
Download Your Free Guide Now!
Discover the secrets of photography with our printable guide! Master essential techniques like aperture, shutter speed, and ISO to create stunning images. Get your free printable PDF now and start turning your snapshots into masterpieces!