How to Photoshop Documents: Editing and Enhancing Files
How to Photoshop Documents: Editing and Enhancing Files
Have you ever wondered how to Photoshop documents to perfection?
Whether you’re looking to edit a scanned contract, enhance a resume, or make subtle adjustments to an important letter, learning Photoshop and mastering document editing can make a world of difference.
In this guide, I’ll walk you through the important steps to achieve professional results. By the end, you’ll be equipped with the skills to transform any new document with ease.
So, let’s dive in and unlock the secrets of flawless Photoshop document editing!
Table of Contents
How to Create a New Photoshop Document
Creating a new document in Photoshop is a simple process that sets the foundation for your project. Let’s walk through the steps to get started.
Step-by-Step Guide to Creating a New Document
To learn how to Photoshop documents, open Photoshop and click on the File Menu. You then select New Document. Here, a new document dialog box will appear.
Enter the name for your new document. Choose the width, height, and resolution. Be mindful of the document size.
Select Color Mode. Common options are RGB and CMYK. Choose color mode wisely for your project needs. Look into the Preset Details for clarity.
Click on the Create button. Voila! Your new document is ready.
Understanding the Document Dialog Box
The new Document Dialog Box is your playground. It helps you to learn how to Photoshop ducuments.
Among the options, you’ll see image size and pixel aspect ratio. These are significant for any photo editing work.
There are also file formats. From JPEG to PDF file, the choice is yours.
Don’t forget about the custom settings. If you’re working on something special, save your settings as a new preset for future use.
Setting Up Your New Document Preferences
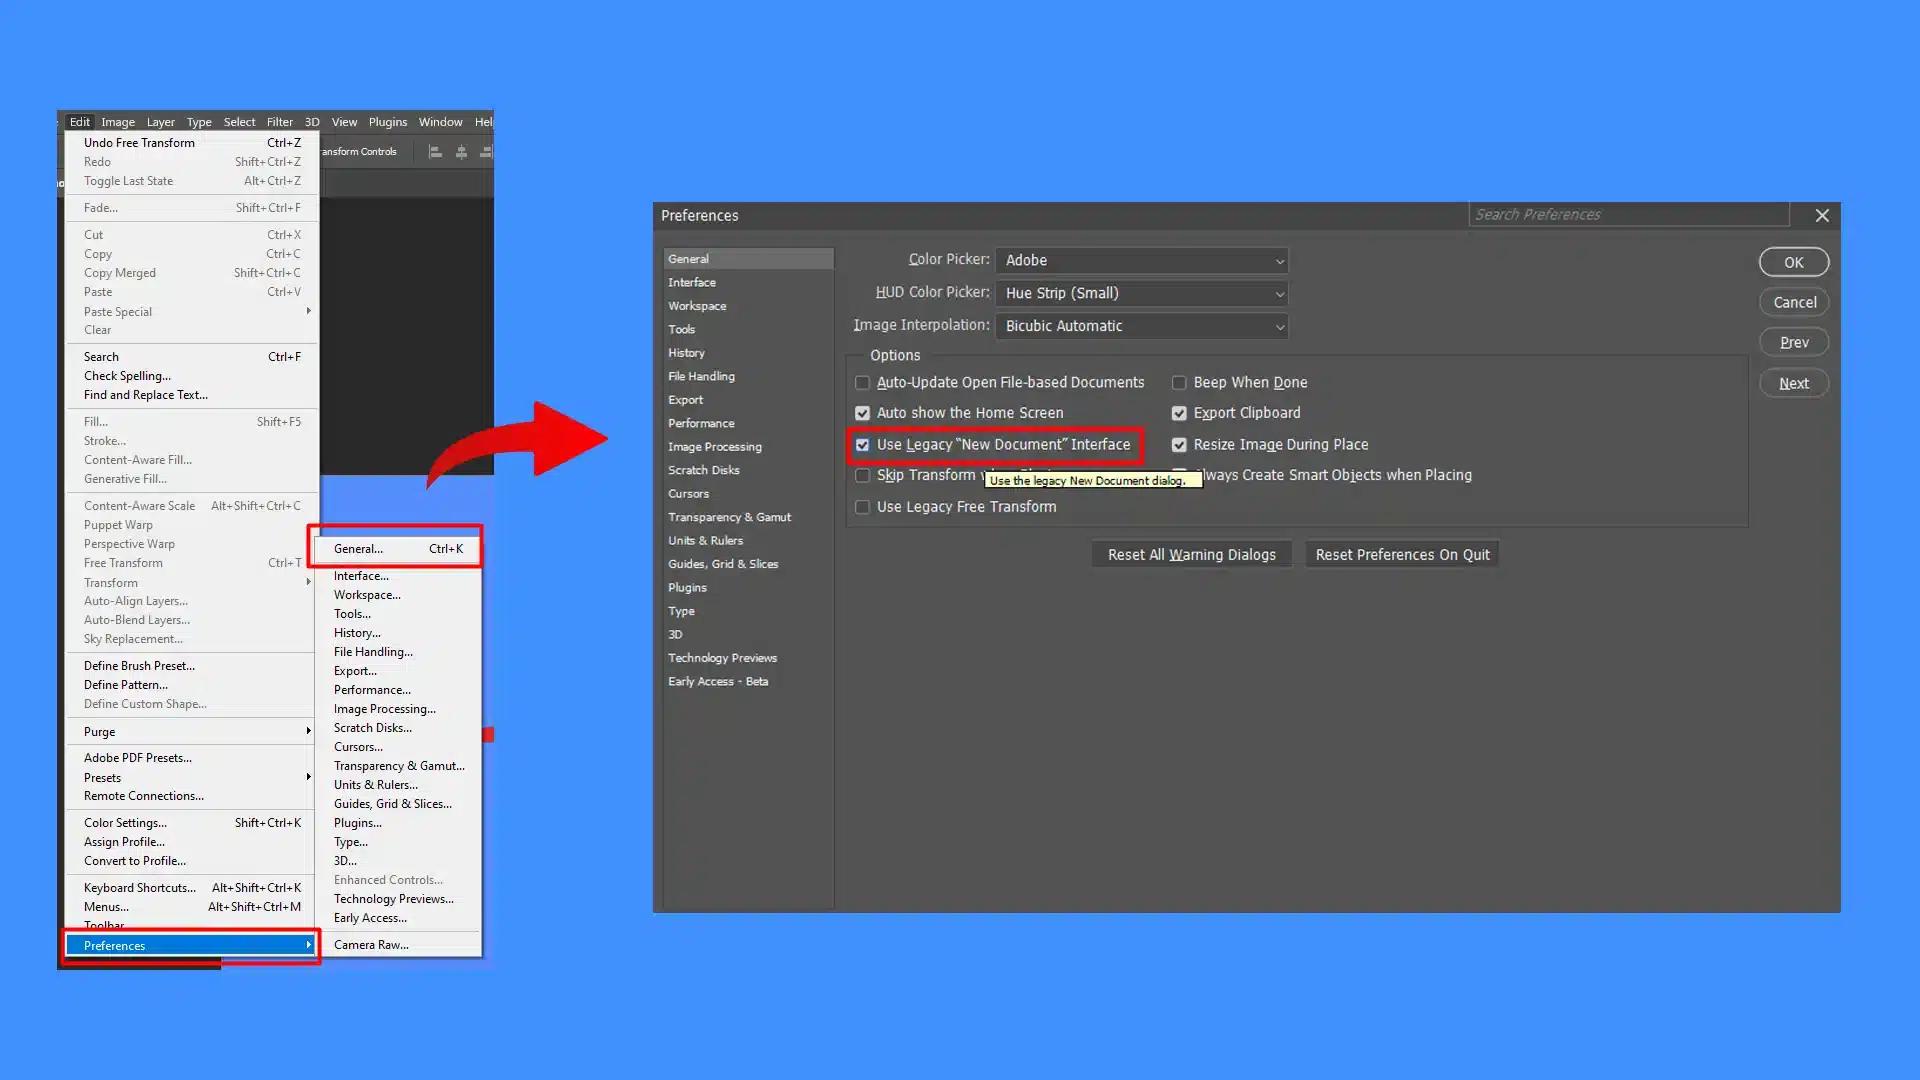
Before diving into Photoshop document editing, let’s talk about preferences. Go up to the menu bar and select Edit, then Preferences, and finally General.
Setting your preferences makes your work smoother.
Adjust the default document size or image size. Save layers when needed.
Feeling unsure? You can save new preset to retain your favorite settings, making it easier next time!
Pro Tip: Always check the new document dialog box before you start. It saves you from resizing headaches later. Click save often to avoid losing work.
When setting up your new document preferences, navigate through the Photoshop interface to adjust settings like default resolution and color mode for a customized workspace.
Editing PDF Files in Photoshop
Editing PDF files in Photoshop allows you to make adjustments to both text and images. Let’s go through the process, starting with importing your PDF file.
Importing a PDF File into Photoshop
To start editing a PDF file format in Photoshop, follow these steps:
Go to the File Menu.
Select Open and navigate to the PDF file you wish to edit.
A dialog box opens, asking how you’d like to import the file.
Choose to import pages or images.
Click OK after selection.
This will open your PDF and allow you to start making changes.
Editing Text and Images in a PDF
Once the PDF is open, you can edit text and images.
Below is a comparison of different editing techniques and tools available in Photoshop CC. This table provides a concise overview of how to handle text and image editing tasks effectively.
Aspect
Overview
Editing Text
To edit text, use the Text Tool. Highlight the text you want to change and type in your new text.
Handling Rasterized Text
If the text is a rasterized image, use the Patch Tool to cover up the old text, then add new text using the Text Tool.
Editing Images
Use the Crop Tool or other image editing tools available in Photoshop CC to edit images for example some side by side picture.
To edit text, click on the Text Tool.
Highlight the text you want to change and type in your new text.
If some text isn't editable, it’s likely a rasterized image of text. For such cases, use the Patch Tool to cover up old text. After the patch tool, add new text using the Text Tool
To edit images, either use the Crop Tool or other image editing tools available in Photoshop CC.
To effectively edit text and images in a PDF, it’s important to master moving images within the document, allowing for precise adjustments and better layout control.
Also, when editing custom text and images in a PDF, you can add creative touches like a text portrait effect to enhance the visual appeal and convey your message more artistically.
Saving and Exporting Your Edited PDF
When finished, save your work by following these steps:
Go to the File Menu again.
Select Save As and choose the PDF format.
A dialog box appears, allowing you to configure file size and quality.
Click Save to export your edited PDF file.
Remember to frequently save your work to avoid data loss.
Pro Tip: Ever wonder about maintaining text clarity? Before adding new text, zoom in for precision.
This helps you recognize text and ensures your edits look cleaner and more professional.
Advanced document editing techniques can help you refine and enhance your projects. One powerful method is using layers, which we’ll explore in the next section.
Using Layers for Document Editing
Layers play an important role in Photoshop document editing. They let you stack text, images, and effects without altering the original file or affecting the image size.
Steps to Use Layers:
Create a new document by selecting the appropriate preset details.
Add a new layer using the Layers panel.
Drag and drop the content or image files onto each layer, ensuring that the image size remains consistent.
Use keyboard shortcuts like Ctrl+J to duplicate layers quickly.
Always name your layers for better organization. This helps when you manage other documents and track changes.
When using layers for document editing, you can easily create and manage repeating patterns in Photoshop by applying them to separate layers, allowing for flexible adjustments and seamless integration.
Applying Filters and Effects
Filters and effects can enhance your new documents.
How to Apply Filters and Effects:
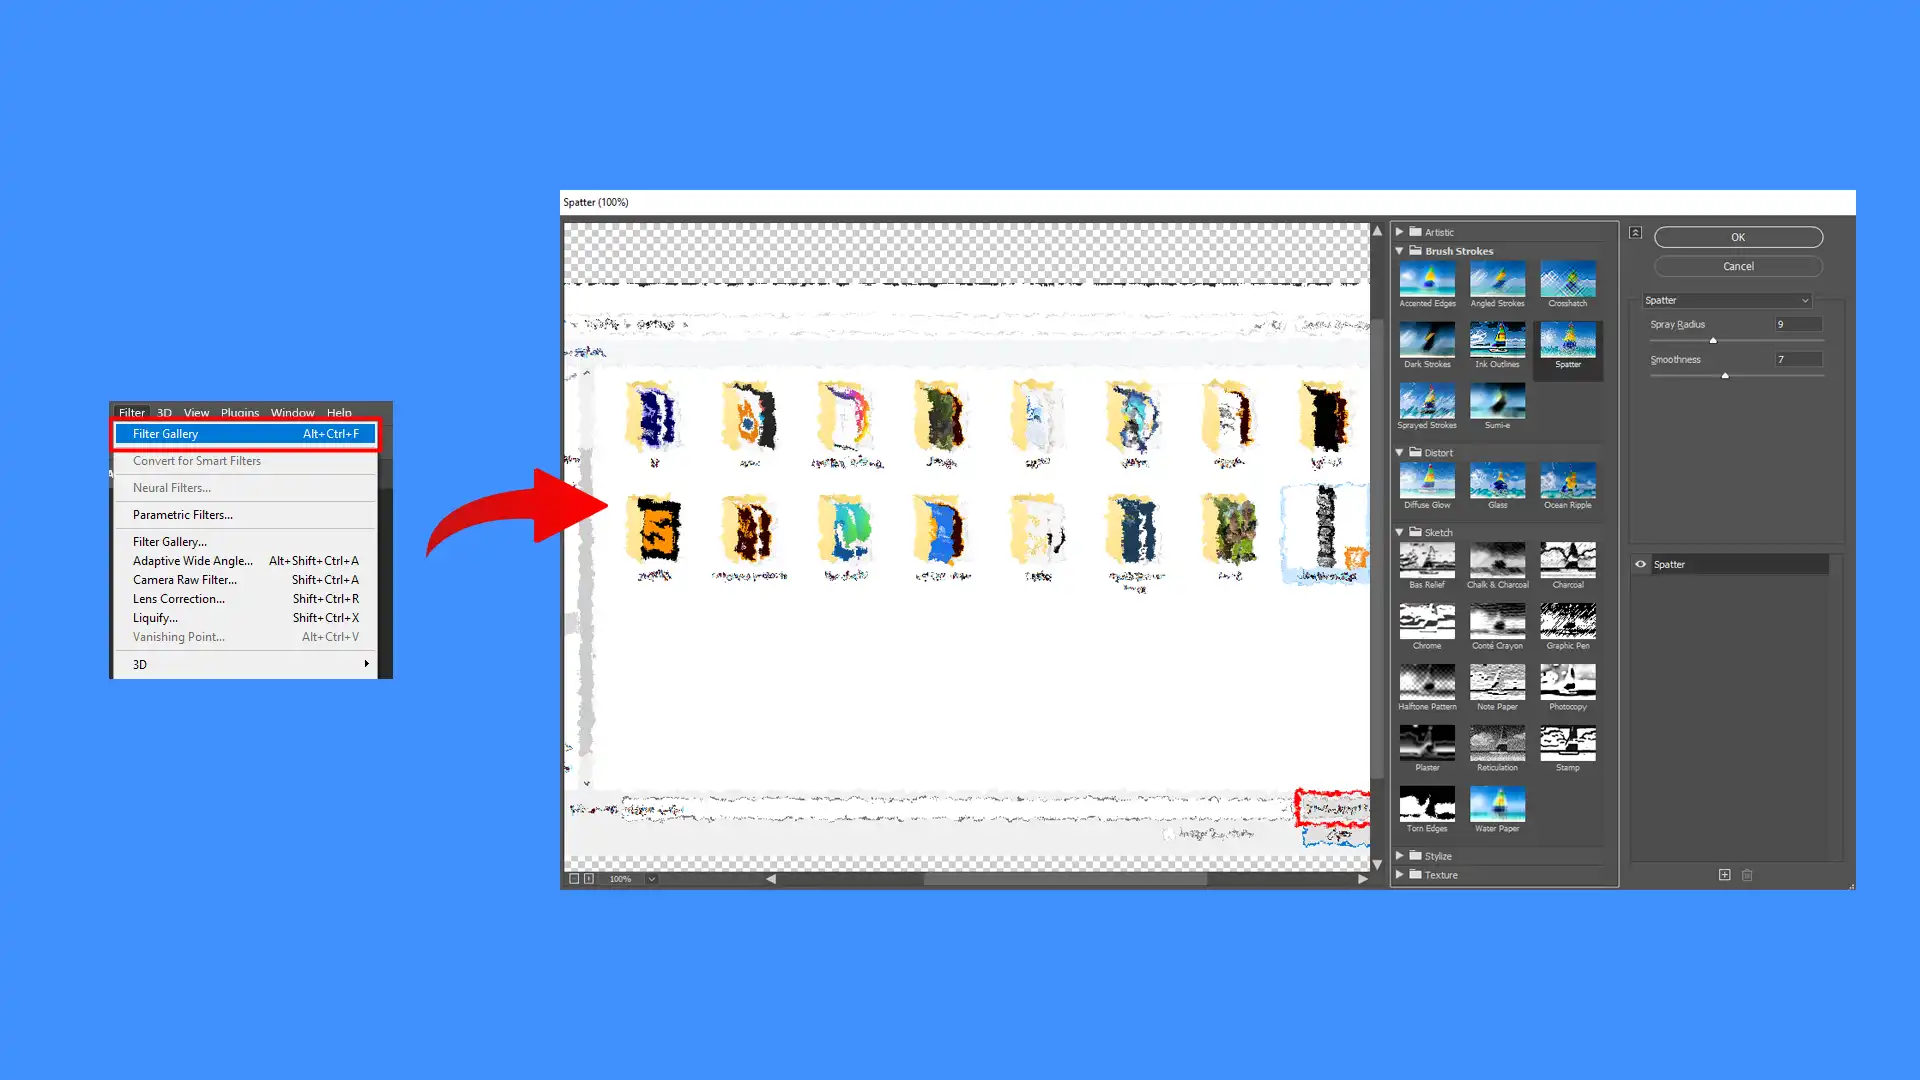
Select the layer you want to edit, and go to the filter menu.
Choose from available filters such as blur, sharpen, or artistic effects.
Adjust the dialog box settings until you're satisfied with the result.
Apply adjustments layers. Now, the effect is non-destructive.
Experimenting with these tools adds character to any Photoshop document editing.
Right-click the layer and select "Convert to Smart Object."
Edit the contents by double-clicking on the Smart Object thumbnail.
Make changes and save. Your document will update automatically.
Note that Smart Objects preserve file size while maintaining quality.
This method retains original data, making future edits more manageable.
Pro Tip: Always save your work frequently using the “Save As” option to avoid losing progress. Use saved presets for quick access to favorite settings.
Tips and Tricks for Efficient Document Editing
To streamline your document editing process, here are some helpful tips and tricks. Let’s start with using keyboard shortcuts for faster editing.
Keyboard Shortcuts for Faster Editing
Keyboard shortcuts are a game-changer when it comes to editing photos efficiently.
They help speed up your workflow, allowing you to focus more on your creative process.
For instance, pressing Ctrl + N (or Command + N on Mac) opens the new document dialog box, where you set up your new Photoshop document.
Similarly, Ctrl + S (or Command + S) saves your work, and believe me, saving frequently is important.
Getting familiar with these shortcuts will save you a lot of time and effort.
Pro Tip: Memorize the shortcuts for your most-used tools, and you’ll see a huge difference in your editing speed.
Using Actions to Automate Repetitive Tasks
Photoshop CC allows you to create actions that automate repetitive tasks, making it easier to manage your workflow.
Open the Actions panel, record a new action, perform your task, and stop the recording. It’s really that simple! Next time you need to repeat this task, just press the “Play” button in the Actions panel.
Pro Tip: Customize your actions to suit your specific needs.
Best Practices for Organizing Your Workspace
Keeping your workspace organized will make your document in Photoshop editing process much smoother.
Name your layers, group similar layers together, and use color-coding to find things quickly.
Set up your panels in a way that suits your workflow. Remember, a well-organized workspace will save you time and make your job less stressful.
Pro Tip: Save your ideal workspace layout as a preset so you can quickly go back to it whenever needed.
Common Issues and How to Fix Them
Understanding why you face errors with the document dialog box is significant. A common issue involves forgetting to adjust settings. Ensure the document size is appropriate by double-checking the new document dialog box.
Steps to Fix Document Dialog Box Errors:
Open the new document dialog box
Select the correct document size
Ensure the color mode is suitable for your needs
Additionally, always save progress with a good name and use custom settings for consistent results.
Remember, the format menu offers various file formats, so make sure you’re selecting the right one for your project.
Understanding the difference between NEF or JPEG format can also help in making the right choice.
Fixing Resolution and Quality Problems
Resolution issues often trace back to the initial settings.
Open the new document dialog box and confirm the document size and resolution are set correctly. If images appear blurry, you may need to check the image size under the Image menu.
Important Steps for Fixing Resolution Problems:
Open the Image menu
Select Image Size
Adjust the resolution to your desired setting
Sometimes, resizing can fix quality issues. Use the crop tool carefully to avoid undesired quality loss.
Additionally, always work with a blank canvas set to the right size from the beginning to prevent such problems. For more advanced edits, consider using Photoshop shortcuts to speed up your workflow.
When fixing resolution and quality problems, it’s helpful to know how to paste an image at the correct size and resolution to maintain clarity and avoid pixelation.
Dealing with Corrupted PSD Files
Corrupted PSD files can be frustrating. First, try reopening the file in Photoshop CC.
If it doesn’t open, attempt these methods to recover it:
Methods to Recover Corrupted PSD Files:
Open an older, saved preset
Check for any backups you might have created
Use the 'Open As' command and select a different file format
In some cases, using third-party recovery tools can help. Always save your work frequently to minimize data loss.
It’s a good habit to keep multiple backups in case of unexpected corruption.
Pro Tip: Utilize the keyboard shortcut to streamline your workflow. For example, pressing Ctrl+N (Cmd+N on a Mac) opens a new document dialog box instantly.
Frequently Asked Questions
How do I Photoshop a PDF?
Open Adobe Photoshop and go to File > Open, then select the PDF file you wish to edit.
Photoshop will prompt you to import the PDF pages; you can select the pages you want to edit.
Once the pages are imported, they will appear as individual layers that you can edit using Photoshop’s tools.
After making your edits, save your project by going to File > Save As, and choose the format you prefer.
How do I Photoshop something out of a document?
Open the document in Photoshop.
Select the Clone Stamp Tool or the Healing Brush Tool from the tool panel.
Alt-click (Windows) or Option-click (Mac) on an area of the image that you want to use as a sample.
Brush over the object you want to remove, which will cover it with the sampled area.
Continue editing until the object is completely removed and blended with the background.
What is the best app to Photoshop new documents?
Adobe Photoshop: Widely regarded as the most powerful photo editing tool, offering extensive features for new document editing.
Adobe Lightroom: Best for color mode correction and photo adjustments, but also useful for new document editing.
GIMP: A free and open-source alternative that offers many Photoshop-like features.
Canva: Great for quick, template-based design edits and simple new document modifications.
How do I edit a file in Photoshop?
Open Photoshop and load the file you want to edit by going to File > Open and selecting the file.
Use the various tools in Photoshop like the Brush, Eraser, and Text tools to make changes to your file.
You can add layers, apply filters, and use adjustment layers to modify the file's appearance.
Once editing is complete, save your file by choosing File > Save As and selecting the desired format and location to save the file.
Learning how to Photoshop documents has made my workflow so much smoother and boosted my productivity. By mastering these skills, I’ve been able to create polished, professional new documents that meet my standards.
Whether it’s tweaking a presentation or editing a report, the techniques I’ve learned have been incredibly valuable. If you’re interested in diving deeper into these tools, I highly recommend checking out my Photoshop course and my Lightroom course.
These resources have helped refine my skills and can do the same for you. Additionally, for those looking to explore Adobe’s software, you can visit Adobe Photoshop and Adobe Photoshop Lightroom for more information.
These links provide access to the software tools that have been instrumental in my work.
If this article has helped you, then Like and Share it with your friends
$2,061.00Original price was: $2,061.00.$1,061.00Current price is: $1,061.00. 27584
Download Your Free Guide Now!
Discover the secrets of photography with our printable guide! Master essential techniques like aperture, shutter speed, and ISO to create stunning images. Get your free printable PDF now and start turning your snapshots into masterpieces!