Master the Basics: How to Open Camera Raw in Photoshop
Master the Basics: How to Open Camera Raw in Photoshop
Ever wanted to learn how to open the Camera Raw feature in Photoshop? You’re in the right place!
Understanding Photoshop’s Camera Raw software can boost your editing workflow. Let’s explore how to open automatically and use this feature.
Ready to transform your photos? Keep reading!
Table of Contents
Why Use Camera Raw file in Adobe Photoshop?
This raw converter plugin keeps more data than JPEGs or TIFFs, giving better control over your image in Camera Raw adjustments.
You work with the original raw data, so your edits aren’t limited by previous changes
Opening Image in Camera Raw in Adobe Photoshop
Opening it in Adobe Photoshop is easy. Open a raw file, and Photoshop automatically opens the window for you to start editing.
When working with digital photos, it’s important to understand the benefits of other image file types, such as JPEG, PNG, NEF and TIFF, to choose the best format for your needs.
Import Your Image: Double press your file, and Adobe Photoshop load into Raw (Camera).
Using Menu: If another image opens, go to 'Filter' on the top toolbar, then click 'Camera Raw Filter'.
Integration with Adobe Lightroom
This plugin works well with Adobe Lightroom, ensuring smooth added workflow tools.
Pro Tip: It’s useful to compare Lightroom vs ON1 Photo Raw to determine which offers the same studio features and workflow for your needs, when integrating the camera raw filter.
Also, mastering the essential tools and more Adobe Photoshop tutorials, such as the brush and lasso tools, is crucial for achieving professional-quality edits.
How to Open Adobe Camera Raw in Photoshop
Now, we’ll learn how to open this plugin in Adobe Photoshop.
Whether new or experienced, mastering these basics helps improve your workflow.
Loading an Image in Adobe Bridge for Advanced Editing
Using Adobe Bridge makes things smooth. Follow these steps:
Initiate the Process: Launch Adobe Bridge and navigate to your files.
Select Your File: Click on the file you want and double press it. Adobe Photoshop loads with the Camera Raw window.
Open Button: Click 'Open Image' to transfer it to Adobe Photoshop for further editing.
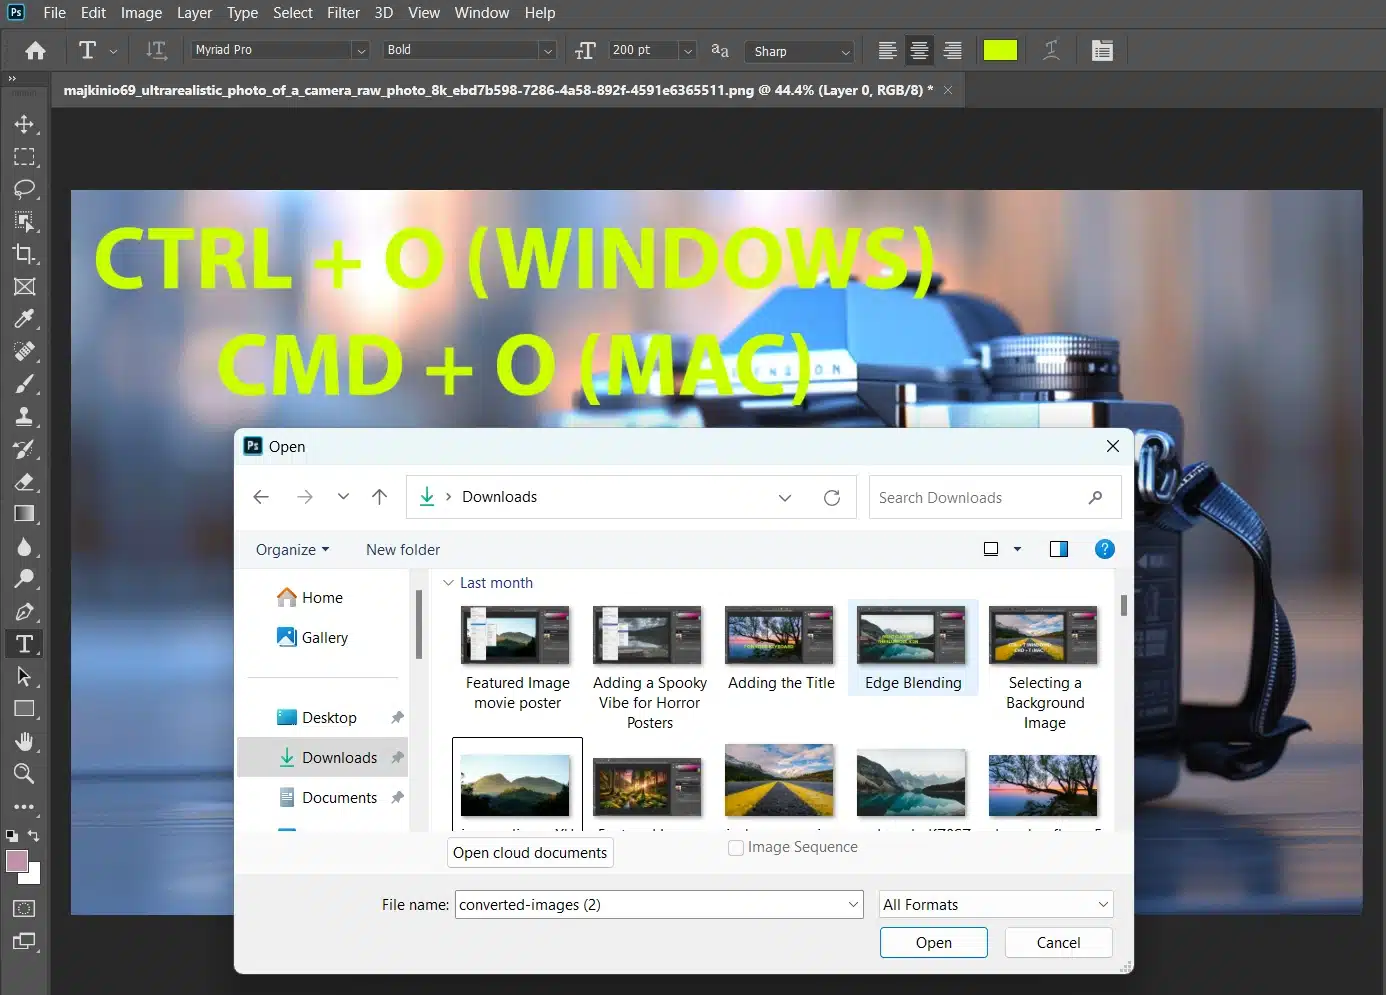
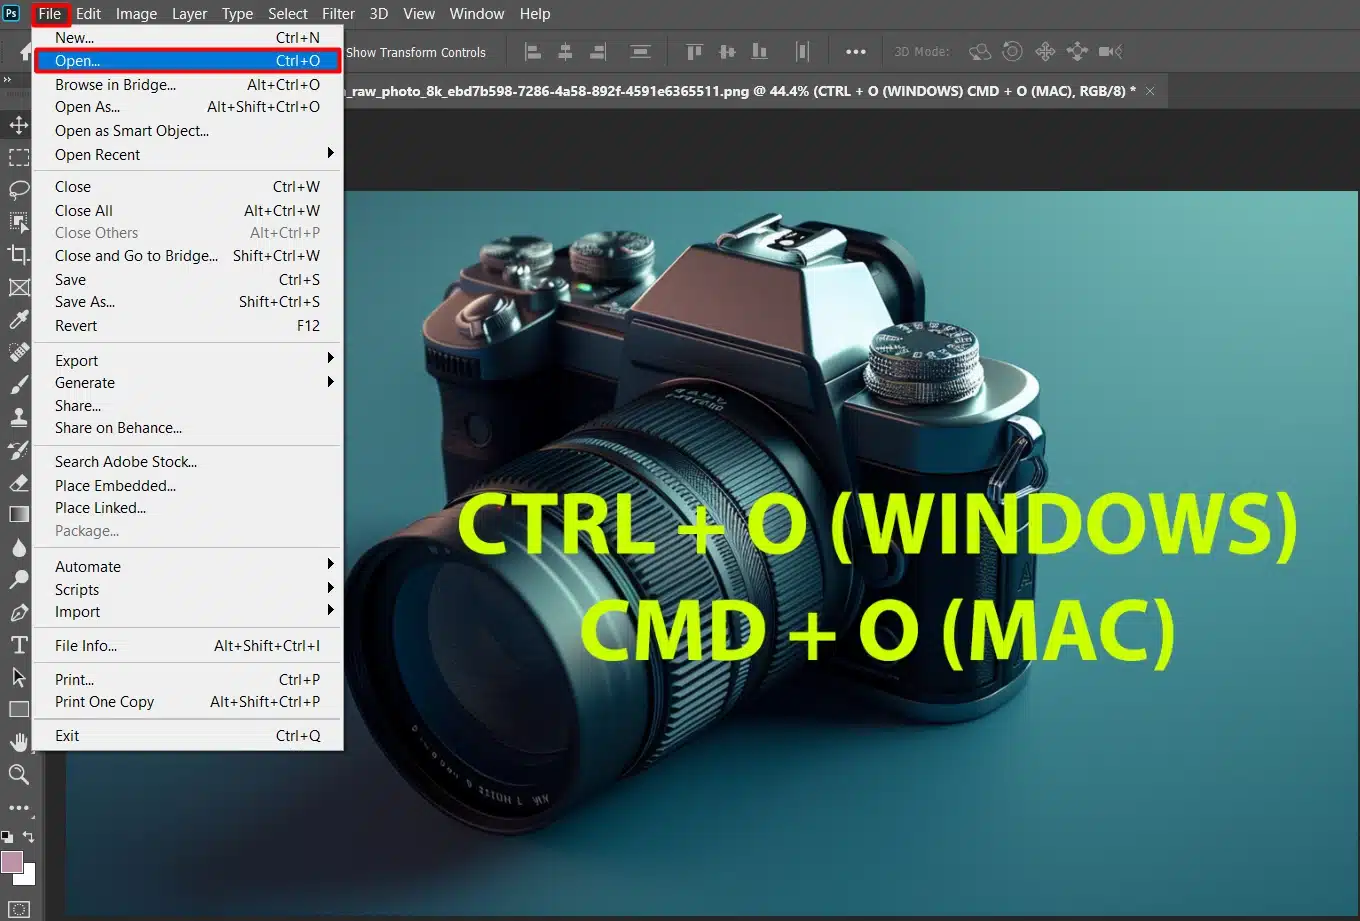
Opening an Image in Photoshop's Raw Editor
If you are already in Photoshop and need to open an image in Camera Raw directly, this method works best:
File Menu: Go to the 'File' menu, hover over 'Open,' and select your desired file.
Shortcut Alternative: Alternatively, use the keyboard shortcut by pressing Ctrl + O (Cmd + O for Mac). Choose the file from your computer.
Initial Window Opens: The plugin window will appear, allowing you to make initial adjustments before you open an image in camera raw main workspace.
When working with this feature, there are several methods to open automatically your image in Camera Raw, each with its own pros and cons.
Below is a concise guide to help you choose the best method for your workflow, highlighting smooth workflow, direct access, non-destructive editing, and quick access through shortcuts.
Method
Steps
Pros
Cons
Adobe Bridge
1. Launch Bridge 2. Double press and image 3. Raw (Camera) opens
Smooth workflow
Requires Bridge
File Menu
1. Go to ‘File’ > ‘Open’ 2. Select file 3. Raw (Camera) opens
Direct access
Slightly slower
Camera Raw Filter
1. Convert to smart objects 2. Go to ‘Filter’ > ‘Camera Raw Filter’
Non-destructive
Requires smart objects
Shortcut
1. Press Ctrl+O (Cmd+O for Mac) 2. Select file 3. Raw (Camera) opens
Quick
Needs shortcut knowledge
Enhancing Your Image with Camera Raw Filter in Photoshop
Already have an image in Adobe Photoshop? Apply Adobe Camera Raw as a filter:
Create a New Layer: Convert your layer into a smart object for non-destructive editing.
Select Camera Raw Filter: Go to the 'Filter' menu and select Camera Raw Filter.
Edit in Camera Raw: Make your adjustments in the initial Raw (Camera) window and click OK.
Pro Tip: Use keyboard shortcuts for frequently used tools and filters to save loading time and enhance workflow.
Enhancing your color image with the Camera Raw filter in Photoshop can make a significant difference.
Adjusting the color settings and applying fine-tuned corrections will help you achieve a more vibrant and polished look
How to Access the Software in Photoshop
Now, we’ll figure out how to open this plugin in Adobe Photoshop.
Start Adobe Bridge: Open Adobe Bridge and find an image file.
Pick Your File: Click and double-click the other image file. Adobe Photoshop load with the initial Camera Raw window.
Open Image: In the initial Camera Raw window, click 'Open Image' in Camera Raw and move it to Photoshop for more edits.
Accessing the Software Directly in Photoshop
If you’re in Photoshop and need to open a Raw file, do this:
File Menu: Go to 'File,' hover over 'Open,' and pick your file.
Shortcut: Press Ctrl + O (Cmd + O for Mac). Select the file from your computer.
Raw Camera Window: The Software's Window pops up. Make your changes before you open an image in Camera Raw.
Using Camera Raw as a Filter in Photoshop
If you already have an image in Photoshop, you can use Camera Raw as a filter:
New Layer: Convert your layer into a non-destructive layer .This keeps your edits non-destructive.
Camera Raw Filter: Go to 'Filter' at the top and select Camera Raw Filter.
Edit Image: Adjust your image in Camera Raw Window. Click OK when done. Your changes will apply to your image layer.
When using Camera Raw as a filter in Photoshop, think about how you might enhance a movie poster.
Adjusting clarity and contrast can make elements pop, giving your poster a more dynamic and professional appearance.
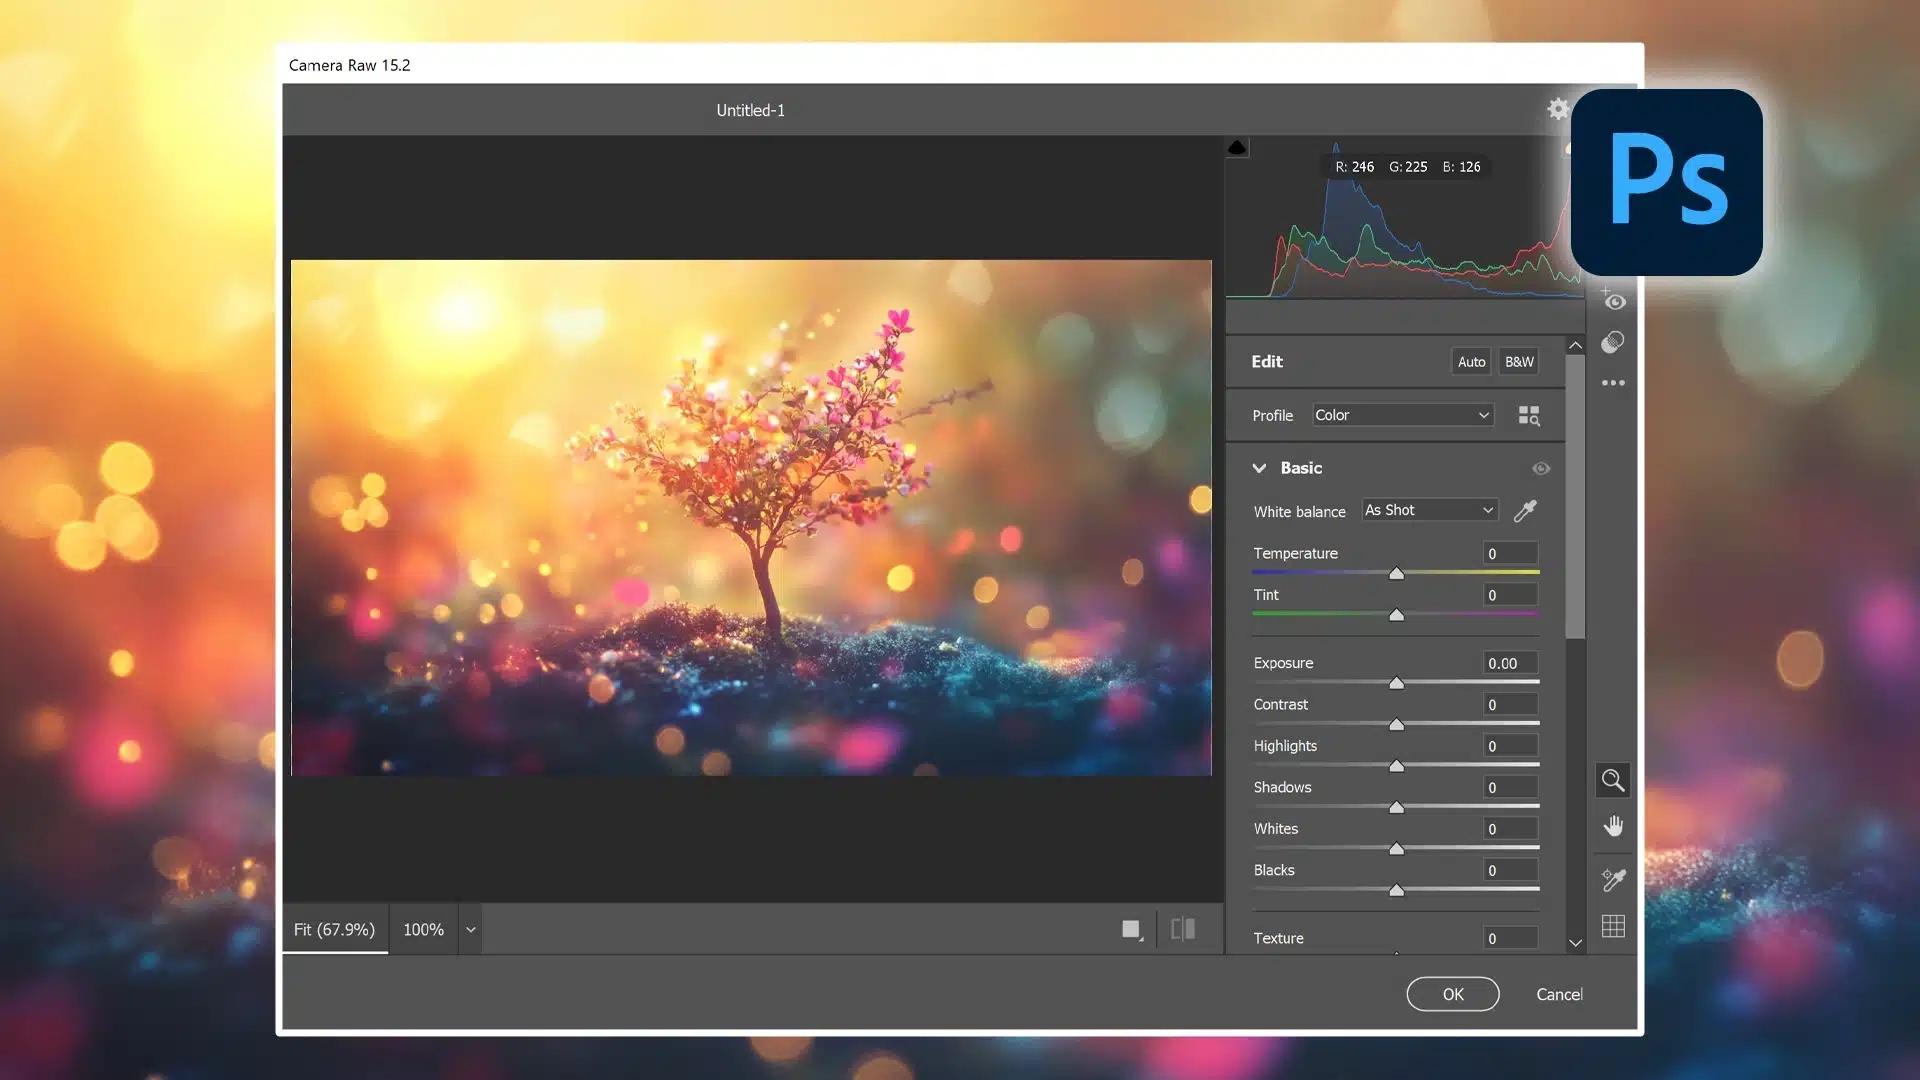
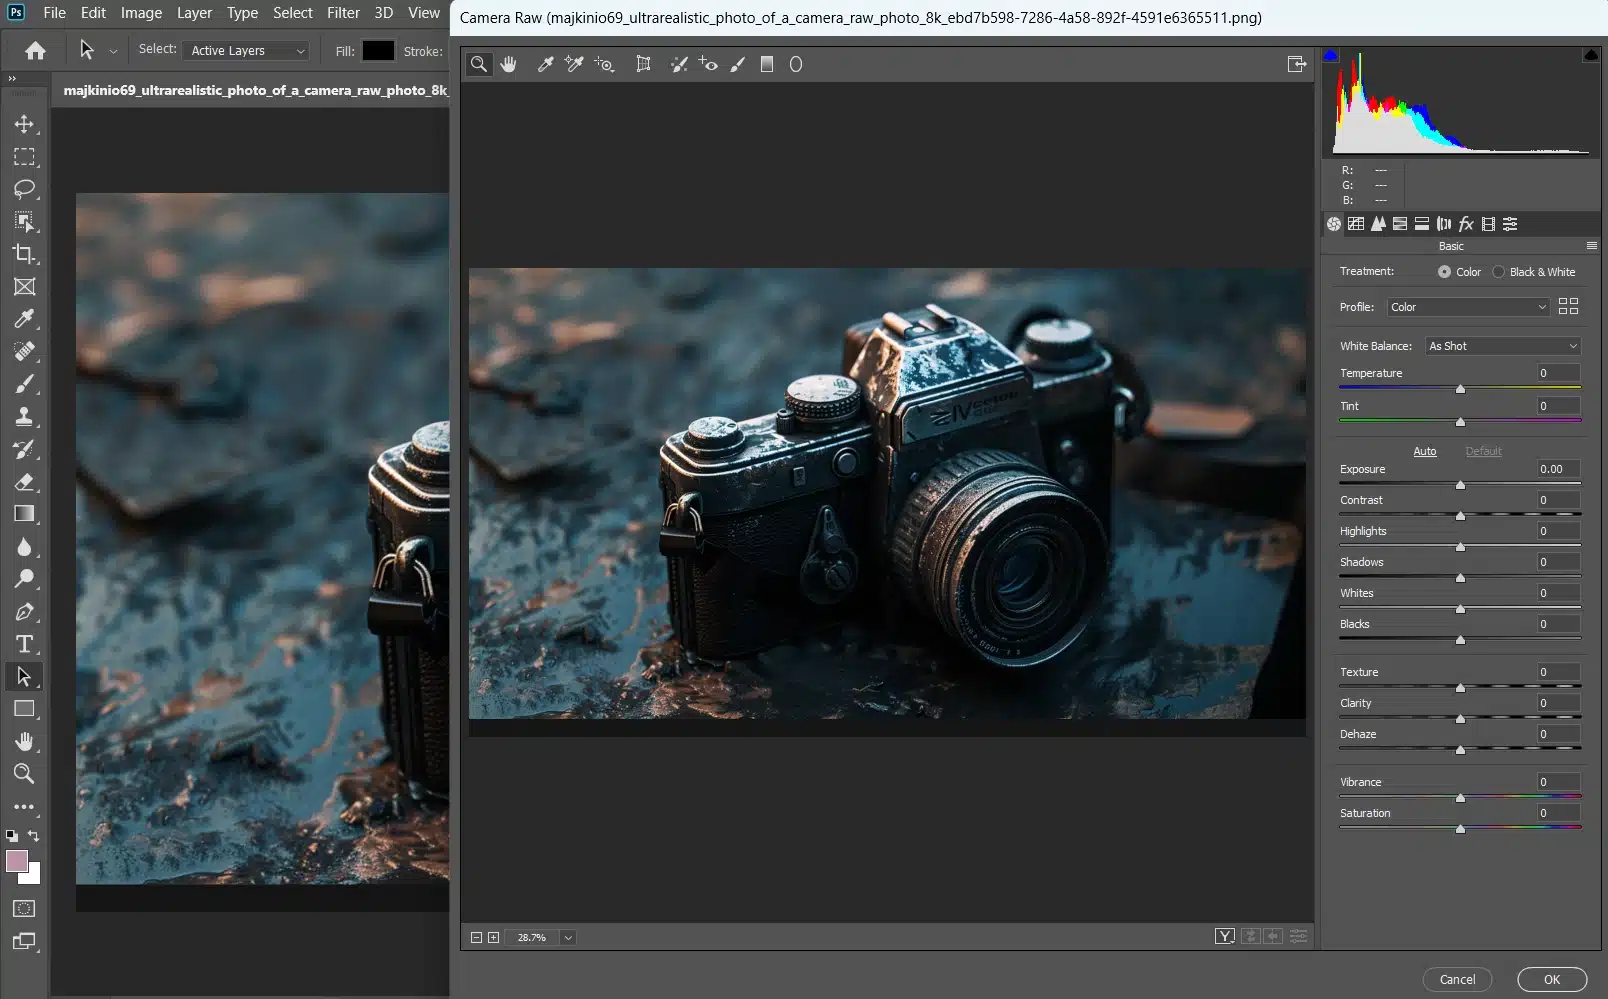
Basic Adjustments in Adobe Camera Raw
Ready to make your photos look awesome with Adobe Photoshop?
Let’s jump into the adjustments.
Exposure and Contrast
Adjust exposure and contrast. Brighten or darken your image files with the exposure slider. Increase contrast by moving the slider right; decrease it by moving it left.
Use this feature to edit a raw file. Select Camera Raw Filter in Adobe Photoshop to start. This raw converter allows you to open images before making further edits in Photoshop
White Balance
Adjust white balance to make whites look white. Use Temperature for blue or yellow and Tint for green or magenta.
This ensures natural-looking image files. In Adobe Photoshop, use Raw (Camera) software to edit the files.
Select Camera Raw Filter to start.
Clarity and Vibrance
Clarity enhances mid tones for texture and detail.
Vibrance brightens colors without oversaturation.
Advanced Software's Features
Applying Graduated Filters
They fix uneven lighting. Imagine a sunset with a bright sky and dark land. Click the Graduated Filter tool and drag it across your photo.
Adjust exposure and contrast for balance. Apply multiple filters for complex corrections. Now simply press shift to adjust placement.
Using the Tone Curve
Use the Tone Curve in Adobe Raw (Camera) to fine-tune contrast and color balance. Open an image in Camera Raw, select the Tone Curve panel, and adjust highlights, midtones, and shadows.
Move curve points or use presets for stunning effects.
Pro Tip: Using plugins for Lightroom can greatly improve your editing capabilities, especially when working with RAW format images to achieve the best results.
Frequently Asked Questions (FAQs)
Why can't I open Camera Raw in Photoshop?
Ensure that your Photoshop version is up-to-date, as Raw (Camera) compatibility often depends on the latest updates.
Check if Raw (Camera) is installed correctly by looking for it under the 'Filter' menu. If it's not there, you might need to reinstall it.
Is Camera Raw included in Photoshop?
Yes, Raw (Camera), which opens raw files straight in Photoshop, is included as a plugin for processing files and updates automatically with Photoshop.
How do I open raw adjustments in Photoshop?
To open raw adjustments in Photoshop, simply double press on the file in Adobe Bridge or use the 'Open' command in Photoshop to open the file directly. This will automatically launch the Raw (Camera) interface.
How do I open RAW files straight in Photoshop without Camera Raw?
Suppose you need to opens raw files straight into Photoshop without using this plugin. In that case, you can use other supported third-party plugins or convert your file to a compatible format like JPEG or TIFF using another software before opening it in Photoshop.
Learning how to open and use Camera Raw in Photoshop can be a game-changer.
Whether you’re using Adobe Bridge, the File menu, or applying Camera Raw as a filter, each method offers a straightforward way to enhance your open images.
The flexibility of Camera Raw allows for precise adjustments that can really elevate your photo editing game.
Knowing how to open Photoshop’s Camera Raw Software has transformed my editing process, making it easier and more precise.
$2,061.00Original price was: $2,061.00.$1,061.00Current price is: $1,061.00. 27585
Download Your Free Guide Now!
Discover the secrets of photography with our printable guide! Master essential techniques like aperture, shutter speed, and ISO to create stunning images. Get your free printable PDF now and start turning your snapshots into masterpieces!