Let me show you how to lock a layer in Photoshop to prevent such mishaps. Imagine working on a detailed design, only to realize you’ve unintentionally modified an important layer. Frustrating, right?
By locking layers, you can preserve your work and focus on your creative process without worry. In this guide, I’ll walk you through the simple steps to ensure your layers stay exactly as you want them.
Stick around, and you’ll master this significant Photoshop skill in no time.
Table of Contents
How to Lock a Layer in Photoshop
Locking a layer in Adobe Photoshop is important when working on complex projects. It ensures specific adjustments or elements remain unchanged. Let’s break down the steps.
Step-by-Step Guide to Locking Layers
Follow these straightforward steps to lock your layers and safeguard your project.
Step 1: Open Your Project in Photoshop
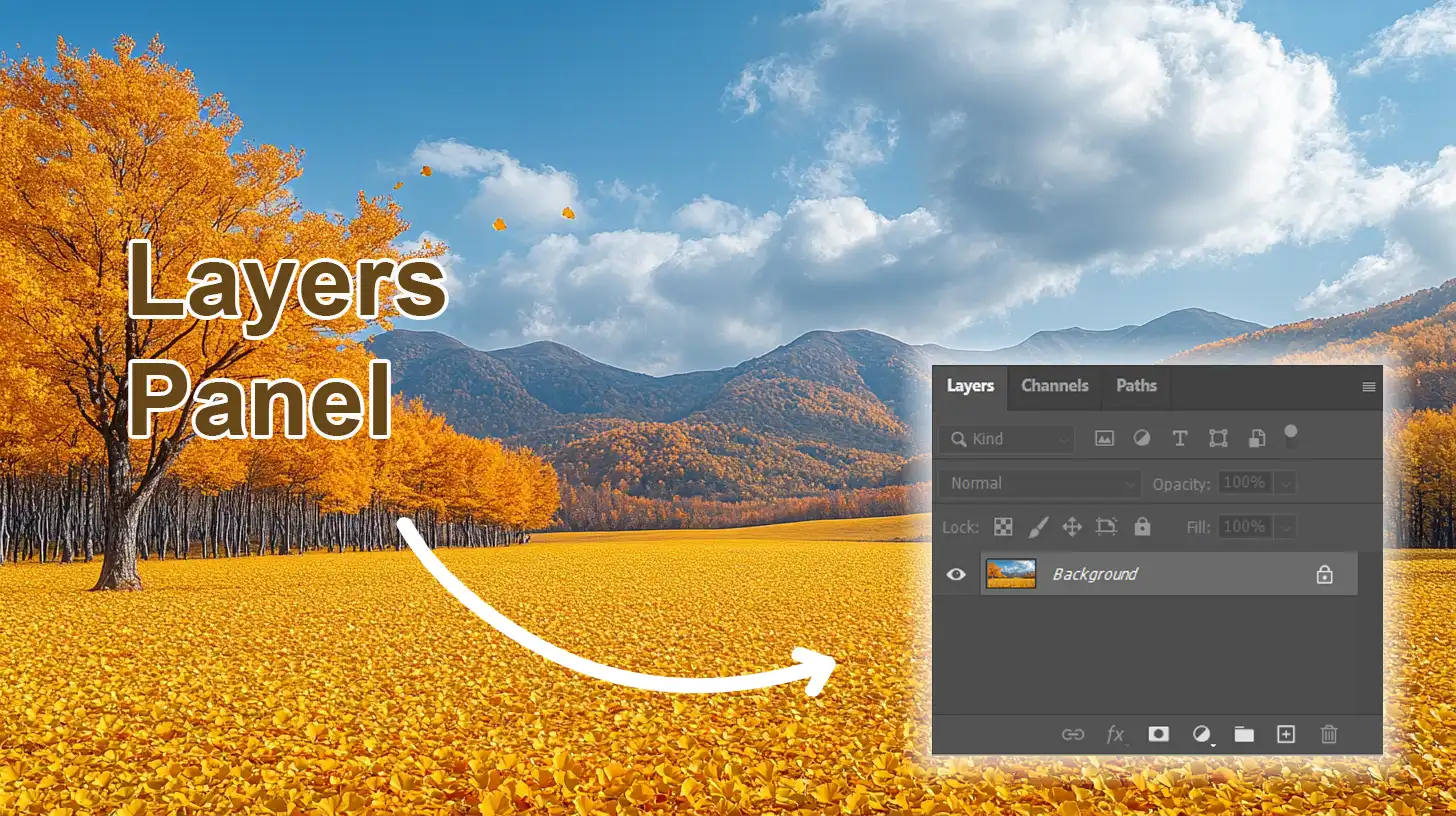
Open your project in Photoshop. Ensure you see the Layers Panel, usually on the right.
Step 2: Locate the Layer to Lock
Identify the layer you want to lock. It could be a background layer, text layer, or any image layer.
Step 3: Select the Layer in the Layers Panel
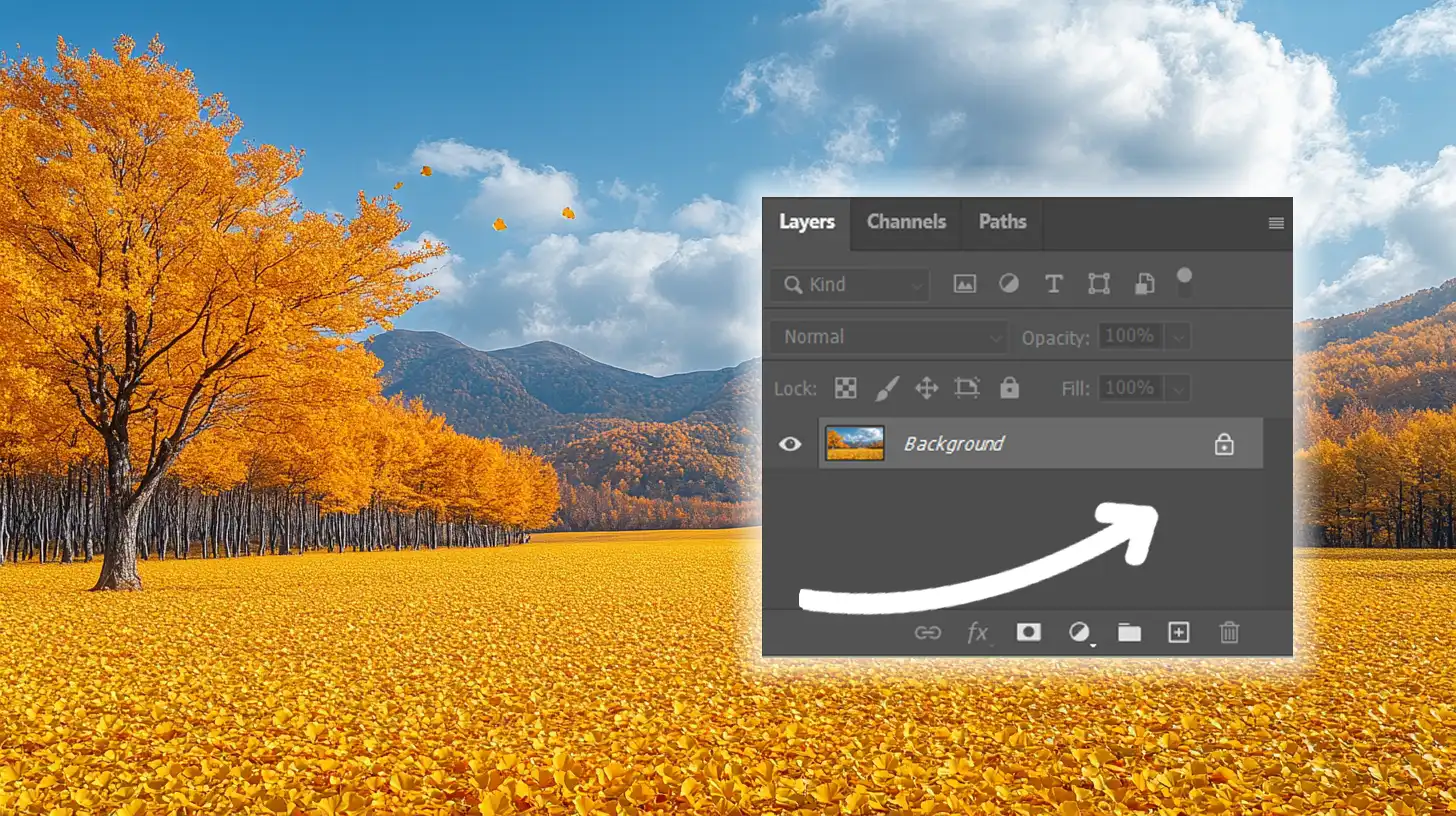
In the Layers Panel, click the layer to select it. The selected layer should now be highlighted.
Step 4: Lock the Layer Using the Lock Icon
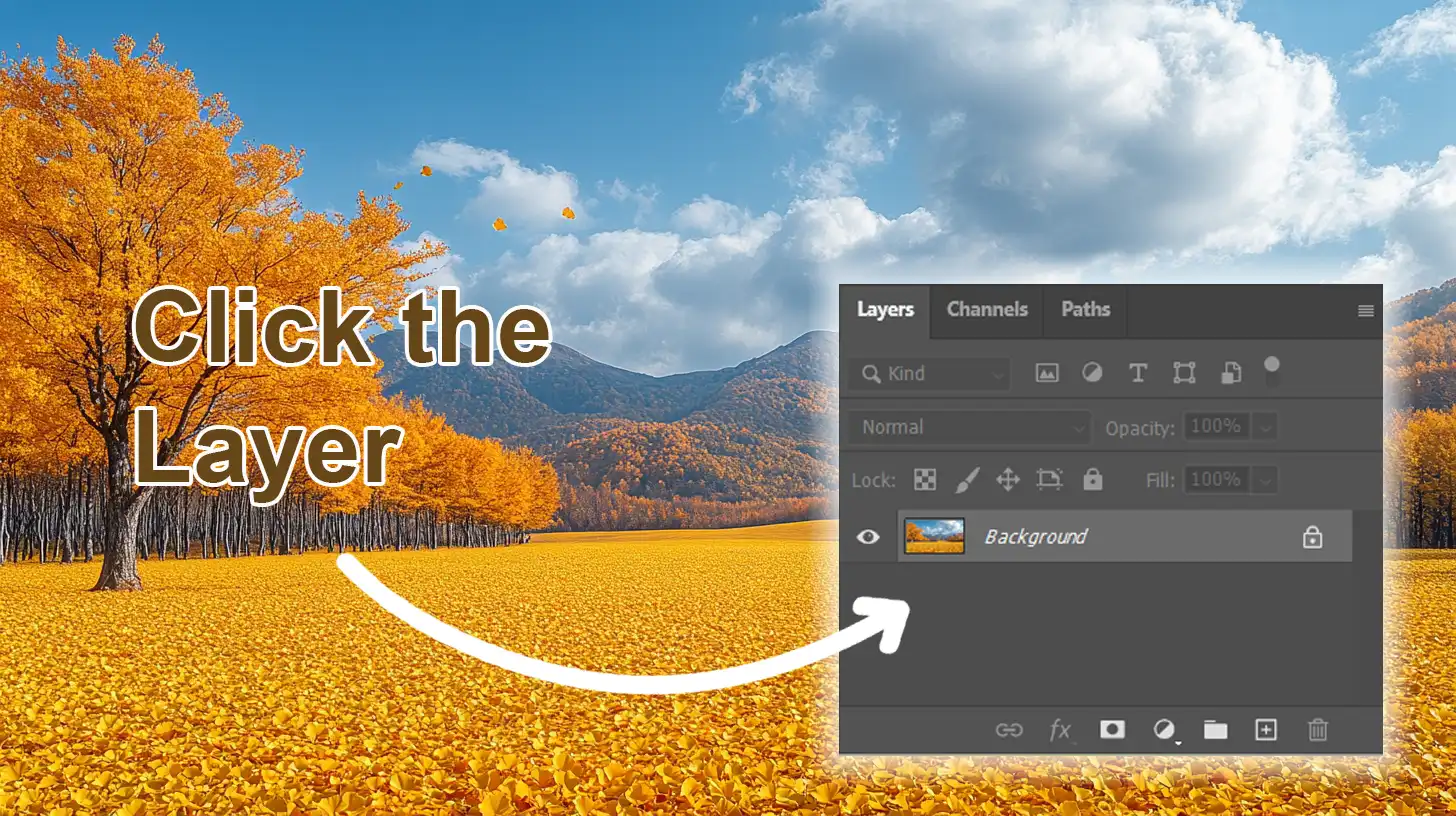
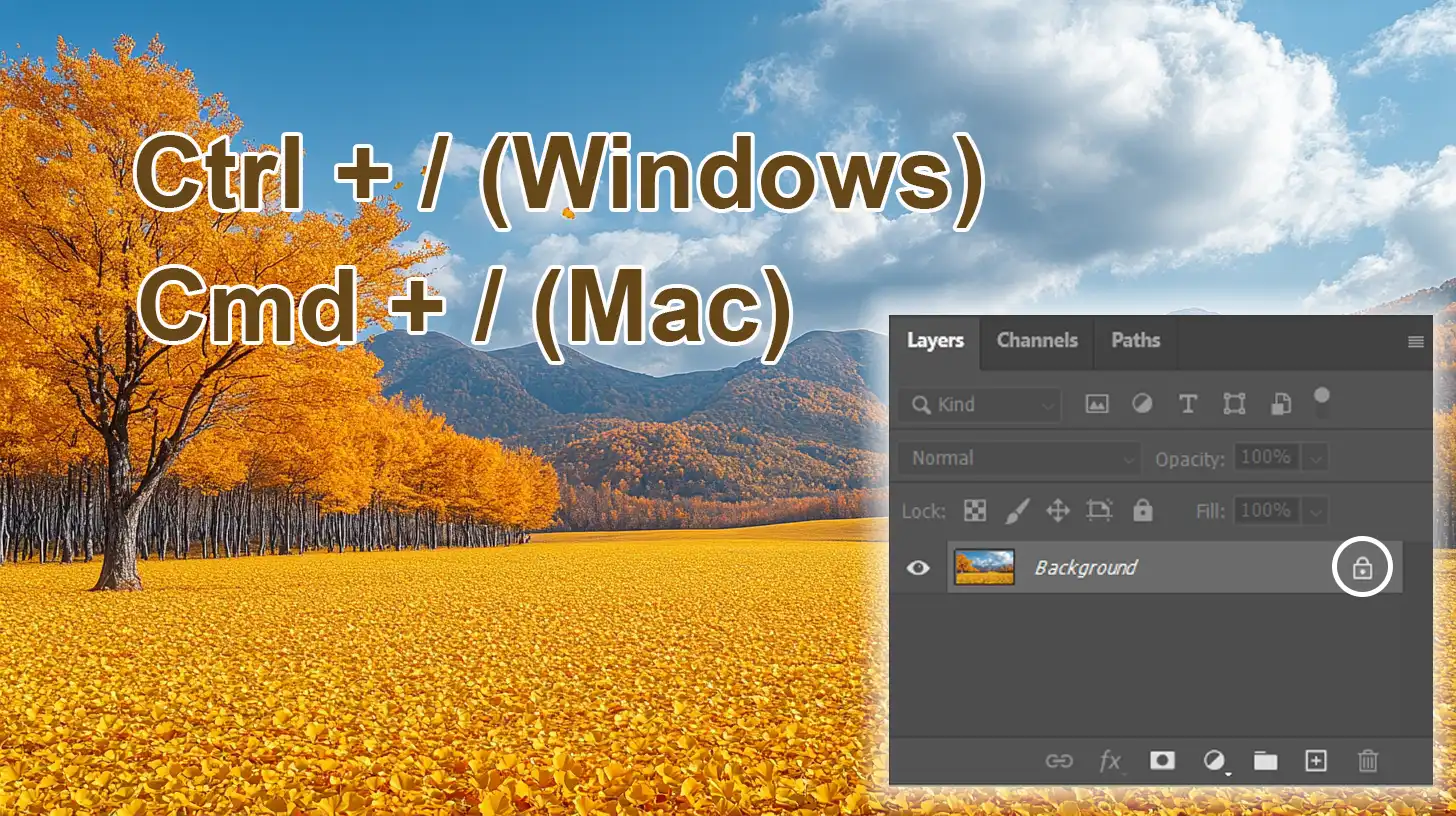
Look for the lock icon at the top of the Layers Panel. Click this icon to lock the layer. The small lock icon appears next to your layer’s name.
Step 5: Confirm the Layer is Locked
Check to see if the padlock symbol is visible next to your layer name. This indicates that your layer, whether it’s a background layer or any other, is now locked.
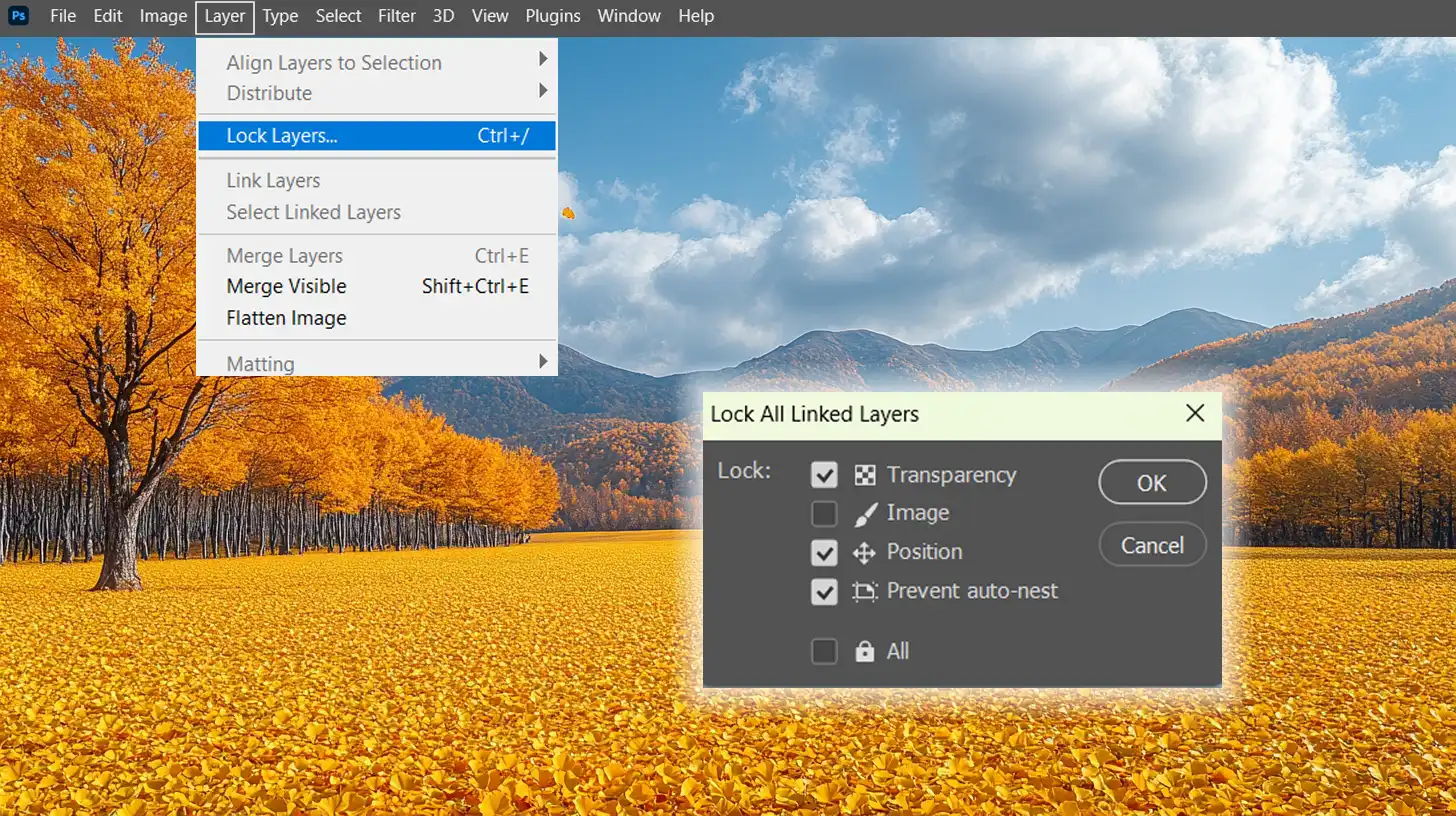
Pro Tip: Use the keyboard shortcut Ctrl + / (Windows) or Cmd + / (Mac) for quicker access to lock a layer. Additionally, you can access more locking options through the Menu Bar by navigating to Layer > Lock Layers.
Mastering these Photoshop shortcuts can significantly speed up your workflow and menu bar options can significantly speed up your workflow.
Different Types of Layer Locks
Select the appropriate lock type to protect specific parts of your layer:
- Lock Transparent Pixels: This option locks all the transparent pixels, allowing only the opaque parts to be edited. Click the checkerboard icon in the Layers Panel.
- Lock Image Pixels: Prevents painting on the layer's pixels, protecting them from accidental changes while leaving other layers editable.
- Lock Position: Locks the layer's position, preventing it from being moved. Select the four-arrow icon in the lock options.
- Fully Locked: This comprehensive lock prevents any changes. Click the lock icon next to the layer name after selecting the lock options.
To unlock layers is simple. Just click the lock icon again in the Layers Panel.
Locking layers, including the background layer, ensures that your work remains consistent. It provides safety from unintentional edits. Whether it’s locking the background layer or any other layer, mastering this will save time and frustration.
By using different lock options, you can control the specific aspects of each layer. Experiment with these features to find what works best for your workflow.
For more advanced techniques, consider learning about other essential tools in Photoshop, such as the content-aware fill or the content-aware scale and the patch tool and even some need to know skills such as how to draw curved lines in Photoshop, and how to easily add shapes in Photoshop to further enhance your editing skills.
Using the Layers Panel
The Layers Panel in Photoshop allows you to manage, organize, and lock layers easily. Understanding how to navigate this panel can help streamline your workflow and keep your project organized.
Below is a comparison of important aspects related to navigating and customizing the Layers Panel.
| Aspect | Overview |
|---|---|
| Navigating the Layers Panel | Learn how to efficiently name, rearrange, create, and delete layers to streamline your workflow. |
| Customizing the Layers Panel | Enhance workflow by grouping layers and using blending modes for unique effects. |
| Understanding the Lock Icon | The lock icon helps prevent accidental changes to layers, maintaining project integrity. |
| Functions of the Lock Icon | Different lock options allow you to protect transparent pixels, image pixels, layer position, or fully lock layers. |
Navigating the Layers Panel
Navigating the Layers Panel in Adobe Photoshop helps you organize your work. Each layer represents different elements of your composition.
On the right side of your screen is where you’ll find the Layers Panel. To get started, learn how to name, rearrange, create new layers, and delete layers efficiently.
Customizing the Layers Panel
Customizing the Layers Panel enhances your workflow. Right-click a layer name and see options at your fingertips.
Group layers to reduce clutter are especially useful when dealing with many layers. Creating a layer group can help organize your project more effectively. Using blending modes gives unique effects to your images, making them stand out.
To take your layer management skills to the next level, explore Photoshop layering tutorials. These tutorials offer advanced techniques and best practices for organizing and utilizing layers effectively.
For more advanced techniques, explore the difference between Photoshop and Lightroom to decide which software best suits your needs.
Understanding the Lock Icon
Locking a layer ensures it remains unaltered during edits. The lock icon is located at the top of the Layers Panel and displays different lock options.
Identifying the Lock Icon
Sit back and identify the lock icon at the top to start. Simple yet fundamental, it prevents accidental changes to your workflow.
Functions of the Lock Icon
Choose the right lock function to protect specific aspects of your layer:
- Lock Transparent Pixels: This keeps transparent pixels untouched while editing only the opaque parts.
- Lock Image Pixels: Ensures you're not painting over pixels accidentally.
- Lock Position: Freezes the layer in place. No more accidental shifts!
- Fully Locked: Prevents any changes whatsoever to the layer.
Unlocking a locked layer is easy. Just lock layers again. Keep it simple to manage by using keyboard shortcuts to lock a layer on the go.
Pro Tip: Want extra control? Use the ‘lock transparent pixels‘ feature, adjust pixel dimensions for pixel-perfect edits, and utilize a pixel art resizer to maintain the quality of your pixel art projects.
How to Unlock Layers in Photoshop
Unlocking layers in Photoshop, like a background layer, is a simple process. Follow these steps to quickly unlock and start editing your layers.
Steps to Unlock a Layer
Unlocking a layer in Adobe Photoshop is simple. Follow these steps:
- Locate the Layers Palette on the right side of your screen. This palette displays all your current layers. If you see a locked layer, it means the layer is currently locked.
- Click on the locked layer to unlock it. You must first convert a background layer to a normal layer. Do this by double-clicking the background layer and hitting "OK" in the dialog box. Now, you can treat it as any other layer.
- To unlock multiple layers at once, select them by holding the Shift key and clicking on each layer. Then, click on the locked layers to unlock all selected layers together.
- If the lock icon doesn't work, check if you have locked the layer partially with specific properties like transparency or position. To clear all locks, go to the Menu Bar, select "Layer," then "Quick Layer Locking," and choose "None."
Troubleshooting Layer Unlocking
Sometimes, unlocking layers isn’t straightforward. Here are some common issues and solutions:
- Ensure you're not trying to unlock a background layer without converting it first. Always convert your background layer to a normal layer by double-clicking it within the layer stack.
- Make sure you're not in a mode that limits changes to layers. For example, ensure you're not in the Blending Mode or using tools that lock a layer's pixels.
- Check if the selected layers are part of a layer group. Unlock each individual layer within the group, then proceed to unlock the group itself if needed.
- Double-check that the layer you're trying to unlock isn't rasterized, as some editing functions require rasterization. Knowing where to find and how to use the Layers Palette effectively resolves most issues.
Pro Tip: Use the keyboard shortcut Ctrl+J (Cmd+J on Mac) to duplicate a locked layer. This way, you can make edits on the duplicated layer while keeping the original layer intact.
For more advanced editing techniques, consider learning about Photoshop masking, which can help you refine your images further. Additionally, master side-by-side picture editing in Photoshop to compare changes and refine your edits more efficiently
Frequently Asked Questions

What is the process to lock a layer in place?
- Open your project in Photoshop.
- Select the layer you want to lock from the Layers panel.
- Click the 'Lock' icon at the top of the Layers panel.
- Choose 'Lock All' to completely lock the layer or select specific lock options like position or transparency.
How do I stop a layer from moving in Photoshop?
- Open your project and select the layer you want to fix in position.
- Click the 'Lock' icon in the Layers panel.
- Select 'Position' to lock the layer's location within the canvas.
What is the process to lock a layer size in Photoshop?
- Open your project and select the layer whose size you want to lock.
- Go to the Layers panel and click on the 'Lock' icon.
- Choose 'Lock All' to prevent any changes to the layer, including its size.
How to lock an image in place in Photoshop?
- Open your project and select the image layer.
- In the Layers panel, click the 'Lock' icon.
- Select 'Position' to ensure the image does not move from its set location.
Conclusion
Knowing how to lock a layer in Photoshop has been a game-changer for me. It has significantly streamlined my workflow, ensuring that I don’t accidentally alter or delete significant elements of my projects.
This small yet powerful feature has saved me countless hours of rework and stress.
If you want to learn more useful tips and improve your Photoshop skills, I highly recommend checking out my Phostoshop Course and Lightroom course. These courses have given me the confidence to handle any creative challenge. Additionally, you can get the best tools by visiting Adobe Photoshop and Adobe Photoshop Lightroom.
Mastering how to lock a layer in Photoshop is just one step toward creating amazing designs. Give it a try and see how it can help you, too.
Read more about Photoshop:


