How to Add Another Image in Photoshop: Simple Steps for Layering
How to Add Another Image in Photoshop: Simple Steps for Layering
When learning how to add another image in Photoshop, it’s easy to feel overwhelmed by the myriad of tools and options available.
But don’t worry, I’ll guide you through the process step-by-step.
By the end of this guide, you’ll be able to seamlessly combine images, adjust layers, and create stunning visuals.
Let’s dive in and simplify this powerful feature together.
Table of Contents
How to Add Another Image in Adobe Photoshop
We’ll cover the essentials of layering multiple images, using the ‘Place’ and ‘Drag-and-Drop’ methods to seamlessly integrate new elements into your project.
Additionally, we’ll explore how to adjust layer properties to ensure that the added images blend well with the existing content, enhancing the overall composition without disrupting the visual flow.
Guide on How Add Another Image in Photoshop
Step-by-step for adding another image into Photoshop:
Open Adobe Photoshop on your computer. If it's not installed, download it from Adobe's website.
Create a new document by going to the top menu bar, then select File> New. Choose your document size and click OK.
Go to the File menu and select Open to choose the first image file you want to use. This opens the Image in a new tab.
Find the second Image in your file explorer. Drag and drop this Image into the Photoshop screen. This adds a new layer.
Select the Move Tool from the tools panel on the left side. Position your second Image where you want it in the final Image.
Working with Layers Panel
The Layer Panel is a powerful and essential tool in Photoshop that allows you to organize and manipulate different elements of your project.
Understanding how to effectively use the Layers Panel can greatly enhance your editing capabilities.
Adjust Image Layer Order
Go to the layer panel on the right side of the screen. Drag the new layer above or below the first Image, depending on which one you want on top.
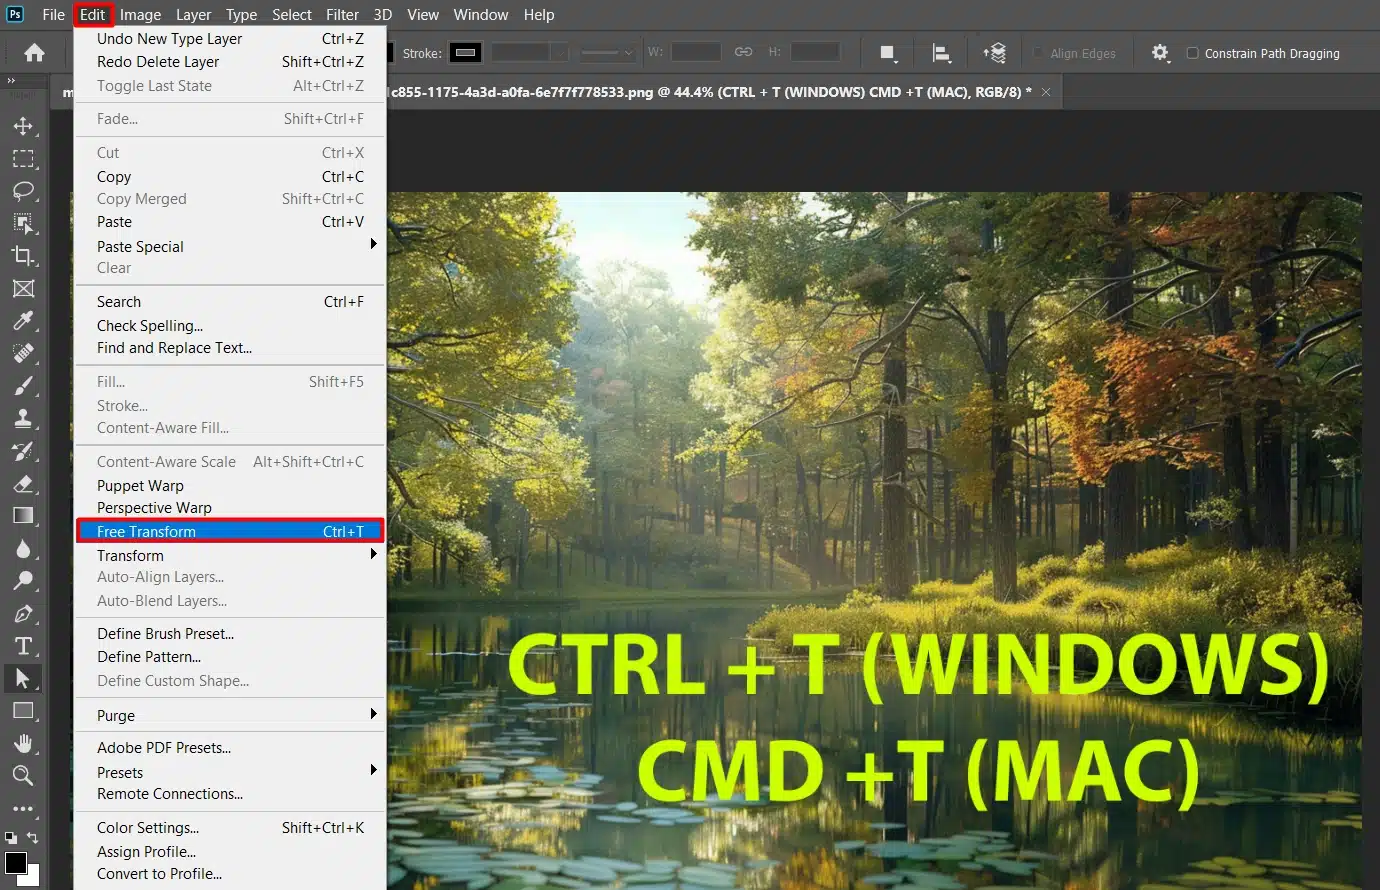
Resize and Rotate
Use the free transform tool to resize or rotate your second Image. You can find Free Transform in the Edit drop down menu or press ‘Ctrl+T’ (Windows) or ‘Cmd+T’ (Mac).
To enhance your editing skills, you can also learn how to resize an imagein Photoshop for better composition and layout.
Also, resizing the image is crucial for printing your design so be carefull and check how to resize image before printing.
Change Opacity
Adjust the opacity of your image layer in the layer panel to blend your images better.
Add a Layer Mask
To hide or show parts of your Image, add a layer mask.
Click the layers you want to mask, then click the layer mask button at the bottom of the layers panel.
Saving Your Work
Once you’re happy with your work, go to File> Save As.
Choose a format that suits your needs.
Choosing the best format for sharing online, JPEG or PNG are good options.
Export Image file
For higher quality, use the export option.
Go to File> Export > Export As and choose your desired export settings.
Smart Objects and Regular Layers for Adding Another Image in Photoshop
Understanding the differences between smart Objects and regular Layers in Photoshop is essential for effective editing.
This table highlights key features such as quality preservation, non-destructive editing, scalability, and the ability to edit filters and adjustments.
By comparing these aspects, users can make informed decisions about which layer type to use for various editing tasks.
Feature
Smart Objects
Regular Layers
Quality Preservation
Maintains original quality during editing
Quality can degrade with multiple edits
Non-destructive Editing
Yes
No
Scalability
Can be resized without losing quality
Can lose quality when resized
Filter and Adjustment Editing
Editable after application
Permanent after application
Flexibility
Can be updated with new content automatically
Static, requires manual updates
Always use Smart Objects instead of regular layers when inserting another image in Photoshop or Photoshop File. This maintains the quality of your images and makes them easier to edit later.
Pro Tip: For more advanced editing, consider using the content-aware fill feature to seamlessly blend your Image in Photoshop.
How to Seamlessly Insert and Edit Images in Photoshop
Adding and editing multiple images in Photoshop can enhance your creative projects by combining elements from different photos.
This section will guide you through the process of opening your base image, inserting additional images, using the Place Embedded command, resizing and positioning, blending, and making final adjustments for a seamless and polished result.
Opening Your Base Image
First, open Adobe Photoshop. Go to the top menu bar and select File> Open. Choose your base image in Photoshop or choose an already existing Photoshop file.
The entire Image appears as the background contents layer in your Photoshop new document.
Inserting the Second Image
Next, insert another image:
Go back to the File menu and select Open.
Choose the second Image.
Drag and drop this Image onto your original Image. It shows up as a new layer above the background layer.
Background layer serve as the foundation for your Photoshop document projects.
They provide the base upon which you build and manipulate other elements.
Understanding how to effectively manage background layer is crucial for seamless editing.
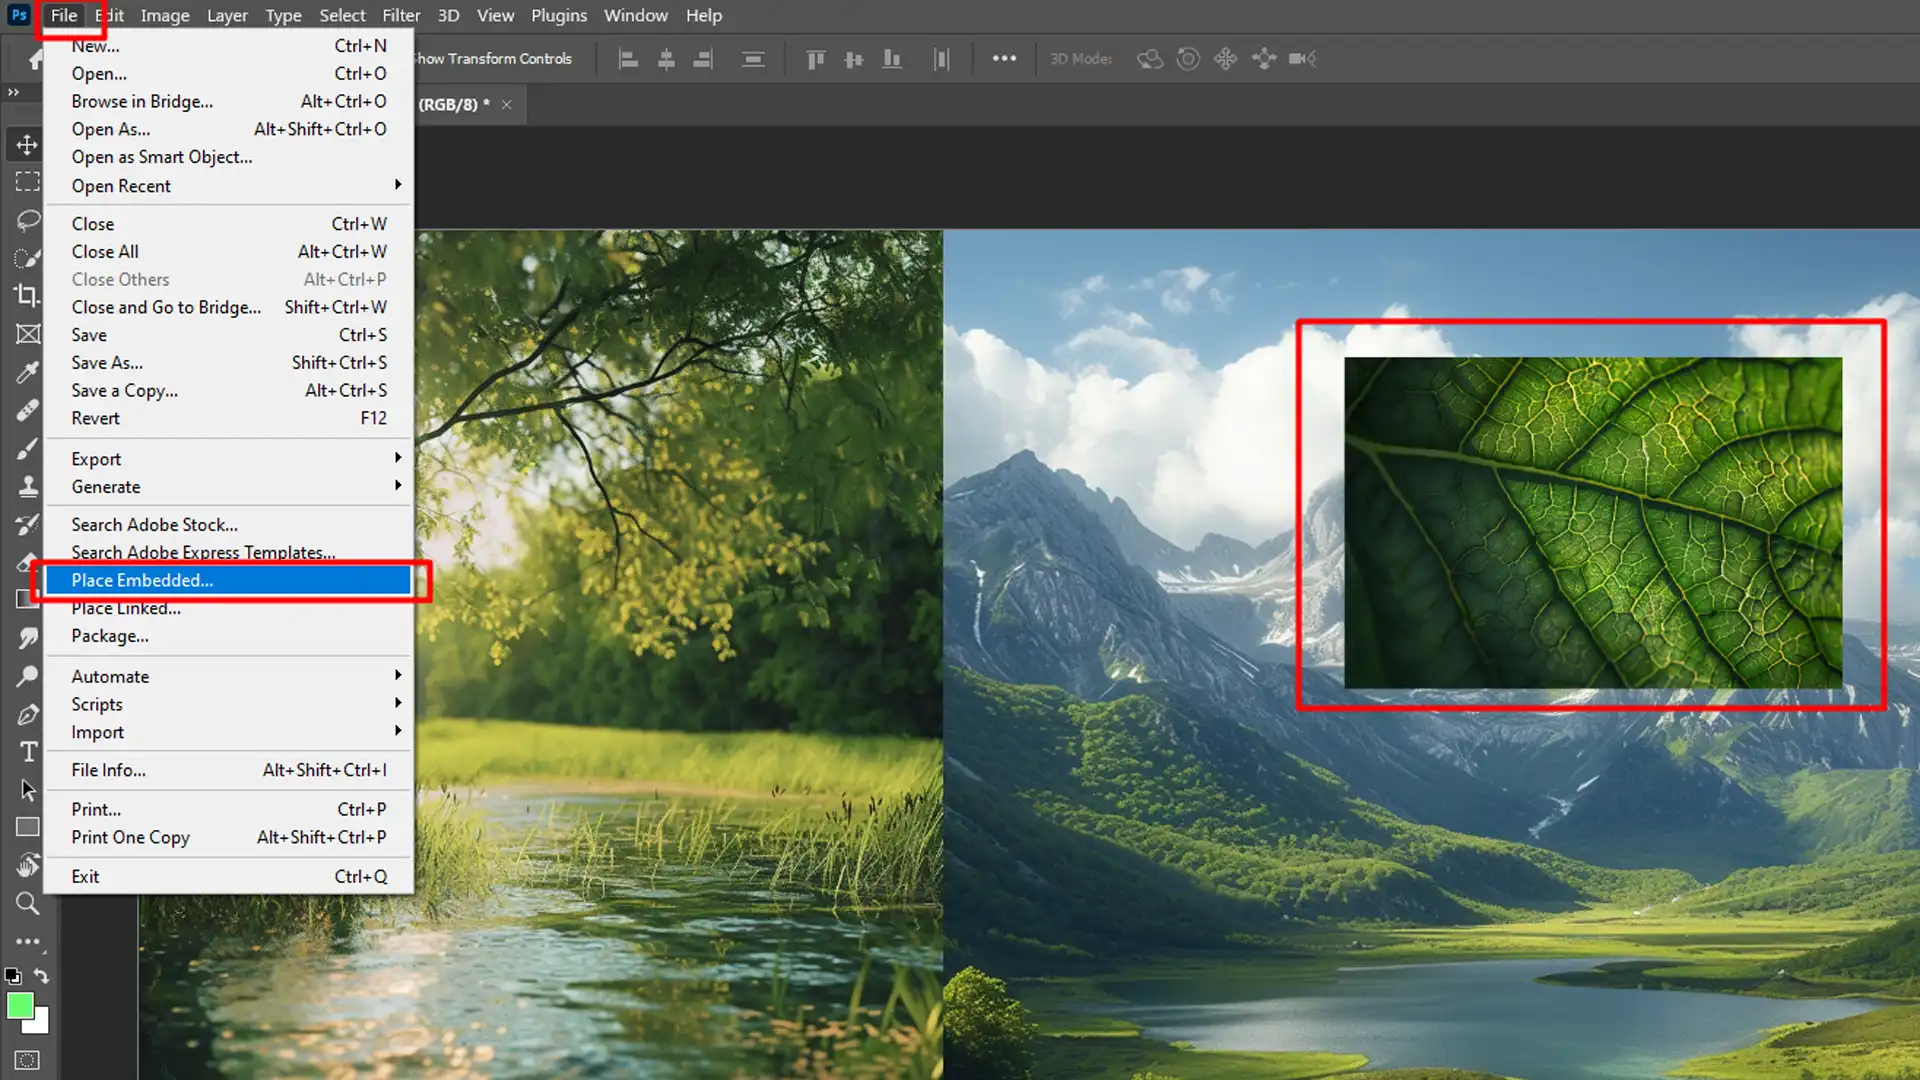
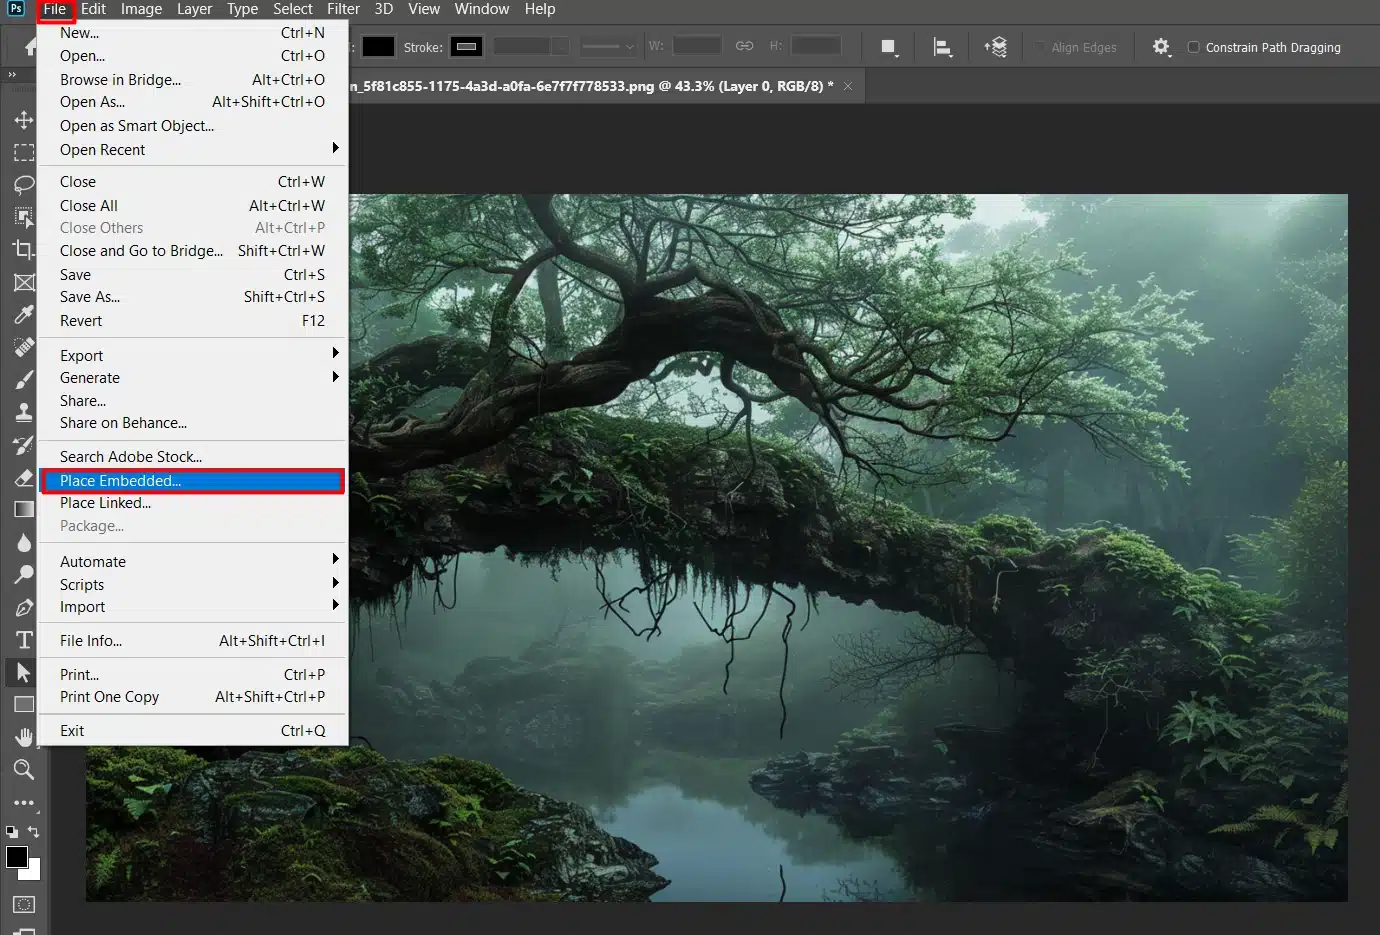
Using the Place Embedded Command
If you want to insert an image directly into your document, use the Place Embedded option:
Click File> Place Embedded from the menu.
Select the image file and click Place.
The Image appears in the center with a bounding box for easy resizing.
Resizing and Positioning the Image
Use the Move Tool to place the new Image where you want it:
To resize, hold down the Shift key and drag it from a corner of the bounding box.
Adjust the position by dragging the Image with your mouse.
Release the mouse button when it's in the right spot.
Lower the opacity to make parts of the underlying image show through.
Another method is adding a layer mask to control visibility on specific sections.
Final Adjustments and Saving
With all images in Place, make the final tweaks:
Use tools like crop, brush, or selection to polish your work.
Save your project by going to File > Save As to keep your original Image intact.
Pro Tip: Insert images and convert them to smart objects for easier edits and better quality.
Tips and Tricks for Better Image Integration
This section provides practical tips and tricks for better image integration, including techniques for matching lighting and effects, using layer masks effectively, and ensuring proper alignment and proportions.
Using Layer Masks
Layer masks are essential tools for your Photoshop document , for blending images seamlessly. Follow these steps:
Select the layer you want to work with.
Click the "Add Layer Mask" button at the bottom of the layers panel.
Use the brush to paint over areas you want to hide or reveal. Black hides; white shows.
Messed up? No problem. Paint over it in white to fix mistakes.
Layer masks give you flexibility and precision. Adjust the brush opacity for better control over the blend.
Look at the top right corner of your layers panel for the opacity slider.
Sliding it left makes your Image more transparent, and sliding it right makes it more solid.
Insert images and blend them to naturally with opacity. Use it to create layered effects or soften hard edges.
Applying Filters
Filters can add an extra wow factor to your low resolution images. To apply filters:
Go to the top menu bar and choose Filter.
A drop-down menu with options like Blur, Sharpen, and Artistic will appear.
Filters can enhance textures, add depth, or transform your Image’s look.
Use them sparingly to avoid making images look artificial. Test different filters and settings to see what looks best. Subtle changes often yield the best results.
Pro Tip: This keeps them non-destructive and retains quality, allowing you to tweak settings later. For advanced editing, consider using the content-aware fill in your Photoshop document to seamlessly remove unwanted elements from your images.
Common Photo Editing Mistakes to Avoid when You Insert And Edit Images
Photo editing can significantly enhance the quality and impact of your images, but it’s easy to make mistakes that can detract from the final result.
This section highlights some common photo editing mistakes, such as over-editing, improper use of filters, neglecting the importance of resolution, and failing to use layers effectively.
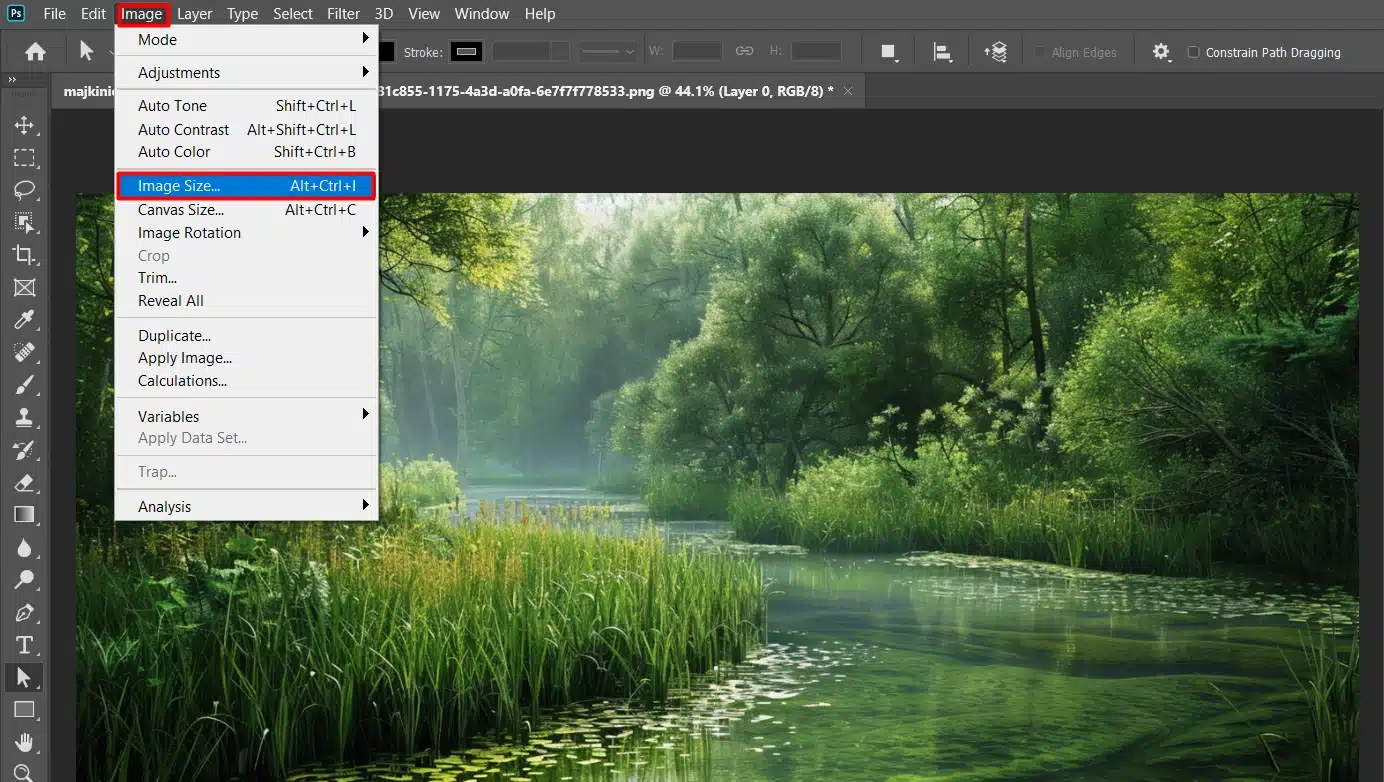
Ignoring Image Resolution
Let’s get straight to it. One big mistake is ignoring image resolution. High resolution means clear images and low resolution means a blurry mess.
To check, click Image in the menu bar, then Image Size. For printing, aim for 300 dpi. For screens, 72 dpi.
Overlooking Color Matching
Color matching is another common mistake. Imagine a bright sunset next to a dull mountain. This does not look right, does it?
Use the Eyedropper Tool to pick colors from one image and apply them to another.
This keeps everything looking like it belongs together. Mismatched colors can make your work look unprofessional.
Forgetting to Save in the Right Format
Don’t forget to save your work in the correct format:
JPEG for web
TIFF for print
PSD to keep your layers
Go to File> Save As and pick the correct format. You don’t want to lose those quality layers after all your hard work. Understanding the difference between NEF and JPEG format can also be crucial depending on your needs.
Pro Tip: Always use smart objects when adding an image. This keeps the original quality intact.
Right-click the layer and select Convert to Smart Object for seamless edits every time!
For more advanced techniques, check out this tutorial on selecting a subject to streamline your editing process.
Frequently Asked Questions
How do I add a second image in Photoshop?
Here’s a step by step guide on how to add a second picture:
Open your first Image in Photoshop.
Go to the File menu and select 'Open' for your second Image.
Use the Move Tools to drag the second Image onto the first image tab.
Adjust the placement and size as needed.
How do I add a new image in Photoshop?
Open Photoshop and go to the File menu.
Click 'Open' and select the Image you want to add.
The Image will open in a new tab. From here, you can edit and manipulate the Image as needed.
How do I insert a picture into another picture?
Here’s a step by step guide of the process:
Open both images in Photoshop.
Select the Image you want to insert using the Move Tools.
Drag it onto the tab of the other Image and release it there.
Position it as desired and use tools like an Eraser or a Mask to blend it seamlessly.
How do I add multiple images in Photoshop?
Open Photoshop and load all the images you want to add by going to File > Open.
Each Image will open in a separate tab.
Use the Move Tools to drag each Image into one main document.
Arrange and resize each Image as needed to create your final composition.
$2,061.00Original price was: $2,061.00.$1,061.00Current price is: $1,061.00. 27582
Download Your Free Guide Now!
Discover the secrets of photography with our printable guide! Master essential techniques like aperture, shutter speed, and ISO to create stunning images. Get your free printable PDF now and start turning your snapshots into masterpieces!