Gold Colors in Photoshop: How to Create Stunning Effects
Gold Colors in Photoshop: How to Create Stunning Effects
Gold colors in Photoshop always catch the eye. Today, I want to show you how to make your text shine like gold using this powerful tool.
Imagine your text looking fancy and elegant, ready to captivate anyone who sees it. Follow these simple steps, and you’ll have sparkling gold text in no time.
Ready to add a touch of luxury to your image and designs? Let’s get started!
Table of Contents
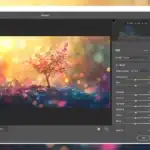
Transform Your Text into Glorious Gold Colors in Photoshop
Give your text a stunning gold finish with this guide. We’ll walk you through each step to ensure your design shines.
Ready to get started? Let’s begin with setting up your document
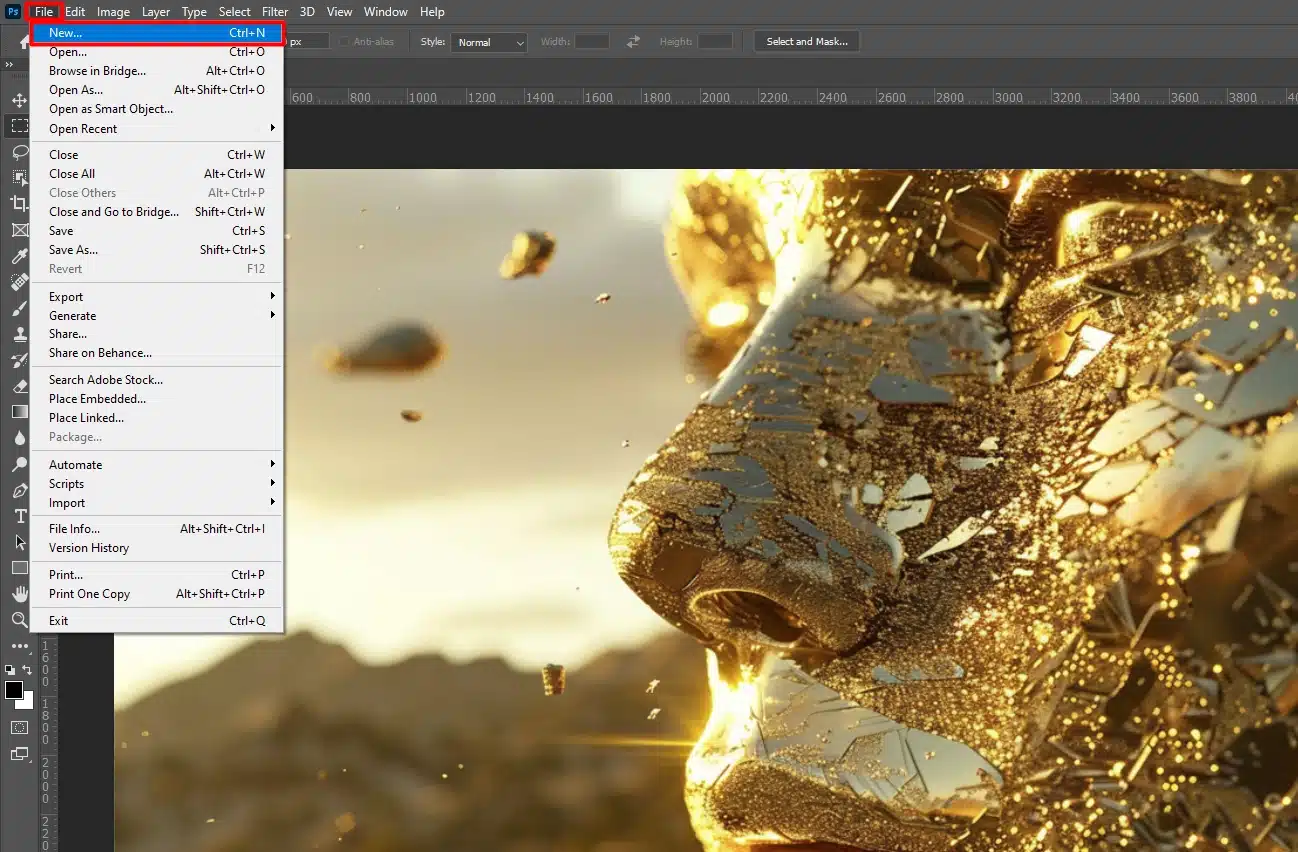
1. Create a New Document
Open Photoshop and start a new document. Set your size and resolution.
A clean start is important for a great finish.
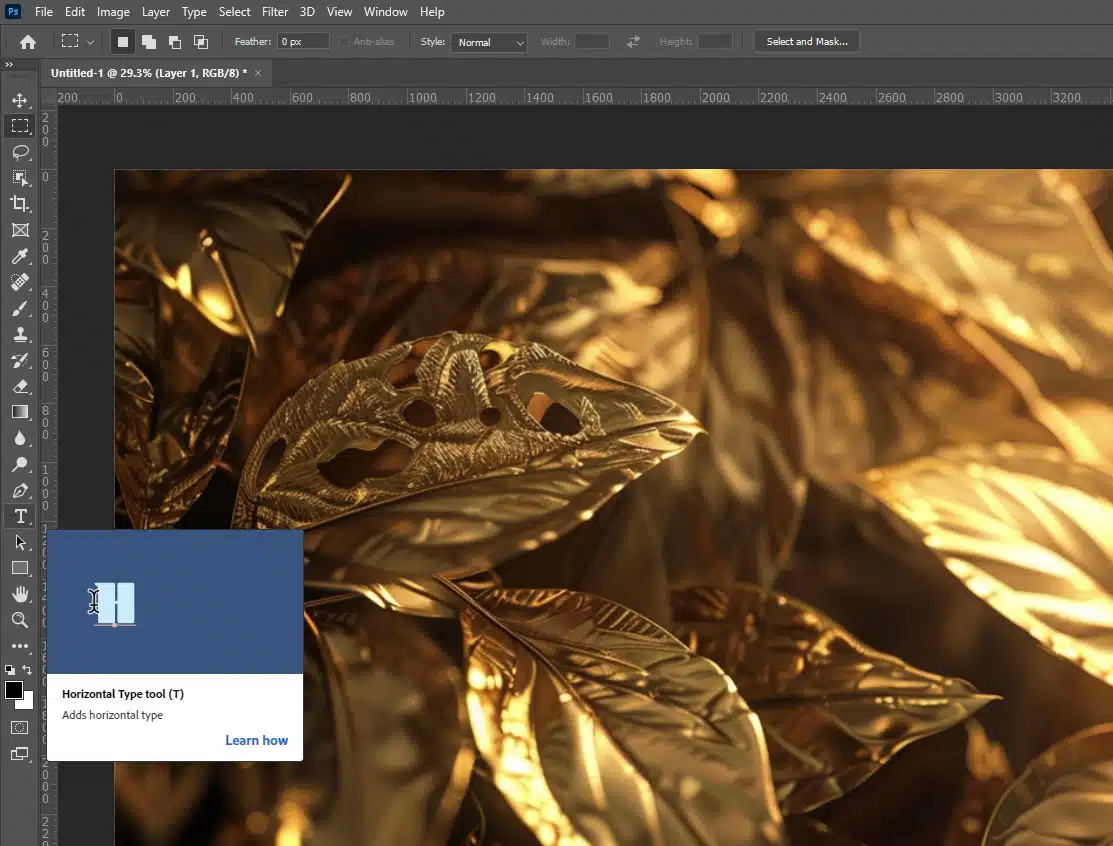
2. Create Text Layer
Select the type tool. Click on the canvas and type your text. Use a bold font for a rich look.
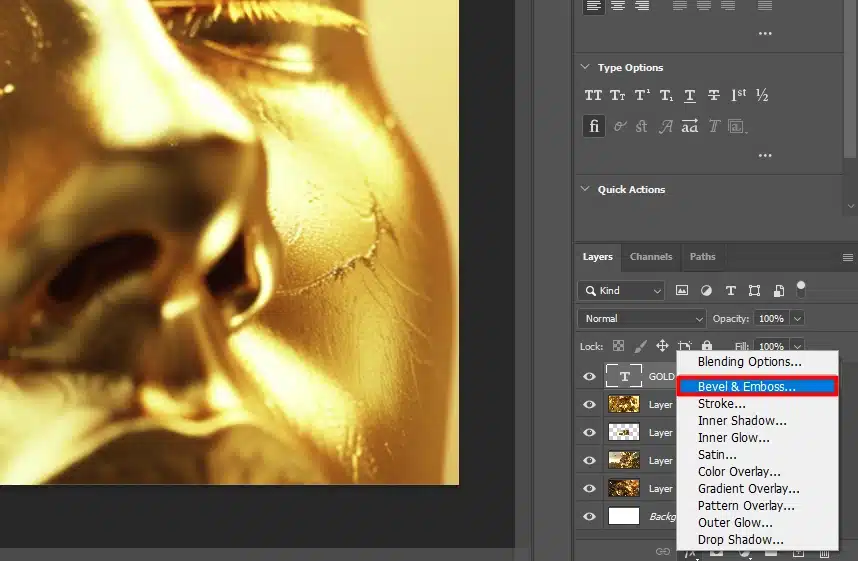
3. Apply Layer Styles
This is where the fun begins. You’ll add a different layer style to get the gold text effect.
Double-click on the text layer to open the layer styles panel.
Bevel and Emboss Layer Effect
Check the Bevel and Emboss box.
Set the style to 'Inner Bevel'. This adds richness.
Adjust the size and shading as you like.
Gradient Overlay Layer Effect
Enable Gradient Overlay.
Pick a gradient with shades of gold colors.
Adjust the angle for the right light effect.
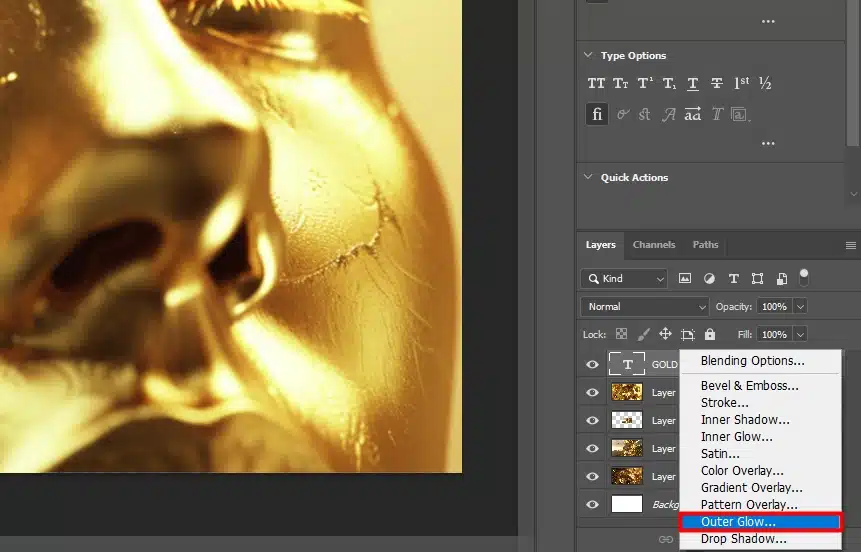
Outer Glow for Gold Text
Select Outer Glow.
Pick a light golden color fill.
Set the spread and size to enhance the glow.
The bevel emboss layer effect in Photoshop adds density and dimension to your text or objects, making them look three-dimensional.
To use the bevel emboss layer effect, go to the layer styles panel, select it, and adjust the settings.
Experiment with styles and shading to perfect the bevel emboss layer effect, ensuring your elements look realistic and engaging.
Incorporating the bevel emboss layer effect adds a professional touch and makes your text and objects stand out.
Layer Style Tips for Gold Text
Mastering layer style is important to creating stunning layer effect in Photoshop. To apply a layer style, double-click on your layer and select the desired layer effect.
Experiment with different layer style options like Gradient Overlay and Outer Glow. Save your favorite layer style settings for future projects.
Using layer style effectively can make your designs stand out and look professional.
4. Final Touches
Make sure your layers are aligned. Adjust the layer settings until you get the perfect gold text for your images.
Pro Tip: Save your layer styles for future use. It saves time and keeps your designs consistent.
Use smart objects for final touches when adjusting layer settings to achieve the perfect gold text effect for your images, as they allow for non-destructive edits and easy adjustments.
Additionaly, consider how similar techniques in Lightroom for fine-tuning can enhance your overall editing process.
Setting Up Your Document
Welcome! Let’s set up your document for a gold effect. This is the first step.
Starting a New Project in Photoshop
Open Photoshop and go to the menu bar.
Click File and then New.
Set dimensions to 1920 x 1080 pixels for tutorials.
Choose a resolution of 300 pixels/inch for high quality.
Select a white or transparent background. White is a good start.
This step sets up your canvas. A well-prepared document makes things easier.
Here’s how to make your gold text stand out with the perfect background:
Add a new background layer. Click the New Layer button at the bottom of the layers panel.
Use the color picker to choose a neutral color like dark gray or contrast . It makes the gold pop.
Turn off the original background by clicking the eye icon next to it.
Your new background layer is ready. This ensures the gold text stands out.
We’ve set the groundwork. Next? Adding that gold text touch!
Pro Tip: Save your document often. It’s easy to forget when you’re excited. Frequent saves prevent loss of work.
When choosing the right background for your gold text effect, use Photoshop shortcuts to quickly access and refine your selection, and employ the patch tool to seamlessly blend and correct any background imperfections.”
Creating the Gold Text
Alright, let’s make some gold text in Adobe Photoshop. This guide takes you through it step-by-step.
It’s easy, I promise.
Stick with me, and you’ll have text that shines like gold.
Adding Your Text for Creating the Gold Text
First, add your text:
Open Photoshop.
Create a new document.
Use the type tool to click on the canvas and type your text.
Choose a bold font. Bold fonts look better.
Next, select your text layer:
Find your layers in the layers panel. If you can't see it, go to Window -> Layers.
With your text layer highlighted, we can move on.
Applying the Gold Gradient
Now, let’s add some shine:
Double-click your text layer. This opens the layer style panel.
Select Gradient Overlay.
Click on the gradient bar in the gradient overlay section. A window pops up.
Choose shades of gold. Experiment with light and dark golds.
Adjust the angle until you like it.
The gradient overlay layer effect in Photoshop adds a smooth color transition to your text or objects, enhancing their visual appeal.
To use the gradient overlay layer effect, go to the layer style panel, select it, and adjust the gradient settings.
Experiment with different color combinations to perfect the gradient overlay layer effect.
Incorporating the gradient overlay layer effect can make your designs more dynamic and eye-catching.
Highlight Mode and Blend Mode
The highlight mode and blend mode in Photoshop are important for creating stunning effects.
Highlight mode enhances the brightness of your design, while blend mode controls how layers interact with each other.
Enhancing Your Design with the Outer Glow Layer Effect
The outer glow layer effect in Photoshop adds a radiant halo around your text or objects, making them stand out.
To use the outer glow layer effect, go to the layer style panel, select it, and adjust it.
Experiment with colors and opacity to perfect the outer glow layer effect, ensuring your elements look dynamic and eye-catching.
Incorporating the outer glow layer effect adds details.
Let’s add extra pop:
In the same layer style panel, click on Outer Glow. This adds light around your text.
Choose a glowing bright color that complements your gold.
Play with the spread and size settings.
Your gold text is almost ready. Let’s add Bevel and Emboss for richness:
In the layer style panel, select Bevel and Emboss.
Set the style to Inner.
Tweak the depth and size settings until you're happy.
Pro Tip: Save your custom layer style as a preset. This way, you can quickly apply the same effects to other projects.
Click on the ‘New Style‘ button in the layer style panel after you’ve perfected your settings.
For more advanced techniques to seamlessly remove unwanted objects from your image, use the content-aware fill feature in Photoshop to automatically fill the area with matching background elements.
Make Your Gold Text Shine
Now, let’s make that gold text really pop with some advanced techniques.
It’s easier than you think. Promise. We’ll focus on enhancing our text by adding some neat layer style, highlights, and shadows.
Adding Layer Style
This table provides an overview of various effects that can enhance the visual appeal of your text or objects. Each effect adds a unique element to your design:
Aspect
Overview
Bevel and Emboss
Adds depth and dimension to your text or objects, making them look three-dimensional. Adjust size, and shading for a realistic effect.
Gradient Overlay
You can create smooth color transitions. Adjust gradient colors and angle to make your foreground color more dynamic.
Outer Glow
Adds a glowing halo around text or objects. Adjust color, spread, and size for the desired glow effect.
Contour
Enhances edges with brightness variations. Adjust contour type and range for smoother look.
Texture
Adds interesting textures to text or objects. Adjust pattern and scale to blend textures well.
Layer styles are significant for a realistic gold layer effect. Here are a few styles to use:
Bevel and Emboss Effect
This effect adds density to your text, making it look more three-dimensional:
Double click your text layer.
Select Bevel and Emboss effect.
Set the style to ‘Inner Bevel’.
Adjust depth to your liking.
This gives your text a raised look, like it’s popping off the screen.
To enhance the effect of bevel and emboss, you can change the color of a layer to achieve the desired highlight and shadow details.
Contour for Smooth Edges and Realism
Contour adds brightnessvariations along the edges, making your text look smoother:
In Bevel and Emboss settings, Double click Contour.
Choose a contour that enhances your gold text.
Adjust the range slider.
It adds extra polish and realism. Give it a try.
Applying Texture to Enhance Your Golden Text Effect
Texture makes your gold text effect look more interesting and less flat:
In Bevel and Emboss, find the Texture option.
Click the Pattern dropdown and choose a texture you like.
Adjust the scale and depth to blend it well.
Textures give your text that extra pop.
Mastering Layer Effects to Create Stunning Golden Text
This tutorial will guide you through using layer effects in Photoshop to create stunning gold text effect.
Layer effects add depth and dimension, making your designs pop.
Follow this tutorial to learn how to apply layer effects like Bevel and Emboss, Gradient Overlay, and Outer Glow.
Each step in the tutorial will help you master these layer effects.
By the end of the tutorial, you’ll be able to use layer effects to enhance your projects and create eye-catching designs.
Implementing Highlights and Shadows on The Gold Text
Highlights and shadows make your gold text effect feel more dynamic:
Selectyour text layer in the layers panel.
Click Layer Style and choose Outer Glow.
Set a light color for highlights and adjust the size.
For shadows, use the Shadow Opacity setting under Drop Shadow.
Highlights and shadows make a huge difference. Don’t skip this step.
Pro Tip: Save your layer style as presets. When you save it, you can easily apply the same gold color effects to future projects. It saves tons of time and keeps consistency across your work.
With these techniques, your gold text effect will absolutely shine. Those small tweaks make all the difference.
Make Your Gold Text Shine
To perfect your gold text effect, focus on the middle tones and values of the gradient.
Adjusting these values helps in achieving the right shade of gold.
Applying and Adjusting Gradient Settings for a Balanced Shade
Load the gradient settings and tweak the shade to ensure a balanced look.
This technique enhances the overall impact.
Reference and Technique
Use a reference image to match the gold shade precisely.
This technique ensures consistency and accuracy.
Experiment with Blend Modes for Optimal Design
Switch between different blend modes to see what works best.
This technique helps you find the perfect look for your design.
Final Touches For The Gold Text
Alright, folks, you’ve made it this far with your gold text effect. Now let’s dive into those final tweaks to make your work pop.
We’ll focus on adjusting colors and adding a background that complements your gold.
Mastering Opacity for Stunning Design Effects
In this tutorial, you’ll learn how to use opacity to create stunning effects. Adjusting the opacity can make your designs look more dynamic.
Follow this tutorial to master the use of opacity in your projects.
Refining Colors for a Dynamic Golden Effect
Your golden text needs the right color settings to truly shine. Let’s start with the gradient overlay layer effect. Follow these steps:
Double click your text layer in the layers panel to open the layer style.
Select Gradient Overlay. This allows you to add a gradient that will make your gold color more dynamic.
Click on the gradient bar. Here you can pick from various golden shades using the color picker.
Adjust the angle of your gradient. Play around with it until the light hits just right.
If the gold is too harsh, tone it down with the opacity. A touch of transparency can make a big difference.
The right colors can make or break your golden text effect, so don’t rush this step.
To achieve a dynamic golden effect, you can apply techniques from portrait editing to refine and enhance the colors for a more vibrant and polished look.
Integrating Green and Orange for Vibrant Text Effects
To add a unique touch, mix green and orange into your design. These colors can be created easily using the color picker.
Press the color picker tool, choose a green or orange shade, and apply it. Experiment with green and orange gradients.
Press the gradient tool, select a green to orange transition, and see the vibrant results.
These colors, when created properly, can make your text pop.
Pro Tip: Once you’ve created your design, press Ctrl+S to save your work.
This ensures that all changes are saved, especially when you created new color effects like green and orange.
Placing a Background for the Gold Text
A good background makes your golden text stand out. Let’s create one that complements your design:
Add a new layer under your text layer. Go to the layers panel and press the new layer button at the bottom.
Pick a neutral or contrasting color, like dark blue or black, using the color picker. Neutral backgrounds make gold shine brighter.
Use the brush tool for subtle textures. Brush Tool can add a slight gradient or some soft light effects to the background layer. Brush tool is great for this.
Ensure the background doesn’t overshadow your text. It should enhance, not distract.
With the right background, your golden text truly pops off the screen.
And remember, experimenting with different layers and blend modes in the layers panel can lead to unexpected but fantastic results.
To create a cohesive design when placing a background for the golden text, consider using the warp text feature to ensure your text seamlessly fits with the background elements.
Unlock Free Design Resources for Better Projects
Accessing freeresources can elevate your design projects without extra cost. Many websites offer free fonts, graphics, and templates.
Utilize free Photoshop brushes and textures to enhance your work. Take advantage of free tutorials to improve your skills.
Remember, free doesn’t mean low quality; you can find high-quality resources to boost your designs.
Pro Tip: Save your final piece in PSD format. This keeps all your layer style and effects editable. You never know when a small tweak might be needed.
Frequently Asked Questions (FAQs)
How to get gold color in Photoshop?
Open your project in Photoshop.
Select the area you want to color or create a new layer.
Go to the Color Picker tool and manually enter the color code for gold, which you can find below.
Apply the color to the selected area.
What is the color code for metallic gold in Photoshop?
The color code for metallic gold in Photoshop is typically #D4AF37.
You can enter this code in the Color Picker to use it in your projects.
How do you find the color code for a gold gradient in Photoshop?
To create a gold gradient, you can use a combination of gold tones from dark to light.
Start with a darker gold like #C79840 and transition to a lighter gold like #FFD700.
Use the Gradient Tool to apply these colors.
What color is rose gold in Photoshop?
The color code for rose gold in Photoshop can be #B76E79.
Input this code in the Color Picker for applying it to your design elements.
Creating gold colors in Photoshop has really transformed my designs. By following these simple steps, I’ve made my text shine and captivate my audience. The significance is in using layer styles like Bevel and Emboss, Gradient Overlay, and Outer Glow. These effects add density and make your text stand out.
$2,061.00Original price was: $2,061.00.$1,061.00Current price is: $1,061.00. 27585
Download Your Free Guide Now!
Discover the secrets of photography with our printable guide! Master essential techniques like aperture, shutter speed, and ISO to create stunning images. Get your free printable PDF now and start turning your snapshots into masterpieces!