Create a New Ellipse Shape and Subtract that Shape From the Background Shape
Create a New Ellipse Shape and Subtract that Shape From the Background Shape
When you’re looking to create a ellipse shape and subtract that shape from the background shape, it’s essential to understand the process in Photoshop.
Imagine the creative possibilities: clear, precise shapes that can enhance your designs, making them stand out.
Have you ever wondered how professionals achieve those perfect cutouts and seamless edits?
I’m about to show you a step-by-step guide that will not only simplify this process but also elevate your design skills.
By the end of this article, you’ll be able to master this technique effortlessly.
Let’s dive in and transform your approach to design!
Table of Contents
Create a New Ellipse Shape with the Ellipse Tool
First, open Photoshop and create a new document. Use the shortcut Ctrl+N (Cmd+N on Mac).
Choose the desired size and resolution for your canvas.
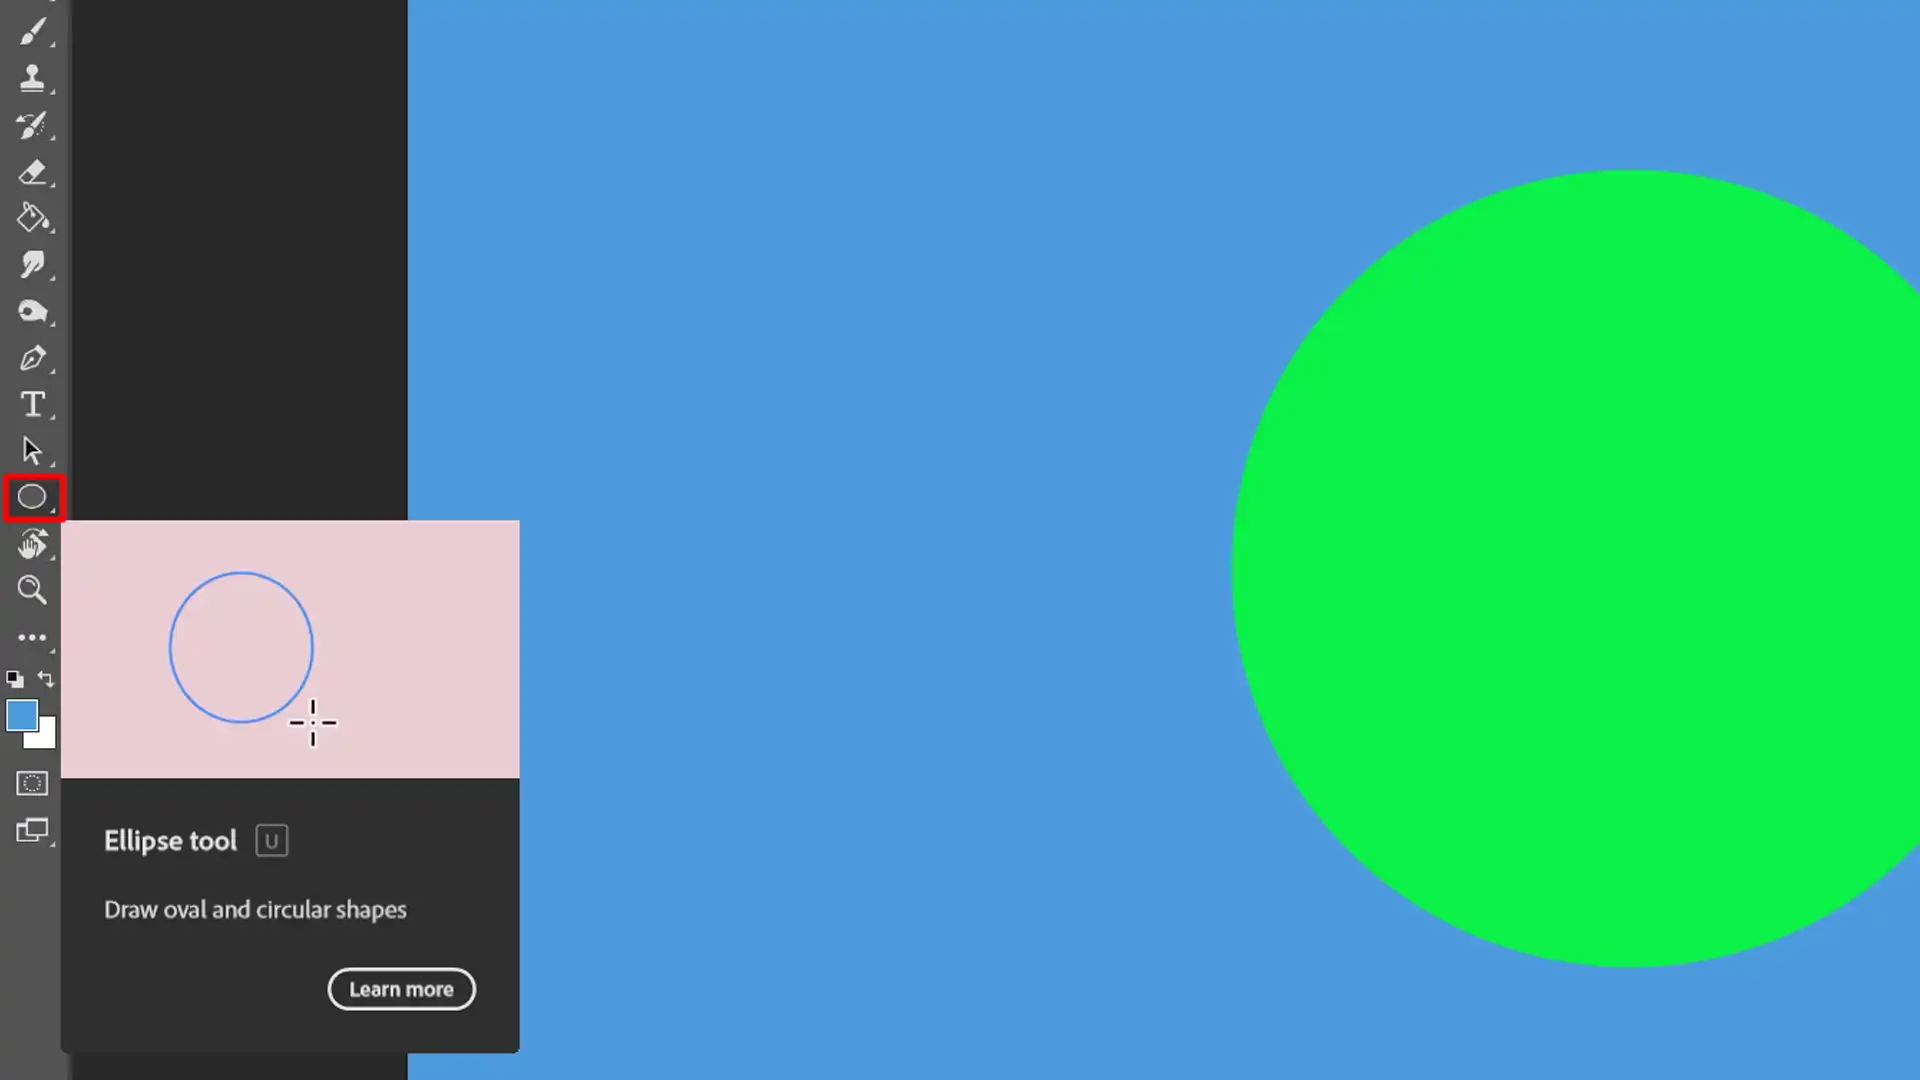
Next, select the ellipse tool from the toolbar.
Clasp Shift while dragging to draw a perfect circle.
Once completed, you now have your ellipse shape.
Ellipse Tool
The Ellipse Tool in Photoshop is an essential feature for drawing precise and symmetrical shapes, such as circles and ovals.
To begin using the Ellipse Tool, first access it from the Tools Panel, which is typically located on the left side of your workspace.
Once you have the Ellipse Tool selected, click and drag on your document to start drawing an ellipse.
If your goal is to create a perfect circles, hold down the Shift key while you drag; this ensures that your shape remains proportionate and symmetrical.
Additionally, if you want to draw your circle or ellipse from the center, hold down the Alt (Option) key as you drag.
This will create the shape outward from the center point, allowing for precise placement in the center within your design.
Flexibility of the Ellipse Tool
The flexibility of the Ellipse Tool makes it particularly useful for various design tasks.
You can easily create and adjust circles and paths, making it ideal for crafting interactive buttons, highlights, or decorative elements.
By mastering the Ellipse Tool, you enhance your ability to produce clean and professional designs.
Whether you need to draw simple shapes or complex layouts, understanding how to use this tool effectively will significantly improve your efficiency and creativity in Photoshop.
Open Photoshop and create a new documents (Ctrl+N / Cmd+N).
Choose the desired size and resolution.
Select the ellipse tool from the toolbar.
Hold Shift and drag to draw a perfect circle.
Complete the drawing to create your ellipse shape.
Subtract That Shape from the Background Shape
Select the background shape layer in the layers panel.
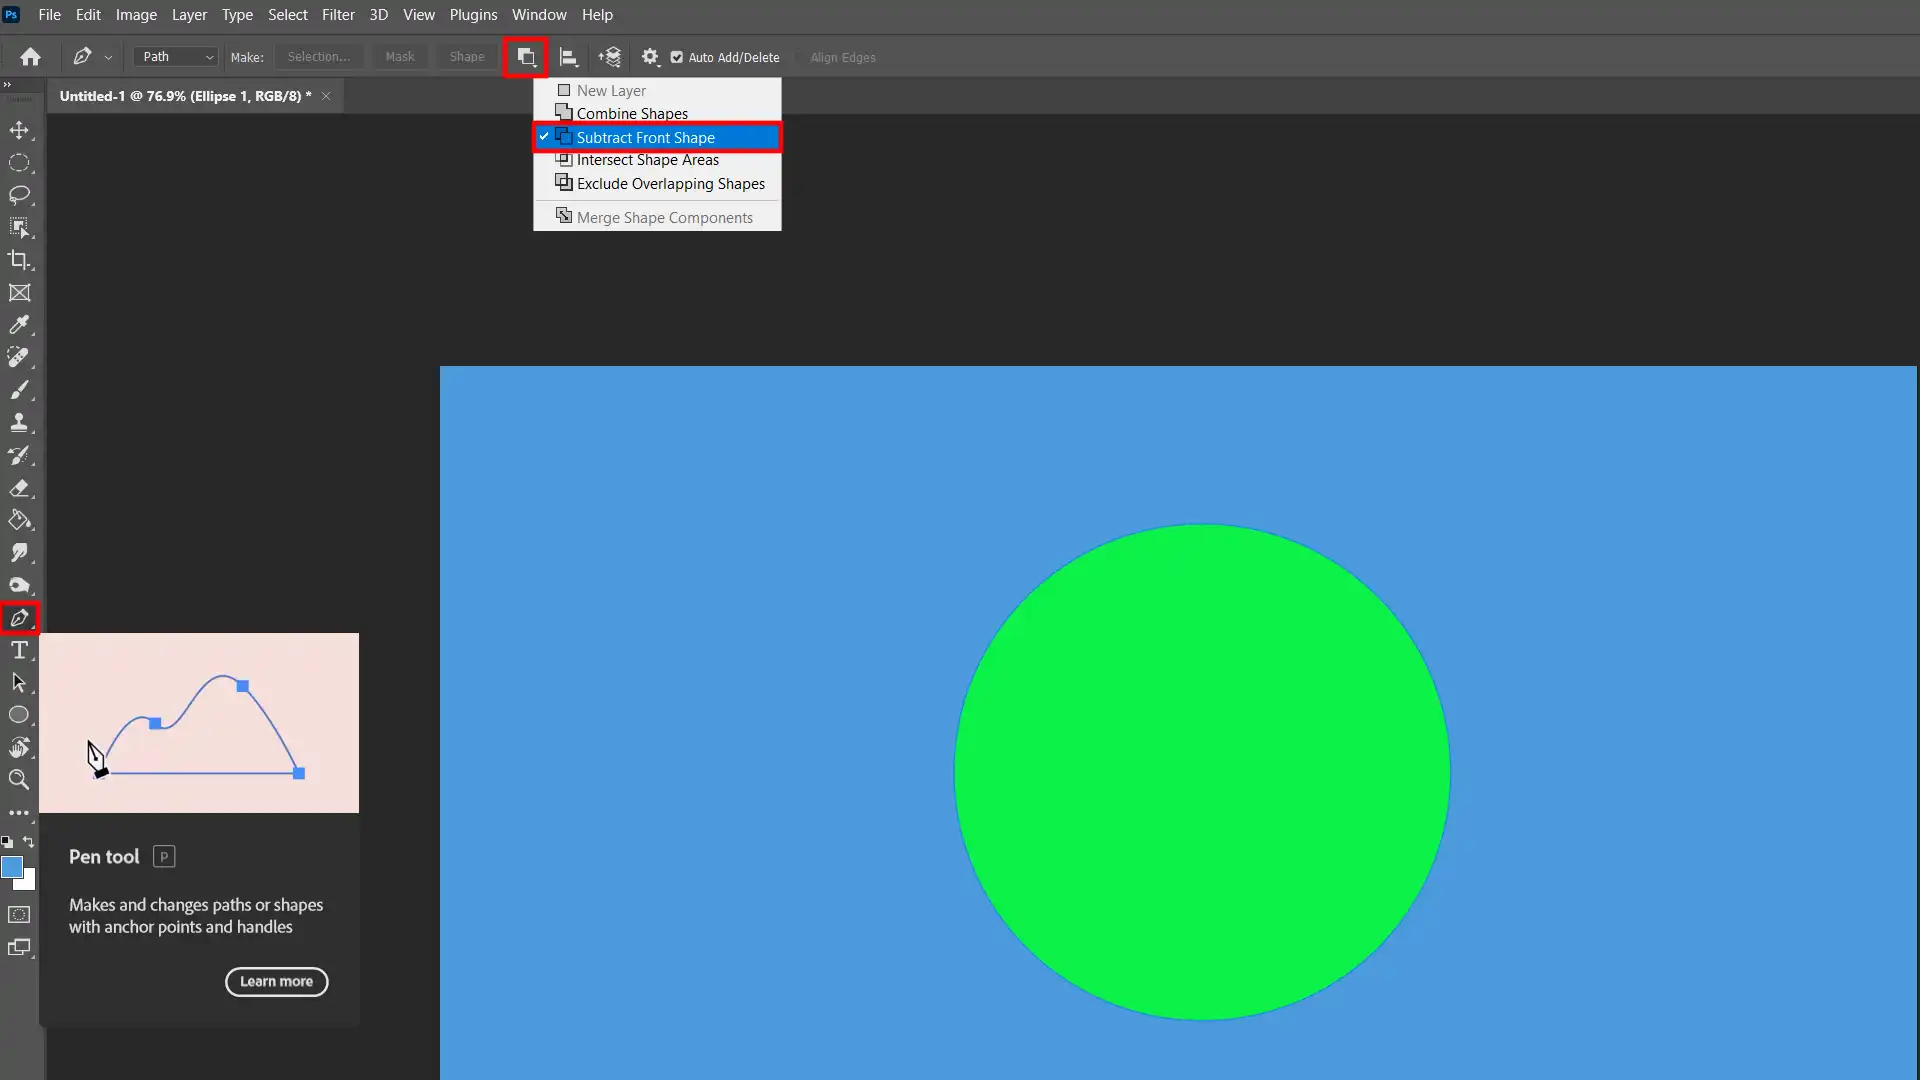
Click the pen tool and outline the background shape. Ensure that there is no overlap with the ellipse shape.
Go to the options bar and choose “Subtract Front Shape” This action will subtract the ellipse from the background shape. You should now see a transparent background where the ellipse was.
Mastering masking is crucial when you need to subtract that shape from the background shape for precise edits. By effectively using masking, you can ensure that the subtraction process is clean and accurate.
This is how you can make that happen:
Select the background shape layer in the layers panel.
Click the pen tool and outline the background shape.
Ensure no overlap with the ellipse shape.
Go to the options bar and choose "Subtract Front Shape".
Observe the transparent background where the ellipse was.
Separate Shape Layers
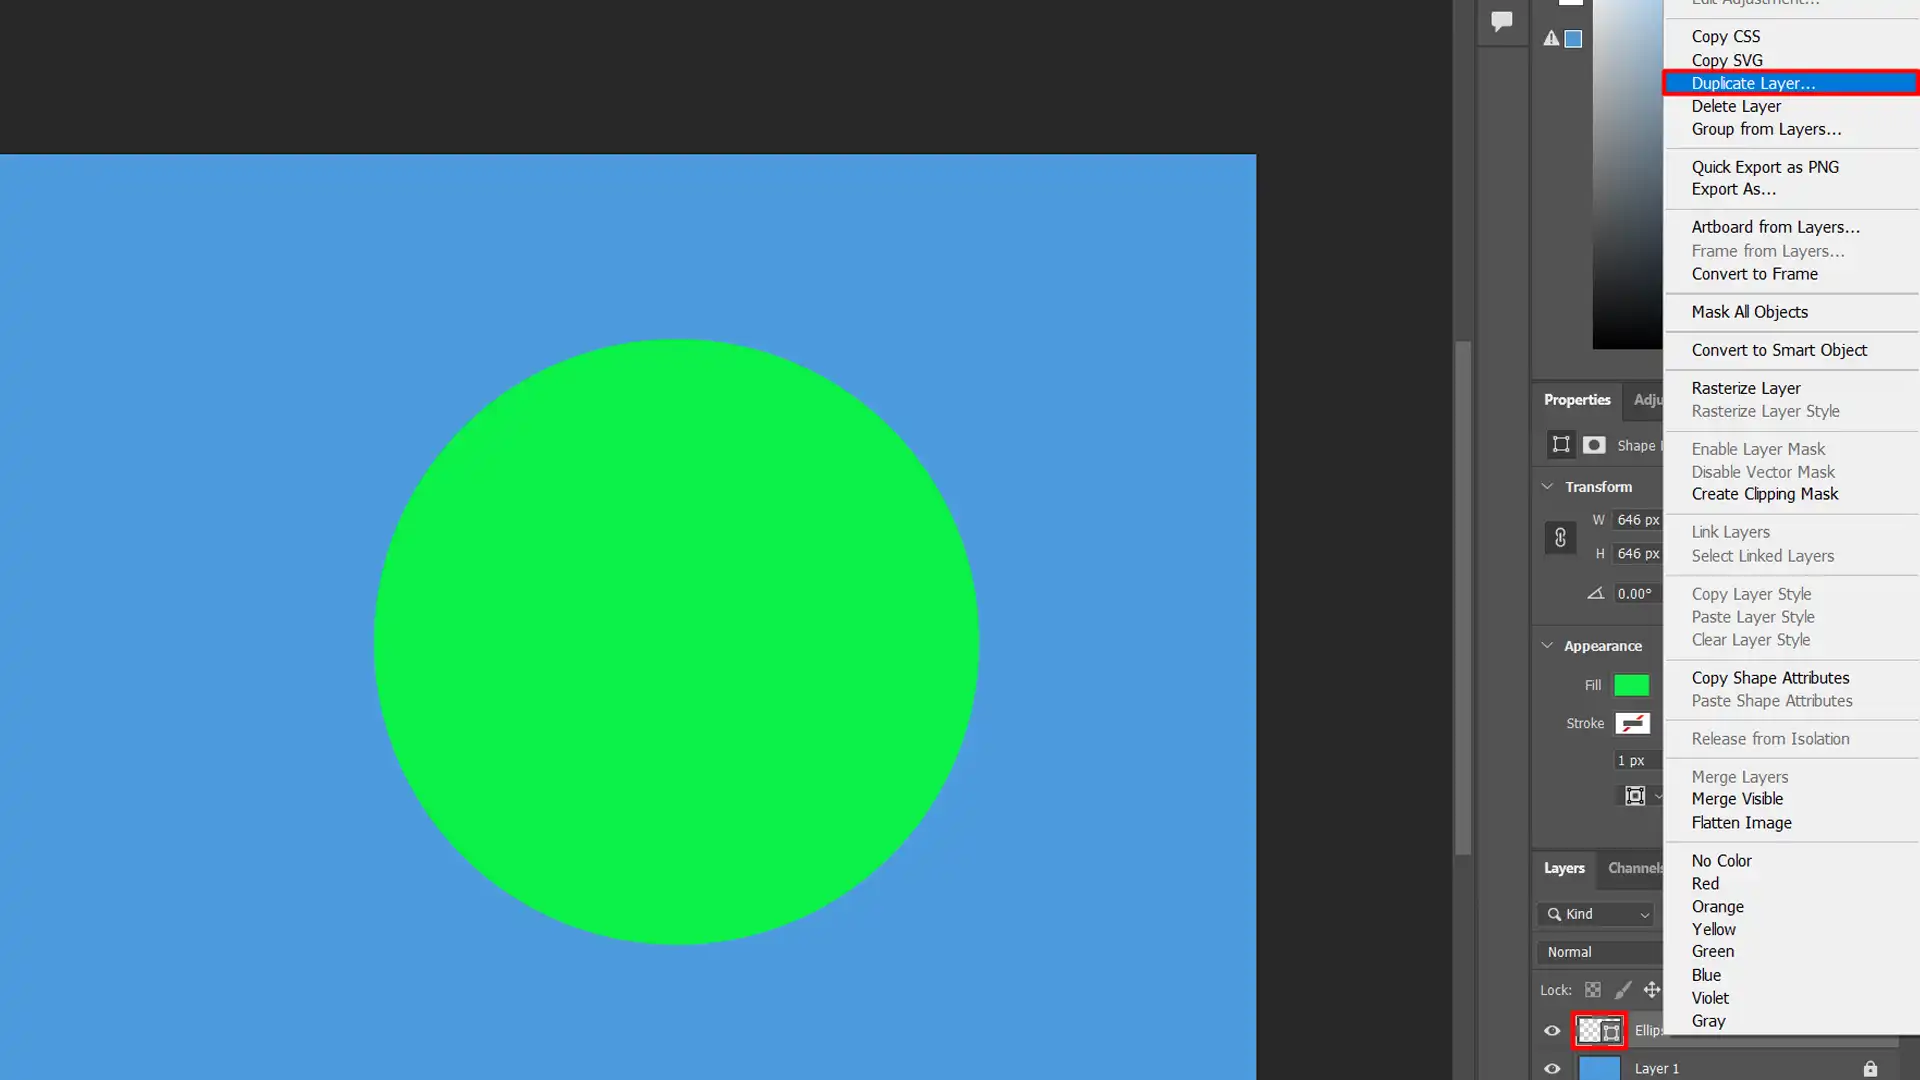
Open your layers panel again. Select the shape layer that contains two shapes.
Right-click and choose “Duplicate Layer”. Now you have two shapes layers.
This makes it easier to edit or move either shape independently.
Pro Tip: Use the path selection tool to fine-tune your shapes for more detail and precision. This simple step adds a polished look to your designs.
For more advanced techniques, consider exploring the content-aware fill to seamlessly remove unwanted elements from your image.
Additionally, learning how to remove background in Photoshop can significantly enhance your editing skills.
Advanced Techniques for the Ellipse Tool
Let’s dive into combining multiple shapes first. Once you have your initial ellipse, head over to the shapes tool panel and pick a new shape.
This could be a rectangle, a triangle, or any custom shape you fancy. After selecting your new shape, you can draw it directly on your document.
By accessing the shapes tool panel and the newly created shape, you can refine and align your design elements seamlessly.
Create a new layer for this new shape to keep things organized.
After selecting your desired shape tool, draw your shape on the canvas alongside or overlapping the ellipse.
To combine them visually, select both shapes layer in the layers panel by holding down Ctrl (Cmd on Mac) and clicking each layer.
Use the path selection tool to select and manipulate the shapes. You can move, resize, and rotate both shapes until they're perfectly aligned.
Go up to the options bar and look for the "Combine Shapes" button. Click it, and Photoshop will merge the shapes but keep their paths editable. Now, these shapes overlap seamlessly!
Using the Pen Tool for Precision
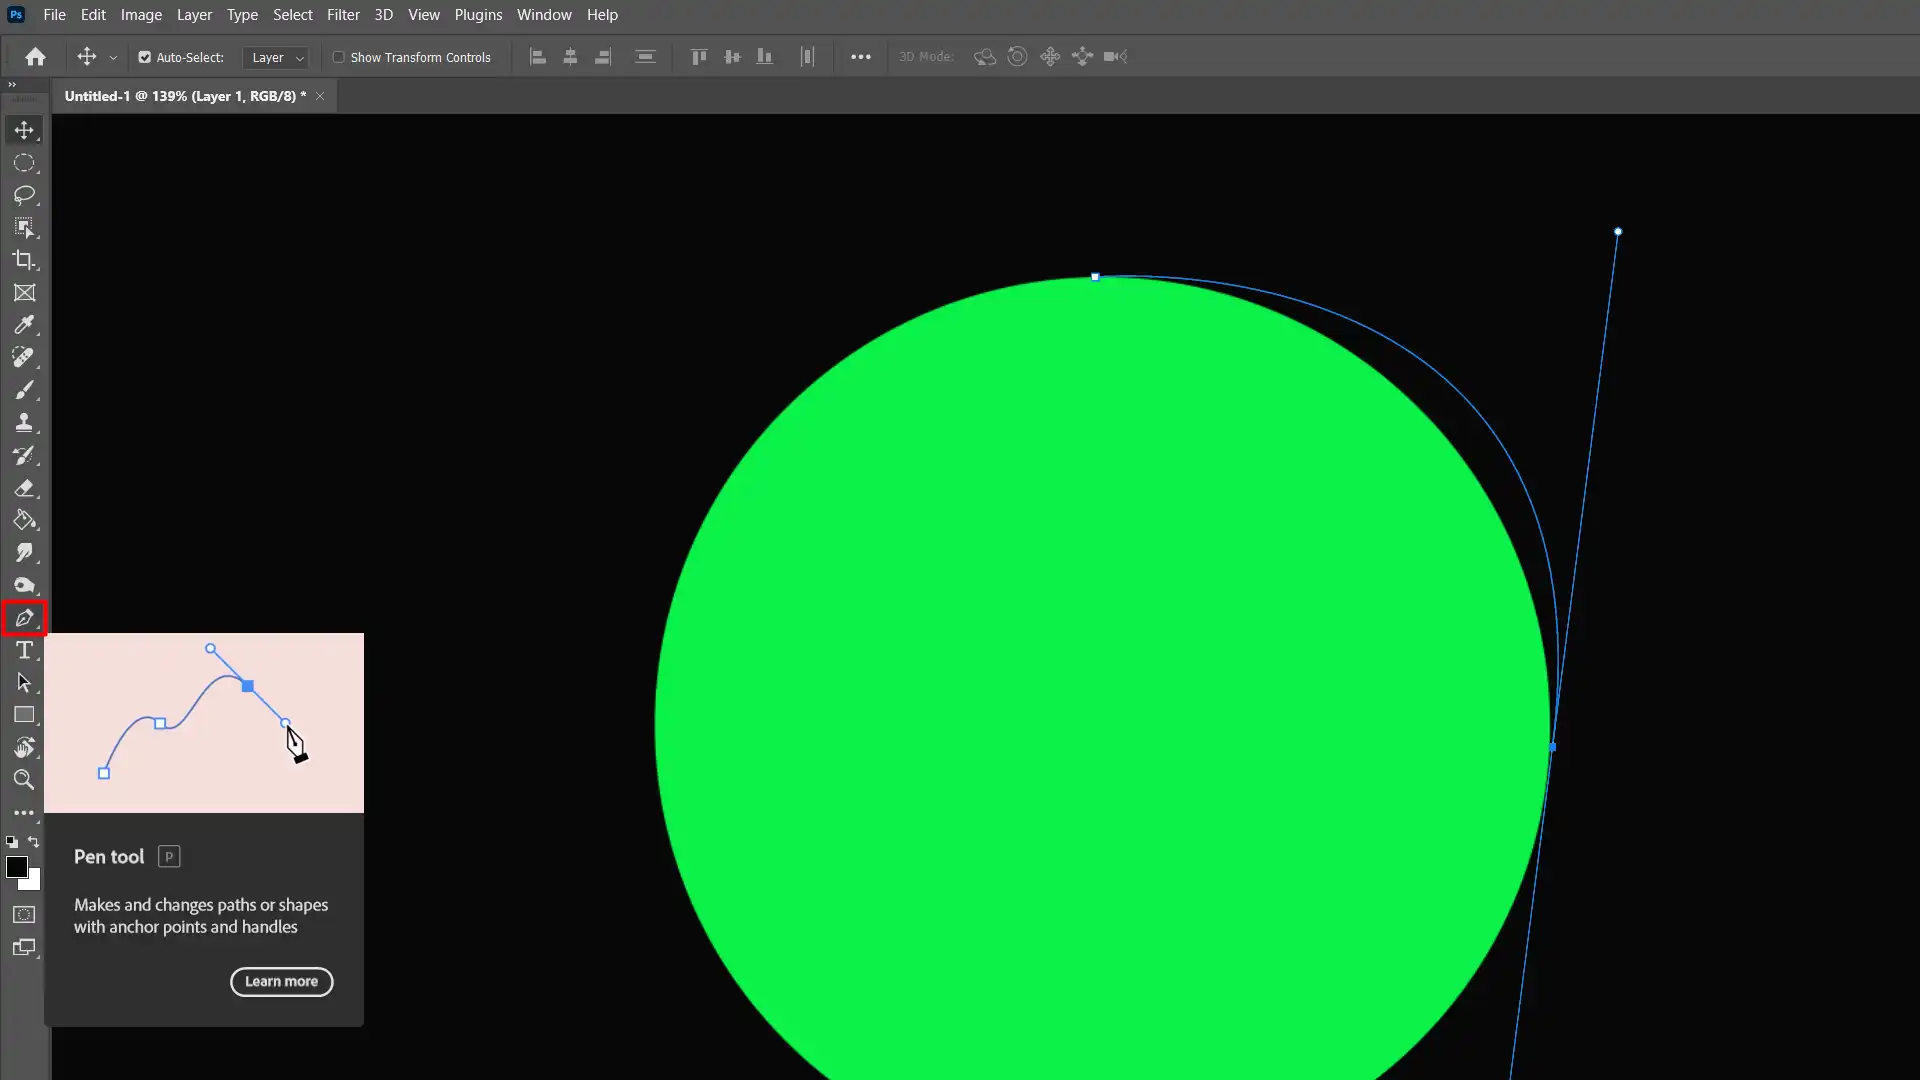
Now, let’s talk about the pen tools. This tool is your best friend for precision work.
Open the shape layer that needs fine-tuning with the pen tools.
Select the pen tool from the tool panel and start drawing points around the shape you want to modify.
Connect these points carefully around your original shape.
If there's a mistake, don't worry. You can adjust the points using the direct selection tool.
The beautiful thing about this is the path selection tool's ability to make these adjustments effortless.
Whether you’re working with vector shapes or custom shapes, mastering the pen tool can make a world of difference. Aim for precision and keep experimenting!
Pro Tip: Always keep your shape layers organized. Name them well to save time when editing multiple shapes.
For more advanced techniques, consider exploring how to use the content-aware fill in Photoshop to seamlessly blend your shapes with the background or how to add texture in Photoshop to give your shapes a unique finish.
Common Mistakes and How to Avoid Them while Shape Subtraction
Common mistakes include improper alignment of shapes and inconsistent use of paths, to avoid them, ensure precise drawing and consistent application of tools throughout your design process.
Mistake
Description
How to Avoid
Improper Layer Selection
Selecting the wrong layer can result in unintended edits.
Ensure the correct layer is active before starting.
Inaccurate Masking
Poor masking can leave rough edges or incomplete shapes.
Use precise masking tools and refine edges carefully.
Overlapping Shapes
Overlapping shapes without proper subtraction can cause visual clutter.
Use subtraction functions accurately to avoid overlaps.
Incorrect Shape Mode
Using the wrong shape mode can result in unexpected outcomes.
Double-check the shape mode settings before applying.
Misalignment Issues
One common mistake in Photoshop is misalignment of shapes.
Let’s address this step by step:
Create a new layer for each shape.
Use the move tool to precisely position the shapes.
Snap the shapes to guides or grids to ensure alignment.
If two layers don't match perfectly, align them by using the align options in the options bar.
Avoiding misalignment saves time and ensures your design looks professional.
Layer Management Problems
Layer management can be tricky. Disorganized layers lead to confusion.
Keep this in mind:
Create clear and descriptive names for each shape layer.
Group related shapes using folders.
Lock layers you don't want to edit accidentally.
Use color codes to track different types of layers quickly.
Organized layers help you work efficiently without getting lost in your project.
Pro Tip: For precise editing, use the ellipse tool along with the move tool to fine-tune your shapes.
Additionally, mastering essential tools in Photoshop, such as the patch tool, can significantly enhance your workflow and final output.
Practical Applications
The importance of mastering various shape tools in Photoshop and Lightroom cannot be understated.
By understanding these tools, one can significantly enhance their graphic and web design projects. For instance, using the circle tool effectively can help create eye-catching icons and buttons.
You can also draw paths to define specific areas of an image, making it easier to apply effects or adjustments to the image.
Knowing how to access and use these tools allows you to design with precision and creativity.
When you draw different shapes and paths, you gain control over how elements are placed and styled within your image.
This ability to manipulate shapes and paths helps in crafting detailed and visually appealing designs.
Graphic Design Projects with Vector Shapes
In the realm of graphic design projects, the practical applications are vast:
We use the ellipse tool to create precise circular shapes.
The move tool allows for accurate positioning.
Using vector shapes ensures scalability without loss of quality.
Combining and subtracting shapes can result in complex designs.
Named layers keep the project organized and easy to modify.
Folders group related shapes, improving workflow.
Lock layers to prevent accidental changes.
One effective method is the use of custom shape tools. These custom shape tools let us build unique shapes not available by default.
For instance, we can use the custom shape tools to subtract shapes from others, creating eye-catching logos or icons.
In addition to using these tools, exploring other answers and techniques can broaden your design capabilities.
By leveraging the versatility of the custom shape options and considering other answers, you can achieve a wide range of design effects and make your work stand out.
Web Design Uses
In web design, shape tools are equally beneficial:
Shapes like circles, squares, and polygons can be used for creating interactive buttons or highlights.
Align options help in maintaining symmetry across the design.
Layer grouping simplifies the management of complex layouts.
Color coding assists in quickly identifying different element types.
The move tool ensures precise placement, crucial for a clean interface.
Custom shape tools offer a creative edge for unique page elements.
The ability to align mismatched layers using these tools keeps designs consistent.
Proper use of the ellipse tool can bring harmony to the web page.
By integrating these essential practices into your projects, you will start creating more professional and captivating designs that stand out.
Pro Tip: Always remember to save your layered files. This way, you can edit and modify them whenever necessary, without losing the original shape or design.
The polygon tool is essential for various web design uses, allowing you to create precise, multi-sided shapes. Its versatility enhances design flexibility and precision in modern web layouts.
Frequently Asked Questions
How to create a new ellipse shape and subtract that shape from the background shape in Photoshop?
To create a new ellipse shape and subtract it from the background, follow these steps:
Open your project and select the Ellipse Tool from the toolbar.
Create the ellipse shape on your canvas.
Ensure that the ellipse layer is above the background shape layer in the Layers panel.
Select the ellipse layer, then go to the Layers panel and choose 'Subtract Front Shape' from the Path operations menu.
How to subtract a shape from another shape in Photoshop?
Easy steps to subtract a shape from another shape:
Select the shape layer you want to be subtracted from.
Using the Pen Tool or any shape tool, create the new shape on the same layer.
With the new shape selected, choose the 'Subtract Front Shape' option from the options bar.
How do you apply a text wrap to the explore text layer using the arc upper horizontal style with a bend of 60?
Apply text wrap in few steps:
Select the text layer you want to modify.
Go to the 'Type' menu and select 'Warp Text.'
In the Warp Text settings, choose 'Arc' and set the style to 'Horizontal.'
Adjust the bend to 60 and click OK to apply the changes.
How do I change the canvas guide color?
To change the canvas guide color, follow these steps:
Go to the 'Edit' menu and select 'Preferences,' then 'Guides, Grid & Slices.'
Find the 'Guides' color option and choose a new color.
In this guide, I’ve shown you how to create a new ellipse shape and subtract that shape from the background shape in Photoshop.
It’s a handy technique that can make your designs look more professional and clean. Personally, I found this method incredibly useful for various projects.
It’s straightforward once you get the hang of it, and it really helps to make your shapes stand out.
If you’re looking to dive deeper into Photoshop, check out my Photoshop Course and for Lightroom enthusiasts, my Lightroom Course might be just what you need.
Also, if you haven’t yet tried Photoshop or Lightroom, you can get them directly from Adobe.
Happy designing!
If this article has helped you, then Like and Share it with your friends
$2,061.00Original price was: $2,061.00.$1,061.00Current price is: $1,061.00. 27584
Download Your Free Guide Now!
Discover the secrets of photography with our printable guide! Master essential techniques like aperture, shutter speed, and ISO to create stunning images. Get your free printable PDF now and start turning your snapshots into masterpieces!