In this article, I’ll show you how to create mesmerizing “Photoshop starbursts” that will grab attention and elevate your photography.
Creating stunning visual effects can transform your photos from ordinary to extraordinary. Have you ever wondered how to add those captivating light flares that make your images pop?
Whether you’re a seasoned pro or just starting out, this tutorial is designed to be simple and straightforward. By the end, you’ll be able to add a professional touch to your photos that will leave viewers in awe. Intrigued? Let’s dive in and unlock the secrets behind this dazzling effect!
Table of Contents
Setting Up Your Photoshop Starbursts Workspace
Let’s dive into the basics of setting up your Photoshop workspace. First, understand the basics to avoid feeling overwhelmed. We aim to make you comfortable with the layout and tools. This will help you start your editing journey with ease.
Designing a New Document
To begin any work in Photoshop, you need to create a new document. Click on “File” and select “New” from the dropdown menu. Set your desired dimensions and resolution:
Go to File > New.
Choose your document size and resolution.
Click Create to open your new canvas.
Once your new document is ready, familiarize yourself with the toolbar on the left side of the screen.
Selecting the right tools early will save time later. For instance, learning how to use the Quick Selection Tool in Photoshop can significantly speed up your workflow.
Understanding the Layers Palette
The layers palette is one of the most important parts of Photoshop. Think of it like stacks of transparent paper. Each new layer can have different elements, and they can be edited individually:
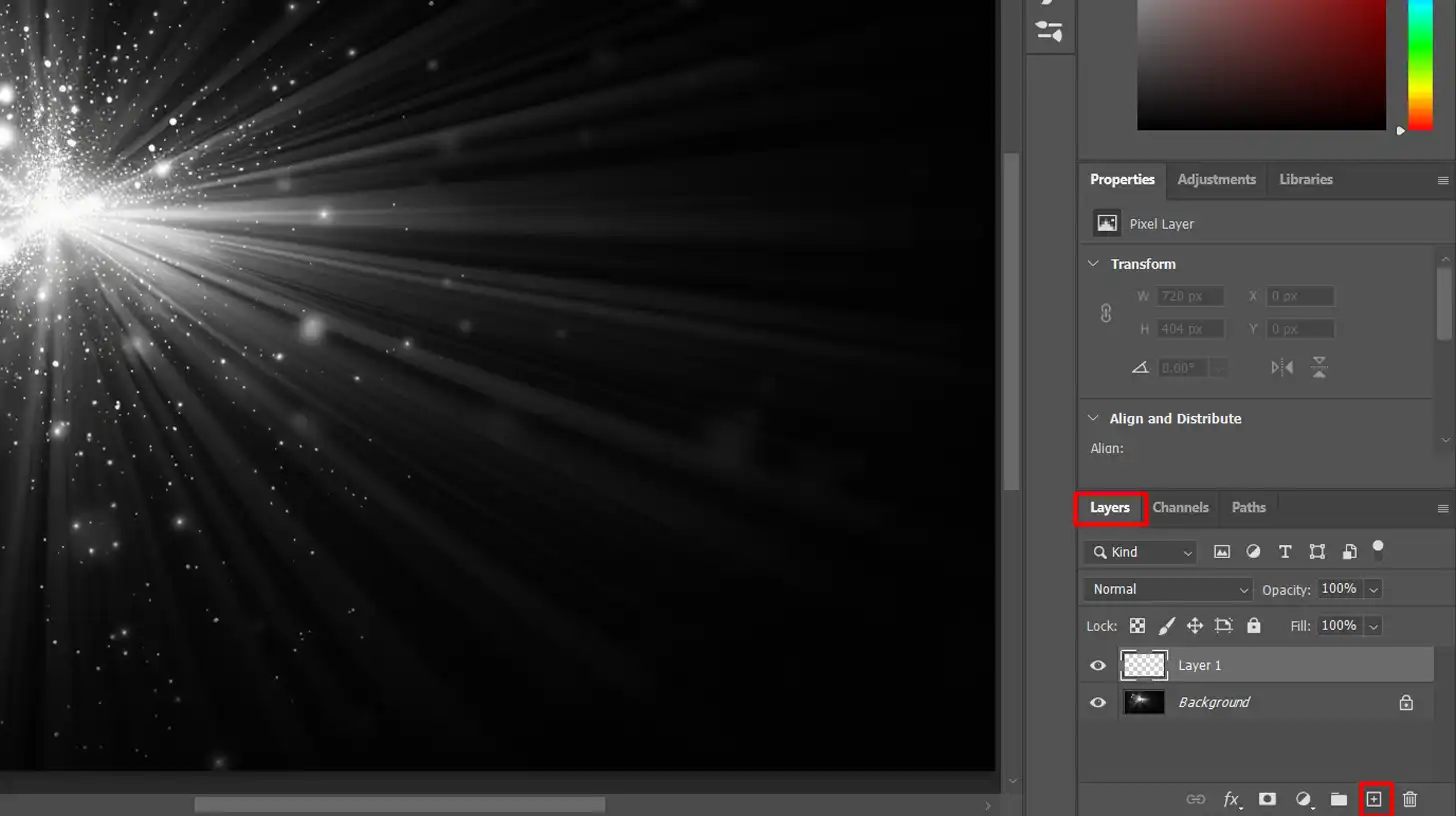
Find the layers palette on the right side of the screen.
Click the New Layer icon to create a new layer.
Use the background layer for your main image and add a layer for additional edits.
Experiment with the blend mode options to see how a layer can interact. Learning these basics will help with more advanced techniques later, such as using smart objects in Photoshop for non-destructive editing.
Pro Tip: Always name your layer. It helps keep your document organized, especially when it gets complex!
Creating the Starburst Effect
Photoshop opens up a world of creative possibilities, especially when it comes to effects like the starburst.
Drawing the Starburst Shape
To start, open Photoshop and create a new document. Choose the dimensions and resolution that fit your needs.
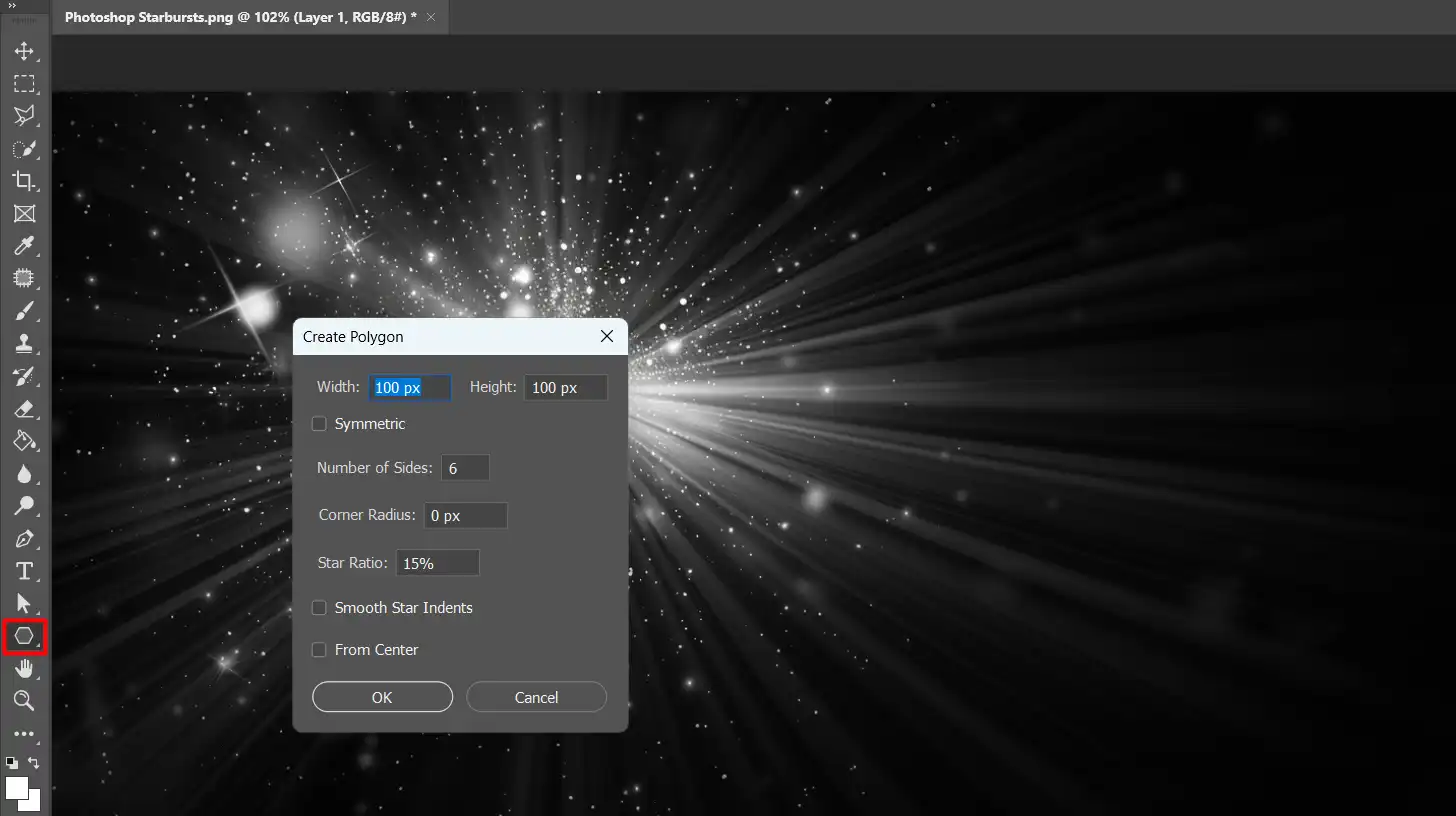
Go to the Toolbar and select the Polygon Tool. Switch it to the Star Shape option.
Hold down the shift key for a perfect starburst shape while drawing.
Adjust the angle and points in the toolbar to get the look you want. Remember, practice makes perfect.
Applying Gradient and Color
After drawing your starburst, it’s time to add color:
Select the starburst shape and go to the layers palette on the right.
Create a new layer for the gradient fill.
Use the Gradient Tool to fill the starburst with the desired colors.
Experiment with different gradients to see what makes your starburst pop.
Using the Background Layer
Now, let’s focus on the background layer. The background sets the stage for the starburst effect:
Select the background layer and choose a complementary color.
Fill it using the Paint Bucket Tool.
You can use create a more interesting background by applying gradients or patterns. Just make sure the starburst remains the focal point.
Recap of Starburst Creation Steps
Achieving a starburst effect in Photoshop is straightforward with practice. Draw your starburst shape, apply gradients and colors, and use the background layer effectively.
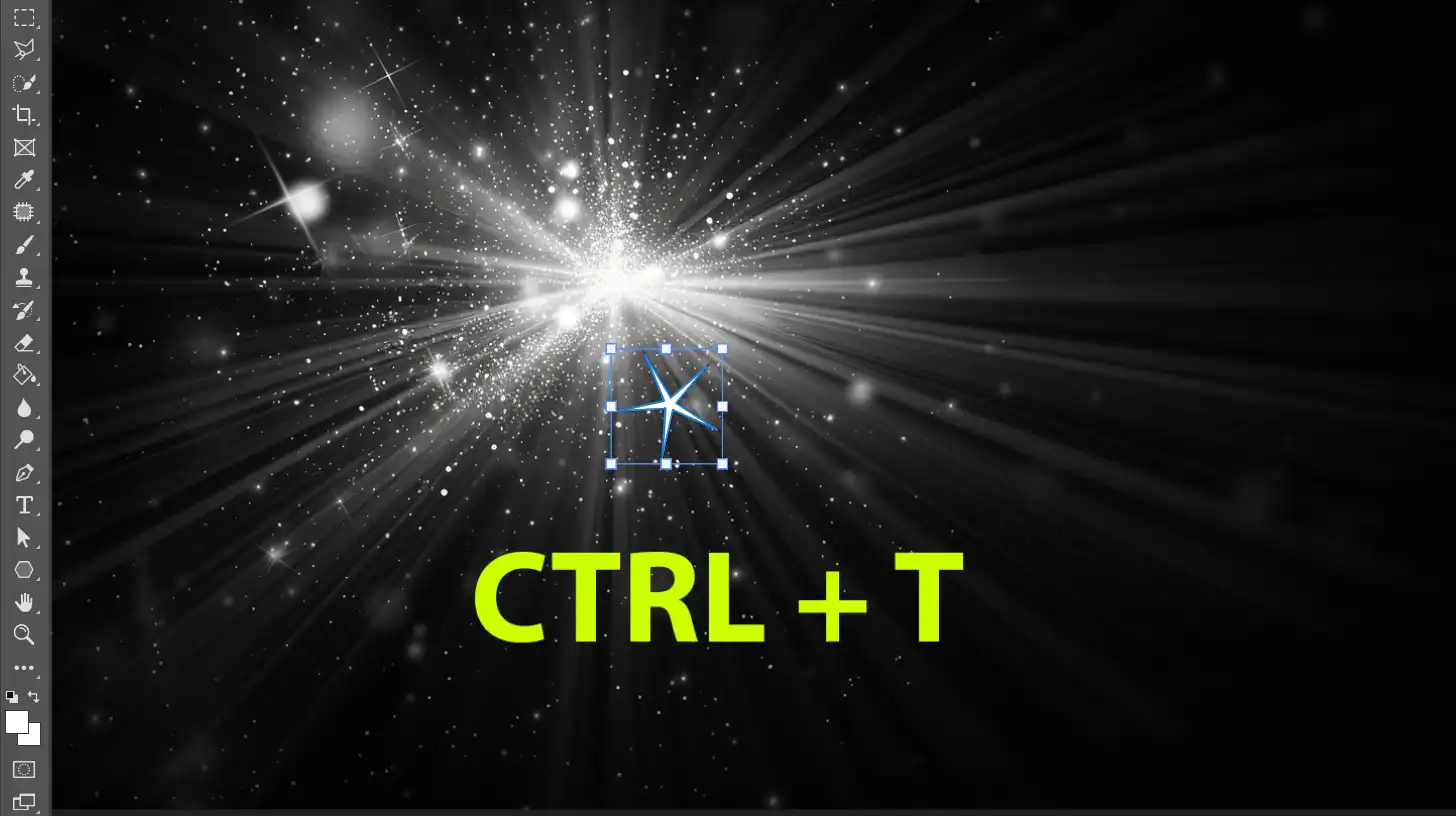
Pro Tip: Use the free transformtool (Ctrl+T) to resize and rotate your starburst shapes effortlessly. This allows for more creative and dynamic designs.
To make your Photoshop starburst effect even better, try adding extra touches and adjustments. This can make your effect more dynamic and eye-catching.
Adding Additional Effects
Creating starburst effect in Photoshop is just the beginning of your design journey. The next step involves adding additional effects to make your starburst truly pop.
Experiment with Blend Modes
Experiment with different blend modes in the layers palette to see how they affect the entire document.
Blending modes can significantly alter the appearance and mood of your starburst, providing endless creative possibilities.
Use the Unsharp Mask Filter
One way to add depth is to use the Unsharp Maskfilter. This sharpens the edges and makes the starburst more defined.
This technique is particularly useful for making your starburst stand out against complex backgrounds.
Apply Gaussian Blur for a Glowing Effect
Another technique is to duplicate the starburst layer, apply a Gaussian Blur, and set the blend mode to Overlay.
This creates a glowing effect, enhancing the visual appeal of your starburst shape. Gaussian Blur is a versatile tool in Photoshop that can be used for various softening effects.
Blending and Layer Styles
Using blending and layer styles can really enhance your starburst effect. By keeping layers separate, you can adjust and refine each part more easily.
Separate Layers for Easy Manipulation
First, open the Layers palette and ensure each starburst is on a separate layer for easy manipulation. This practice not only simplifies the editing process but also allows for more precise adjustments.
Use Layer Styles
You can use layer styles like Outer Glow or Drop Shadow to give your starburst a more dynamic appearance. Layer styles are essential tools in Photoshop for adding depth and dimension to your designs.
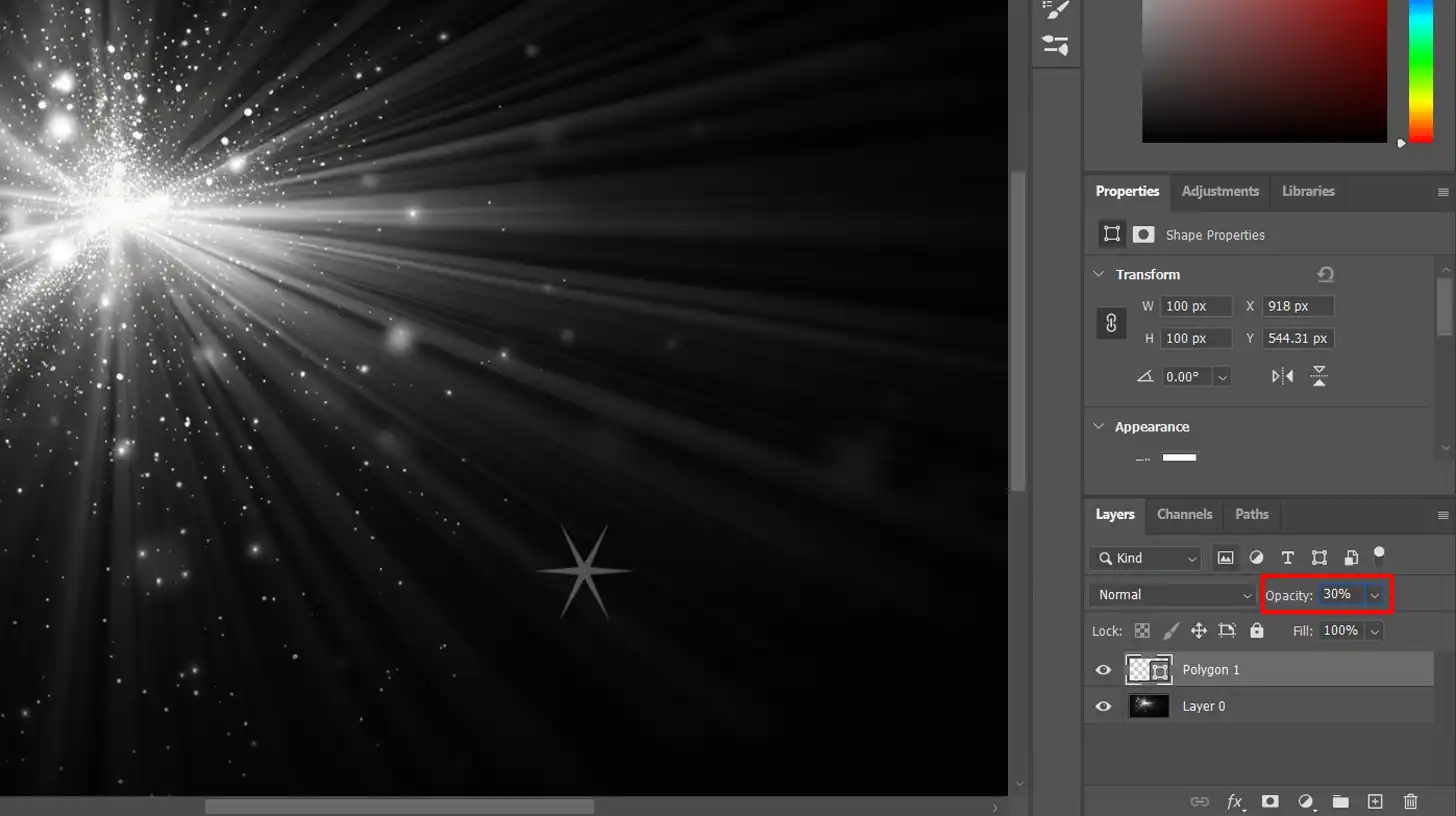
Adjust Opacity
Adjusting the opacity can make your starburst blend naturally with the background. Experiment with different settings until you’re satisfied with the result. Opacity adjustments are important for achieving a harmonious composition.
Free Transform Tool
By utilizing the free transform tool (Ctrl+T), you can resize and rotate the starburst to fit perfectly within the canvas.
Remember, the important factor is to create a balanced and appealing composition, so don’t hesitate to make adjustments as you go.
The Free Transform tool is one of the essential tools in Photoshop for manipulating shapes and a layer.
Pro Tip: Always save your work in multiple layers. This allows you to go back and make changes without affecting the entire document.
This practice is especially important when working on complex projects that require frequent adjustments.
Finalizing and Exporting the Photoshop Starbursts Artwork
Now that we’ve added all the desired effects and a layer, it’s time to finalize and export your starburst masterpiece. Let’s make sure everything looks perfect before we save and share it.
Reviewing Your Work
To make sure your starburst effect looks great, it’s important to check your work closely. Zooming in and out helps you see details and overall balance.
Zoom In and Out
Review your work thoroughly by zooming in and out to check all details, ensuring there are no unwanted artifacts or errors.
Pay special attention to the edges of your starburst shape. Look for any misalignment or odd effects. You can use the Zoom Tool in Photoshop for precise adjustments.
Hide and Unhide Layers
Hide and unhide each layer by clicking the eye icon next to it. This can help you spot mistakes you might have missed earlier.
Verify that your layer is properly arranged and no significant element is hidden behind another unintended one.
Utilize Photoshop shortcuts to speed up this process. Additionally, use Lightroom shortcuts for efficient image adjustments and batch processing
Pro Tip: Peer review your image, maybe ask a friend or family member for feedback. Fresh eyes can often spot issues you’ve overlooked.
Exporting the Final Image with the Photoshop Starbursts effect
Before you finish and save your starburst effect, make sure to prepare your image for export. Flattening your image is an important step in this process.
Flatten Your Image
First, flatten your image by merging all layers. You do this by selecting ‘Flatten Image‘ in the Layers panel. Beware, though, once flattened, you can’t undo or change individual layer!
Export Options
Next, navigate to the File menu and choose Export. From here, select the format you prefer common options are JPEG and PNG. For web use, you might lean toward JPEG due to its smaller file size. If you need transparent backgrounds, go with PNG.
Adjust Settings
In the export dialogue box, make sure to adjust the settings to your liking:
For print-quality images, a resolution of 300 DPI is ideal.
For web, 72 DPI will suffice.
Choose the proper color profile, normally sRGB for screens.
Pro Tip: Always save a copy of your document with the layer intact (.psd) before flattening. This ensures you can come back and edit if needed.
With these steps, you now know how to finalize your stunning starburst effect images in Photoshop.
Take the time to tweak and refine your work, and then proudly display it for the world to see.
Creating Starburst in Photoshop or Illustrator
Let’s dive into the world of creating starbursts with Photoshop or Illustrator. This tutorial will guide you step-by-step. It’s easier than it sounds, and trust me, the results are worth it.
The Basics of Creating Starbursts
Start by opening your document in Photoshop or Illustrator. Make sure your canvas is ready.
Add a new layer by clicking the icon at the bottom of the Layers panel. This keeps your work organized.
To create the starburst effect, choose the Polygon Tool.
You can find this in the select menu, under the Shapes. Set sides to 4 or more. Holding Shift while you draw ensures perfect angles.
Adding Color and Effects
Next, fill your starburst shape with the desired color. Use the Paint Bucket Tool for this.
Make sure to choose a bright color that stands out against your background. This helps the starburst pop.
To add depth, experiment with blend mode options from the Layers panel.
Try different effects until you find one that enhances your image. For a glowing starburst, consider applying a Gaussian Blur.
Refining Your Starburst Shape
Using the free transform tool (Ctrl+T on Windows or Cmd+T on Mac), resize and rotate your starburst.
Fit it well within your canvas. Remember, adjustments can make a big difference.
Want sharper lines? Apply the unsharp mask filter from the Filters menu. This step defines the starburst, making it look crisp and professional.
Final Touches
Review your entire document. Use the zoom tool to ensure everything looks perfect, even up close. If needed, add some details or adjust the opacity of your layer.
Save your work. Go to the select menu, choose Save As, and pick the desired format. PNG is best for web use, while JPEG is great for prints.
Pro Tip: Always name your layer. It avoids confusion when dealing with multiple adjustments.
By now, you should have your own starburst creation ready for whatever project you’re working on.
Remember, practice makes perfect. Enjoy experimenting with different effects and let your creativity shine.
Tips and Tricks for Better Photoshop Starbursts
Let’s dive straight into the goal: creating perfect starbursts in your designs.
Whether you’re working on a new document or tweaking an old project, starbursts can give your work that extra pop.
Here’s a quick overview of common mistakes and advanced techniques for creating starbursts in Photoshop
Aspect
Common Mistakes
Advanced Techniques
Layer Management
Forgetting to use new layers, limiting editing flexibility
Duplicating layers and using blend modes to add depth and complexity
Alignment
Misalignment of starburst, not holding Shift key to maintain angle
Using Free Transform Tool (Ctrl+T/Cmd+T) to resize and rotate for perfect positioning
Color Usage
Using the same color for different components, making the image look flat
Experimenting with different hues and using the Replace Color Tool
Resolution
Pixelation due to low-resolution canvas
Always using a high-resolution canvas to prevent blurriness
Common Mistakes to Avoid
When creating your starburst effect, avoiding common pitfalls can make a big difference. One frequent mistake is not using new layers, which can limit your editing flexibility.
1. Forgetting to Use New Layers
A classic error is forgetting to use new layers for each change. Not only does this make editing easier, but it also helps keep your entire document organized. This is especially important when using essential tools in Photoshop.
2. Misalignment
Not aligning your starburst is another common issue. When you create, hold the Shift key to maintain the angle. Trust me, a misaligned starburst is like a crooked picture frame annoying.
3. Fill Color
Using the same color for different components can make your image look flat.
Experiment with different hues to see what brings out the best in your starburst. You can also use the Replace Color Tool in Photoshop to easily switch up colors.
4. Pixelation
The dreaded pixelation problem! Always use a high-resolution canvas. This prevents your starburst effect from looking blurry. It might seem basic, but it’s easy to overlook.
Advanced Techniques for Photoshop Starbursts
Explore some advanced methods to enhance your starburst effect. One technique involves using duplicated layers and blend modes to create more depth and interest.
1. Duplicating Layers and Blend Modes
Start by duplicating your starburst layer and playing with blend modes. Multiplying layers can add depth and complexity.
2. Unsharp Mask Filter
Remember the Unsharp Mask filter? Applying it to your starburst layer can make the edges crisp. This adds a professional touch to your design.
3. Gaussian Blur
The Gaussian Blur creates a glowing effect. Duplicate your new layer, apply the blur, and set the blend mode to Overlay. Voilà! Instant glow.
4. Free Transform Tool
Finally, use the free transform tool (Ctrl+T for Windows, Cmd+T for Mac) to resize and rotate your starburst.
This allows you to position it perfectly within your canvas. Precision is important here.
Pro Tip: Save your work in multiple layers. It lets you tweak different aspects without altering the entire document.
Frequently Asked Questions (FAQs)
What’s the process for creating a starburst effect in Photoshop?
Open your image in Photoshop.
Select the 'Brush Tool' from the toolbar.
Choose a starburst-shaped brush from the brush preset picker.
Click on the area of the image where you want to add the starburst effect.
Adjust the size and opacity to fit your needs.
What’s the method for adding a starburst effect?
Open the image in your editing software.
Find and select the 'Effects' or 'Filters' menu.
Look for 'Starburst' or 'Sunburst' effect within the menu.
Apply the effect and adjust settings like intensity and color.
Preview the effect and apply it if satisfied.
How do I add a sunburst in Photoshop?
Open your project file in Photoshop.
Go to the 'Filter' menu, then select 'Render' and choose 'Lens Flare'.
In the Lens Flare dialog, select a flare style that resembles a sunburst.
Place the flare center where you want the sunburst effect to appear.
Adjust the brightness to control the intensity of the sunburst.
How do you photograph starbursts?
Use a small aperture (high f-number) to create a starburst effect with light sources.
Position your camera so that light sources are partially obscured by an object.
Use a tripod to stabilize your camera for clear, sharp images.
Experiment with different light sources and backgrounds to enhance the effect.
Adjust your exposure settings if necessary to avoid overexposing the light sources.
In conclusion, learning to create Photoshop starbursts has really improved my photography projects.
Adding a starburst effect makes my images pop and stand out. I remember the first time I used this technique on a sunset photo it transformed the scene and gave it a professional look.
If you want to enhance your skills, I recommend checking out this Photoshop Course and the Lightroom course. Both have been incredibly helpful for me, and I believe they’ll be just as useful for you.
$2,061.00Original price was: $2,061.00.$1,061.00Current price is: $1,061.00. 27584
Download Your Free Guide Now!
Discover the secrets of photography with our printable guide! Master essential techniques like aperture, shutter speed, and ISO to create stunning images. Get your free printable PDF now and start turning your snapshots into masterpieces!