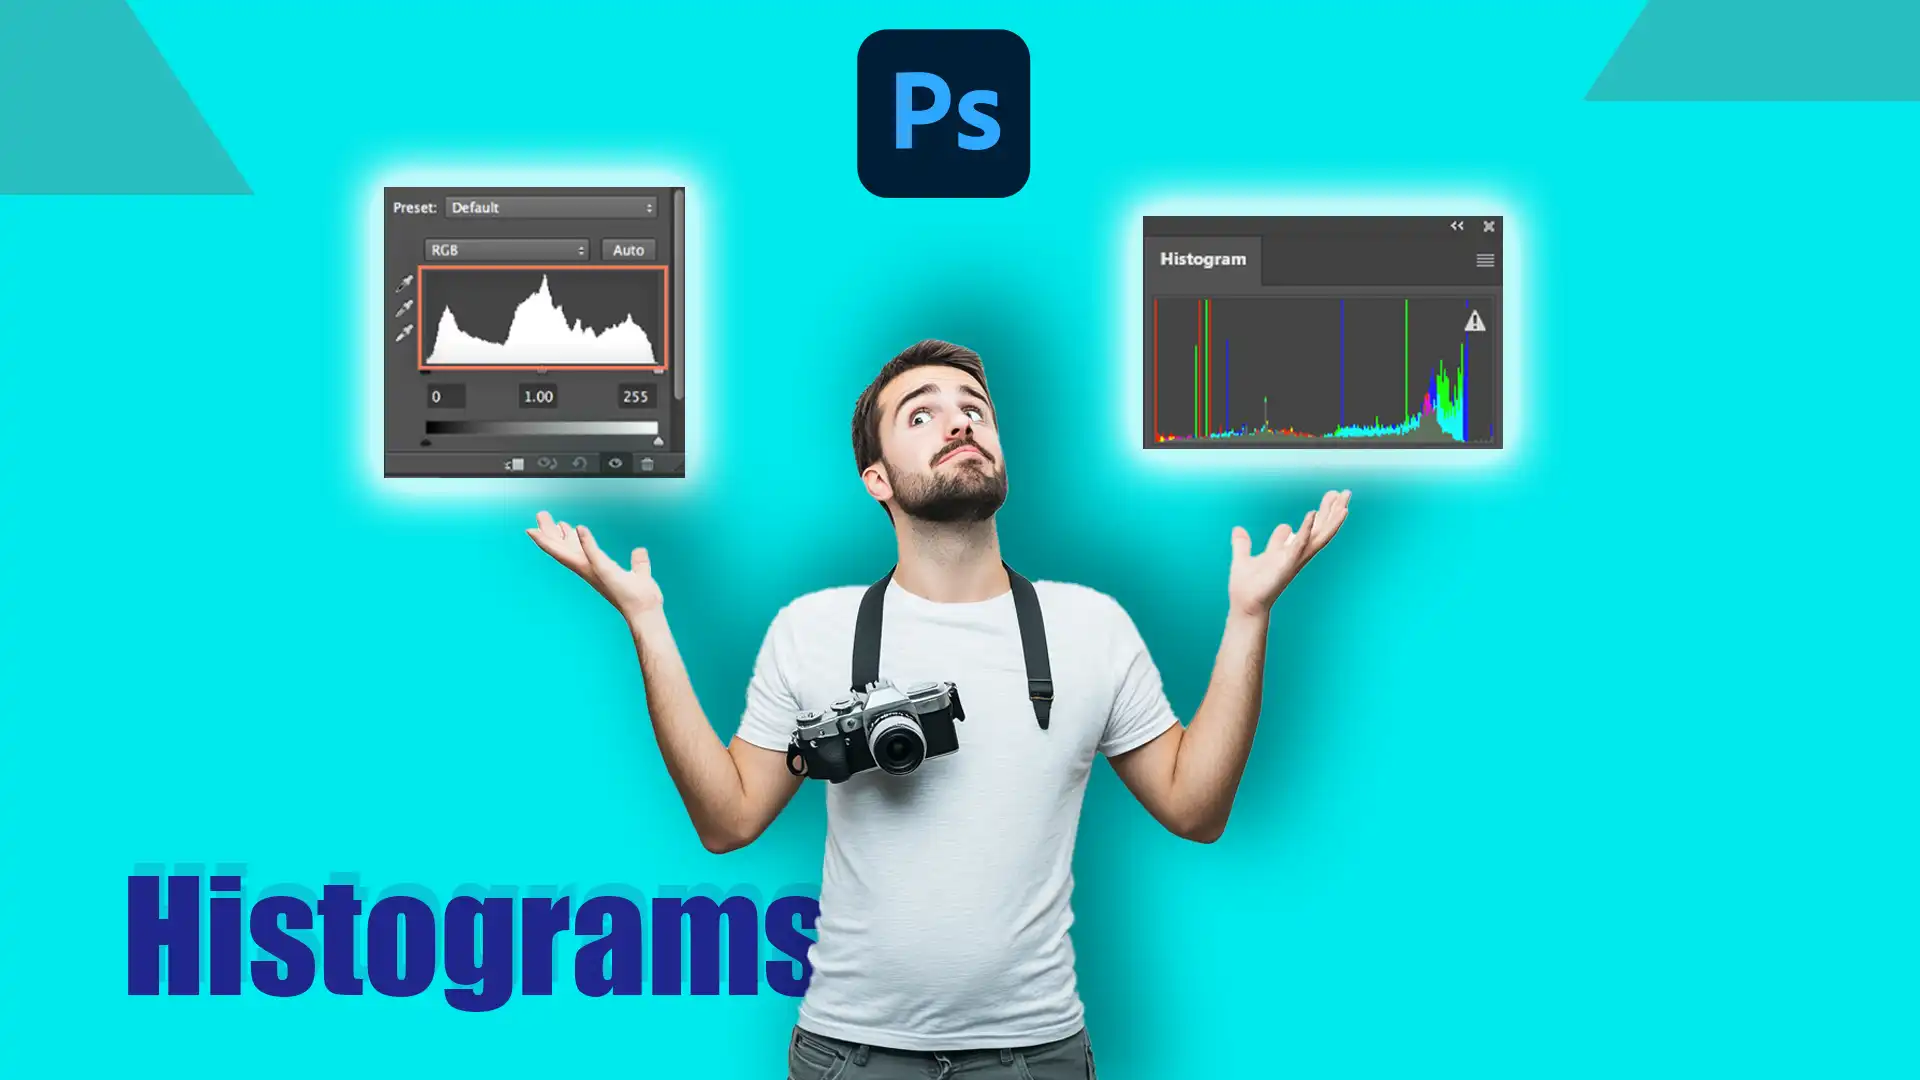
Histograms in Photoshop are necessary when you want to understand exposure and color balance. They’re a visual representation of tonal range and allow you to make precise adjustments.
In this tutorial we’ll show you how to use histograms in Photoshop to get the best out of your photos. You’ll learn practical tips and tricks to take your editing to the next level.
Stay with us to see how mastering histograms can change your editing life.
Table of Contents
About Photoshop Histograms
Histograms are foundational to understanding photography and Lightroom.
They offer a graphical representation of the image data, displaying the distribution of pixel brightness across an entire image.
Learning how to read and use a histogram can drastically improve your editing workflow.
Understanding the Histogram Panel
The histogram panel is an essential tool in Photoshop for photographers. It shows the brightness levels in your photo, highlighting areas with too much contrast or underexposure.
When you adjustexposure, you will notice changes in the histogram displays, helping achieve proper exposure.
Components of a Histogram
A histogram represents:
Tonal Range: From deep tones on the left side to highlights on the right.
Tonal Values: Distributes pixels according to brightness.
Shadow Detail: The lower end shows darker elements.
Highlight Detail: The higher end indicates brighter parts.
Using Photoshop Histogram Tools for Tonal Adjustments
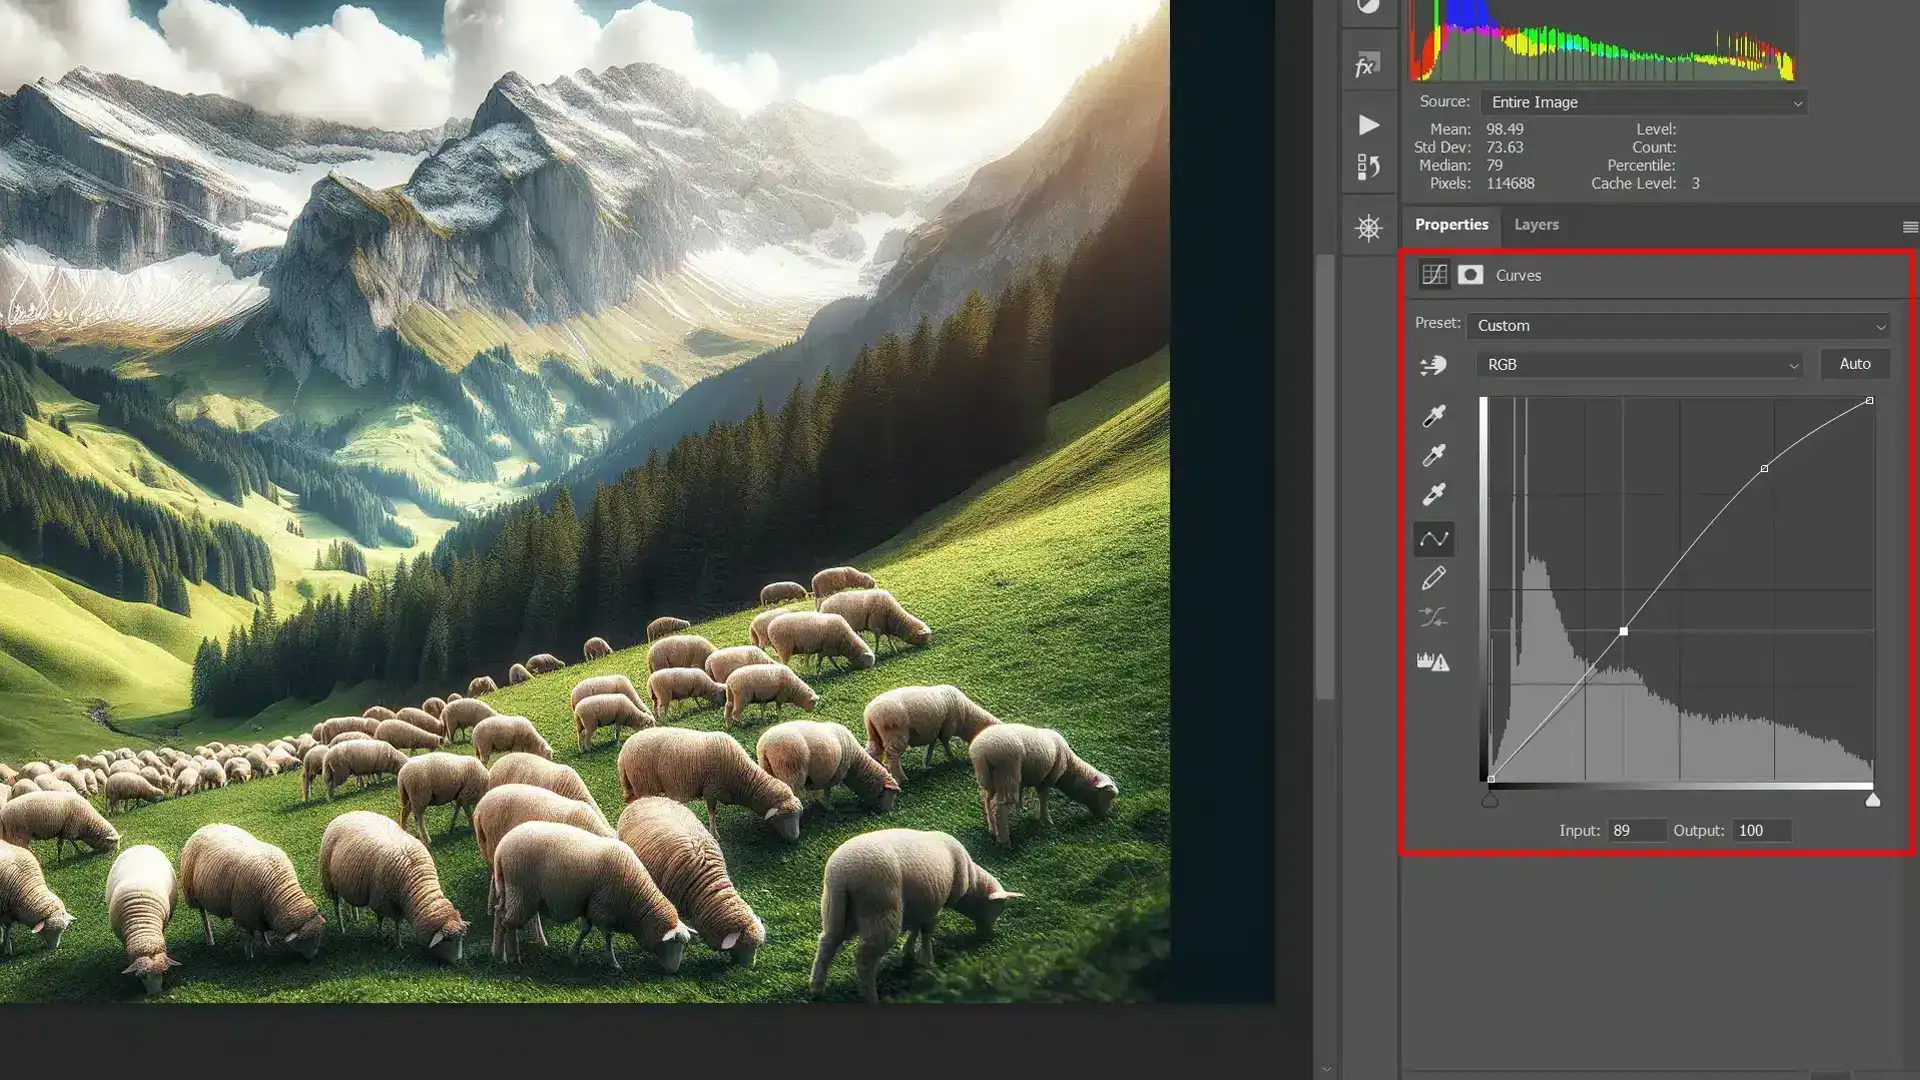
Incorporating tools like the curvesadjustment layercan subtly strengthen your images by tweaking tonal values. These adjustments refine details that might be initially hidden.
Practical Example: Editing Shadow Clipping
When working on an image with shadow clipping, observe how pixels in the image cluster at the extreme darker tones of the histogram panel.
You can recover lost details by strategically adjusting layers, such as using an adjustment composite or levels dialog box.
These techniques are particularly useful for challenging scenarios like snow photography, where applying specific tips for snow photography can help ensure proper exposure and preserve detail in both bright and shadowed areas.
Benefits of Reading Histograms on a Camera's LCD Screen
Most digital cameras also feature histograms on their LCD screens, which aid in the real-time evaluation of shots and prompt immediate corrective actions if necessary.
Mastering how to use manual mode in your camera settings complements histogram analysis, giving you full control over exposure settings for precise and intentional image capture.
Enhancing Image Quality with Histograms
By continually referencing your histogram data during photo editing sessions, you’ll be able to recognize and fix problem areas efficiently.
Whether it’s recovering shadow detail or balancing overall tonal range, histograms provide actionable insights into pixel values and color channels within your photos.
Applying these principlescan significantly enhance your urban landscape photography, especially when incorporating specialized tips for urban landscape photography to overcome exposure challenges inherent in capturing city scenes.
Understanding the Photoshop Histogram
The histogram is a significant tool in photography. It helps you understand the distribution of tonal values in your image.
Examine the histogram panel, and you can make better editing decisions to improve your photos.
Histogram Details
The histogram displays a graphical representation of pixel lightness levels, giving insights into an image’s brightness values and highlights.
The left side of the histogram shows dark pixels, while the right side represents lighter areas.
Analyzing these details ensures well-balanced exposure and detailed improvements.
Tonal Range
It displays on the histogram’s horizontal axis, showing how well your photo captures from pure black to pure white tones.
A full-tonal-range histogram indicates a high-quality image that covers all brightness levels effectively.
Expanded view: Offers a detailed look at separate channels displayed, such as red, green, and blue.
Compact view: Simpler but less informative, focusing mainly on immediate adjustments for quick edits.
Making careful adjustments to cover this range improves dynamic range and overall image quality.
When choosing between NED or JPEG formats, understanding the tonal range is important. NED files offer a broader tonal range compared to JPEGs, providing more flexibility in editing.
Similarly, when choosing between NEF or JPEG format, understanding the tonal range is essential. NEF files also provide a wider tonal range compared to JPEGs, allowing for greater flexibility and higher image quality during the editing process.
The Types Histogram Represents
Different types of histograms cater to varying photography needs.
A high-key image has most data clumped towards the right side, indicating predominantly bright tones. Conversely, a low-key image will have more crowding towards the left.
Examples:
Ideal Histogram: Balanced data spread showing full tonal range.
Low Key Image: Predominantly darker tones indicated by peaks on the left side.
High Key Image: Lighter tone dominance with peaks on the right side.
Each type informs photographers how best to tweak their images using histograms as guiding tools for perfect outcomes.
Integrating these concepts into practical use, improving both underexposed and overexposed scenarios, becomes easier with visible progress on every edit session.
Using the Photoshop Histogram Panel
The histogram panel is important for understanding your photo’s exposures and color distribution. By making use of this important tool, you can ensure higher quality edits and optimized visuals.
Let’s explore how to effectively utilize the histogram panel in various scenarios.
Feature
Expanded View
Compact View
All Channels View
Details Displayed
Detailed data for each color channel
Simplified, single-pane view
Separate histograms for each color channel
Use Case
In-depth analysis of tonal range and colors
Quick checks, limited screen space
Holistic view of color composition
Visualization
Shows individual color channel data
Condensed information
Simultaneous display of all channels
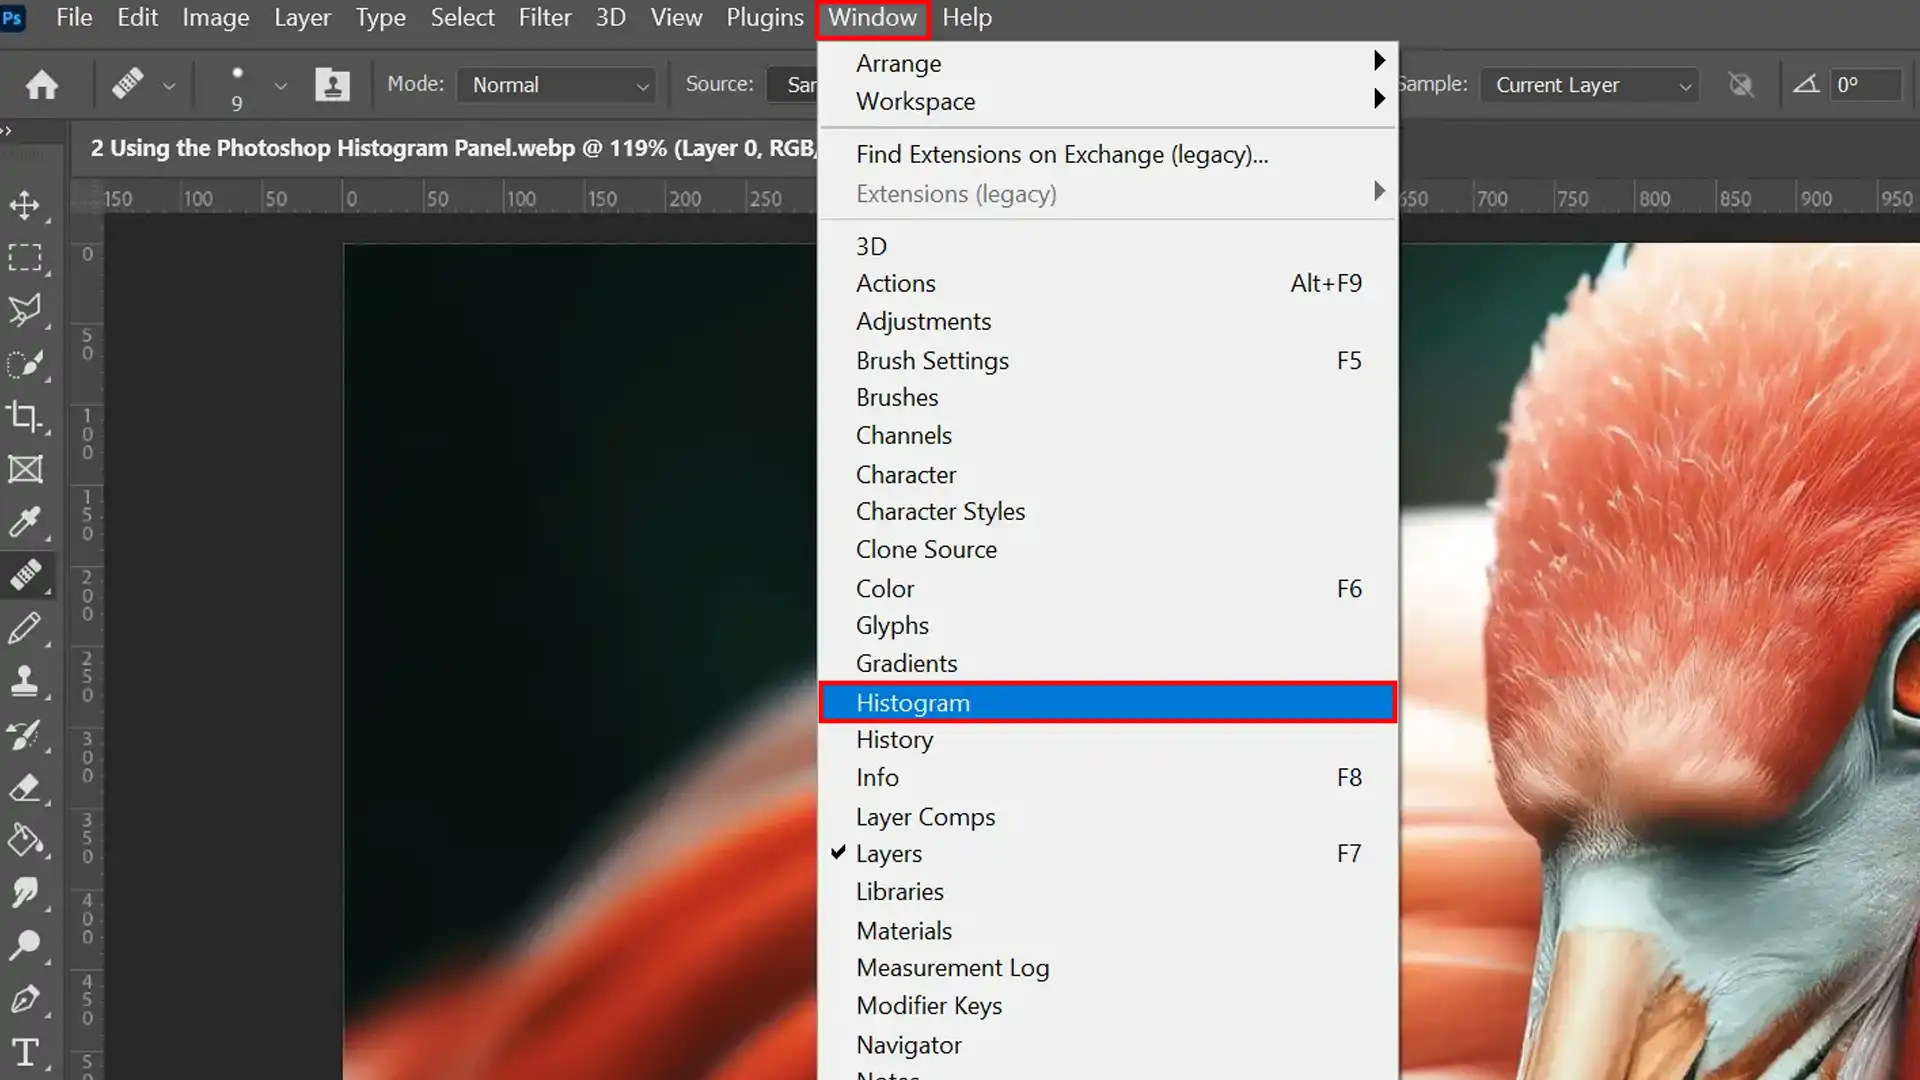
Accessing the histogram panel is straightforward. Simply navigate to the menu bar, click on the “Window” tab, and select “Histogram.”
This action will display the histogram window, providing a quick overview of your image’s brightness levels and color intensity.
Additionally, pairing the histogram panel with the color range command can help you further refine your selections based on specific colors, allowing for more precise adjustments to exposure and color distribution within targeted areas of your image.
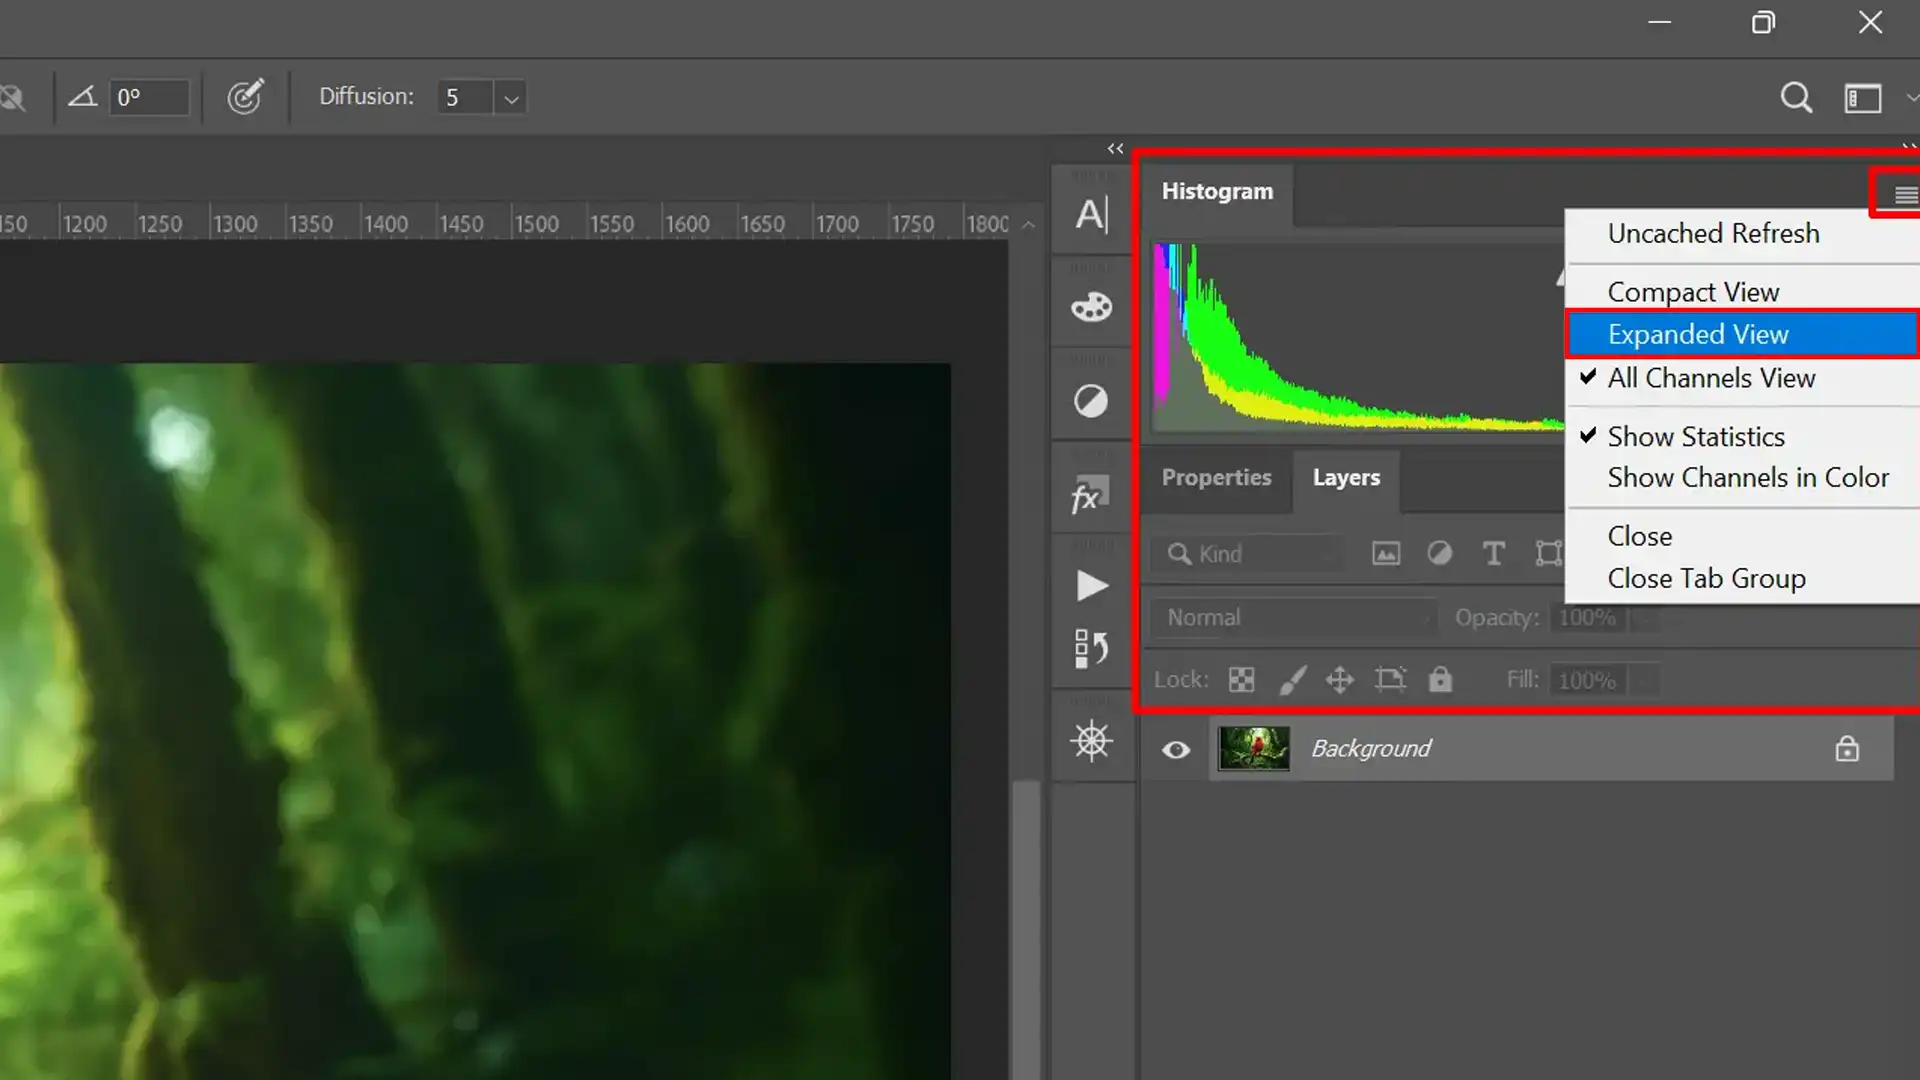
Adjusting the Histogram View
There are multiple ways to customize your histogram view for more precise analysis. Depending on your needs, you may switch between different settings like expanded view or compact view.
Expanded View - In the expanded view, you can see detailed information about each color channel. By displaying data across all channels separately, you get better insight into your image’s tonal range.
Compact View - For a simpler presentation, toggling to compact view condenses this data into a single pane. While it offers less detail compared to expanded view, it still remains useful for quick checks or when screen space is limited.
All Channels View - All channels view shows individual histograms for each color channel simultaneously. It helps you pinpoint issues affecting specific colors and offers a holistic understanding of your image's overall composition.
Viewing Specific Channels
Switch between distinct channels by using the dropdown menu within the histogram panel.
Selecting red, green, or blue filters permits focused editing on specific parts of your image’s color spectrum without interference from other colors.
Creating a 3D Glass Effect in Photoshop is easier when you focus on viewing specific channels. By isolating channels, you can fine-tune your 3D effect for a more precise and vibrant result.
Viewing Channel Histograms in Color
Enhance clarity by viewing histograms for each color channel in their respective colors. This visualization aids in identifying whether issues like overexposed highlights (appearing as pure white) or removing shadows (appearing as pure black) disproportionately affect particular channels.
Examining Histogram Statistics
For a deeper understanding, take a closer look at histogram statisticsavailable directly within the properties panel. Here, you can explore metrics such as mean brightness levels, median values, and standard deviations.
These numerical insights serve as solid evidence to support your visual observations and guide your editing decisions.
Analyzing Histograms in Multilayered Documents
Delve into the intricacies of histogramanalysis while working with multilayered documents within Photoshop’s layers panel.
Toggle through layers to observe how each layer influences the overall histogram representation of your composite image. This process offers valuable insights into how different layers contribute to the final visual outcome, enabling you to make informed adjustments for optimal results.
Previewing Histogram Adjustments
Use preview adjustments while altering visibilitysettings.
Watching real-time changes refresh within the histogram helps confirm edits are improving (highlight details) rather than degrading them due to inadvertent clipping or loss of information.
Refreshing the Histogram Display and Image Data
Ensure accurate readings by refreshing periodically whenever major edits have occurred, especially those involving an adjustment layer selected previously.
Clicking “Refresh” updates the display so that what appears aligns precisely with the current project status, avoiding misinterpretation caused by lingering lagging indicators reflecting older iterations instead.
Advanced Features of Photoshop Histograms
As you dive deeper into Photoshop shortcuts, you’ll uncover some advanced tricks that can really up your editing game. Let’s take a closer look at what the histogram tool has to offer.
Customizing How Photoshop Histograms Look
Beyond the default histogram view, Photoshop allows users to customize the display settings to suit their specific needs.
You can adjust brightness and contrast and even add extra info, such as warnings for areas where your image might be too bright or too dark. This lets you fine-tune your view of the image, helping you make more informed edits.
Go to the "Window" menu and select "Histogram."
In the histogram panel, click on the options menu icon (three lines).
Adjust settings such as brightness, contrast, and overlays to customize your histogram display.
Furthermore blending modes in Photoshop opens up a world of creative possibilities, allowing you to blend layers and effects seamlessly for unique and captivating compositions.
Creating Your Own Special Photoshop Histograms
In addition to the standard luminance histogram, Photoshop providestools for creating custom histograms tailored to specific analysis needs.
This could involve creating histograms for individual color channels or specialized histograms for assessing aspects such as noise levels, sharpness, or color distribution.
By generatingcustom histograms, photographers can go into bigger detail on their images and identify areas for improvement with greater accuracy.
Open your image in Photoshop.
Go to the "Image" menu, select "Adjustments," and choose a tool like "Threshold" or "Selective Color" for specialized analysis.
Fine-tune the settings to focus on the specific details you want to examine.
Making Photoshop Histograms Work Automatically
In Photoshop, you can set up actions or scripts that use histograms to adjust your images automatically. This saves you time and ensures your edits are consistent, whether you’re working on one image or a whole batch.
Start by recording an action: Go to the "Window" menu and select "Actions."
Click on the "New Action" icon, name your action, and click "Record."
Perform your desired edits, including any histogram adjustments.
Stop recording the action by clicking the square "Stop" icon in the Actions panel.
To apply the action to multiple images, go to the “File” menu, select “Automate,” then “Batch.” Choose your action and the folder containing your images, and let Photoshop do the rest.
To streamline your workflow, utilizing Photoshop Actions can significantly enhance your editing efficiency. By automating repetitive tasks, Photoshop Actions help maintain consistency and speed up your process.
Frequently Asked Questions
How to make a histogram in Photoshop?
Creating a histogram in Photoshop is straightforward. First, open your image in Photoshop. Then, go to the “Window” menu and select “Histogram.” A histogram panel will appear, displaying the distribution of brightness levels in your image.
What does the histogram in Photoshop tell you?
The histogram in Photoshop provides valuable insights into your image’s tonal range and distribution.
Specifically, it shows the distribution of pixel brightness levels, from dark tones on the left to highlights on the right. By analyzing the histogram, you can assess the overall exposure, contrast, and tonal balance of your image
What is PSD histogram?
A PSD histogram refers to the histogram used within Adobe Photoshop (PSD stands for Photoshop Document).
This histogram displays the tonal range of an image, including shadows, midtones, and highlights, by showing the number of pixels for each tonal value. It’s an integral tool for evaluating image exposure and contrast within Photoshop.
Where is histogram in Photoshop Elements?
Photoshop Elements does have a histogram. The histogram serves the same purpose as in Photoshop.
It provides insights into an image’s brightness levels and tonal range, aiding in making precise tonal and exposure adjustments during the photo editing workflow.
To access the histogram in Photoshop Elements, go to the appropriate menu or panel for image adjustment options.
So there you have it, mastering histograms has changed my editing process.
By understanding and utilizing these tools, I can make exact adjustments to exposure and color balance and get amazing results.
I encourage you to experiment with histograms and see the difference it makes in your own work. And, if you want to enrich your skills even further, I highly recommend checking out our in-depth Photoshop course and Lightroom course.
If this article has helped you, then Like and Share it with your friends
$2,061.00Original price was: $2,061.00.$1,061.00Current price is: $1,061.00. 27582
Download Your Free Guide Now!
Discover the secrets of photography with our printable guide! Master essential techniques like aperture, shutter speed, and ISO to create stunning images. Get your free printable PDF now and start turning your snapshots into masterpieces!