Lightroom Color Label Shortcut to Speed up Your Workflow

Lightroom is an excellent tool for organizing and editing photos, but navigating through large photo collections can take time. That’s where the Lightroom Color Label Shortcut comes in handy. With just a few quick clicks, you can easily label your images by color. This feature makes it faster to find and edit photos in lightroom later.

In this article, I will guide you through how to use this powerful shortcut. You will learn the best ways to set color labels, how to customize them. Whether you’re a beginner or a pro, this guide will improve your Lightroom workflow.

Table of Contents

How to Set Color Labels in Lightroom Using Shortcuts

Setting color labels in Lightroom Classic is an easy and efficient way to organize your photos. By using keyboard shortcuts, you can quickly assign labels without needing to search through menus. This helps speed up your editing process, especially when working with large photo collections. Let’s explore how to set and use color labels effectively.

Using Keyboard Shortcuts to Assign Color Labels

A classical sculpture with Lightroom keyboard shortcuts displayed on the top left.

You can assign color labels directly using the number keys on your keyboard. Each number is tied to selective color. Here are the keyboard shortcut for both Mac and Windows:

These shortcuts can be used in Grid or Loupe View in the Library Module. If you are working with multiple images, select them all, and then press the number key to assign the same label across your selection.

How to Set a Custom Color Label Set

Lightroom interface showing how to customize the color label set by navigating through Metadata options.

If you need more control over your workflow, you can customize the color label set. This is helpful for those who want to create labels specific to their editing style. For example, you can assign red for images that need retouching or blue for final edits. Follow these steps to create a new set:

This method allows you to keep your labels consistent across projects, saving time and making your workflow more efficient.

Filter Images by Color Labels

Lightroom interface showing the Attribute tab with options to filter images by tags such as red, blue, green, and others.

Once you’ve labeled your photos, you can easily filter them using the Library Filter bar:

This is especially useful when working with large catalogs of images, as it helps you focus on specific photos without getting lost, much like a 3D Glasses Effect that sharpens your view.

Common Use Cases for Color Labels

Photographers use color labels for various purposes depending on their workflow. Here are some examples:

Using these labels consistently helps keep your catalog organized and ensures you always know the status of each photo. This is one of many effective photography tips to streamline your workflow.

Practical Example

Imagine you’ve just completed a photoshoot with 200 images. You want to quickly sort through them. You can press 6 to label the images that need more work with red, and press 9 for the final edits. For those final edits, you might also experiment with the blending mode to enhance the look of specific images. This way, when you’re ready to export or print, you can filter by the blue label and avoid scrolling through hundreds of images.

By incorporating these color labels and keyboard shortcuts into your daily editing routine, you’ll notice a smoother and more organized workflow. This not only saves time but also ensures that you never miss an important image again.

Why Use the Lightroom Color Label Shortcut for Efficient Workflow

Using the Lightroom Color Label Shortcut is a simple way to boost your editing efficiency. By assigning colors to images, you can organize, sort, and filter photos quickly, saving time when working with large catalogs. This system keeps your workflow clean and organized, helping you refine photos in lightroom that need attention.

Speed Up the Sorting Process

The Lightroom Classic color label shortcuts allow you to categorize your images without wasting time clicking through menus. Here’s how it helps:

For example, you can label all photos that need editing with a red label and those that are final edits with a blue label. This keeps everything organized and easy to find.

Simplify Your Workflow with Color Labels

The color label system in Lightroom Classic also simplifies photo management. By using color labels along with other tools in lightroom like flags or star ratings, you can create a powerful organization structure. This lets you handle even the largest photo collections with ease. Additionally, you can use the Create New Layer shortcut (Ctrl + Shift + N on Windows or Command + Shift + N on Mac) to efficiently manage your adjustments and edits. Here’s how:

Enhance Metadata Management

The metadata panel plays a key role in organizing your photos, and color labels make it even better. Each label is recorded in the label metadata field, making it easier to search and filter later. This is helpful when managing large libraries of images.

Easy Navigation and Workflow Improvements

When editing large batches of photos, navigating through them efficiently is crucial. Color labels help you keep track of your progress:

This smooth navigation saves time, letting you focus more on creative photo editing rather than file management.

Practical Example: Improving Your Workflow

Let’s say you’ve finished shooting a wedding with hundreds of photos. In your wedding photography workflow, you label the unedited images as red and the final edited ones as blue. Now, instead of sorting through the entire collection, you can easily find the photos that need your attention. This method frees up time for more important tasks, like fine-tuning your edits.

Using the Lightroom Color Label Shortcut gives you control over your workflow and ensures that your projects stay organized, no matter how many images you’re working with.

How to Sort and Filter Images by Color Label in Lightroom

Sorting and filtering images by color label in Lightroom Classic is a fast way to manage large collections. By using color labels, you can focus on specific groups of photos that need attention. This is especially helpful when working on projects with many images, such as events or portfolios.

Action Steps Details
Sort by Color Label Go to Library Module.
Click Sort dropdown (bottom right).
Select Sort by Color Label.
Organizes photos by color labels.
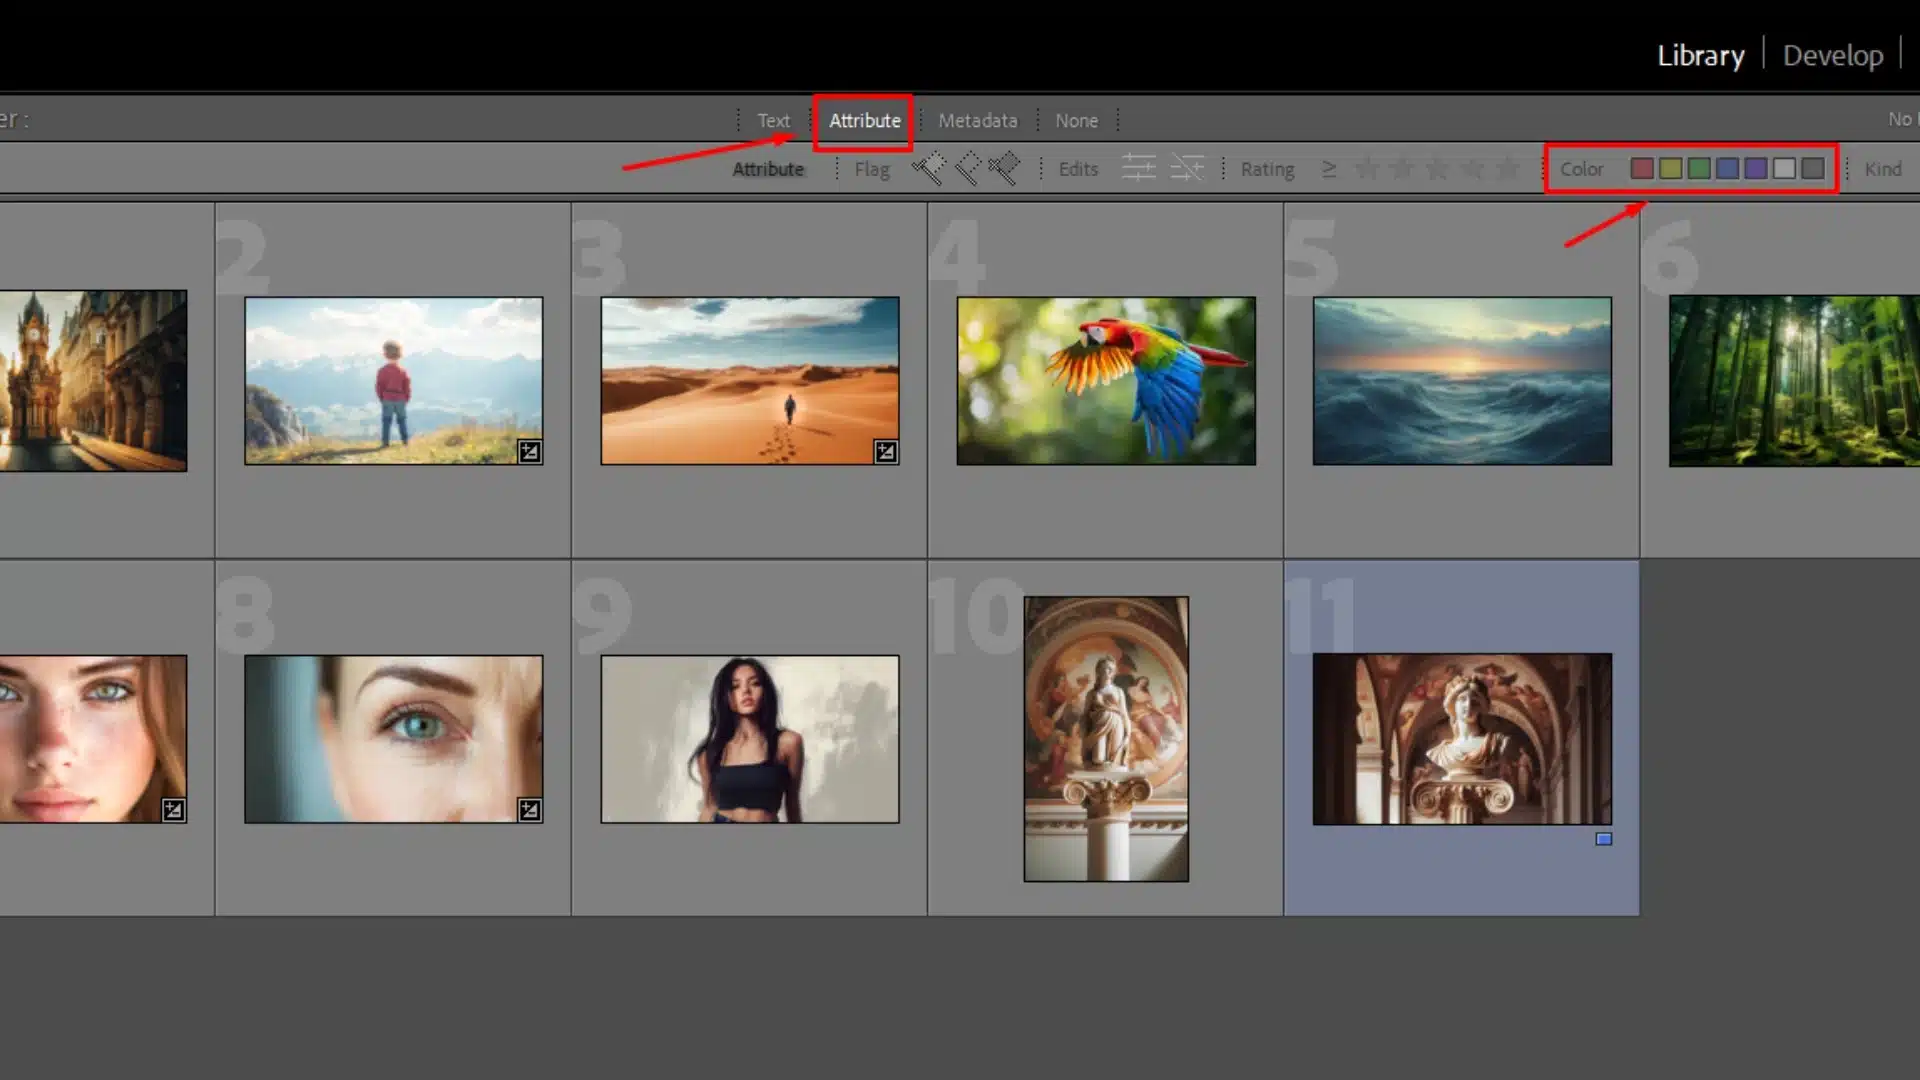
Filter by Color Label Go to Attribute tab.
Click color label icon to filter.
Filters images by selected color labels.
Keyboard Shortcuts Press number key:
6: Red
7: Yellow
8: Green
9: Blue
Assigns color labels using keyboard.
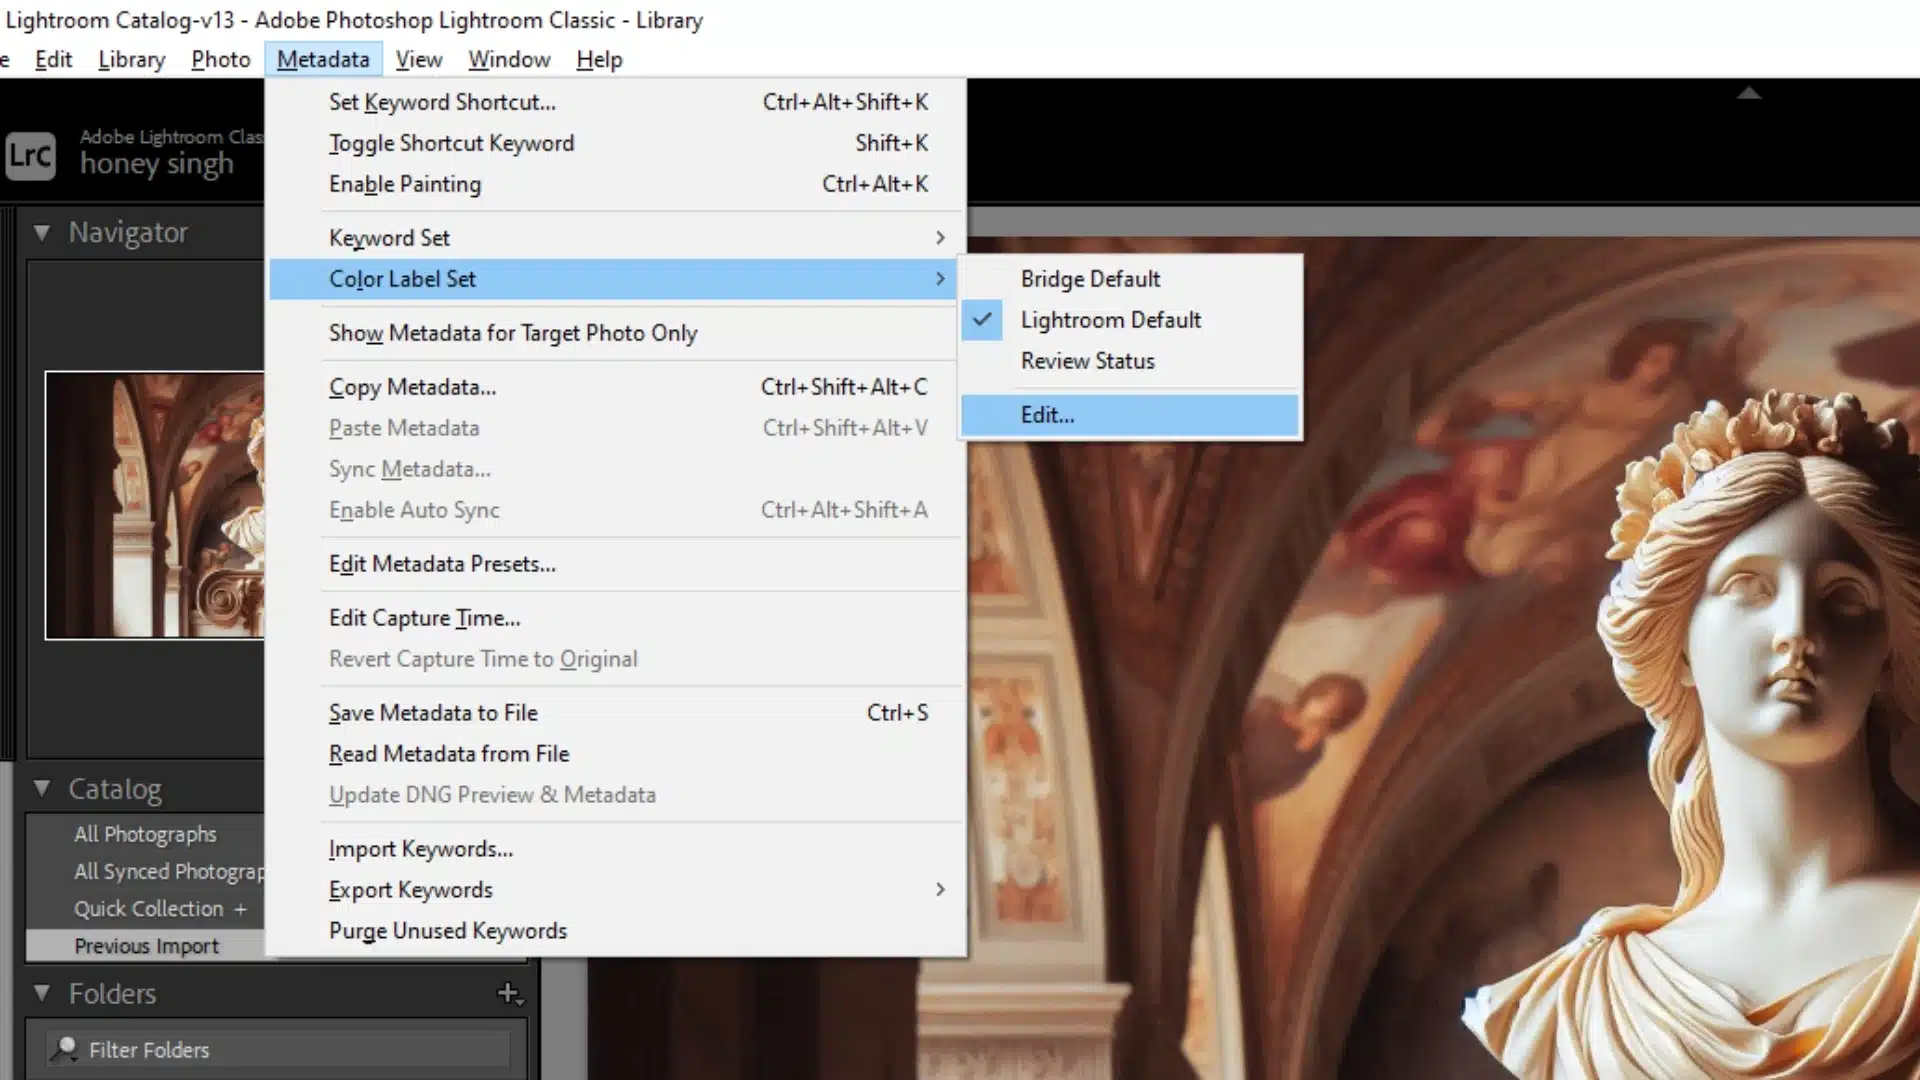
Customize Color Labels Go to Metadata > Color Label Set > Edit.
Rename labels.
Customize labels for workflow (e.g., “Final Edit”).

Sorting Images by Color Label

Sorting images based on their color labels is simple. It helps you quickly organize your photo collection by the status of your edits. Here’s how you can do it:

This feature allows you to arrange your photos based on their color label. For example, you can group all photos with the red label (needing editing) at the top and those with the blue label (finalized edits) below them.

Filtering Images by Color Label

You can also filter your images by their color labels. This lets you view only the photos with a specific label, which is useful when you want to work on a particular set of images. Here’s how to filter your photos:

You can select multiple labels to view different sets of photos at the same time, such as blue and red labeled images.

Using Keyboard Shortcuts to Filter Images

For even faster sorting, use keyboard shortcuts. Press the corresponding number key (6 for red, 9 for blue, etc.) to assign a color label to an image. Then, use the Library Filter bar to display only those photos.

Customizing Color Label Sets

If you want more control over your workflow, you can create a color label preset in lightroom that matches your editing needs. Here’s how:

This helps ensure that your labels stay consistent across different projects and improves your sorting process.

Practical Example: Filtering Images for Review

Let’s say you’ve just finished a photo session, and you’ve labeled all unedited photos with a red label and edited photos with a blue label. To work on your unedited images, simply filter by the red label in the Library Module. This way, you won’t have to scroll through hundreds of photos to find the ones that still need editing.

By using color labels and the develop module, you can easily track the progress of each image and streamline your editing process in Adobe Lightroom Classic.

Additional Tips for Sorting and Filtering

By using these sorting and filtering techniques, you’ll improve your Lightroom workflow and manage large photo collections more efficiently.

Frequently Asked Questions: Lightroom Color Label Shortcut

Ultimate-Lightroom-Course-Detailed-Image-Adjustments

How to Set Color Label in Lightroom Shortcut?

Set a color label in Lightroom Shortcuts, use the following keyboard shortcuts:

These shortcuts can be used in Grid View or Loupe View in the Library Module. Select your photos and press the number key to assign the appropriate color label.

How Do I Show Color Labels in Lightroom?

To show color labels in Lightroom Classic, follow these steps:

Once set, your color labels will appear around the selected image thumbnails, helping you see which photos have been tagged with specific colors.

What Is the Shortcut for Color Picker in Lightroom?

In Lightroom Classic, there is no direct shortcut for the Color Picker. However, you can assign color labels using the number keys (6 to 9) to assign colors like red, yellow, green, and blue to your images.

If you are looking to adjust the color in an image, use the White Balance Selector by pressing W while in the Develop Module, or use the Graduated Filter Tool by pressing M to make color adjustments.

How to Sort Lightroom by Color Label?

To sort your photos by color label in Lightroom Classic, follow these steps:

This will arrange your photos by their assigned color labels, making it easy to find and work with specific groups of images.

These answers will help streamline your Lightroom Classic workflow by effectively using and managing color labels.

Conclusion

Lightroom interface displaying the editing options, allowing customization like red, yellow, green, blue, and purple.

Using the Lightroom Color Label Shortcut has been a game-changer for me. I remember editing hundreds of photos for a client and feeling overwhelmed by the sheer number of images to sort. By assigning color labels like red for unedited and blue for final edits, I easily managed my workflow and stayed on track. It saved me so much time and helped me stay organized, even with large projects.

If you’re ready to master Lightroom and boost your editing efficiency, check out our Lightroom Course or Photoshop Course to take your skills to the next level!

If “Lightroom Color Label Shortcut”article has helped you, then Like and Share it with your friends

Facebook
Twitter
LinkedIn
Pinterest

Have a nice photoshoot!

Read more about: Photo Editing with Lightroom and Photoshop

Download Your Free Guide Now!

Discover the secrets of photography with our printable guide! Master essential techniques like aperture, shutter speed, and ISO to create stunning images. Get your free printable PDF now and start turning your snapshots into masterpieces!