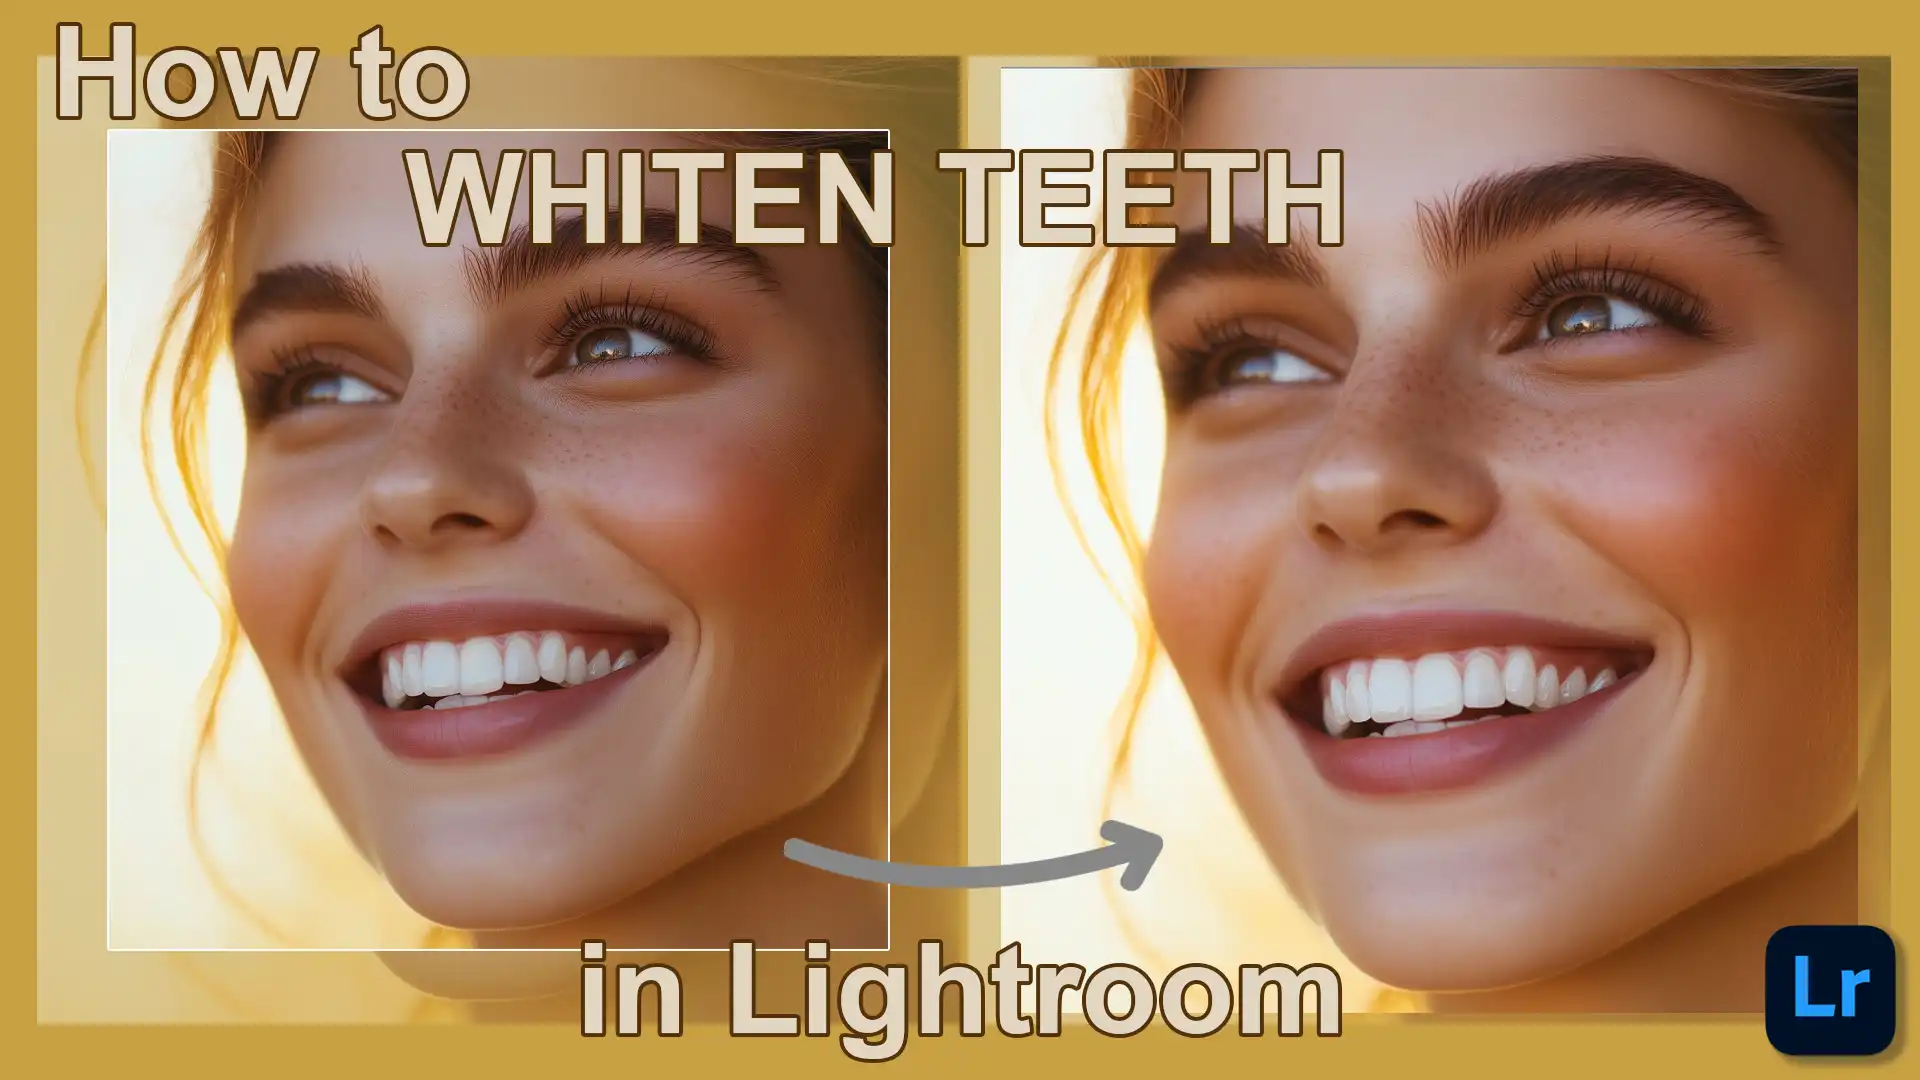
Ever wondered how to whiten teeth in Lightroom to make your photos truly shine? You’re in the right place! When it comes to photo editing, a bright, confident smile can make all the difference.
Whether you’re a budding photographer or just someone who loves capturing moments, learning this simple yet effective trick can elevate your images instantly.
Imagine transforming a good photo into a great one with just a few clicks sounds exciting, right?
Stick around, and I’ll walk you through the steps to achieve that perfect, radiant smile in your photos.
Table of Contents
Step-by-Step Guide: How to Whiten Teeth in Lightroom
Before diving into the whitening teeth process, it’s important to prepare your photo for editing. This ensures that your adjustments will yield the best results, allowing you to enhance the brightness and overall look of your subject’s smile effectively.
Preparing Your Photo for Editing
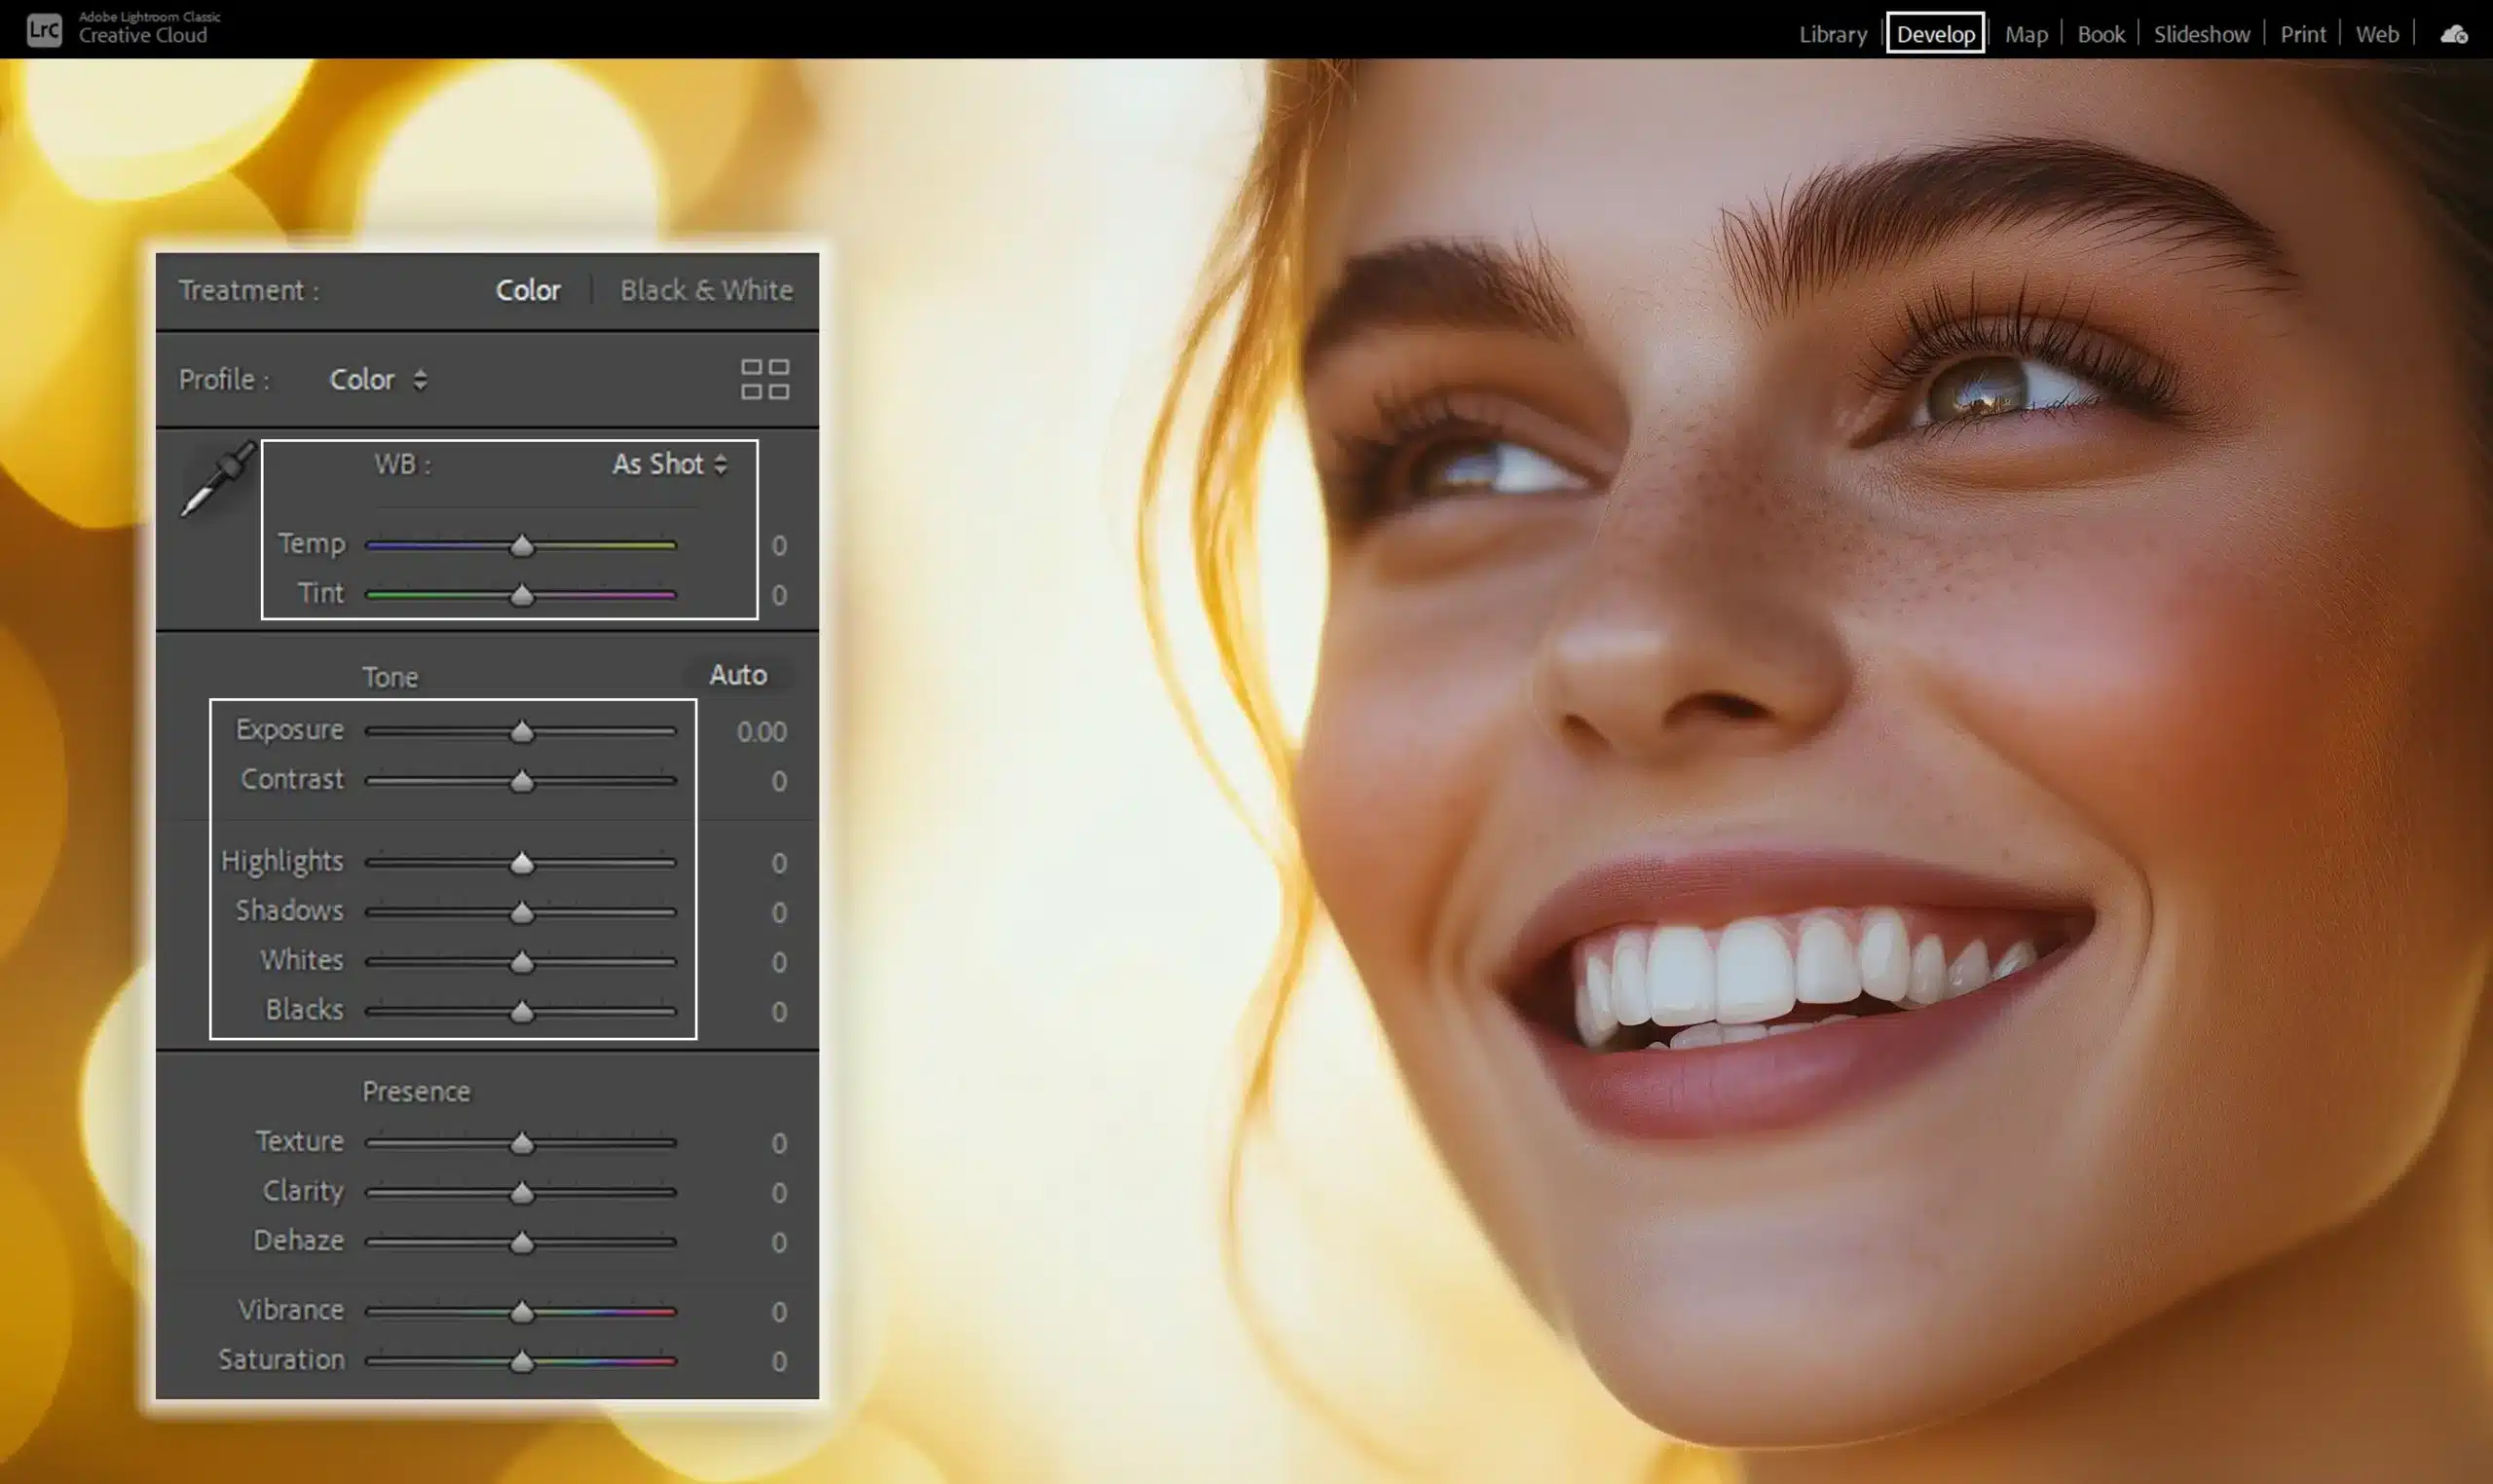
First, import your photo into Lightroom. Open the image you want to edit in the develop module.
This module provides all the necessary tools for making adjustments. Look at the overall lighting and exposure of your image.
Adjust the exposure if it’s too dark or too bright. Check the white balance to ensure your photo has natural colors.
Using the Adjustment Brush for Teeth Whitening
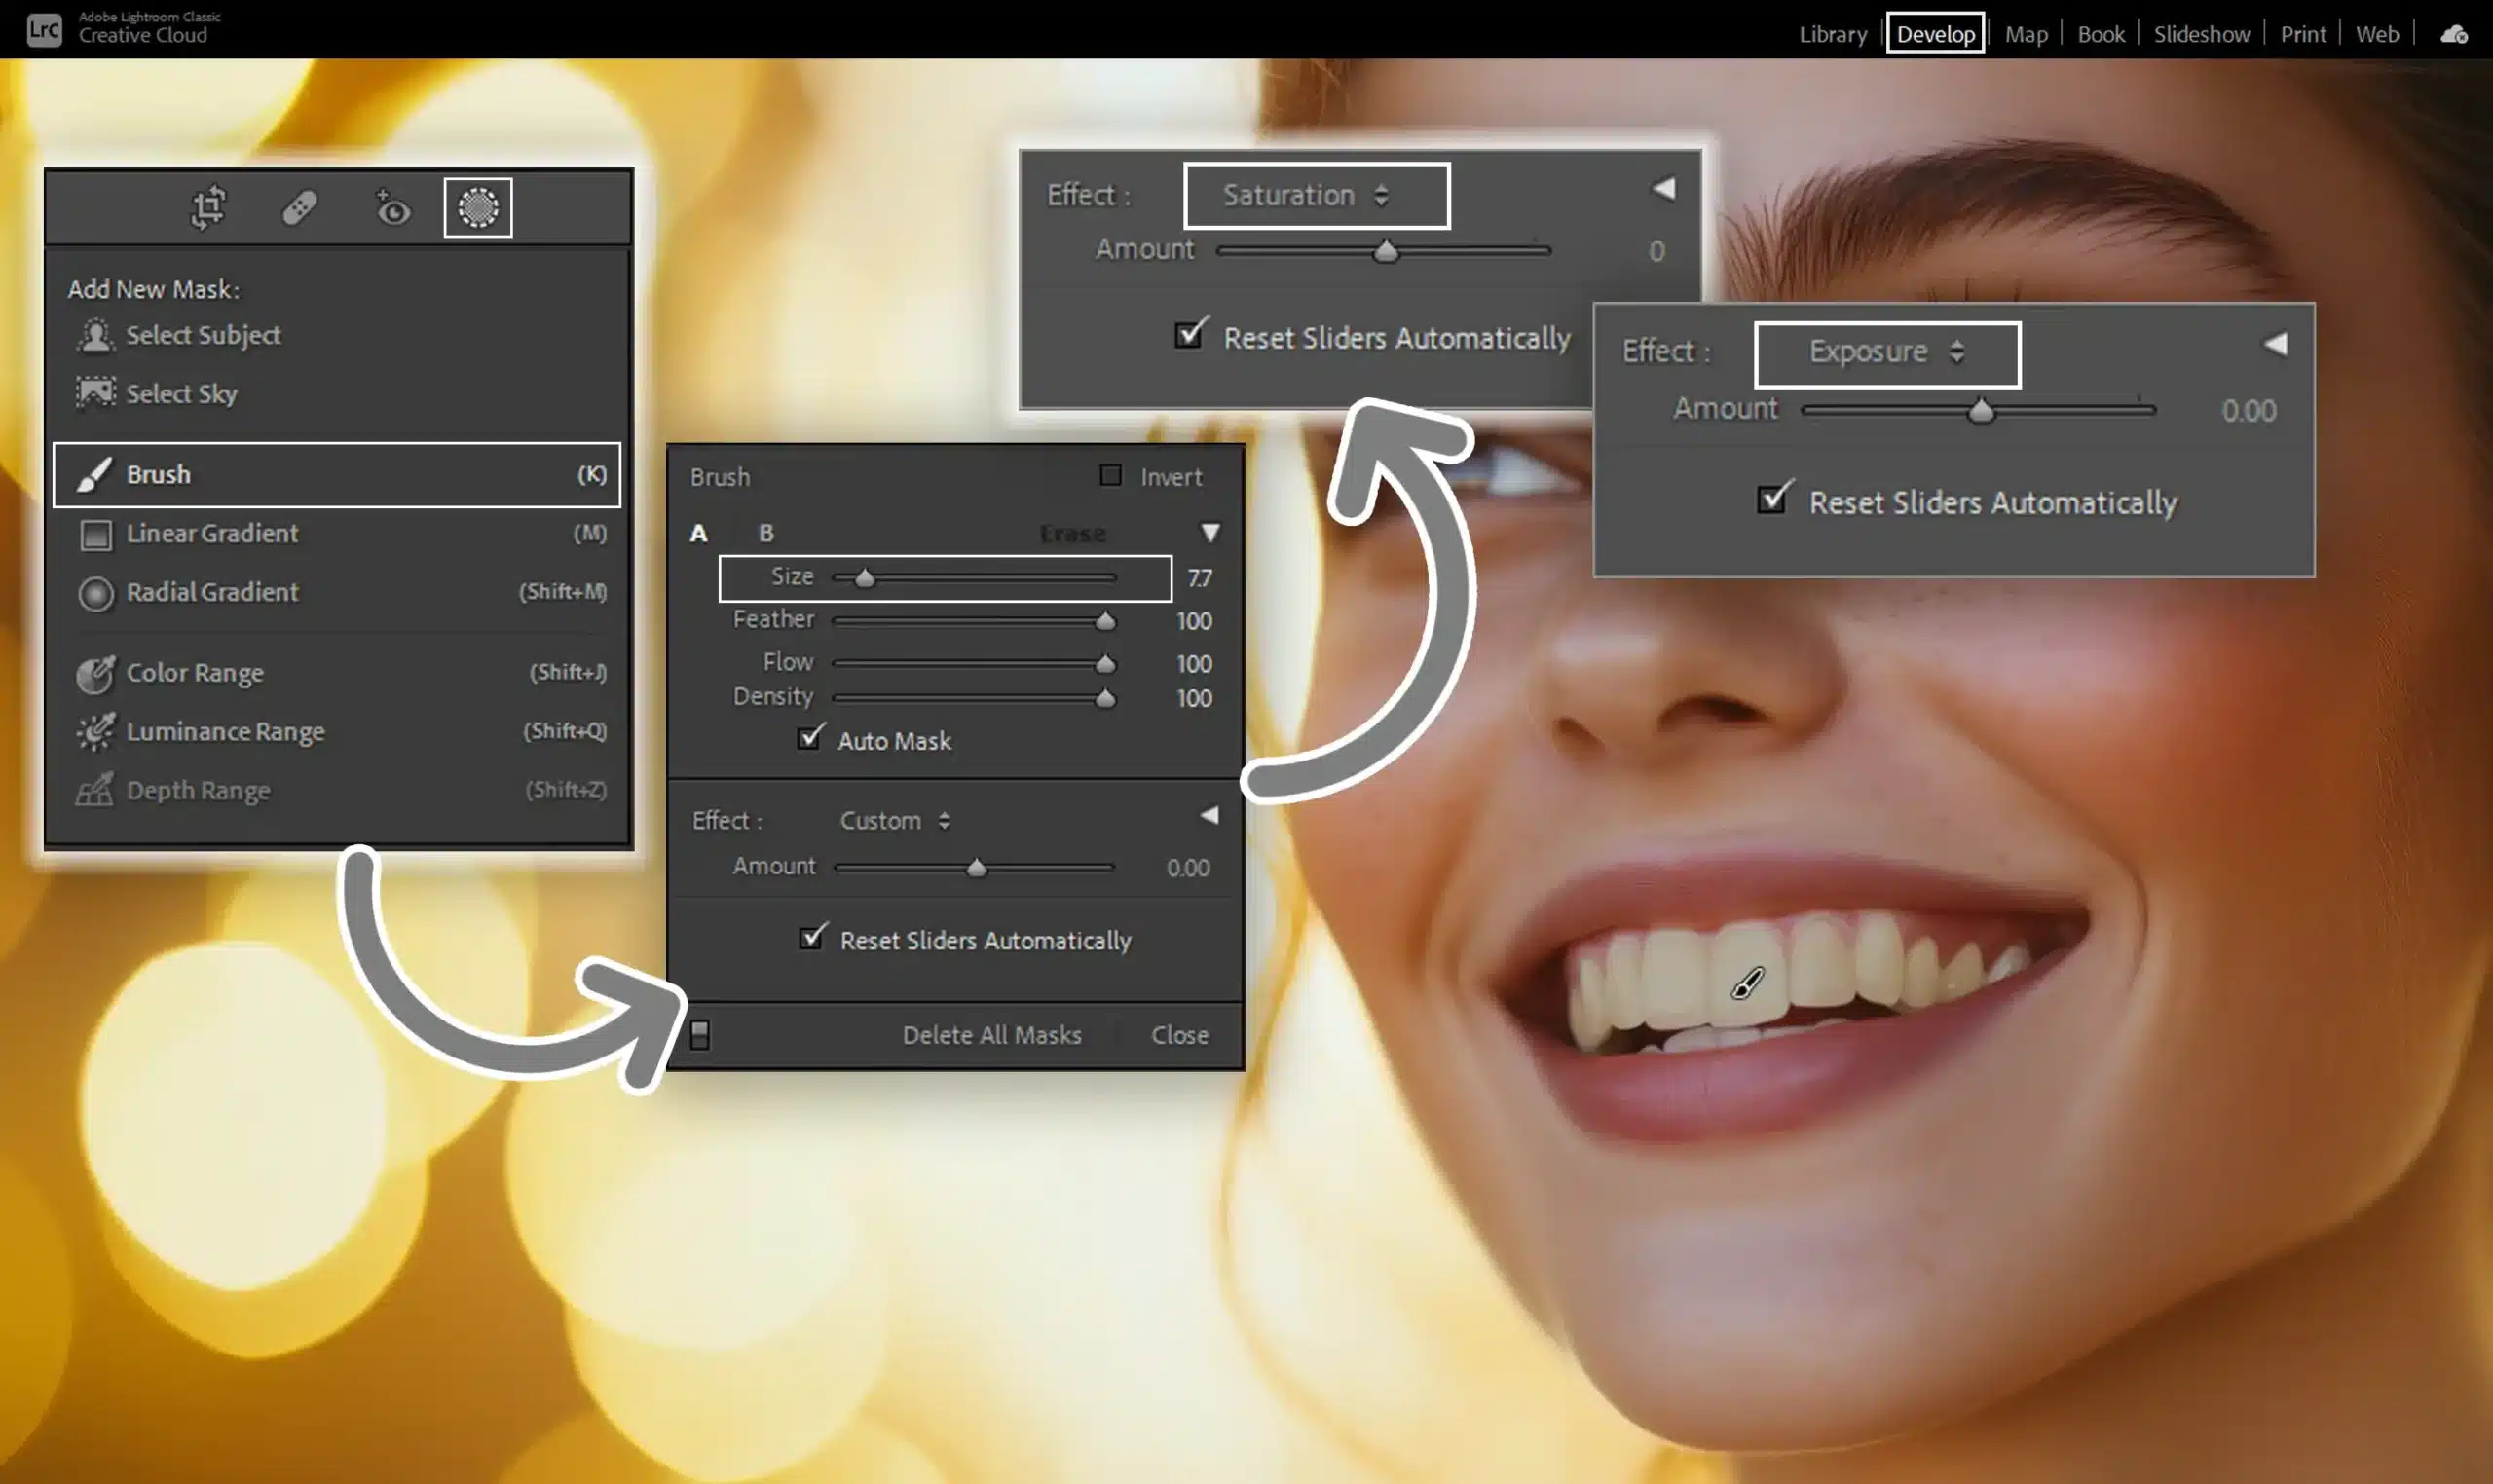
Next, select the Adjustment Brush tool by clicking the brush icon in the Develop module. The Adjustment Brush panel will appear, allowing you to customize your brush settings.
For best results, set the brush size to match the size of the subject’s teeth. Ensure the brush’s feather is soft to blend the whitening effect naturally.
In the slider panel:
- Reduce the saturation slightly to remove color from the teeth.
- Increase exposure and highlights to brighten the teeth.
- Now, carefully paint over the teeth. You'll see the mask overlay, showing where you've applied the effect. Make sure to cover all areas of the teeth evenly.
Fine-Tuning the Whitening Effect
Now that you’ve applied the initial whitening effect, fine-tuning is important to achieve a natural look.
Adjusting the brush features in Lightroom will help you perfect the whitening teeth effect, ensuring that your edits blend seamlessly with the rest of the photo.
Adjusting Brush Settings in Lightroom
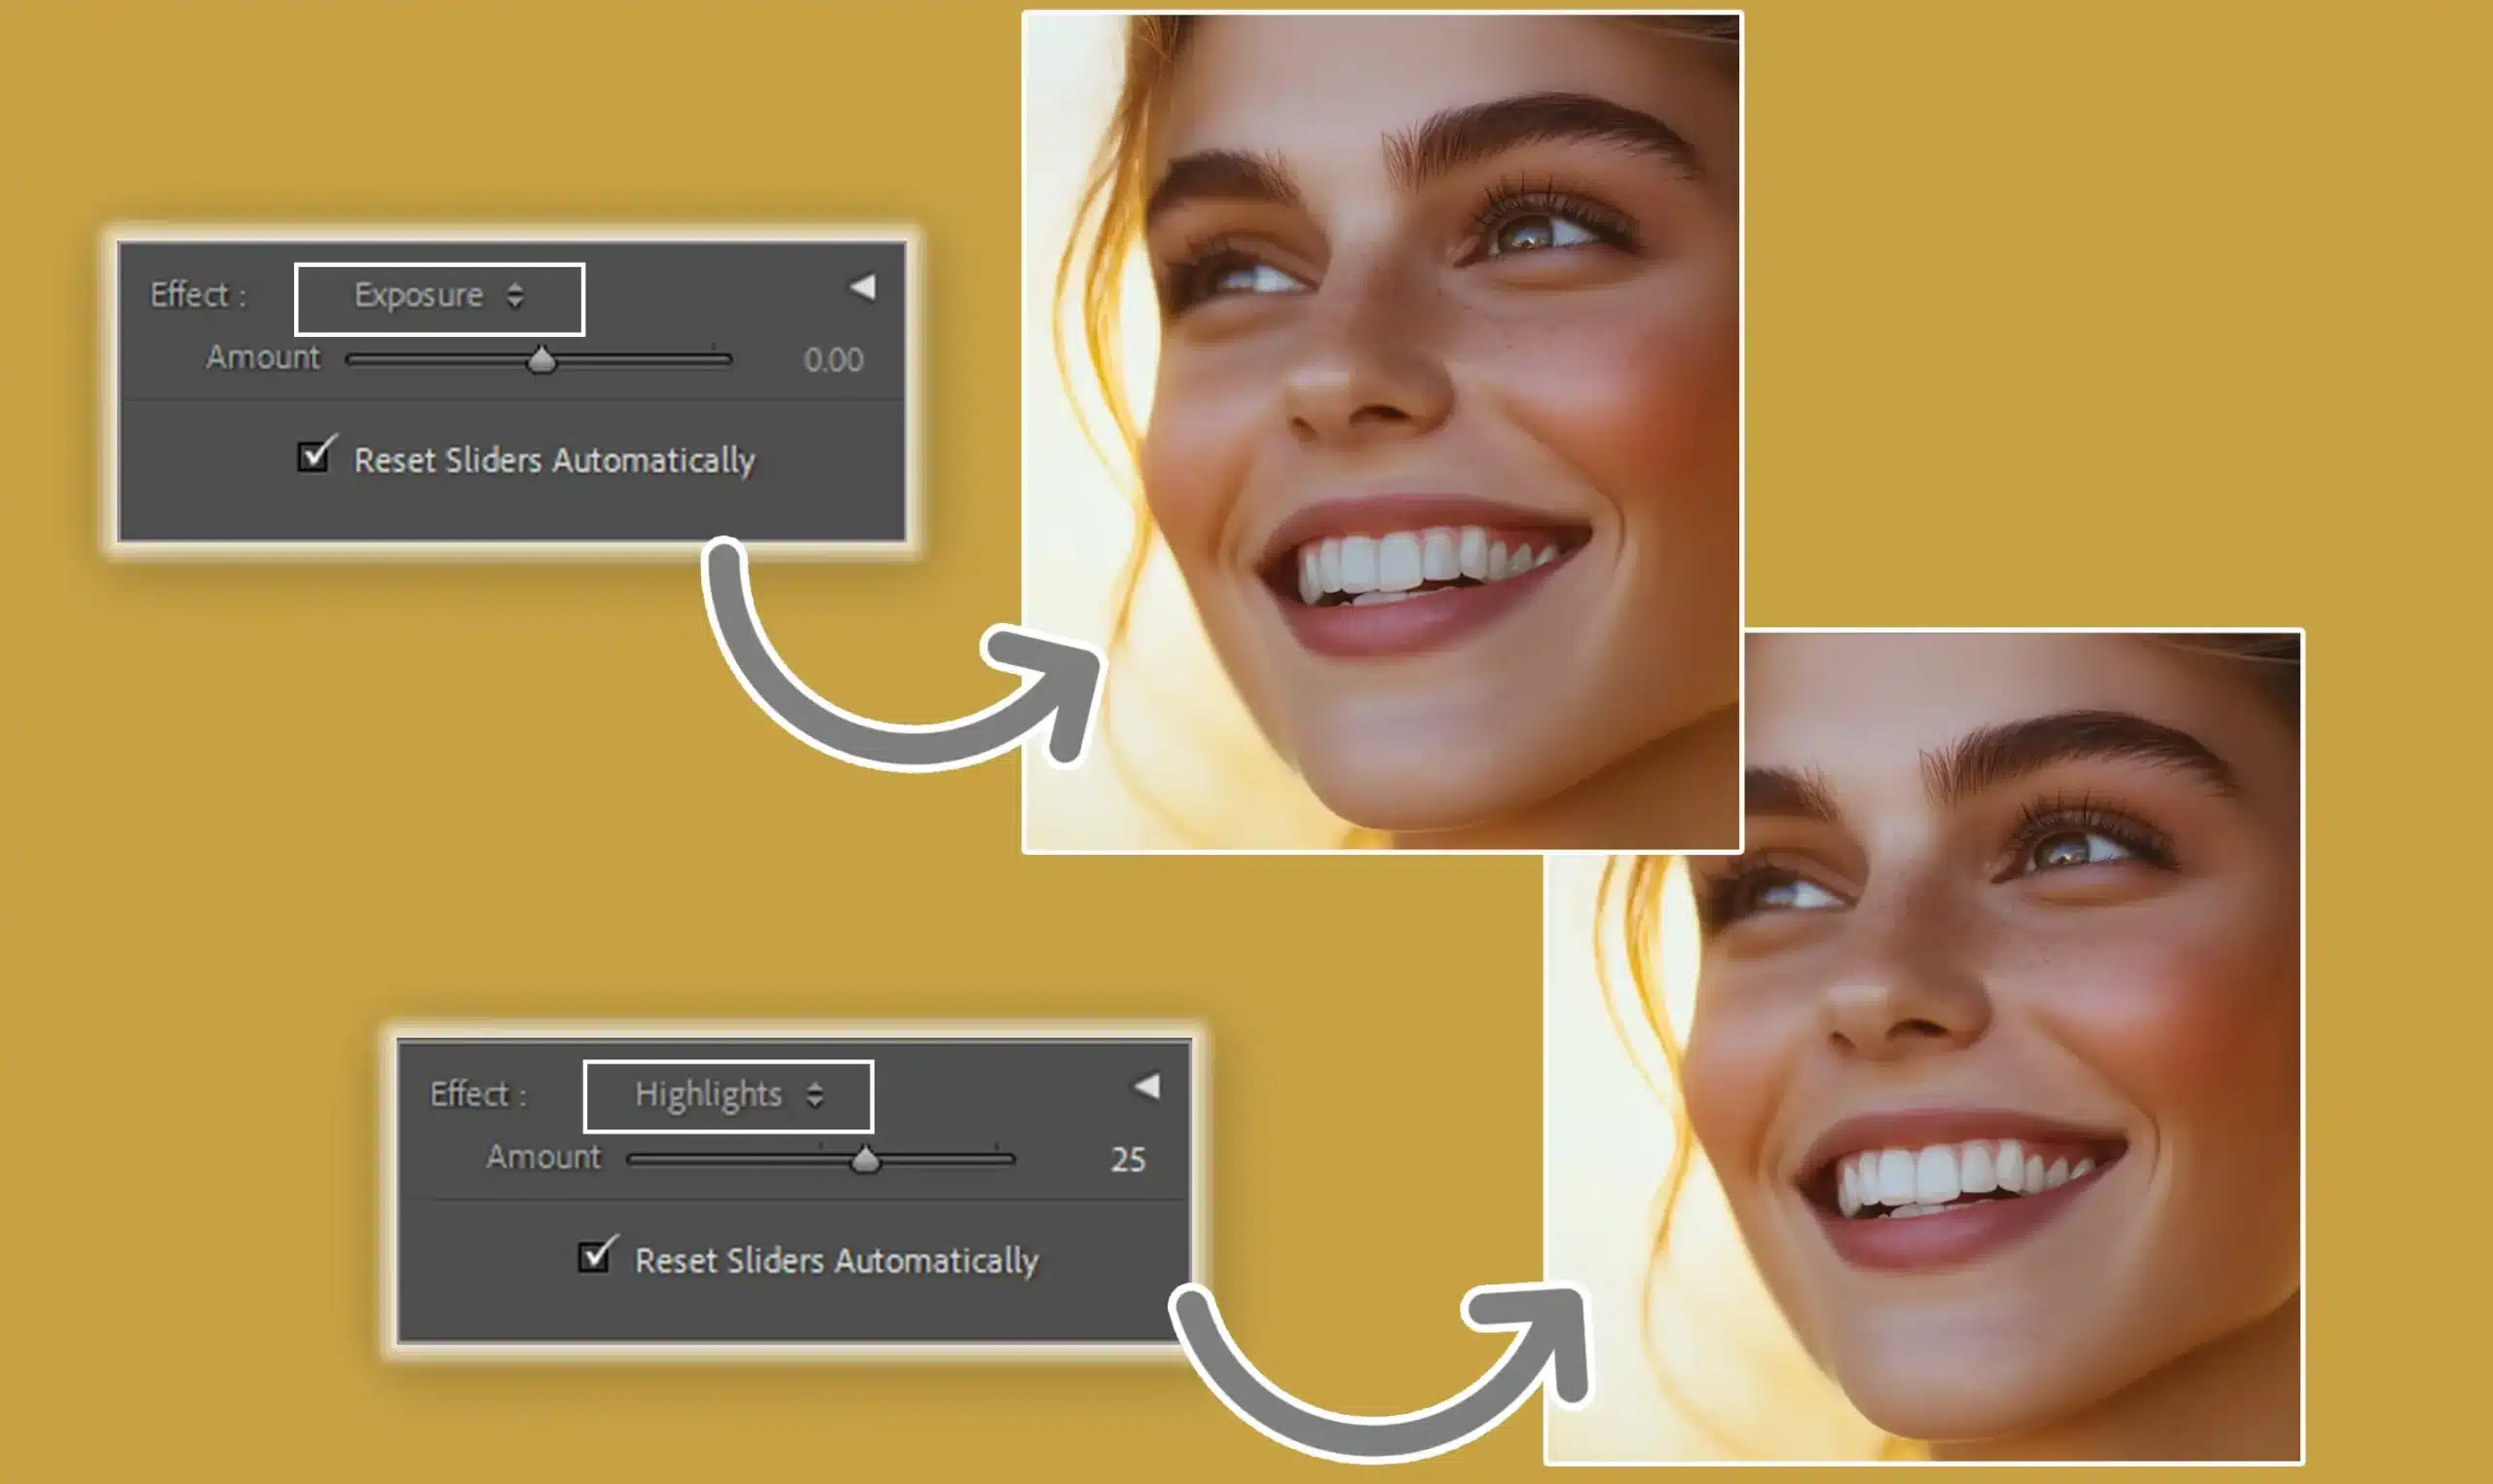
To perfect the whitening effect, tweak the settings in the adjustment brush panel. If the whitening looks too strong, lower the exposure or highlights.
If it’s too subtle, increase them a bit. The goal is to achieve natural-looking white teeth without going overboard, all while using the brush icon effectively to make adjustments.
Balancing Brightness and Contrast
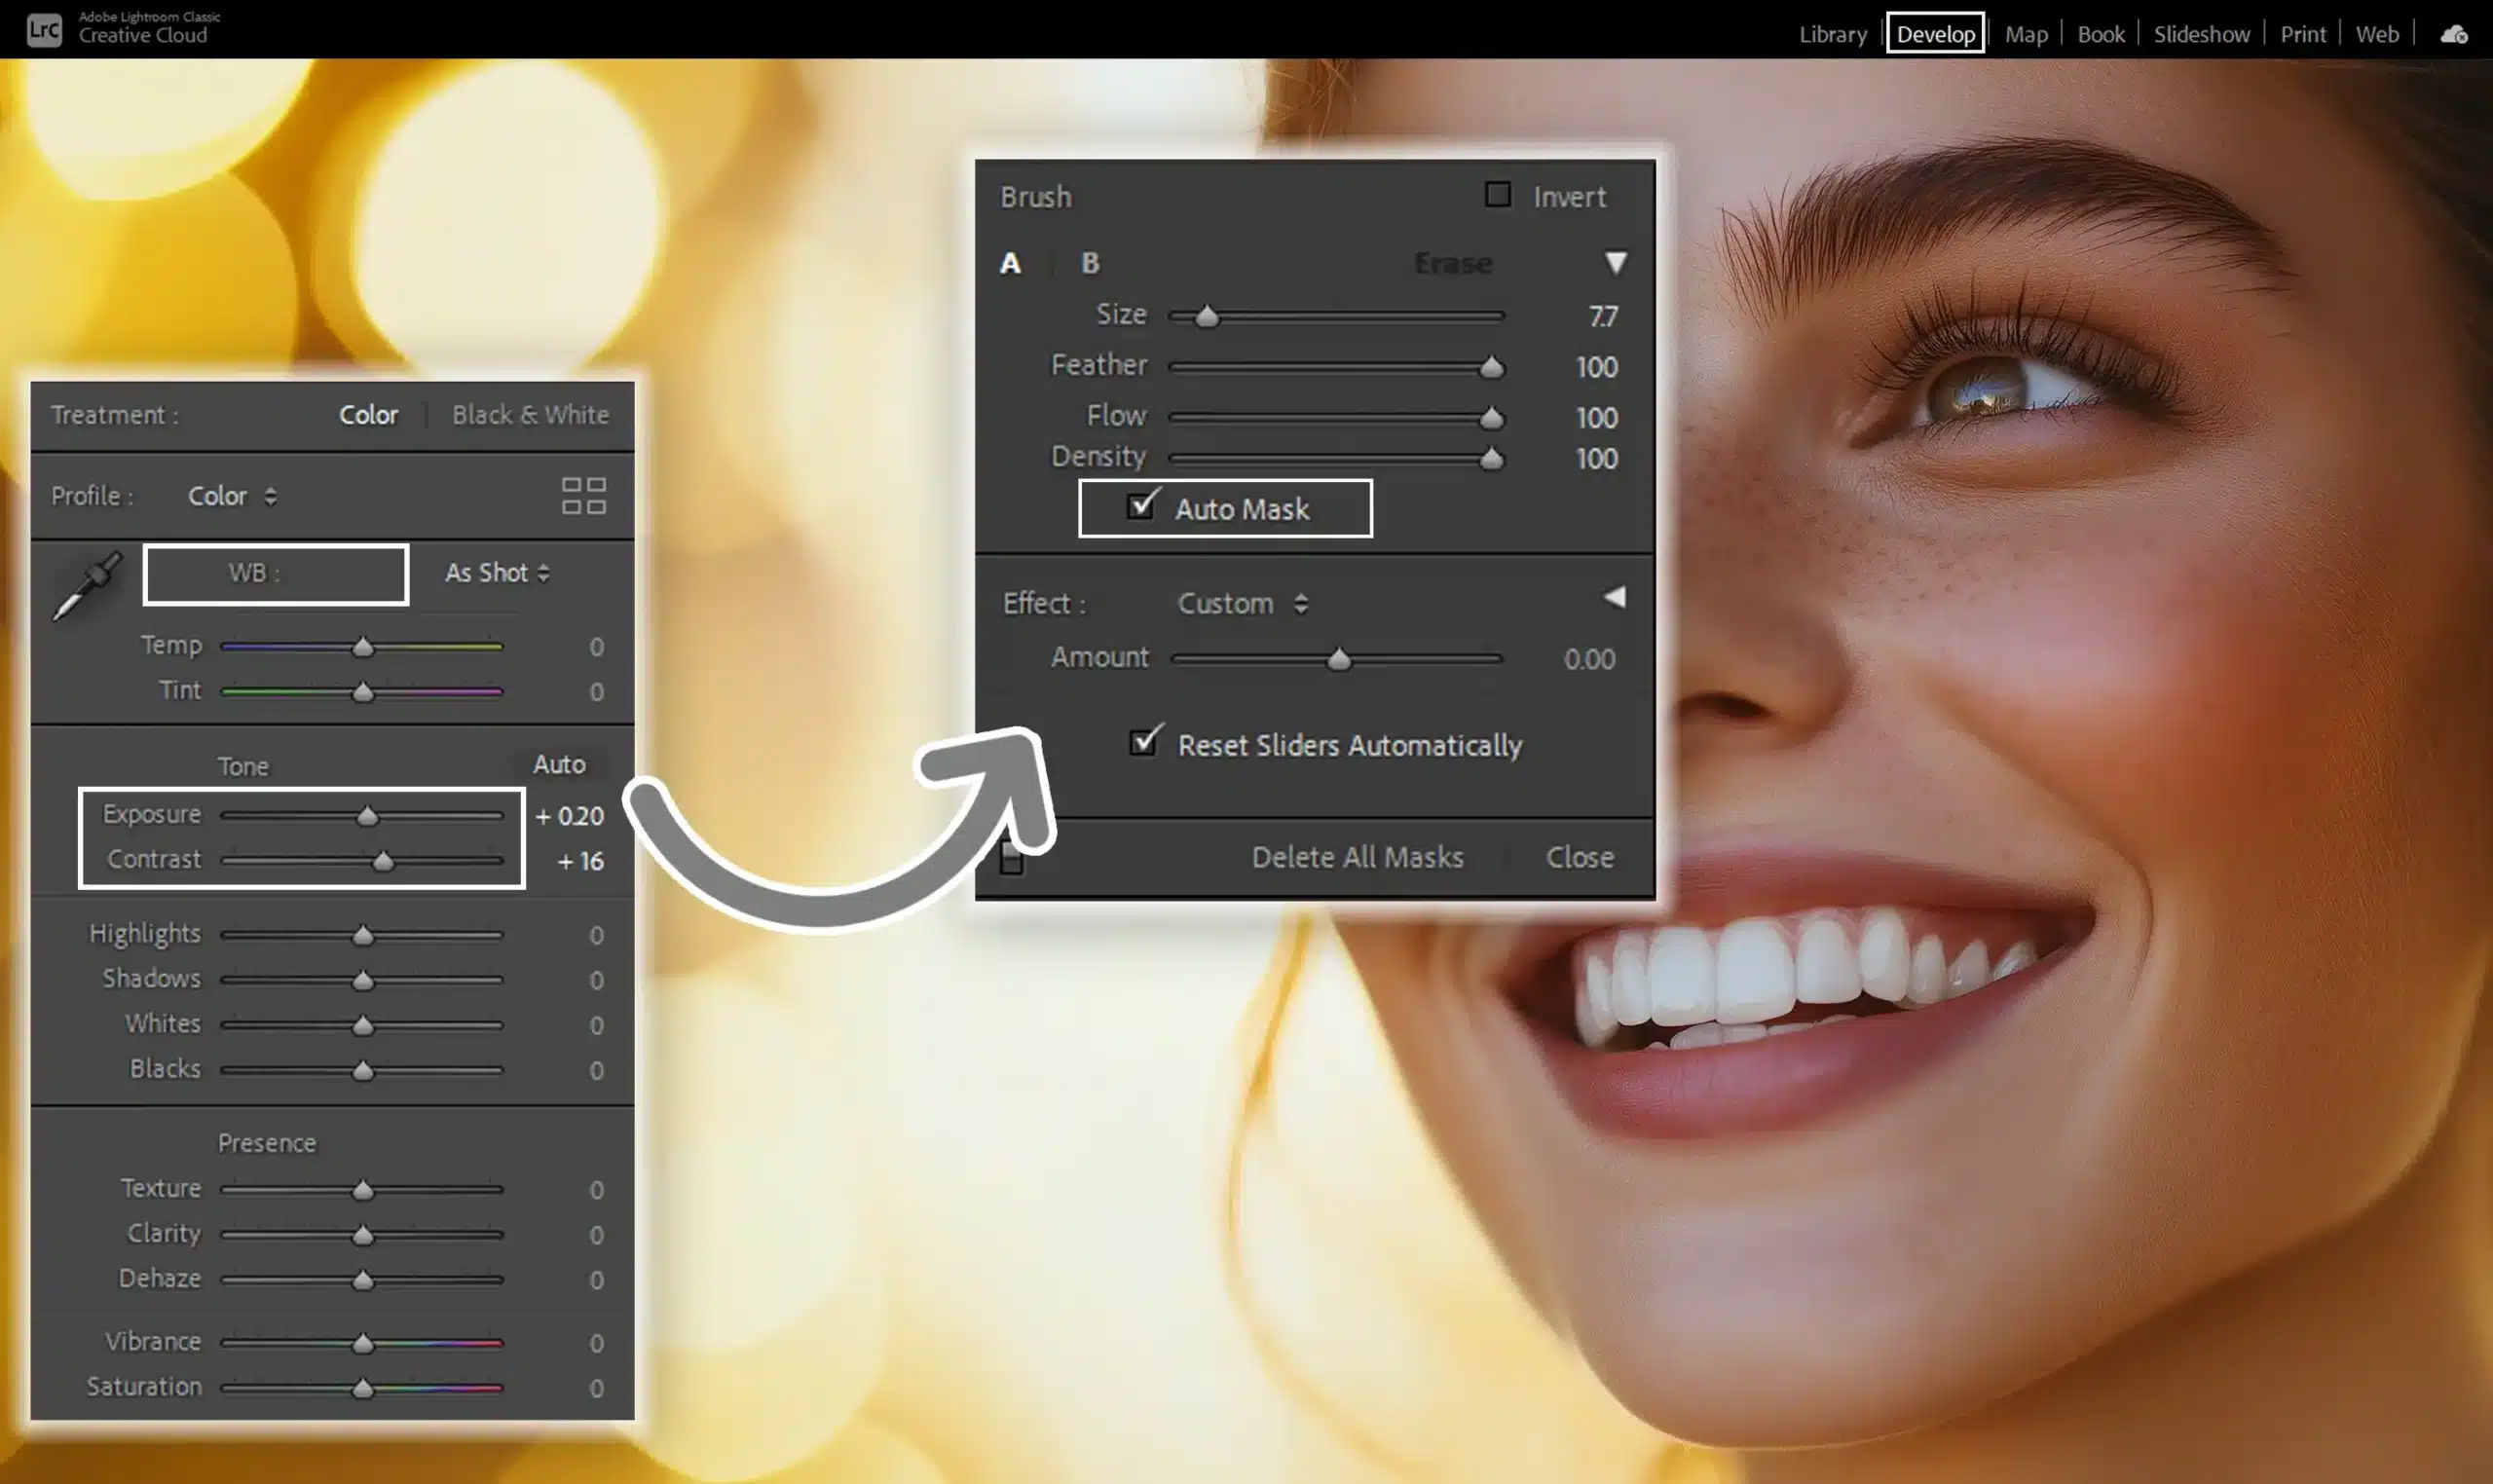
Alongside adjusting the brush parameters, check the overall brightness and contrast of your photo. If the teeth stand out too much, it may look unnatural.
Balance the brightness and contrast to blend the teeth-whitening effect seamlessly into the entire image. If needed, use the auto mask feature to ensure that only the teeth are affected.
To refine your adjustments further, you can also click the farthest right icon in the adjustment panel for additional options.
Pro Tip: Optimize white balance in photography by mastering how to adjust white balance accurately before whitening teeth.
Proper white balance ensures true-to-life colors, enhancing the natural appearance of the smile and preventing unnatural color casts during the whitening process.
Common Mistakes and How to Avoid Them
If you want to master how to whiten teeth in Lightroom, it’s important to avoid common pitfalls related to teeth whitening. In this section, we’ll discuss two main mistakes.
The table below highlights typical errors and provides practical tips to help you enhance your editing skills effectively.
| Common Mistakes | How to Avoid Them |
|---|---|
| Over-Whitening: Keeping It Natural |
|
| Ignoring Other Facial Features |
|
Over-Whitening: Keeping It Natural
Over-whitening is a frequent issue when people whiten teeth in Lightroom. Teeth that are too white can look fake. You should always aim for a natural look.
Tips to avoid over-whitening:
- Don't set exposure too high. Keep it subtle.
- Reduce saturation slightly. This removes unnatural colors.
- Use the brush panel carefully. Small adjustments work best.
To achieve a natural teeth whitening effect, balance is important. Always compare with the original image.
Ignoring Other Facial Features
An important point to remember is not to focus solely on the teeth. Adjustments to other facial features can make your edits more harmonious.
Tips for a harmonious edit:
- Use the auto mask option to isolate areas. This keeps your edits precise.
- Ensure facial tones are consistent. Balance the brightness of adjacent skin areas.
- Don't neglect to whiten eyes; doing so can enhance the overall effect.
Pro Tip: Always save your settings as a teeth whitening preset. This saves you time on future edits.
Knowing how to whiten teeth in Lightroom isn’t just about making teeth whiter. It’s about creating a naturally enhanced look. Avoid these mistakes, and you’ll get stunning results every time.
For more advanced techniques, consider exploring Lightroom shortcuts to speed up your workflow or learning about how to use lens correction in Lightroom to further enhance your images.
Advanced Techniques for Whitening Teeth in Lightroom
So far, we’ve covered the basics! Now, we will walk through advanced techniques to get you editing like a pro.
Let’s check them out!
Layering Techniques for Enhanced Effects
To achieve the best results when whitening your subject’s teeth, adjusting the brush parameters is important.
This allows for precise application and ensures that the whitening effect looks natural and enhances the overall image.
Step-by-Step Process
To achieve the perfect teeth-whitening effect, layering is important. Follow these steps:
- Select the adjustment brush panel.
- Adjust the brush size before applying it to the subject's teeth. This method ensures focused brightening.
- Set the exposure subtly and reduce saturation a bit. Too much, and the teeth will look unnatural.
- Use the brush to paint over the teeth gently. Avoid harsh edges by slightly brushing beyond the teeth's edges.
- Once the initial layer is done, add another layer for more refinement. Adjust brush size again for precision if needed. Repeat until you achieve the desired whitening effect.
Using Presets for Consistency
Creating and applying presets can help maintain consistency in your edits, especially when it comes to teeth whitening.
By saving your adjustments, you can easily apply the same look to all of your subject’s teeth across different photos, ensuring a uniform appearance that enhances your overall editing workflow.
Creating and Applying Presets
Applying presets simplifies the whitening process and ensures consistency across multiple images.
Follow these steps:
- Create a custom preset after fine-tuning your teeth whitening settings.
- Save it for future use. This step saves time and maintains uniformity in edits.
Exploring Other Presets
If you often edit portraits, exploring other presets tailored for tooth whitening can be helpful.
These presets often blend well with skin tones and other features, offering a balanced finish. Presets are found in the drop-down menu of the settings panel.
Pro Tip: Save your settings once you’re happy with them, label your preset clearly, and learn how to install Lightroom presets. This labeling helps you select the right preset at a glance, streamlining your editing workflow.
Knowing how to whiten teeth in Lightroom effectively enhances your skills, leading to better edits and happier clients. Aim for natural, not overly processed looks.
Comparing Lightroom with Other Editing Software
When evaluating Lightroom against other editing software like Capture One, it’s important to consider how each program handles specific tasks, such as teeth whitening.
Understanding the differences can help you choose the best tool for achieving the desired results, especially when it comes to enhancing the brightness of your subject’s teeth in your photos.
Lightroom vs. Capture One
In comparing Lightroom and Capture One, it’s important to note their main differences.
Each software offers unique features that provide just the right amount of control for your editing needs.
Understanding these distinctions can help you choose the best option for your workflow.
Main Differences
Capture One is known for its robust color editing capabilities. It’s like having a master artist’s palette where you can fine-tune colors with exceptional precision.
Lightroom, on the other hand, offers ease of use and seamless integration with other Adobe products.
For instance, using the brush tool to whiten teeth in Lightroom is straightforward and highly effective.
User Interface
Another significant difference is the user interface. While Capture One may appear complex to beginners, Lightroom has a more intuitive layout that makes it easier for new users to navigate and find tools quickly.
So, if you’re someone who doesn’t want to spend hours learning new software, Lightroom might be the better choice.
Both programs excel in managing large photo libraries, but Lightroom’s cloud-based options offer more flexibility.
Lightroom vs. Photoshop
When comparing Lightroom and Photoshop, understanding their editing capabilities is important.
Each software offers unique features that cater to different aspects of photo editing.
Photoshop vs Lightroom highlights how they differ in their functionalities to help you choose the right tool for your editing needs.
Editing Capabilities
Photoshop is more powerful for pixel-level editing. You can remove entire objects from an image, create numerous layers, and add special effects.
But, when it comes to batch processing and organizing photos, Lightroom outshines Photoshop.
Lightroom’s ability to import, organize, and edit large numbers of images efficiently is a big time-saver. Plus, whitening teeth in Lightroom is just a few clicks away!
If you’re looking to enhance the overall look and feel of your images, Lightroom’s essential tools make it a go-to option for many photographers.
Control and Convenience
Photoshop provides unparalleled control over individual elements within an image, whereas Lightroom focuses on enhancing the overall look and feel of the image.
If you’re working on event photography or editing a vacation album, Lightroom streamlines the process, making those teeth-whitening tasks faster and more convenient.
In contrast, Photoshop will give you more creative control but at the cost of increased complexity.
To achieve whiter teeth in your photos, use the brush tool in Lightroom with subtle exposure and saturation adjustments. This method ensures natural-looking results without overdoing it.
The main takeaway here is that Lightroom is ideal for comprehensive photo management and quick edits, while Photoshop is better suited for detailed, intricate changes.
Pro Tip: Once you’ve mastered how to whiten teeth in Lightroom, expand your skills by learning how to whiten teeth in Photoshop.
Photoshop’s advanced tools, such as layer masks, adjustment layers, and how to make brush in Photoshop, allow for more detailed and customizable whitening.
Frequently Asked Questions

Can you whiten teeth in Adobe Lightroom?
Yes, you can whiten teeth in Lightroom. It involves using selective adjustments to brighten and reduce yellowness in the teeth.
How do I whiten teeth in a photo?
Follow these steps for whitening teeth in a photo:
- Open your photo in Lightroom.
- Select the Adjustment Brush tool.
- Set the brush size and feather to accurately cover the teeth.
- Adjust the exposure and saturation to lighten the teeth and reduce yellowness.
- Brush over the teeth carefully to apply the effect.
How to mask teeth in Lightroom?
To mask teeth in Lightroom:
- Open your photo in Lightroom.
- Select the Adjustment Brush tool.
- Adjust the brush size, feather, and flow for precise control.
- Carefully paint over the teeth to create a mask.
- Adjust the mask settings if necessary to ensure only the teeth are selected.
How do I whiten whites in Lightroom?
For whitening whites in Lightroom:
- Open the photo in Lightroom.
- Use the Adjustment Brush, Radial Filter, or Graduated Filter, depending on the area size.
- Decrease the temperature to remove warmth and increase the exposure slightly.
- Apply the adjustments to the desired white areas in the photo.

Conclusion
Mastering how to whiten teeth in Lightroom has significantly improved the quality of my portrait editing. It’s a simple yet powerful technique that can make a substantial difference in your photos, providing a more polished and professional look.
By using the adjustment brush and fine-tuning various settings, I have been able to achieve natural-looking results that enhance my subjects’ smiles without appearing overdone.
If you’re interested in diving deeper into photo editing, I highly recommend checking out these comprehensive courses.
The Photoshop course and the Lightroom course offer invaluable insights and advanced techniques that can elevate your editing skills to the next level.
Understanding how to whiten teeth in Lightroom not only saves time but also boosts the overall aesthetic appeal of your photographs. It’s a must-have skill for anyone serious about photo editing.
Read more about Photoshop:


