How To Group Layers in Photoshop: Best Techniques!
How To Group Layers in Photoshop: Best Techniques!
Do you want to know all the steps needed to create a group layers in Photoshop?
You’re in the right place!
Layers in Photoshop are crucial to making great images and a clean workspace.
Imagine being able to edit different parts of your image separately – sounds cool right?
In this post, I’ll show you everything from creating and managing visible layers to advanced stuff like layer masks and blending modes.
Let’s get started!
Table of Contents
How to Group Layers in Photoshop?
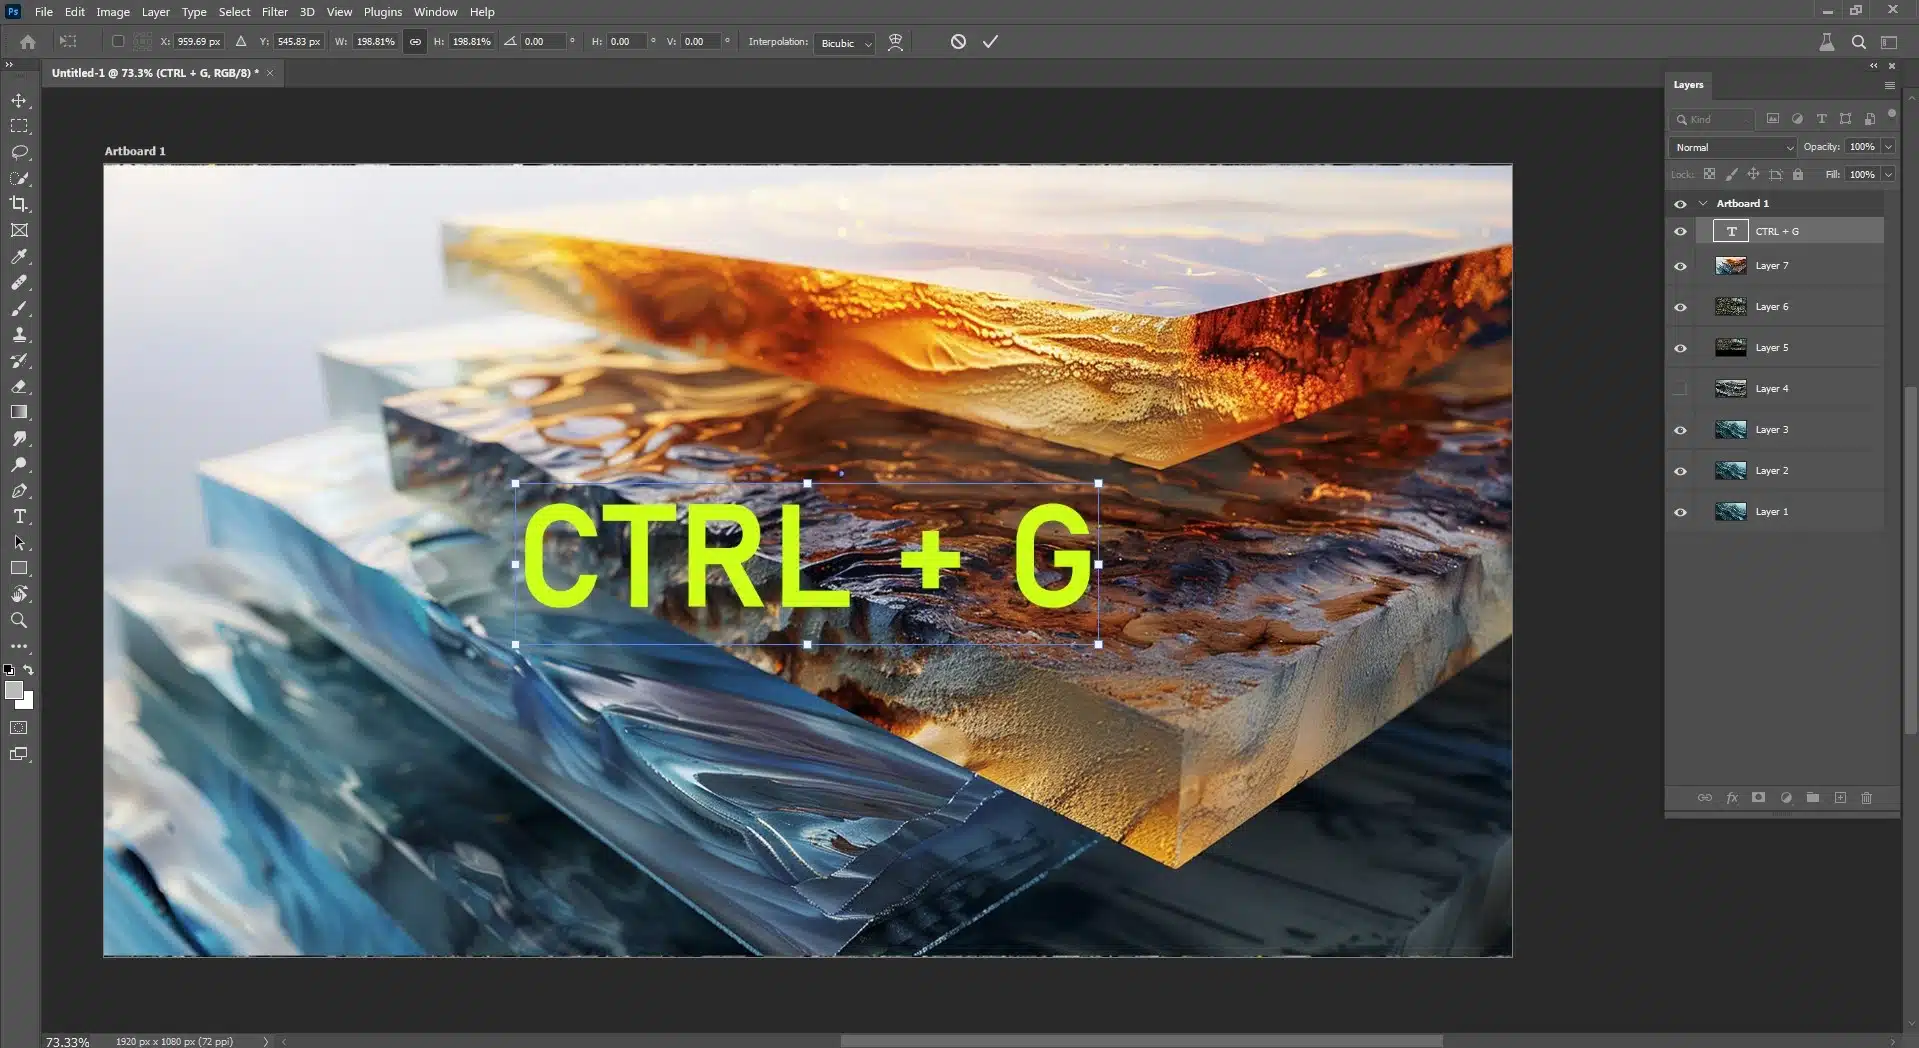
Grouping layers in Photoshop helps you stay organized by combining multiple layers into a single folder.
To group layers, select two or more layers in the Layers panel by holding down the Ctrl (Windows) or Cmd (Mac) key and clicking each layer. Then, press Ctrl+G (Windows) or Cmd+G (Mac) to create a new group.
Once grouped, you can move, transform, or applyeffects to all layers within the group simultaneously, enhancing your workflow efficiency and keeping your workspace tidy.
Using grouping alongside feature like the object selection tool can further improve your editing capabilities, allowing for more precise and creative control over your projects.
Managing bottom layer and top layer in Photoshop is key to keeping your work organized.
I’ll show you how to create, rename and delete layers.
Create a New Layer in Photoshop
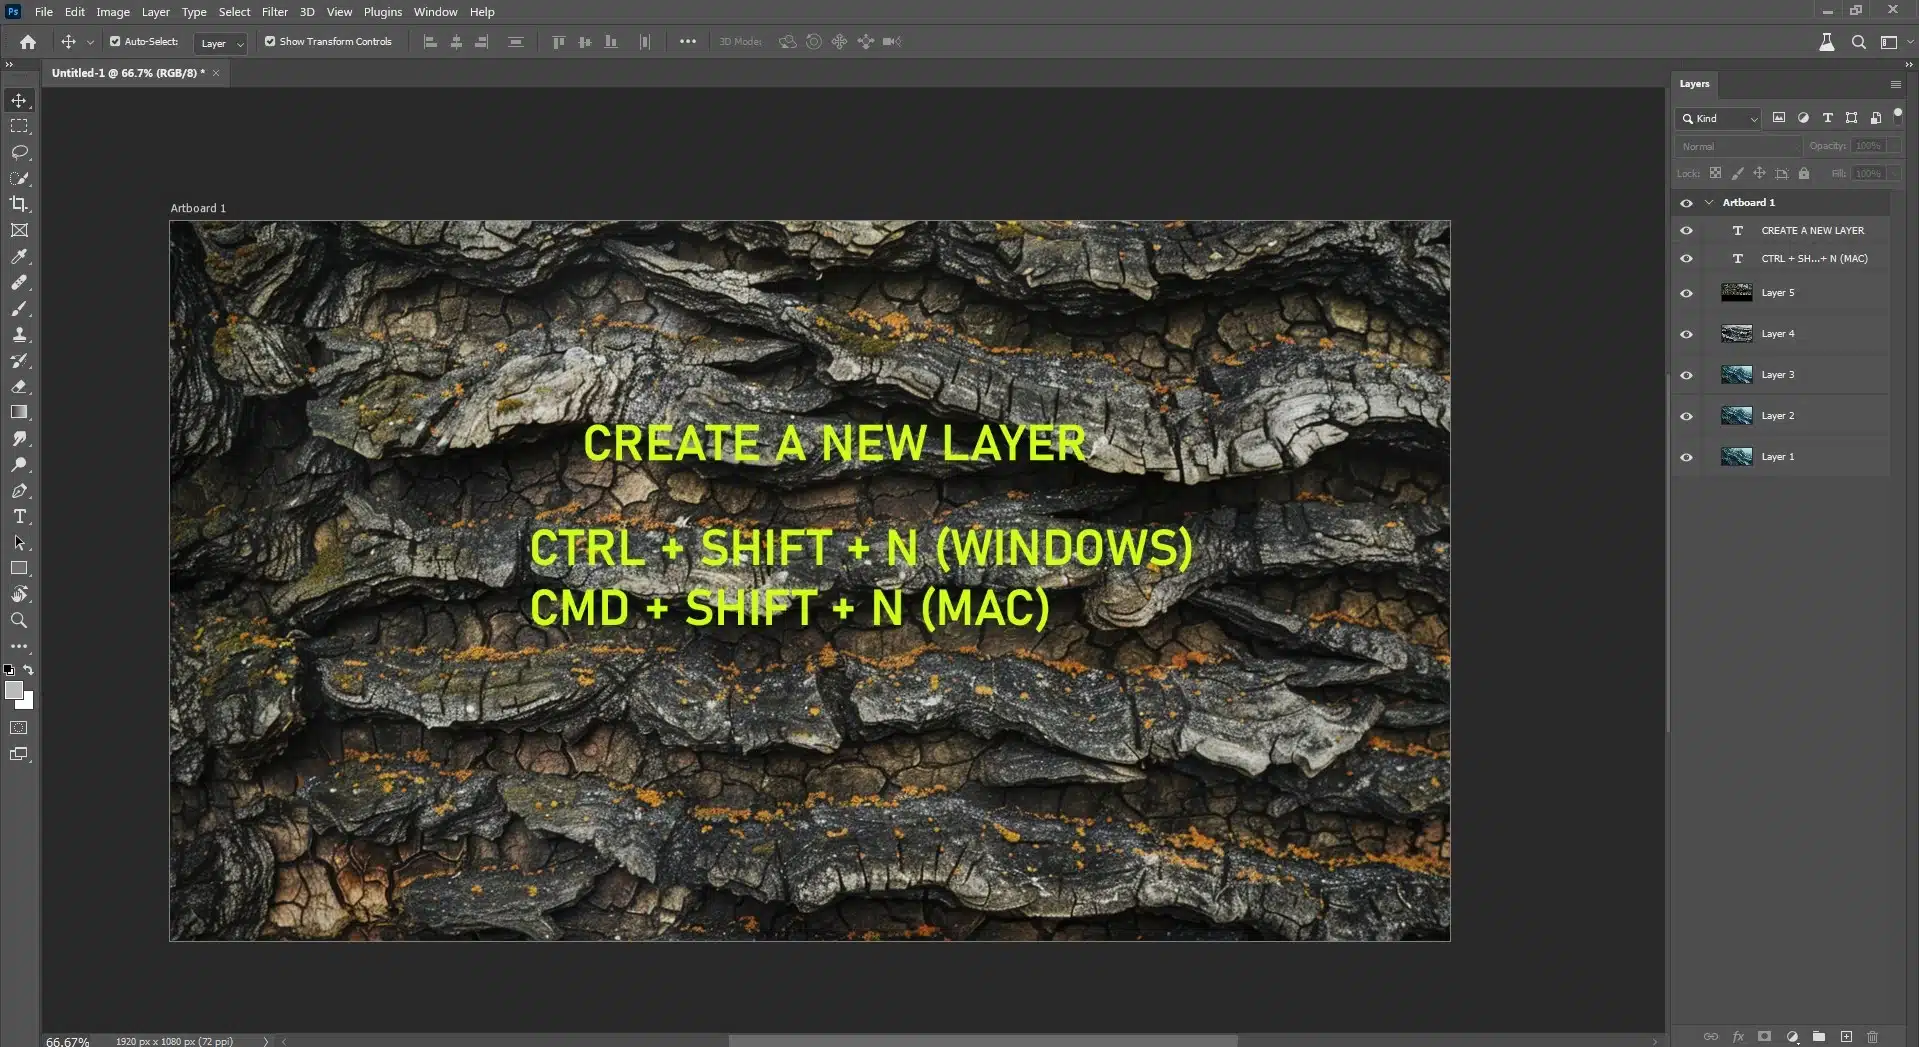
Creating a new layer is easy, especially by using the new layer shortcut. In the layers panel, click the new layer button. This adds a new layer above the currently selected layer.
You can also use the shortcut Shift + Ctrl + N. This new layer can be used for any edits without affecting other layers.
Using new layers for different edits, such as applying the dodge and burn or using the clone stamp, ensures your original work remains intact and editable.
Rename Layers
Renaming layers helps keep your project tidy. To rename a layer double click the layer name in the layers panel. Type the new name and press Enter.
This makes it easier to know what each layer is for, especially when working with many layers.
Pro Tip: Properly named layers are particularly useful when adjusting the white balance in your photos, as it helps quickly identify the purpose of each layer and streamlines the editing process
Delete Layers
Deleting layers you no longer need will clean up your workspace.
To delete a layer, select it in the layers panel and press the delete key. Or right-click the layer and choose Delete Layer from the context menu.
This will keep your project clutter free.
Ungroup layers
Ungrouping layers in Photoshop involves separating one or more layers from their current group to make them independent again.
To ungroup layers, select the group containing the layers you want to ungroup in the Layers panel, right-click, and choose “Ungroup Layers” from the context menu.
This action will remove the selected layers from the group while preserving their content and properties. Alternatively, you can drag two or more layers from the group in the Layers panel and drop them above or below the group folder.
Ungrouping layers help reorganize your project and manage layer arrangements more effectively, especially when working with complex compositions or tools like smart objects in Photoshop.
Advanced Layer Groups Techniques
Now, we will discuss some advanced techniques that you will certainly find helpful.
Layer Masks
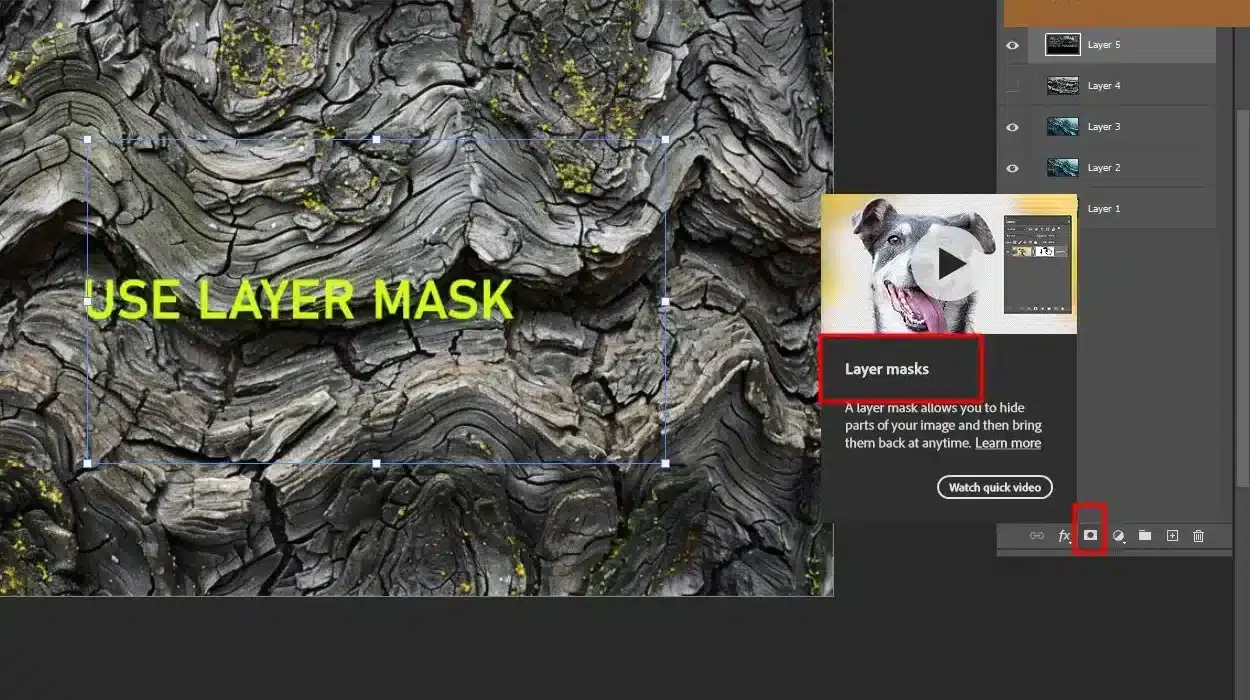
Layer masks are a crucial tool for non-destructive editing in image editing software. They provide the ability to selectively hide or reveal specific parts of a layer without permanently altering the original image.
This allows for precise and reversible editing, making it easier to experiment with different effects and adjustments.
When you create a new layer, you can add a layer mask or check our layer masking guide to control its visibility. This is great for combining multiple layers together.
Adjustment Layers
Adjustment layers allow you to adjust the color and tone of your image without changing the original pixels.
They sit above your image layers in the layers panel and affect all the layers below them. Hit the new layer button and adjust your image with ease.
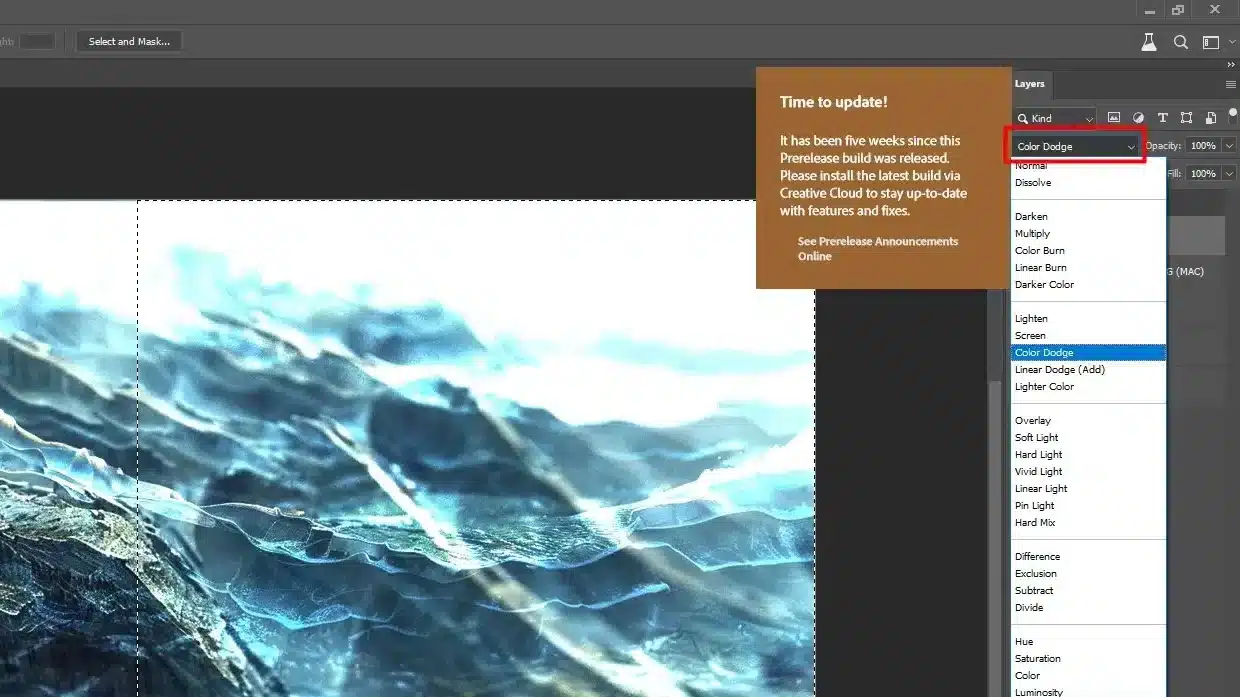
Blending Modes
Blending modes control how a layer interacts with the layers below it. They can be found in the Layers Panel, offering options like Multiply, Screen, and Overlay.
Now, let’s dive into some useful tips and tricks you should know when you want to group layers.
Layer Organisation
Layer organization is crucial to workflow. Keeping your layers panel tidy helps you find and edit elements quickly.
I always start by naming each layer clearly and grouping related layers.
This way, I don’t get confused and can focus on creative work.
Name Layers: Give each layer a name.
Group Layers: Hit the new group button to create a layer group.
Color Code: Color code layers for easy identification.
Function
Shortcut (Windows)
Shortcut (Mac)
Description
Group Layers
Ctrl+G
Cmd+G
Organizes related layers
Merge Layers
Ctrl+E
Cmd+E
Combines selected layers
Link Layers
Ctrl+G
Cmd+G
Links layers for joint edits
Color Code Layers
Right-click the layer
Right-click the layer
Choose a color for easy identification
Layer Comps
Layer comps are a lifesaver for managing different design versions. They allow you to save multiple layer states in one document.
I use layer comps to switch between design variations without duplicating files. This saves time and keeps my layers panel tidy.
With layer comps, you can easily toggle between different text placements, color adjustments, and other design elements.
This is especially useful when combined with tools like the magic wand as it allows for quick and efficient experimentation with various design options.
Firstly, Create Layer Comp: Go to the layers panel menu and select "New Layer Comp."
Then, Switch Comps: Switch between comps to compare designs.
Finally, Update Comps: Update comps when you change layers.
New Layer:Ctrl+Shift+N (Windows) or Cmd+Shift+N (Mac)
Merge Layers: Select layers and Ctrl+E (Windows) or Cmd+E (Mac)
Link Layers: Select layers and Ctrl+G (Windows) or Cmd+G (Mac)
By mastering these tips and tricks, and learning new techniques, you can make your layer management more efficient and focus more on your creative process.
Layer Groups for Better Performance
The grouping layers menu in Photoshop can speed up your workflow and reduce file size.
Let’s see how to optimize layer groups for better performance.
File Size Reduction with Layer Groups
When you group layers in Photoshop, you can manage them more effectively.
Grouping reduces file size by combining multiple layers into one organized group, which helps streamline complex projects with numerous layers.
This reduction in file size is beneficial when working on intricate designs that require a lot of layers, as it ensures smoother performance and easier file handling or selecting couple of objects in the same design.
Workflow Efficiency
Layer groups can significantly enhance your workflow efficiency.
By grouping your layers, you can quickly find and edit the layers you need, saving valuable time that would otherwise be spent searching through an extensive layers panel.
This organizational method allows you to focus more on the creative aspects of your work rather than on administrative tasks.
Layer Group Best Practices
Here are some best practices:
Name Your Groups: Always name your new group so you can find them later.
Use Folder Icons: Use the folder icon to visually separate groups.
Group Related Layers: Keep related layers together for easier editing.
Use Layer Masks: Apply a layer mask to a group for non-destructive editing.
Limit Group Depth: Don't nest too many groups to keep the layers panel tidy.
Following these will give you well-organized and efficient layer groups and a smoother workflow.
Layer Types in Photoshop
Photoshop has many types of layers, each for a purpose.
Image Layer: Image data.
Shape Layer: Vector shapes.
Fill Layer: Solid colors, gradients, or patterns.
Adjustment Layer: Color and tonal adjustments.
Layer Mask: Hide parts of a layer without deleting them.
Now you know what to look for.
Creative Uses of Layer Groups in Photoshop
Complex Compositions
Layer groups in Photoshop help with complex compositions. By grouping elements, you can control and edit them.
I use a new layer group to combine shape layers and text.
Non Destructive Editing
Non-destructive editing is critical to flexibility. By grouping layers you can apply edits without altering the original content.
I always create a new group for edits so I can experiment freely.
In conclusion, using the group layers in Adobe is a total game changer.
From my experience, grouping layers keeps projects clean and efficient.
Whether you’re working on complex compositions or simple designs, grouped layers make editing faster. And applying effects to a group means consistency and saves you a ton of work.
Next time you’re working in Photoshop, use layer groups. Trust me, it will transform your workflow.
$2,061.00Original price was: $2,061.00.$1,061.00Current price is: $1,061.00. 27582
Download Your Free Guide Now!
Discover the secrets of photography with our printable guide! Master essential techniques like aperture, shutter speed, and ISO to create stunning images. Get your free printable PDF now and start turning your snapshots into masterpieces!