
Mastering the art of blending two images in tures Photoshop is a skill that can significantly improve your digital artwork.
It’s an interesting process and getting it right requires patience, practice, and a good understanding of Photoshop tools.
The technique involves using ‘Layer Masks’ and ‘Blend Modes’, among other features available in Photoshop.
These functionalities provide flexibility to users while combining photos, creating impressive results when done correctly.
As we transition into the meatier part of this guide, we’ll delve into specifics on how to effectively use these tools for image blending.
Stay tuned as we take you through instructions on achieving seamless blends between multiple photos.
Table of Contents
A Simple Guide to Blending Two Images in Photoshop
Mastering the art of blending two images in is a skill that can significantly improve your digital artwork. It’s an interesting process and getting it right requires patience, practice, and a good understanding of Photoshop tools.
The technique involves using ‘Layer Masks‘ and ‘Blend Modes’, among other features available in Photoshop.
These functionalities provide flexibility to users while combining photos, creating impressive results when done correctly. As we transition into the meatier part of this guide, we’ll delve into specifics on how to effectively use these tools for image blending.
Stay tuned as we take you through step-by-step instructions on achieving seamless blends between multiple images.
- Use the Quick Selection tool to isolate subjects.
- Match perspectives and lighting for a unified look.
- Experiment with contrasting elements for unique outcomes.
Mastering Image Blending

Blending images in Photoshop opens up a realm of artistic possibilities.
Whether you’re creating a seamless composite or adding texture to a portrait, the key lies in mastering the subtle art of combining elements.
Let’s expand on the foundation we’ve laid, exploring new techniques that will take your image blending skills to the next level.
Merge photos, combine sets of pictures, utilize auto features for seamless blending. Merge photos to create stunning composites.
Combine multiple pictures effortlessly using Photoshop’s auto-blend feature. Experiment with merging sets of photos for unique effects.
Combine various elements from different photos to craft captivating compositions. Utilize auto-blend for quick and precise merging of multiple photos.
Master the art of blending photos seamlessly to enhance your creativity.
Introduction to Blending Two Images in Photoshop
When you begin, it’s vital to start with a clear vision. Consider the narrative you want your final piece to tell. Are you aiming for a realistic outcome or something more abstract?
The initial choice of photos sets the stage for the process. Look for photos that share similar lighting conditions and perspectives to ensure a cohesive result. As you advance, experimenting with contrasting photos can yield strikingly original compositions.
Lighting and Shadows
The believability of your blended image heavily depends on how well you can match lighting and shadows. If the lighting direction in your base image is from the left, ensure your added elements follow suit.
Use the Dodge to enhance or diminish areas of light and shadow, molding the elements together as if they were photographed under the same conditions.
Layers in Photoshop
Layers are the backbone of non-destructive editing . Think of them as transparent sheets that you can manipulate individually. To blend two images effectively in Photoshop, organize your layers logically.
Keep your base image at the bottom, and focus stack additional elements above. Remember to name your layers; this simple practice keeps your workflow clear and manageable, especially with complex composites.
- Name layers for easy identification.
- Use Adjustment Layers to tweak colors without altering the original image.
- Employ Layer Masks to hide and reveal parts of each layer non-destructively.
Optimizing Layer Visibility
Adjusting the visibility of layers is a nuanced skill. Play with the Opacity slider to soften the impact of a layer, or use Layer Masks for more control.
With Photoshop masking, painting with black conceals while white reveals, allowing for precise blending. The Gradient tool within a mask can create a smooth transition between images, especially useful for skies or backgrounds.
Preparing Images for Blending
Before you blend, prepare your images. This means ensuring they are of similar resolution and aspect ratio.
Use the Crop tool for quick adjustments, and consider the overall color scheme. Images with drastically different color temperatures can be challenging to blend convincingly.
| Aspect | Description | ||
|---|---|---|---|
|
|
||
|
|
||
|
|
||
|
|
||
|
|
||
|
Consider the final composition’s aspect ratio for specific platforms like social media or print. |
Color Theory in Blending
A strong grasp of color theory can elevate your blending work. Complementary colors can make elements pop, while analogous colors offer a sense of harmony.
Use the to plan your blend, and remember that colors can evoke emotions, setting the tone for your image. Incorporating these advanced techniques will not only refine your blending skills but also enhance the storytelling power of your images.
As you progress, consider exploring the differences between Photoshop and other graphic software through our insightful article on Photoshop vs Illustrator.
This knowledge will further inform your approach to image blending and expand your creative toolkit. blending is not just about technique; it’s an art form that allows you to convey your vision with limitless imagination.
Keep practicing, and don’t hesitate to experiment with different blending methods to discover what works best for your artistic goals.
Step-by-Step Blending Techniques
Transitioning from the basics of layer management and color theory, we now delve into its more intricate aspects.
This section will guide you through advanced tactics, ensuring your final composition is seamless and visually striking.
At the top of your editing steps, master advanced layer management.
Set the groundwork for intricate edits with precise layer organization. Step up your game with advanced color theory techniques.
Edit with finesse using advanced tools and blending modes.
Fill your compositions with depth and complexity using advanced layer effects.
Experiment with top-tier editing techniques to elevate your artistic vision. Dive deep into advanced blending modes to achieve nuanced results.
Using Layer Masks
- Start by selecting the layer you wish to blend.
- At the bottom of the layers panel, click the mask icon to add a mask to the layer.
- Use the brush tool with black to conceal and white to reveal parts of the layer.
- Refine the mask by changing the brush size and hardness to blend edges smoothly.
- If needed, the 'Selection Tools in Photoshop' can assist in creating precise masks for intricate areas.
Exploring Blend Modes
- Click on the layer you wish to blend.
- Find the blend mode drop-down menu at the top of the layers panel.
- Hover over different modes to preview the effect. "Darken" and "Lighten" modes are good starting points.
- For creative projects, "Overlay" and "Soft Light" can introduce subtle texture and depth.
Adjusting Layer Opacity for Perfect Results
Layer opacity controls how transparent a layer is, which directly impacts the blending effect. Here’s how to adjust it:
- Select the layer you're working with.
- Locate the opacity slider at the top of the layers panel.
- Slide to the left to decrease opacity and make the layer more transparent, or to the right to increase opacity.
- Adjusting opacity is especially useful when working with 'how to add shapes in Photoshop' to achieve the desired prominence of shapes within your composition.
- Experiment with different levels of opacity to find the perfect balance for your blend.
Use the ‘Quick Selection’ to refine selections for your masks, explore various blend modes to achieve different effects, and adjust layer opacity to control the intensity of your blends.
By following these advanced steps, you will gain a better control over the process, allowing for a more nuanced and professional finish.
Advanced Blending with Gradient Tool
Creating Smooth Transitions
- Select the layer mask where you want the transition.
- Choose the Gradient Tool from the tool palette.
- Pick a gradient that goes from black to white and drag across the mask to apply.
- Fine-tune the gradient by changing its angle and scale to match the lighting and perspective of your images.
Custom Gradients for Unique Effects When Blending Two Images in Photoshop
- Click on the Gradient Editor in the options bar.
- Add new color stops by clicking below the gradient bar and select the colors you wish to include.
- Adjust the location and midpoint of the color stops to control how the colors transition.
- Experiment with different opacity stops to introduce transparency into your gradient, adding another layer of depth to your blend.
Refining Edges for Seamless Blends
- Use the Quick Selection tool to outline the area you want to blend.
- Once selected, go to Select and Mask to enter the Refine Edge workspace.
- With the Refine Edge brush, paint over the edges to smooth out any imperfections.
- Adjust the Feather and Contrast sliders to soften the edges and blend them into the background more naturally.
By refining the edges, you create a subtle transition that can make the composition feel more cohesive and less like a digital construct.
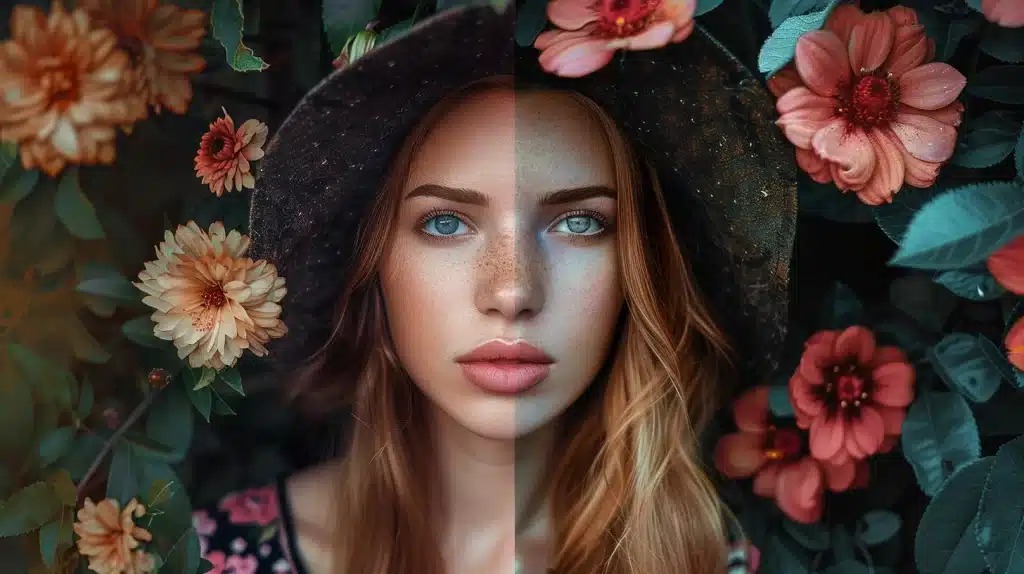
For visual engagement, consider placing before-and-after images here to showcase the effects of refining edges on a blend. Incorporate these advanced techniques to take your Photoshop skills to the next level.
Remember to use the Gradient Tool with intention and experiment with different settings to achieve the best result for your images.
Whether it’s creating smooth transitions, crafting custom gradients, or refining edges, each step is a move towards a more polished and professional outcome.
Final Touches to Your Blended Images
Adding Adjustment Layers
- Open your project and locate the Layers panel.
- Click the 'New Adjustment Layer' icon at the bottom of the panel.
- Select the type of adjustment you wish to make (e.g., Brightness/Contrast, Hue/Saturation).
- Use the properties of the adjustment layer to tweak the settings until you achieve the desired effect.
Fine-Tuning Color and Contrast
- Choose an adjustment layer that targets color balance or levels.
- Adjust the sliders to correct any color mismatches between the blended elements.
- To enhance contrast, consider using a Curves adjustment layer and fine-tune the curve to deepen shadows and brighten highlights.
Techniques for Advanced Color Matching in Blending
Achieving perfect color harmony between blended images is crucial for creating a seamless and visually appealing composition.
Beyond basic adjustments with Color Balance and Hue/Saturation, advanced techniques involve using the Curves tool to match the color tones precisely.
This process starts with identifying the predominant color tones in each image and then adjusting the curves for each color channel — red, green, and blue — to align these tones.
Additionally, utilizing the Color Match feature in Photoshop can automate part of this process by analyzing and applying the color scheme from one image to another.
This method is particularly effective when combining elements from vastly different sources, ensuring they all appear to inhabit the same space convincingly.
Experimenting with selective color adjustments can also fine-tune specific areas without affecting the whole image, allowing for intricate color consistency.
Crafting Dynamic Composites with Smart Objects
Smart Objects in Photoshop offer a non-destructive way to work with multiple images and elements in a single composition.
By converting layers into Smart Objects, you can apply filters, transformations, and adjustments without permanently altering the original data.
This flexibility is invaluable, as it allows you to revisit and tweak each element’s settings as your composite evolves.
Furthermore, Smart Objects enable you to work with linked duplicates, meaning changes made to one instance automatically update across all copies.
This feature is incredibly useful for creating dynamic scenes with repeating elements or patterns that need to remain consistent throughout the artwork.
Delving into the potential of Smart Objects will unveil new layers of creativity, from complex scene building to intricate detail work, all while maintaining the highest quality and editability of your digital artwork.
Saving and Exporting Your Work
- Save a copy of your project in PSD format to retain layer information.
- For sharing online or printing, export the image in a format like JPEG or NEF.
- Use the 'Export As' option under the File menu to choose the appropriate settings for your image's final use.
Visual Engagement
To enhance the visual appeal of this article, consider placing before-and-after images of the blending process near the ‘Adding Adjustment Layers’ section. This visual aid can help readers see the impact of adjustment layers on the final image.
For the ‘Fine-Tuning Color and Contrast’ section, a side-by-side comparison of color-corrected and non-corrected images would be beneficial. It can visually demonstrate the importance of color matching in image blending.
Lastly, include a graphic illustrating the ‘Save and Export’ workflow, showing the different file formats like JPEG and NEF and their uses, next to the corresponding section. This can serve as a quick reference guide for readers.
In summary, the final touches to your blended images involve careful adjustment layer application, meticulous color and contrast fine-tuning, and proper saving and exporting practices. These steps are vital in achieving a polished and professional result that stands up to scrutiny and meets your creative vision.
Frequently Asked Questions

Can you suggest advanced methods to manipulate the transitions between elements when blending two images in Photoshop?
- Explore the use of the Smudge Tool to subtly smear edges, creating smoother joints.
- Consider the Puppet Warp feature to bend and adjust merging segments organically.
What are effective strategies for ensuring the continuous flow of colors throughout my composition?
To ensure chromatic harmony:
- Initiate with a solid foundation in color theory to select a cohesive palette.
- Make use of complementary colors to create vibrance, or analogous colors for a more subtle effect.
- Calibrate saturation and luminance with Hue/Saturation Adjustment Layers to unify the appearance.
What role does blending technology play in the realm of artistic expression?
- Blending empowers artists to manifest unique visions through digital compositing.
- This technology ensures boundless creative potential for constructing surreal or hyper-realistic creations.
How can I blend images from vastly different lighting conditions in Photoshop?
Blending images with different lighting conditions is a challenge that requires careful attention to detail.
Start by using Adjustment Layers for exposure and brightness to match the lighting as closely as possible.
The Dodge and Burn tools can also help by selectively adjusting the brightness and darkness of specific areas.
Additionally, experimenting with different Blend Modes can achieve more natural transitions between the images.
For complex scenarios, consider using the Luminosity Masking technique, which allows for more precise control over which areas of the image are affected by adjustments.

Conclusion
This creative process unlocks endless possibilities for us digital artists.
Once I got a solid handle on the basics, mastering this technique to produce eye-catching composite images became second nature.
Whether you’re in the professional design world or just dabbling in digital art as a hobby, the skills learned from mastering image blending are invaluable.
For anyone looking to dive deeper, I highly recommend checking out comprehensive Photoshop course.
Moreover, it’s crucial to recognize that Photoshop is just one instrument in the broader orchestra of digital art tools.
Programs like LIGHTROOM bring to the table different features and workflows that can enhance our Photoshop capabilities.
By familiarizing ourselves with these tools and learning to use them together, we can elevate our digital artistry to unprecedented levels.
So, let’s keep exploring, keep learning, and above all, keep creating.
For those curious about the distinctions between Photoshop and its streamlined sibling, diving into the differences between Photoshop and Photoshop Elements has offered me insightful perspectives on selecting the best tool for my projects.
Read more about Photoshop:


Course

Light Effect Photoshop


Lightroom Course 2025

Adobe Photoshop Course 2025

Photo Editing Course


