The Layers Panel is your workspace for managing different elements of your design.
Here, you’ll learn how to add and arrange new layers to build and refine your image effectively
Getting Started with New Layers
The layers panel shows all the images and artwork elements inside your PSD file.
You can picture it like stacking sheets of plastic on top of each other. Each new layer is a different piece of the overall image.
Each new layer you add can contain any element. This can be an image, a shape, or text.
These aren’t bound to a single file. They’re separate elements you manipulate without impacting other layers.
Think of it like organizing a desk. You can move individual objects without shifting the entire contents of the desk.
One core aspect of working with layers is the ability to make part of an image transparent or hide it entirely.
Transparent pixel is useful here because they allow background layers to show through. This flexibility in editing enhances your creative options.
And remember, the active layer you select is the one you can edit at any point.
Navigating the Layers Panel
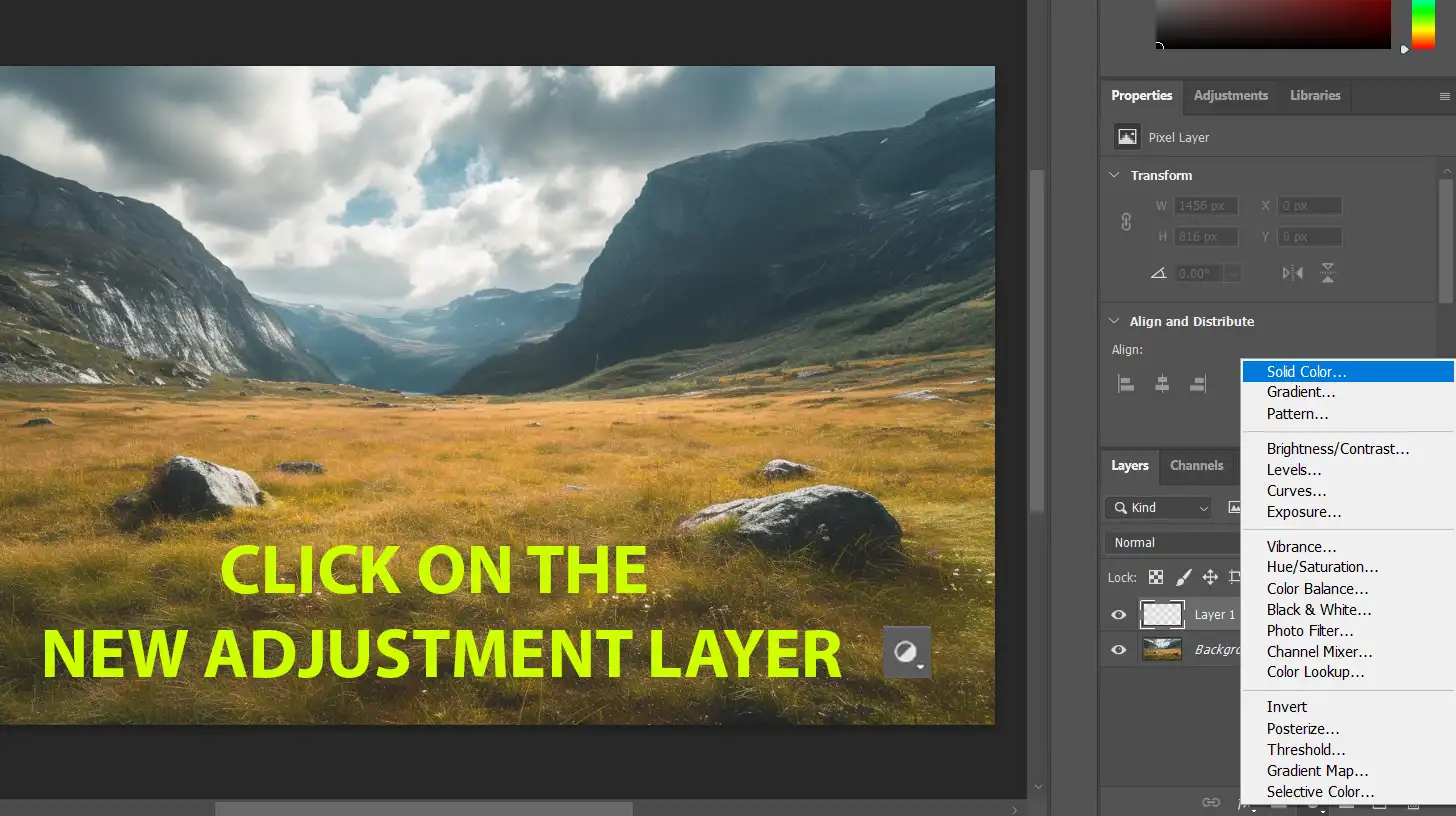
To get started, open your file and look for the layericons at the bottom of the panel.
Clicking it will create a new blank layer. This is where you can add new elements like text or shapes without affecting the underlying layers.
If you need to adjust the background color or replace it entirely, simply use another solid color layer. This solid color layer will serve as your new background.
You can switch back to what you had by hiding the color layer. To change the order of layers, drag one layer up or down in the list. Layers stack up in the order they appear in the panel.
Managing Background Layers:
To effectively manage your background layers, follow these steps to ensure precise control and organization in your projects.
Here’s a quick guide to help you navigate the process:
Identify the active layer that's selected. Sometimes it's called the "target" layer.
You may need to rasterize a background layer. Right-click on it to see the option for "Rasterize."
To change the background color, select the brush tool and paint on your new background.
For more complex compositions, add a solid color layer and adjust its opacity.
Keep your workspace organized by naming your layers. It helps you manage them easily.
Adjusting opacity and blending modes gets you to compositing multiple images seamlessly. Opacity controls how transparent each layer is, letting parts of other layers show through.
Tips for Effective Active Layer Management:
To optimize your active layer management, implement these practical tips to enhance organization and efficiency in your editing process:
Name layers clearly to avoid confusion.
Lock image layers if you don't want to accidentally edit.
Use adjustment layers for non-destructive edits.
Experiment with layer styles like drop shadow to add depth.
Save your work frequently to avoid losing progress.
Keep different elements on separate layers. This keeps each part of your image independent. Removing or editing one layer won't disturb the others.
Pro Tip: Double-click on a layer to open the dialog box for layer properties. Here, you can adjustlayer styles and experiment without risking the background image.
For effective active layer management, leverage the advanced tools in Lightroom, including options for controlling blur in Lightroom.
These features can significantly improve how you organize and refine your layers.
Advanced Techniques with Background Layers
Enhance your edits with advanced techniques.
Discover how leveraging active layers can improve your background layer work.
Leveraging Active Layers
Active layers are the heart of Photoshop work. When an active layer is selected in the layer panel, all edits apply to it.
Always know which layer you’re working on. Select your other layer by single-clicking it. You can tell it’s active when it highlights.
Never underestimate the power of naming your layers. A clear name saves time and prevents mistakes.
Name your layers wisely to avoid chaos. Lock unnecessary layers to secure them from accidental edits. Just click on the lock icon in the layer panel.
Working with Transparent Pixels
Transparent pixels allow for interesting design choices. Adding or editing these pixels can make your background layer more versatile.
Use the Eraser Tool to create transparency. Combine erase functions with the magic wand tool for precision.
Employ layer masks to control these pixels non-destructively. Masks let you hide parts of a layer without erasing any actual content.
To use a layer mask, select a layer, click the layer mask icon, and paint black on the mask to conceal.
Combining Multiple Background Layers
Combining multiple background layers can be rewarding but tricky. Drag an image into your main document.
Each image will automatically create a separate layer. Adjust the background color or other properties of each image layer individually.
To blend an image smoothly, use blending modes from the layer menu. Modes like Multiply and Overlay can blend different elements with ease.
Adjust opacity for better compositing. Drag the opacity slider in the layers panel to see changes in real-time.
Pro Tip: Double click on any layer to open the layer stylesdialog box. You can add layer effects easily using this dialog.
Also, when combining multiple background layers, consider using Lightroom to enhance your edits further.
Its powerful tools can help you adjust colors and fine-tune details for a seamless final image.
Common Issues and Troubleshooting
Learn how to resolve frequent issues with background layers.
This section addresses common problems and offers practical solutions.
Unlocking the Background Layer
The background layer is locked by default. This keeps you from editing it directly. Unlock it to make changes.
Simply click the lock icon next to the background layer in the Layers panel. The background should now be editable.
Using the Right Tools
Another issue is using the wrong tools for editing:
The Eraser Tool and Magic Wand Tool in Photoshop are helpful. They allow you to remove parts of the image accurately.
If you want more control over transparency, use layer masks instead. They let you hide or show parts of a layer without deleting pixels. It's like an undo button that you control.
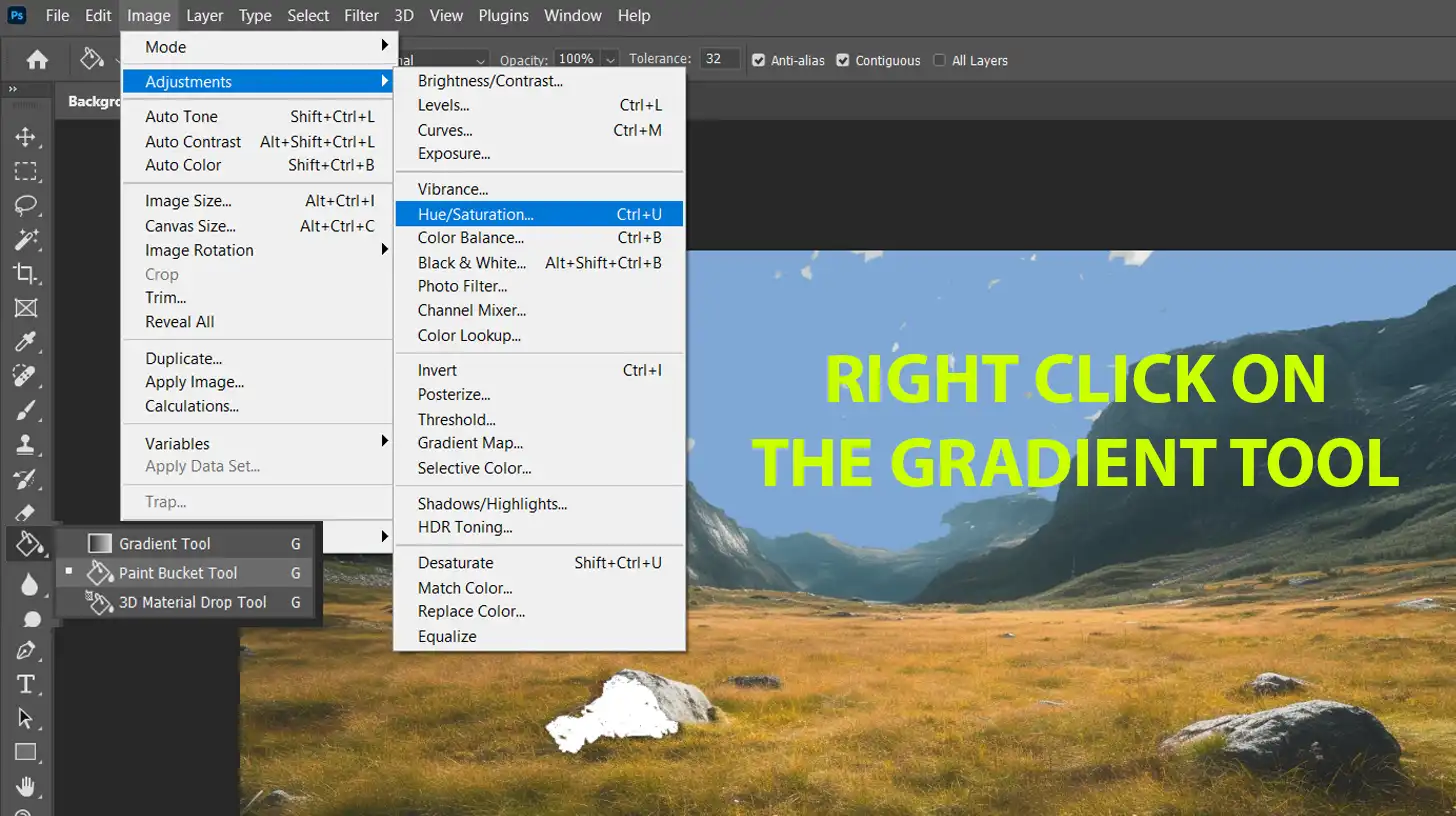
Sometimes, the background color might not fit your image. Change it easily by selecting the Paint Bucket Tool.
Click on the background layer and fill it with your chosen color. If it still doesn’t look right, adjust the hues and saturation. These are accessible via Image > Adjustments in the top menu.
Troubleshooting Tips
This next section provides practical advice to ensure you’re working with the right layer, including tips on utilizing tools like the quick selection tool for more precise edits.
Selecting the Correct Layer
Troubleshooting background layer issues takes patience. First, check if the background layer you want to edit is selected.
Silly as it sounds, it’s a common oversight. Ensure you’re working on the correct layer.
Blending Layers
If blending backgrounds and other layers isn’t smooth, try tweaking the opacity.
This helps an image to blend more naturally. Use the slider in the Layers panel to find the right balance.
Combining Various Images
When combining various photos, the background might clash with other elements.
To fix this, use adjustment layers. They help maintain color and lighting consistency across the image.
Improving Performance
If Photoshop seems slow or unresponsive, it’s often due to large file sizes or too many activelayers.
Simplify things! Flatten layers to reduce the file size. You can also merge layers. This boosts performance.
Creating Duplicate Layers
A frequent error is making permanent changes to your original image.
Avoid this by creating duplicate layers. This way, you always have a backup if something goes wrong.
Pro Tip: Use content-aware fill for advanced edits. Select the area you want to remove, go to Edit > Content-Aware Fill, and let Photoshop do the magic.
Frequently Asked Questions
What is a background layer?
A background layer is the bottommost layer in an image editing program like Photoshop. It serves as the foundation on which other layers are added.
How do I add a background layer?
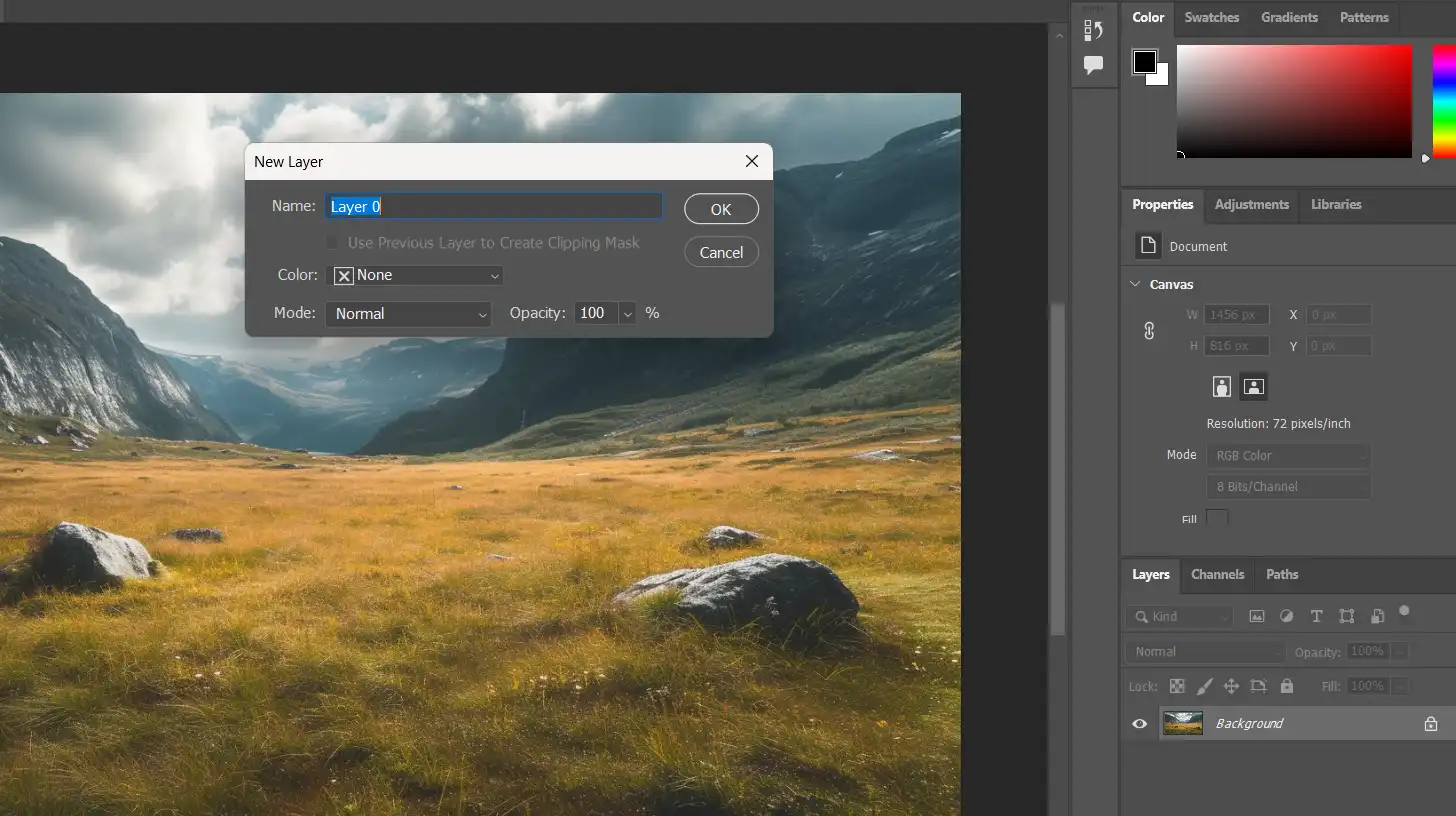
To add a background layer, start a new file in Photoshop. The first layer automatically created is your background layer.
You will be creating a new background layer by choosing ‘Layer‘ from the menu, then ‘New‘, and ‘Layer‘
How do I turn a layer into a background layer?
To convert a regular layer into a background layer, right-click on the other layer in the layers panel and select ‘New Background from Layer’.
Where is my background layer in Photoshop?
The background layer is typically located at the bottom of the Layers Panel in Photoshop.
If you don’t see it, it may have been deleted or converted into a regular layer.
$2,061.00Original price was: $2,061.00.$1,061.00Current price is: $1,061.00. 27585
Download Your Free Guide Now!
Discover the secrets of photography with our printable guide! Master essential techniques like aperture, shutter speed, and ISO to create stunning images. Get your free printable PDF now and start turning your snapshots into masterpieces!