Mastering adjustment layers in Photoshop is the key to unlocking your image’s full potential.
This guide will teach you how to use them to edit your photos smoothly. Whether you want to adjust brightness, contrast or colors, adjustment layers are the non-destructive way to do it.
Let’s get into it and level up your editing game.
Table of Contents
How to Use Adjustment Layers for Resizing Images in Photoshop
When working with images in Adobe, using adjustment layers can significantly enhance your ability to control resizing and editing without losing image quality.
This flexible and nondestructive approach allows you to make changes that don’t permanently alter the original image.
Selecting the Correct Adjustment Layer
Choosing the correct type of layer is essential to begin resizing an image effectively. Depending on what aspect of the image you want to adjust, your choice will vary:
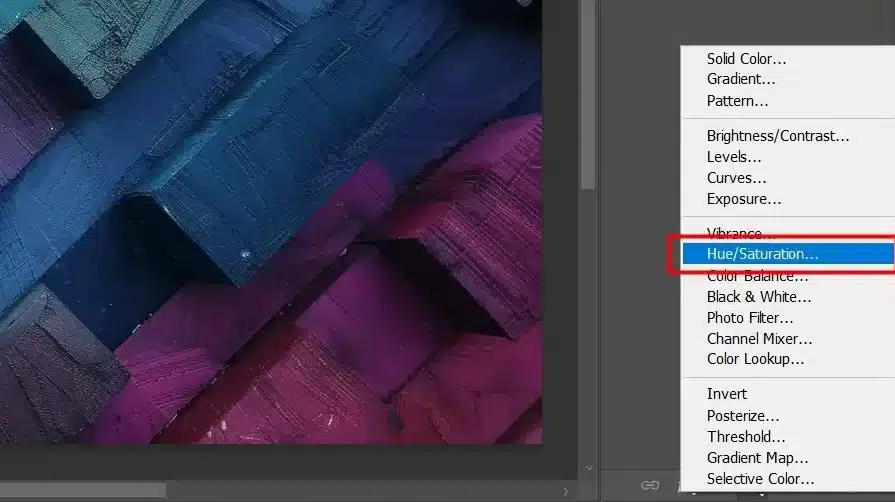
Add a new Hue Saturation or Color Balance adjustment layer before resizing for color and tonal adjustments, such as brightness or contrast enhancements.
If you aim to edit the entire exposure or color tone of the whole image layer before resizing it for better composition, utilize a Curves or Levels adjustment layer.
You can access these options by clicking the “New Adjustment Layer” button at the bottom of the Layers Panel.
Ensure all tweaks perfectly align with your vision for the resized image.
It’s essential to monitor resolution and potential pixelation issues; if necessary, consider applying a sharpening filter.
Once satisfied with these modifications, merge all active layers into one composite by Right-clicking on any active layer panel and selecting ‘Flatten Image’ from the context menu.
Advanced Techniques with Adjustment Layers
As we delve deeper into Photoshop’s capabilities, advanced layering techniques using adjustment layers can significantly enhance your workflow and final outputs.
These layers offer non-destructive editing options, such as using the Patch Tool, when dealing with complex projects.
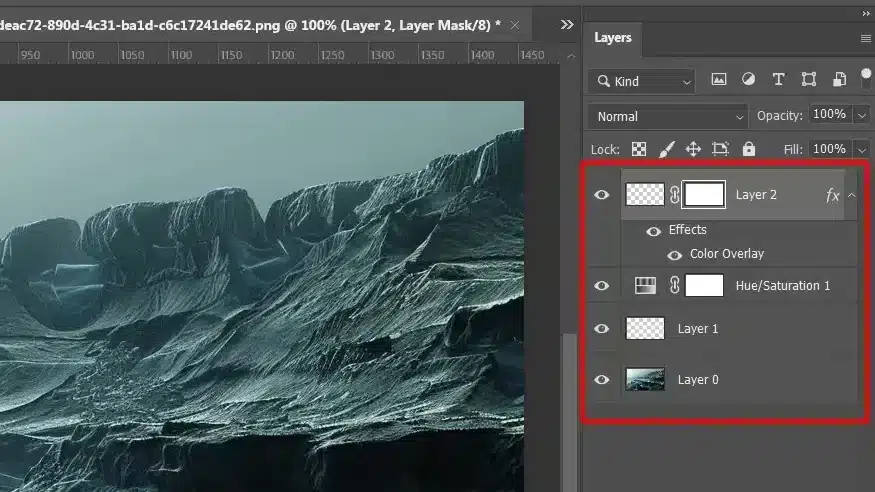
Using Masks with Adjustment Layers
Adjustment layers and layer masks are potent allies in selective editing.
Adding a mask to an adjustment layer allows you to dial in exactly where you want specific adjustments applied without affecting other areas of the image.
This can be particularly useful when adjusting brightness or contrast in just parts of your photo rather than the entire image.
Click the new adjustment layer icon to add a mask and choose your desired adjustment.
Use the brush tool to paint over areas where you want to apply or restrict the effect.
Adjustment Layers for Color Correction
Color correction is another area where adjustment layers prove indispensable.
Whether adjusting for skin tones or enhancing sunset hues, tools like Curves and Hue Saturation make it possible.
Use these tools through the adjustments panel for precise control over color shifts within an image.
One efficient technique involves tweaking color balance using separate adjustment layers for shadows, mid tones, and highlights:
Create three different Curve adjustment layers.
Target shadows in one layer by adjusting curves primarily on the left side of each RGB channel’s curve.
Apply similar logic for mid tones and highlights by focusing on mid range and proper side adjustments, respectively.
Blend all changes neatly using a strategically placed layer mask.
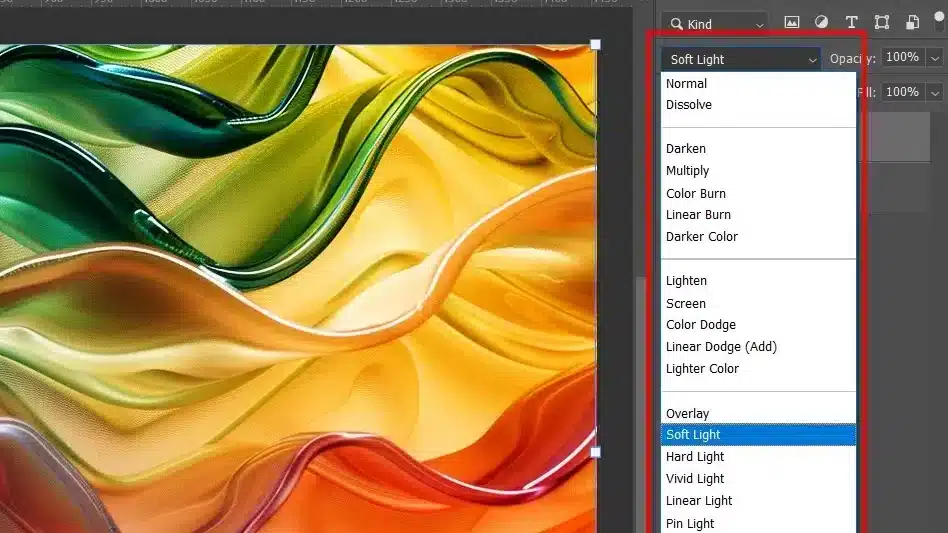
Blending Modes and Their Effects on Layers
Blending modes dictate how an adjustment layer interacts with layers below it.
Overlay mode intensifies colors, whereas Multiply can help deepen shadows realistically, Soft Light subtly enhances existing hues without oversaturation:
Utilize a Vivid Light blending mode on a color enhancement adjustment layer to make your image's colours pop dramatically while keeping underlying details intact.
Try applying Difference blending mode selectively using a masked fill layer for artistic effects such as simulating reflections or creating stark contrasts against the original elements of your composition (original image).
To explore all options effectively:
Open an experimentation project file and safely toggle between modes observed from the properties panel or direct selection via the top menu bar under Layer > Layer Style > Blending Options.
Optimising Workflow: Adjustment Layers Shortcuts
Efficiency can transform your workflow from cumbersome to highly productive in digital editing.
Let’s delve into some advanced techniques, such as mastering both Photoshop and Lightroom shortcuts, to handle these effectively.
Key Shortcuts for Fast Layer Management
Navigating through adjustment layers within the layers panel can drastically reduce editing time.
Here’s a table summarising the pivotal shortcuts every designer should know:
Harnessing the full potential of adjustment layers involves more than manual manipulation; you also need to understand these automating repetitive tasks:
Create commonly used effects involving color balance or exposure corrections via Actions. Applying repetitive modifications like tonal adjustments to different projects becomes a one click affair.
Utilise conditional actions in which certain adjustments trigger based on specific aspects of the image – such as brightnessvalues.
Implement Scripts for complex sequences where standardActions fall short. These can manipulate layers to target particular needs or outcomes.
Troubleshooting Common Issues with Adjustment Layers
When working with adjustment layers in Photoshop, you may occasionally encounter issues that affect your workflow and the quality of your outcomes.
Identifying and resolving these common problems can significantly enhance your editing efficiency.
Solving Blending Mode Conflicts
Blending modes are essential tools within the layers panel for achieving various visual effects. They control how adjustment layers interact with all the layers beneath them.
However, conflicts can arise when blending modes do not respond as expected.
Step-by-step guide to resolve blending mode issues:
Ensure you have correctly set the blending mode for each adjustment layer.
Check if any hidden fill layers or adjustment layers are unintentionally affecting the result.
You can use the properties panel to fine tune properties specific to each layer mask, adjust opacities, or experiment with different settings in the blend modes options dialog box.
If persistent issues prevail, consider duplicating your problematic adjustment layer in Photoshop and applying an inverted adjustment layer function to see if it highlights any underlying conflicts between layers.
Fixing Layer Mask Errors
Layer masks are instrumental in defining visibility across various parts of your images within adjustment layers, allowing for intricate adjustments without altering the original image.
Nonetheless, mistakes in mask application might compromise your project’s visual integrity.
Steps to correct common layer mask errors:
First, verify that the problematic layer mask is selected.
Examine if there are accidental overlaps or gaps. Utilizing a soft brush can provide smoother transitions on edges.
If black or white colors on the mask aren't producing expected visibility changes, ensure hue saturation levels are adequately adjusted from color balance and tonal adjustments within the adjustment panel.
To refine finer details or feathering effects around your adjustments, visit both Adjustment Layer Button for more precise control using sliders available under the dialog box entering numerical values for specificity;
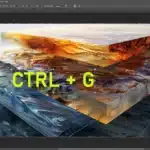
Layer Management for Complex Edits
Effective layer management is essential in maintaining the clarity and hierarchy of your project’s structure within the layers panel.
When dealing with multiple adjustment layers, here’s how you can optimize your workflow:
Organise Layers: Group related layers (like all adjustment layers affecting brightness or contrast) to simplify navigation and editing.
Use color coding for different layers, making scanning your stack easier.
Leverage layer masks on adjustment layers to localize their effects, preventing changes from affecting unrelated parts of your composition.
This intelligent organization ensures that every adjustment serves its purpose without overwhelming the composition.
Enhancing Composites with Adjustment Layers
Adjustment layers transform suitable composites into great ones by refining their color dynamics and impact.
Using features like hue saturation and color balance, you can enhance mood, correct exposure issues, and blend elements more seamlessly into a cohesive piece.
Here are specific techniques to elevate your composite imagery:
Match Colors Across Scenes: Apply a hue saturation adjustment layer to align hues from different shots so they feel like parts of a unified scene.
Intensify Depth & Dimension: Utilize a curves or levels adjustment layer to add depth or highlight specific elements within the frame.
Fine-tune Details: A soft light blend mode on an adjustment layer filled with grey is a subtle yet powerful technique for managing sharpness and detail.
Frequently Asked Questions
Where is the adjustment layer in Photoshop?
The adjustment layer is Located at the bottom of the layers panel in Photoshop. Look for an icon shaped like a half-filled circle. Moreover, clicking on this icon opens a list of adjustment options to enhance your photos.
How to use an adjustment layer?
Using an adjustment layer in Photoshop allows you to apply color and tonal adjustments to your image without permanently altering the original image.
Simply choose an adjustment layer from the layers panel.
Then, adjust the properties from the adjustments panel or properties panel, and you’re set.
How do I add a pattern adjustment layer in Photoshop?
To add a pattern adjustment layer in Photoshop, go to the layers panel and click on the new adjustment layer button. Instead of selecting a standard adjustment option, choose “Pattern” from the dropdown menu.
Proceed to select your preferred pattern from the available options.
How do I add an adjustment layer to a layer mask in Photoshop?
After creating your adjustment layer, click the layer mask icon at the bottom of the layers panel.
Use the brush tool to paint in white on the areas you want the adjustment to apply and black on the areas you don’t.
This technique allows you to apply your adjustments selectively.
What is the layers panel in Photoshop?
The Layers Panel in Photoshop is a critical feature that allows you to manage and organize the different elements of your image editing project.
Therefore, each layer can be edited independently, giving you more control and flexibility over your edits.
As we wrap up this guide, I hope you’ve gained a clear understanding of how to use adjustment layers in Photoshop to elevate your photo editing game. By incorporating these techniques, you’ll be able to make your images stand out with professional-quality enhancements.
Remember, practice makes perfect, so keep experimenting with different settings and adjustments. As you continue your Photoshop journey, stay curious and creative, and watch your skills reach new heights.
$2,061.00Original price was: $2,061.00.$1,061.00Current price is: $1,061.00. 27584
Download Your Free Guide Now!
Discover the secrets of photography with our printable guide! Master essential techniques like aperture, shutter speed, and ISO to create stunning images. Get your free printable PDF now and start turning your snapshots into masterpieces!