3D Text Photoshop - Step-by-Step Easy to Follow Guide
3D Text Photoshop – Step-by-Step Easy to Follow Guide
Creating 3D text Photoshop can add a whole new dimension to your projects, making your designs stand out. Have you ever wondered how to make your text pop off the screen with a realistic, three-dimensional look?
You’re in the right place! In this article, I’ll guide you through the process step by step, ensuring you can achieve stunning results, even if you’re a beginner.
Imagine the impact of your next graphic design project with eye-catching 3D text.
Intrigued?
Let’s get started and transform your designs from flat to fabulous!
Table of Contents
What is 3D Text Photoshop?
3D text Photoshop refers to the creation of text that appears three-dimensional within a two-dimensional project.
This technique brings depth and a realistic touch, transforming flat text into something much more engaging.
Benefits of Using 3D Text Effects
Eye-Catching Design: 3D text stands out and captures attention.
Professional Appearance: Gives your designs a sophisticated and professional look.
Versatility: Useful for a variety of projects, from advertisements to social media graphics.
How to Create 3D Text Photoshop
Creating 3D text Photoshop is a fun and engaging process that allows you to bring depth to your designs.
By using simple tools and techniques available in the top row of Photoshop, you can transform flat text into a striking, three-dimensional element.
Step-by-Step Guide to Create 3D Text Photoshop
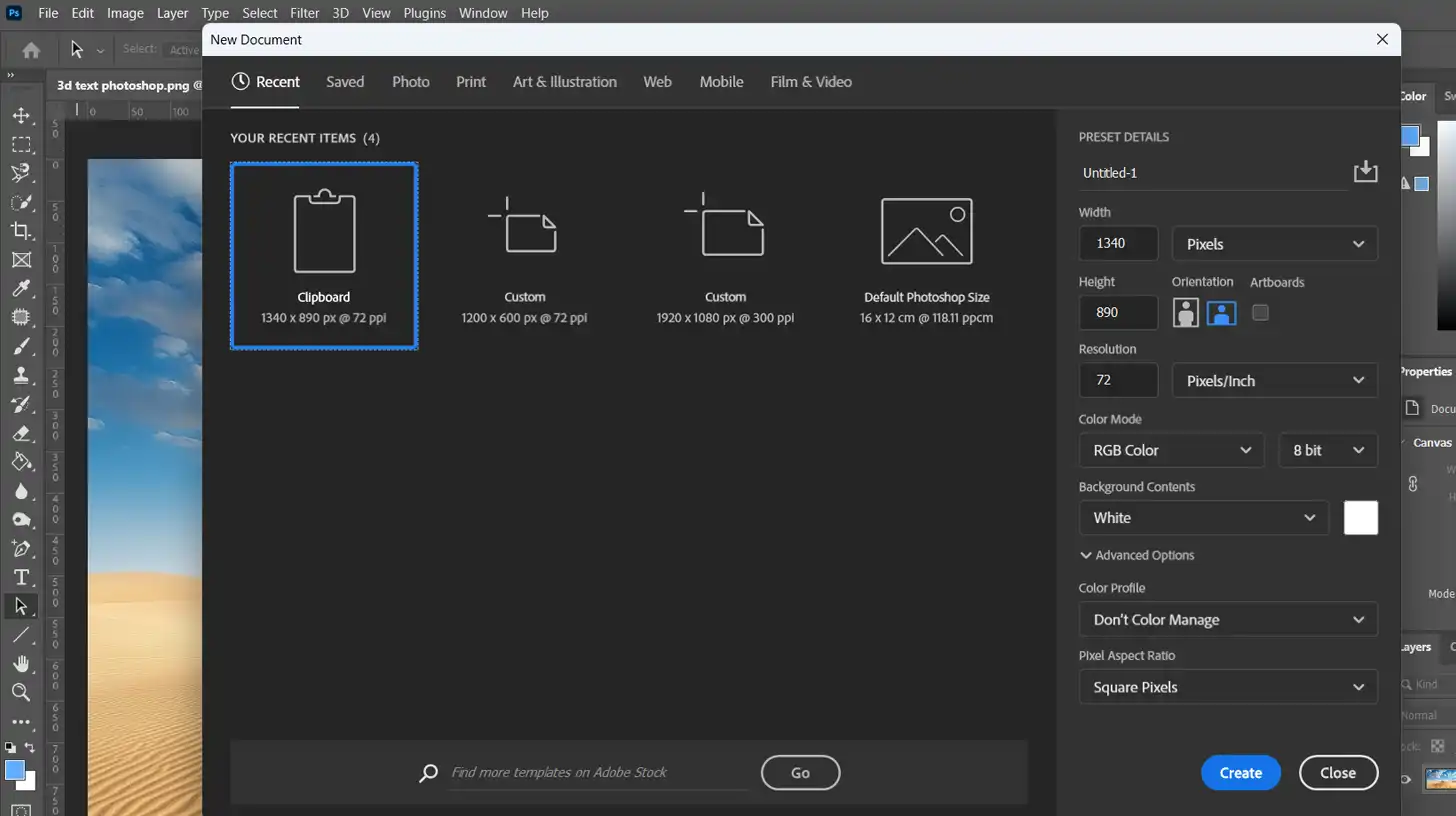
Step 1: Open your Photoshop document. Go to the File menu and select New Document. Set your background contents as desired.
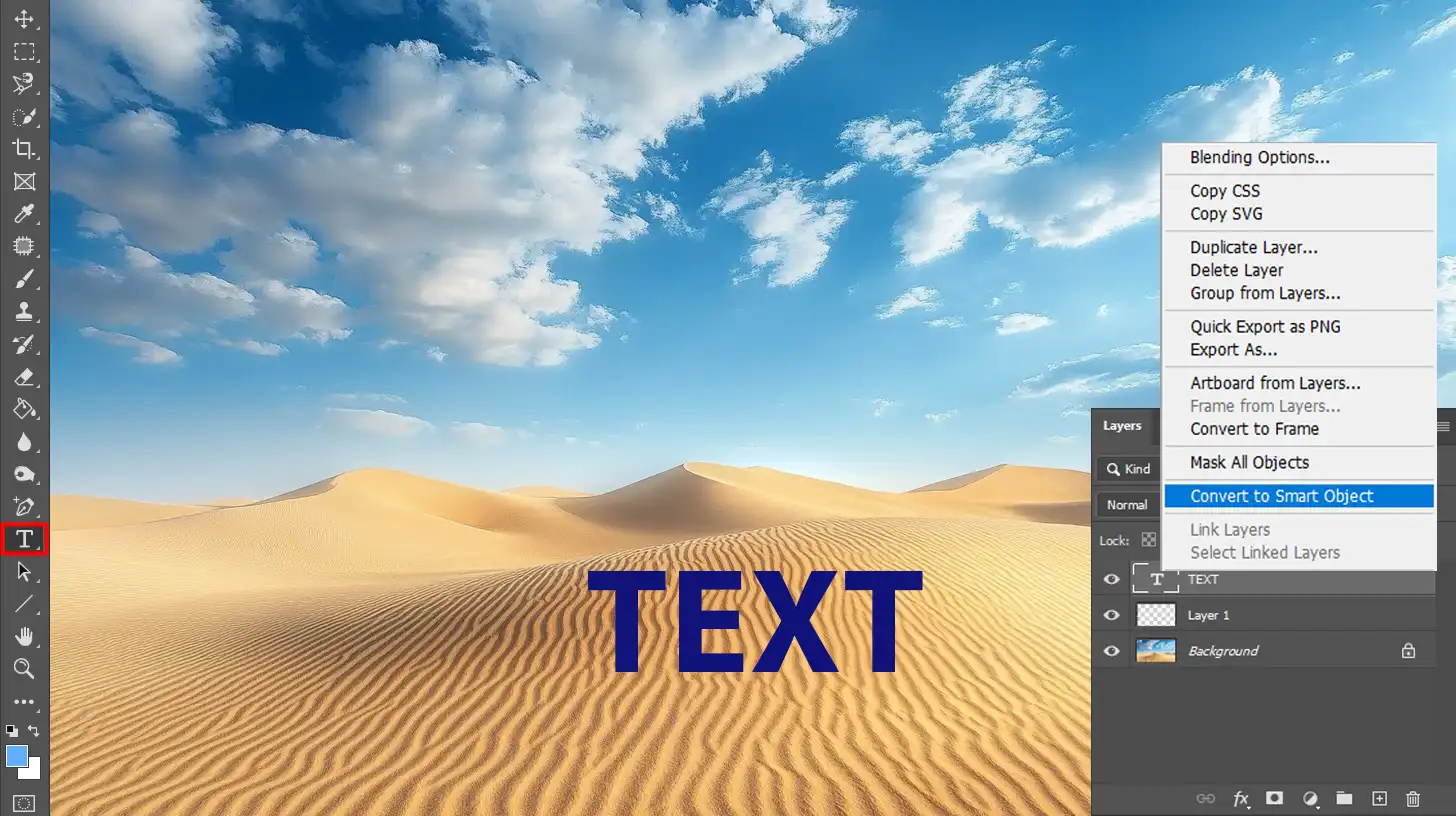
Step 2: Select the type tool from the toolbar. Click on your canvas and type your desired text. This creates a text layer in the layers panel.
Step 3: Go to the layers panel, right-click the text layer, and choose Convert to Smart Object. This allows further editing without losing quality.
Applying Layer Styles
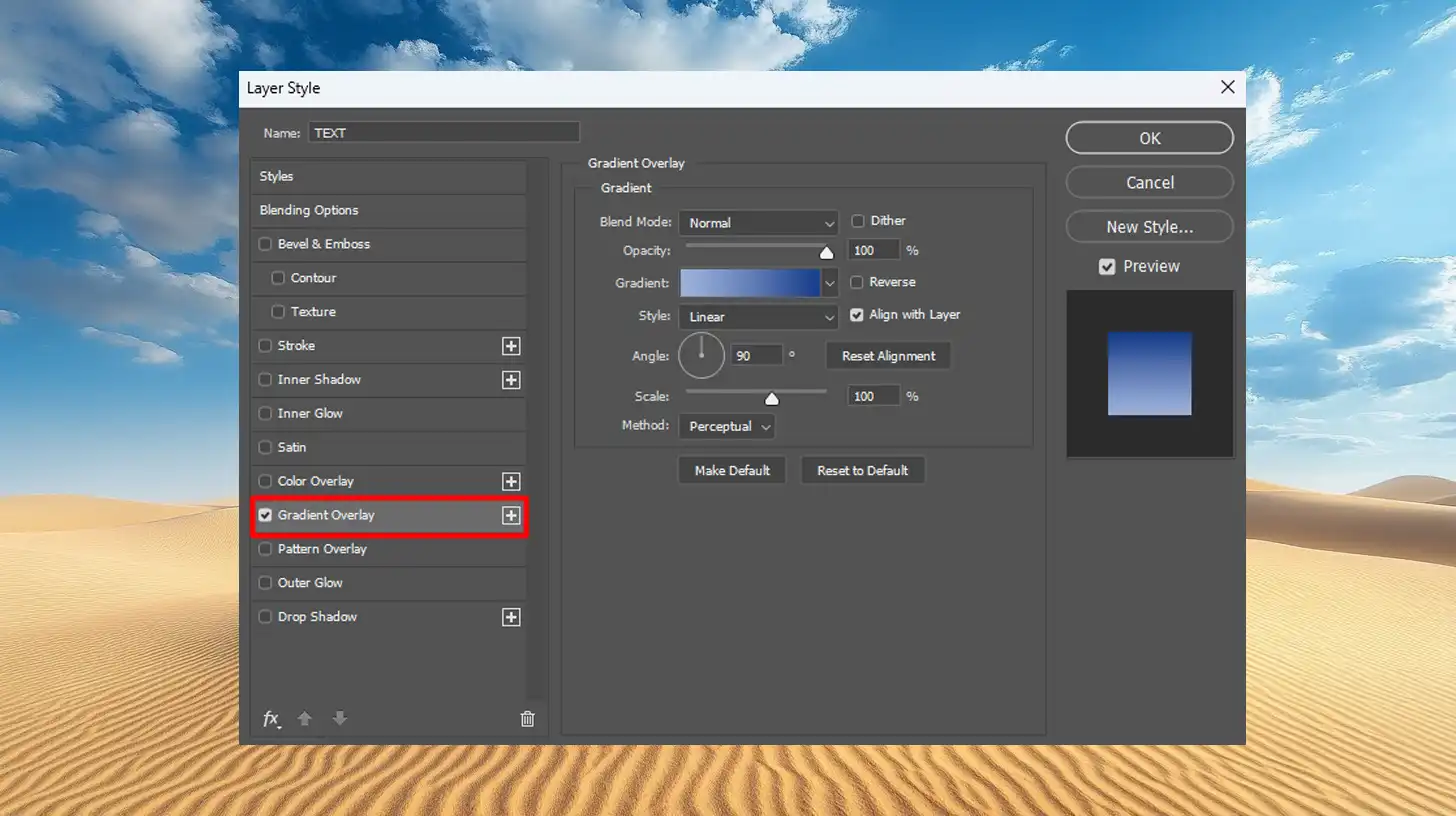
Gradient Overlay: Double-click on the text layer to open the Layer effects panel, then select the overlay. Choose your gradient colors for enhanced effect.
Bevel and Emboss: In the layer effects panel, select Bevel and Emboss. Adjust the settings to create a three-dimensional look.
Transforming the Text
Free Transform: Press Ctrl+T (or Command+T on Mac) to activate free transform. Right-click and choose Perspective or Skew to adjust the text angle.
After you are satisfied with the adjustments, press Enter. Your 3D text is now ready! For a final touch, you can add a new fill layer or a solid color background layer to enhance the overall design.
Pro Tip: For a more efficient workflow, use Photoshop shortcuts like Ctrl+T (Command+T on Mac) for Free Transform and explore the essential tools in Photoshop, such as the Infinite Light option in the Properties Panel.
This will help you achieve dynamic shadows and lighting effects, adding realism to your 3D text.
You can also experiment with the 3D glasses effect by adjusting the red and blue channels for a stereoscopic look, adding even more depth and visual interest to your design.
Creating 3D Text Photoshop
Adding 3D text to your designs in Photoshop can make a big impact. It stands out, grabs attention, and gives your work a professional touch.
Let’s break down how to create 3D text Photoshop, step by step.
Setting Up Your Document
First, you need to set up your document properly:
Open Photoshop and navigate to the File menu.
Select New Document. This opens the new document dialog box.
Choose your desired size and background color.
Press OK. Now, your canvas is ready.
Using the Text Tool
Follow these steps to add text:
Select the Type Tool from the tools panel.
Click on the canvas and type your text. A new text layer will appear in the layers panel.
Adjust the font, size, and color in the options bar at the top. Keep your text simple at first; we’ll add the magic soon.
Applying 3D Effects
When applying 3D effects in Photoshop, you can take your original text to the next level by adding depth and dynamic visual elements.
With just a few adjustments and the use of the arrow key to fine-tune positioning, you can create a visually appealing design. Let’s dive into how to apply these effects.
Gradient Overlay Layer Style
To apply a gradient overlay:
In the layers panel, right-click your type layer and select Convert to Smart Object.
Double-click the type layer to open the layer style dialog box.
Select Gradient Overlay Layer Style. Pick colors that will make your text pop and give it depth.
Enhance your smart objects in Photoshop to master the gradient overlay layer style. This combination allows non-destructive edits and greater flexibility, elevating your design with seamless, customizable effects.
Layer Style Dialog Box
To add a bevel and emboss effects:
Stay in the layer style dialog box and scroll to Bevel and Emboss.
Check the box to enable it. This gives your text that 3D effect.
Adjust the settings to get the desired result. Feel free to experiment until you’re happy with what you see. Remember, you can always undo changes if needed.
Once you have added the primary effects, you can enhance the text using other options like Drop Shadow or Outer Glow. Simply toggle these settings on and adjust their parameters in the dialog box.
To tweak the angle and position, use the free transform tool:
Press Ctrl+T (or Command+T on Mac) to activate it.
Right-click to choose Skew or Perspective. This helps align your text properly within your design.
Pro Tip: Use the infinite light setting in the properties panel to add dynamic lighting effects to your 3D text. This will make it look even more realistic and integrated into your design.
For an even more enhanced look, explore Photoshop text effects like Drop Shadow and Outer Glow to make your design pop. If you’re feeling adventurous, try combining 3D text with a text portrait effect for a creative twist.
Also, don’t forget to manage your design effectively using the Photoshop text box feature for clean and organized layouts.
Alright, now we’re diving deeper into the magic world of 3D text Photoshop. Buckle up, and let’s make those letters pop!
Customizing Your 3D Text
Customization is where the fun begins. With the Type Layer selected, head over to the options bar. This is your control panel. Change the font, size, and color. For an amazing effect, try using different fonts together. Mixing things up keeps the design fresh.
To give your text more depth, use different layer styles. Select your text and click on Gradient Overlay. Choose a gradient that complements your design.
Next, apply Bevel and Emboss to give it a solid, chunky look.
Enhancing your 3Dtext involves mastering gradient techniques. By customizing your 3Dtextwithgradients, you add depth and vibrancy, creating visually stunning designs that truly stand out.
If you want shadows to look perfect, use the infinite light setting. It adjusts the shadow direction dynamically.
Enhancing your 3Dtext starts with effective Photoshop shadow techniques. By customizing shadows, you add depth and realism, making your 3Dtext stand out and integrate seamlessly into your design.
Using the Layers Panel
The layers panel is your best friend. Seriously, it keeps everything organized. Each part of your design sits on its own layer, allowing individual adjustments.
Need to merge layers? Select all the layers you want and press Ctrl+E(or Command+E on Mac).
For advanced effects, try using blending modes. With your layer selected, open the blending mode dropdown in the layers panel. Choose options like Multiply or Screen to see immediate changes. Experimentation is fundamental to mastering these techniques.
Incorporating a Background Layer
No 3D text is complete without a fitting background. Adding a background layer is easy.
Go to the layer menu and click New Layer. Then, select your background color using the color picker. I love darker backgrounds; they make 3D text pop.
Your background can be an image, too. Import a photo and drag it below your type layer in the layers panel. Adjust the size using the move tool and shift key for proportional resizing.
You can also use the arrow key to place the image precisely. You’ll be amazed how much difference a good background can make.
Mastering background layer techniques is essential for incorporating a background layer seamlessly into your designs.
These strategies ensure smooth transitions and enhance your creative projects effectively.
Pro Tip: To make your 3D text even more dynamic, create a duplicated layer of your text and set it to a soft blending mode.
This adds a subtle glow, making your text stand out. For more detailed layering techniques, check out Photoshop layering tutorials. They’ll help you refine your approach and master creating depth and dimension in your designs.
Also, exploring the Photoshop vs Illustrator debate can guide you in choosing the right software for specific tasks, as both programs offer different strengths for text and graphic design. The final result? A striking design that looks professionally made.
Troubleshooting Common Issues with 3D Texts Photoshop
Creating 3D text Photoshop can be thrilling, but it’s easy to make mistakes. Let’s walk through common issues and how to tackle them.
Before diving into your 3D text project in Photoshop, it’s important to consider these fundamental aspects to ensure a smooth workflow and professional results.
The table below outlines some important points to keep in mind as you work on enhancing your designs.
Aspect
Overview
Layer Management
Ensure to keep layers organized to maintain flexibility. Merging layers too soon can limit future edits.
Applying Layer Styles
Use layer styles like Bevel and Emboss to add depth and dimension to your 3D text.
Lighting Effects
Adjust lighting in the Properties Panel to ensure shadows and highlights fit your design.
Color Selection
Use the Color Picker to choose contrasting or complementary colors that make your text pop.
Precise Positioning
Use the arrow keys to fine-tune the positioning of your text and ensure proper alignment.
Blending Modes
Experiment with blending modes like Multiply or Screen to add creative flair to your 3D text.
Final Checks
Always review your 3D text for adjustments before finalizing to ensure it meets your design goals.
Common Mistakes to Avoid
Getting 3D text right isn’t just about clicking buttons.
Here are the pitfalls you must dodge:
Skimping on Layers: Each layer plays a role. Merge too early, and you lose flexibility. Keep your layers handy until the final tweaks.
Avoiding Layer Styles: Layer styles like Bevel and Emboss give depth. Don't skip them. They turn flat text into something bold and eye-catching.
Wrong Lighting Effect: Not every effect suits every design. Adjust the lighting effect via the properties panel for the desired shadow and highlight.
Ignoring the Options Bar: Hidden in plain sight. Use the options bar for precise control over your text attributes.
Tips for Better 3D Text
Now, let’s make your 3D text pop with these tips:
Use the Color Picker: Choosing the right colors is important. Use the color picker to find colors that contrast or complement well.
Experiment with Arrow keys: Move your text by tiny increments using the arrow keys. It helps align everything just right.
Apply Layer Styles: Double click on the layer to access a variety of layer styles. Be it gradient overlays or drop shadows, these tools add flair.
Keep an Eye on Layers: Layer management is fundamental. Utilize the layers panel to arrange, group, and navigate layers smoothly.
Final Checks: Before wrapping up, check if any adjustment is needed in your 3D text Photoshop.
3D text can transform your designs. Stay mindful of the common pitfalls and embrace these tips.
Pro Tip: A merged layer with adjusted blending modes can bring new dimensions to your 3D text. Don’t hesitate to experiment.
Frequently Asked Questions (FAQs)
How do you make text 3D in Photoshop?
Open Photoshop and select the text tool to type your text.
With the text layer selected, go to the menu bar and click on '3D'.
Select 'New 3D Extrusion from Selected Layer' to convert your text into a 3D layer.
Use the 3D panel to adjust the depth, scale, and rotation of your 3D text.
How to do 3D perspective text effects in Photoshop?
Create a new text layer and type your desired text.
Go to the '3D' menu and choose 'New 3D Extrusion from Selected Layer'.
In the 3D workspace, select the 'Current View' and use the slide tool to adjust the perspective.
Experiment with different angles and views to find the best 3D perspective effect.
What's the process for creating 3D text?
Type your text using the text tool in an additional layer.
Convert the text to a 3D layer by selecting '3D' then 'New 3D Extrusion from Selected Layer' from the menu.
Modify the 3D settings in the Properties panel to customize the look of your text.
Add lights and shadows from the 3D panel to enhance the 3D effect.
How do you make a 3D form in Photoshop?
Start with a shape or text layer that you want to turn into a 3D form.
Choose '3D' from the menu and select 'New 3D Extrusion from Selected Layer'.
Adjust the extrusion depth, cap settings, and bending options in the 3D panel.
Use the 3D tools to rotate, move, and scale the form in the 3D space.
Creating 3D text Photoshop has really changed how I work on my design projects. Adding depth and dimension to simple text makes everything look more engaging.
Whether I’m working on promotional materials or social media graphics, using 3D text makes the designs pop and stand out. It’s been a total game-changer for me.
If you’re excited to learn more about these techniques, I recommend checking out this Photoshop Course and this Lightroom course.
They’ve helped me improve my skills, and I know they can help you, too.
For those interested in Adobe’s powerful tools, you can get Adobe Photoshop or Adobe Lightroom to start creating amazing designs.
You’ll see how fun and useful 3D text Photoshop can be for your projects.
If this article has helped you, then Like and Share it with your friends
$2,061.00Original price was: $2,061.00.$1,061.00Current price is: $1,061.00. 27584
Download Your Free Guide Now!
Discover the secrets of photography with our printable guide! Master essential techniques like aperture, shutter speed, and ISO to create stunning images. Get your free printable PDF now and start turning your snapshots into masterpieces!